How to Align a Treadmill Belt
Your treadmill belt keeps sliding to one side, rubbing against the frame, and making that awful scraping sound mid-run. You've probably tried nudging the tension bolts and hoping for the best. That rarely works.
Learning how to align a treadmill belt comes down to watching the belt move and making tiny, deliberate adjustments to the rear roller.
Manufacturer specifications vary slightly by brand, but the principle is consistent: a walking belt tracks toward the side with more tension. The adjustment bolts on the rear roller control that tension angle. As of 2026, most home treadmill models use the same 5mm or 6mm Allen wrench system, which keeps the fix simple.
Here's how to diagnose the drift and center the belt for good.
Quick Answer
Unplug the treadmill. Locate the two rear roller bolts. Turn the left bolt clockwise if the belt drifts left.
Turn the right bolt clockwise if the belt drifts right. Run the belt at 2 to 3 mph. Watch the edge gap.
Repeat in quarter-turn increments until centered.
Check the gap between the belt edge and the side rail after every adjustment. Aim for roughly 1/8 to 1/4 inch on both sides. Never turn a bolt more than a quarter turn without testing.
Tension adjustments are separate from alignment adjustments.
The Quick Answer: Why Aligning a Treadmill Belt Is a Visual Task
Most alignment problems come from a simple misunderstanding. People treat it like a tension issue and crank both bolts evenly. That does nothing for tracking.
The belt drifts because the rear roller sits slightly off-square relative to the deck. Your job is to nudge the roller angle, not squeeze the belt tighter.
The visual part matters because you can't feel this angle. You have to watch the belt move. That's why every service guide starts the same way: power up the machine, stand at the back, and observe the gap between the belt and the walking deck rails.
It looks like a moving ribbon. When the gap shrinks on one side, the belt will follow that rail within a few seconds.
This is also why small adjustments win. A half-turn on one bolt can swing the tracking dramatically. Doing too much at once turns a simple fix into a frustrating loop of overcorrecting.
Real technicians compare it to tuning a guitar string. A little twist goes a long way, and your eyes tell you when it's right.
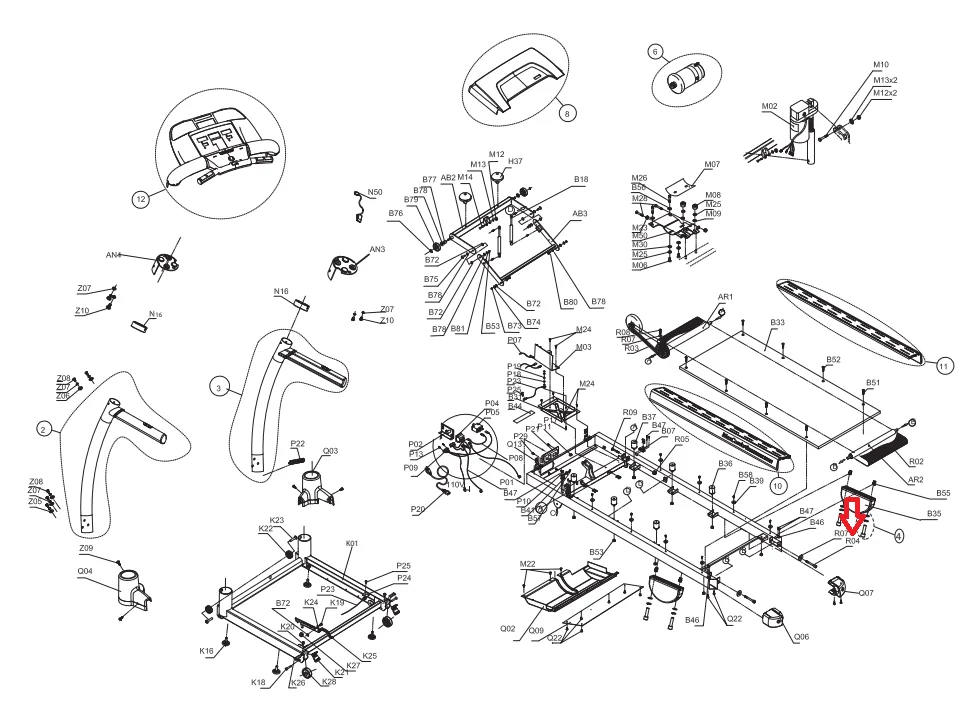
Image source: Bing (Web (fair-use with source credit))
Step-by-Step: How to Center a Treadmill Belt with Quarter-Turn Adjustments
Before You Start: Unplug It, Grab the Manual, Find Your Roller Bolts
Safety comes first. Unplug the treadmill completely before reaching under the deck. The motor can engage unexpectedly if the machine is powered on, and the pinch point near the rear roller will crush fingers.
Next, find the owner's manual. Most manuals include a diagram showing the exact bolt positions for your model. They usually sit on the rear cap, one on each side of the frame.
Some designs hide them behind a small plastic cover.
Get your hex key ready. Most home treadmills use a 5mm or 6mm Allen wrench. A few older models use a Phillips screwdriver.
Check your manual if you're unsure. Keep the tool handy because you'll make several small adjustments in the next few minutes. It's the same approach you'd take with other equipment in your home gym, so knowing what you're working on before you start always pays off.
The Walk-and-Watch Test: Reading the Belt's Edge at Low Speed
Plug the treadmill back in. Stand behind the machine and start the belt at a slow speed, around 2 to 3 mph. This is the speed that lets you see tracking issues without creating a safety risk.
Fast speeds make the belt whip around, and you'll struggle to spot the drift.
Kneel down and watch the gap between the belt's edge and the side rail. In a perfect setup, the belt stays centered with an even gap on both sides. If the belt creeps toward the right rail, the gap on the right shrinks.
If it creeps left, the left gap narrows.
Give it 30 seconds to a minute. Tracking issues usually appear within that window. If the belt looks centered, let it run a bit longer to confirm.
Some belts wander only after a few minutes of operation.
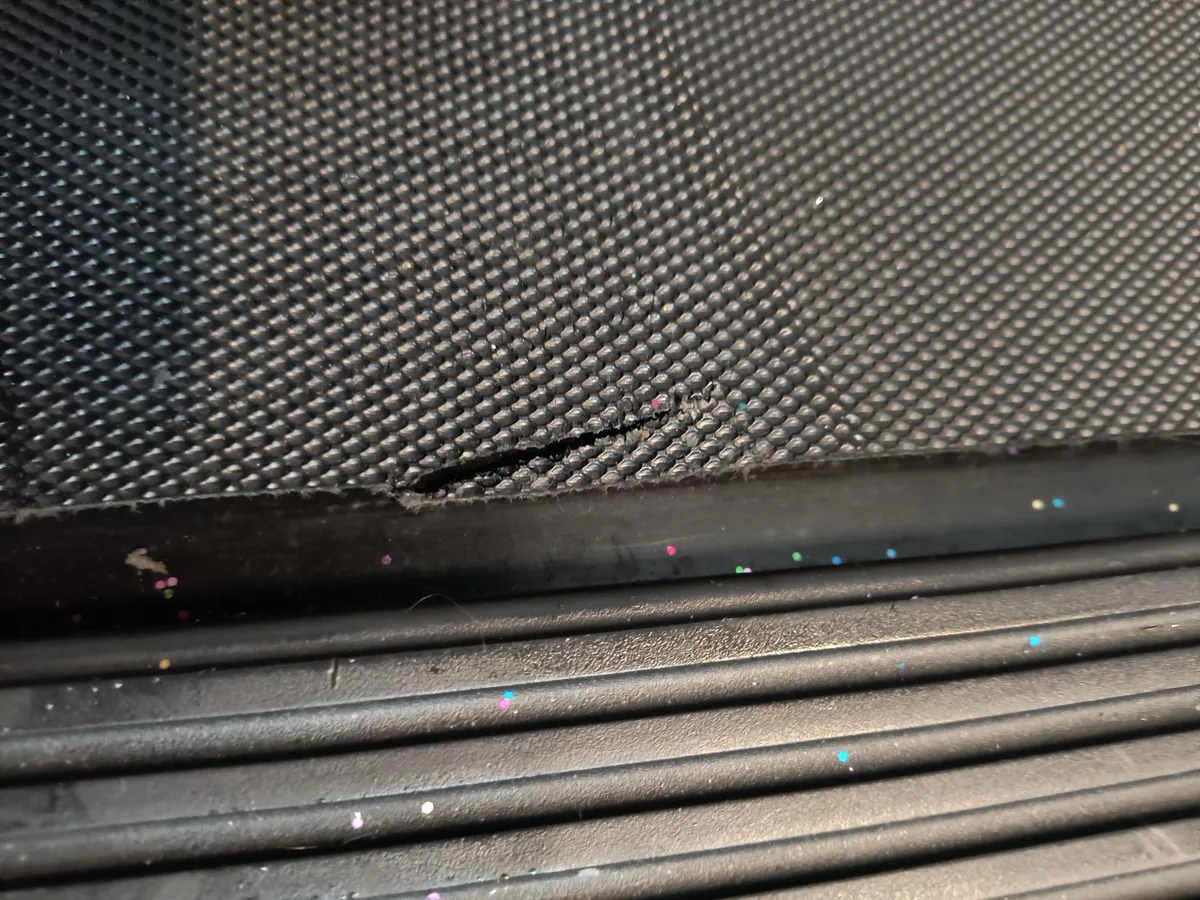
Image source: Bing (Web (fair-use with source credit))
Quarter-Turn Adjustments: Which Bolt Moves the Belt Where
This is the part that confuses most people. The rule is simple. The belt moves toward the side you tighten.
If the belt drifts left, tighten the left bolt. If it drifts right, tighten the right bolt. A quarter turn clockwise on the correct bolt nudges the belt back toward center.
Stop the treadmill before adjusting. Unplug it if you need to reach under the deck, though the rear bolts are usually accessible without crawling underneath. Turn the correct bolt a quarter turn.
Plug back in and run the test again.
Watch the belt for another 30 seconds. It takes time for the tracking to respond. If it's still off, repeat the process.
Patience matters here. Most belts need three to five small adjustments before they settle in the middle.
Re-Check and Repeat: Getting the Belt Centered
After each quarter turn, run the belt at speed and watch the edge clearance. The goal is that even 1/8 to 1/4 inch gap on both sides. Use a ruler or just eyeball it.
Most people can spot the difference once they know what to look for.
Once the belt tracks straight, test it at a jogging speed, around 4 to 5 mph. Some belts hold center at low speed and drift when the pace increases. A final fast-speed check confirms the fix is solid.
If the belt keeps drifting to the same side after several adjustments, stop. You may have a tension imbalance instead of an alignment problem. Check the belt tension by lifting the edges.
Both sides should lift approximately 2 to 3 inches off the deck. If one side feels far looser, adjust the tension bolts evenly before revisiting alignment.
Tools, Tension, and Clearances: Quick-Reference Specs
Getting the measurements right saves you time. Here's the quick reference that covers most home treadmills, based on manufacturer specifications and service technician guidance.
| Item | Typical Spec | Notes |
|---|---|---|
| Adjustment bolt type | 5mm or 6mm hex key | Some models use Phillips screwdrivers |
| Side gap clearance | 1/8 to 1/4 inch | Measure between belt edge and side rail |
| Belt lift test | 2 to 3 inches | Lift the center edge off the deck |
| Test speed for alignment | 2 to 3 mph | Slow enough to see drift clearly |
| Adjustment increment | Quarter turn (90 degrees) | Never exceed a quarter turn per test |
| Time for full alignment | 10 to 15 minutes | Includes repeated tests between turns |
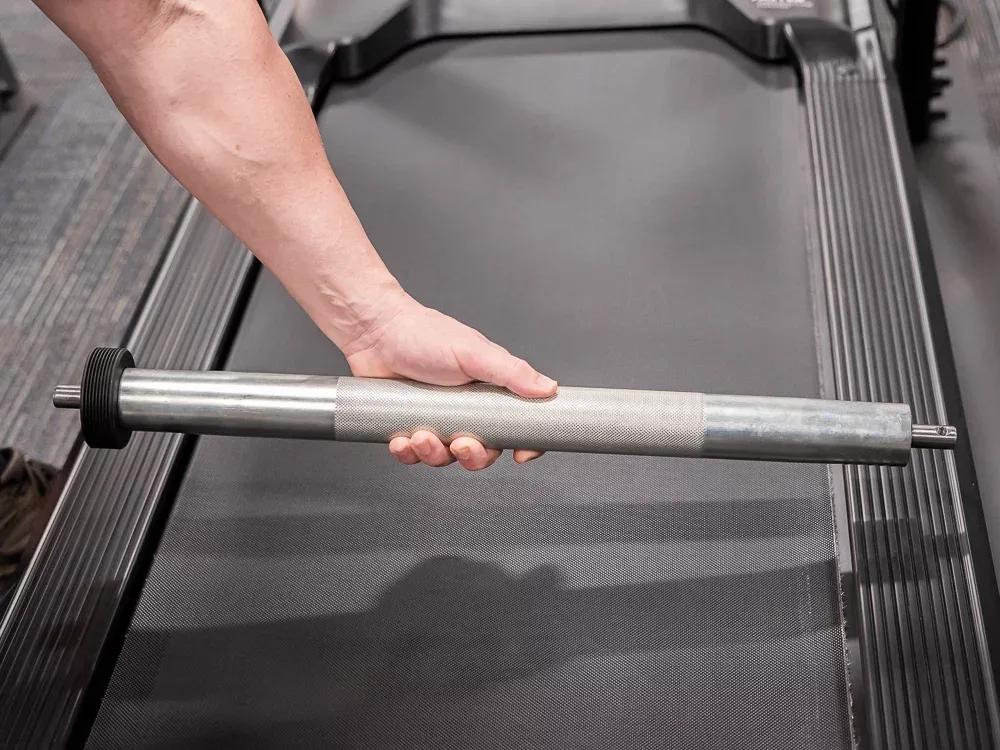
Image source: Bing (Web (fair-use with source credit))
The Lift Test for Tension
The belt should feel tight but not drum-tight. Push down on the belt's edge near the center of the deck. It should lift about 2 to 3 inches.
If it barely moves, the belt is overtightened. If it lifts easily past 3 inches, it's too loose.
Tension and alignment are connected but separate. An overtightened belt makes the roller bearings work harder. A loose belt slips under your feet.
Fix tension first, then handle tracking. Trying to align a belt that's too tight or too loose will drive you crazy because the belt won't respond predictably.
Checking Both Sides
Tension issues often hide as one-sided problems. Put your hand on each side of the belt near the front roller. Compare the firmness.
If one side feels noticeably tighter, loosen the tight side and tighten the loose side in matching quarter turns. This evens out the roller pressure before you start alignment work.
Common Visual Mistakes (and How to Avoid Them)
The biggest mistake is over-adjusting. One full turn on a rear bolt can swing the belt from one rail to the other. Stick with quarter turns, and always test between each adjustment.
This discipline prevents the back-and-forth thrashing that turns a 10-minute fix into an hour of frustration.
Confusing tension with alignment is a close second. Many users tighten both bolts evenly to fix a drift. That changes how tight the belt feels but does nothing for tracking.
Alignment comes from the relative angle of the rear roller, not overall tightness.
Another common error: watching the belt from the front. The front roller gives a distorted view because the belt converges toward the rear roller. Always stand behind the treadmill and watch the rear.
That's where the adjustment happens.
Skipping the fast-speed test is also a trap. A belt that tracks fine at 2 mph can wander at 5 mph. Always finish with a jogging-speed test.
If the belt holds center under faster rotation, the alignment is solid.
Finally, don't ignore the obvious. A misaligned belt often results from an uneven floor. Your treadmill deck needs to sit level.
Use a carpenter's level across the running surface, both lengthwise and crosswise. If you're training on a rubber mat that folds oddly or a floor with a slight slope, the frame twists and drags the belt sideways. Routine upkeep of your other cardio gear matters too, and keeping your treadmill level prevents many tracking headaches before they start.
When Alignment Isn't the Real Problem: Wear, Deck Leveling, and Roller Issues
Sometimes the belt refuses to track no matter what you do. That's a clue you're dealing with a different failure mode. Let's walk through the usual suspects.
Worn or Delaminated Belt Edges
Running belts wear down over years of use. The edges fray, and the underside glazes over. When the belt loses its uniform surface, it develops its own tracking behavior.
No amount of roller adjustment will fix that. Check the edges and underneath for cracking, fraying, or shiny spots. If the belt looks worn, replacement is the honest solution.
Dry or Un-Lubricated Deck
A treadmill deck needs silicone lubricant to reduce friction. When the lube runs dry, the belt drags unevenly across the deck surface. That drag creates resistance the rear roller has to fight.
The result often shows up as a persistent drift to one side. Look for the lubrication guide in your manual. A quick silicone application per the manufacturer's recommendations can resolve issues that look like alignment problems.
Uneven Floor or Frame Twist
This one tricks a lot of people. Your treadmill is level, but the frame twists slightly when you step on it. Check the deck with a level while standing on the machine if possible.
Also inspect the rubber feet or leveling caps underneath. A missing foot or a worn one changes the frame geometry. The rear roller sits off-square, and the belt wanders.
Bent Roller Bushings or Bearings
This is more serious. If the belt tracks straight at low speed but drifts aggressively at speed, the rear roller bearings may be worn or bent. Remove the belt and spin the roller by hand.
A healthy roller spins smoothly. A worn one feels gritty, jerky, or has visible play at the ends.
When roller damage is present, professional repair is the right call. Most home users don't have the tools or replacement parts for this job. A certified service technician can diagnose the issue in minutes and provide a correct replacement.
If you're considering a new machine instead, it helps to know what you're buying so you can compare repair costs against replacement value.
The same logic applies to your other equipment. A machine that squeaks or underperforms often needs simple maintenance rather than replacement. Our guide on diagnosing common fitness equipment noises walks through the process for ellipticals, but the troubleshooting mindset transfers directly to treadmills.
The advanced safety standard for home treadmills is ASTM F2115, which covers performance and safety issues. Per ASTM International's official standards page, this specification establishes testing requirements for endurance and stability. Knowing that your treadmill meets this standard helps you decide whether DIY repair is acceptable or whether professional service is warranted.
If your model doesn't list ASTM F2115 compliance in the manual, be extra cautious with self-service repairs involving the drive motor or electronics.
Frequently Asked Questions
Why does my treadmill belt keep drifting to the same side?
Your rear roller sits slightly out of square. Tightening the bolt on the drifting side by a quarter turn nudges the roller back into alignment. If the belt drifts again quickly, check for a worn belt or a bent roller instead.
These mechanical issues override any bolt adjustment you make.
How tight should the treadmill belt be?
The belt should lift about 2 to 3 inches off the deck at the center edge. If it's tighter, the roller bearings wear faster. If it's looser, the belt slips under foot strike.
Fix tension before aligning, since a loose or tight belt won't respond predictably to tracking adjustments.
What if the belt won't track even after multiple adjustments?
Stop adjusting. This suggests a mechanical problem, not an alignment issue. Check the belt for frayed edges, inspect the roller bearings for play, and confirm the treadmill deck is level.
If those all look fine, call a certified service technician. Continuing to turn bolts can damage the frame or rollers.
Can I run the treadmill while adjusting the belt?
No. Unplug the machine first. Reaching under the deck while the motor is engaged risks serious finger injury.
Align in cycles: unplug, turn a bolt a quarter turn, plug back in, test at low speed. It takes longer, but it's the only safe way.
How long does it take to align a treadmill belt?
Most alignments take 10 to 15 minutes. That includes the repeated low-speed tests between each quarter turn. A stubborn drift might take longer, but if you're still fighting it after 30 minutes, you're likely dealing with a different problem.
At that point, weighing repair against replacement cost makes sense before spending more time.
Should I replace the belt if it's misaligned?
Only if it's worn. Frayed edges, glazed undersides, and cracks mean replacement. A plain tracking issue usually responds to adjustment.
If the belt is older than 5 years and you use the treadmill regularly, replacement is a reasonable preventive move. The same adjustment fundamentals apply to other home cardio machines, so the skills transfer.