How to Walk Backward on a Treadmill Safely
Learning how to walk backward on a treadmill safely is trickier than it looks. Your body relies on visual cues to balance. When you face the rear of the machine, those cues vanish.
That's when falls happen.
Most treadmill belts start at 0.5 mph. That's still fast enough to trip you if your foot placement is off. Per ASTM F2106, the safety clip must stop the belt instantly.
So before you take a single backward step, you need to understand why this movement carries extra risk.
Quick Answer
To walk backward on a treadmill safely, start at 0.5 mph. Stand on the side rails facing the rear. Clip the safety key to your clothing.
Step onto the belt one foot at a time. Hold both handrails. Walk with short, controlled steps.
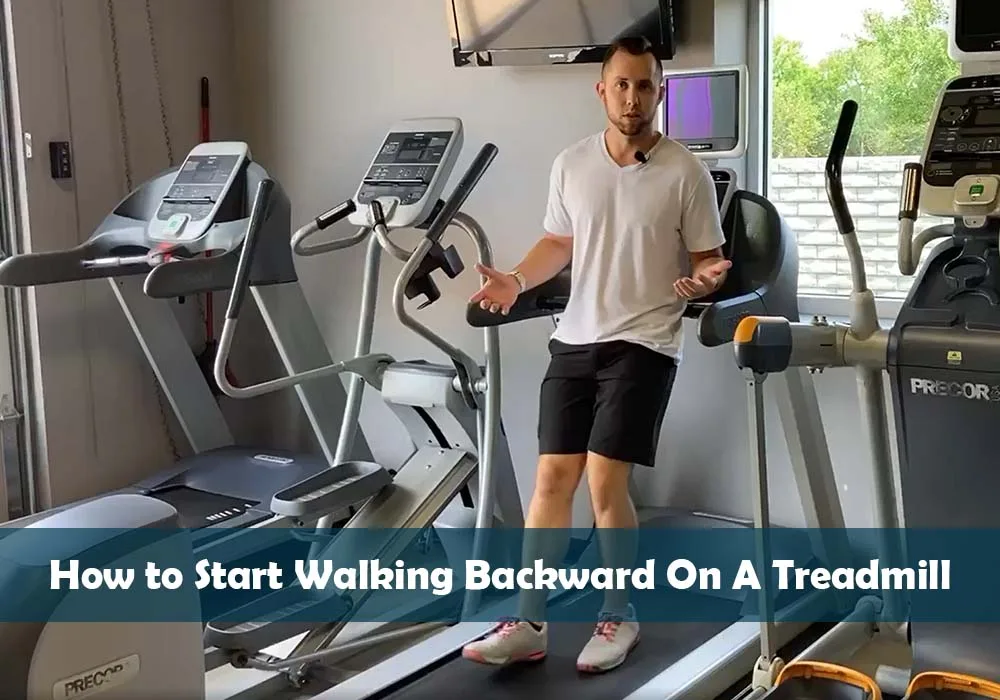
Image source: Bing (Web (fair-use with source credit))
Why Backward Walking on a Treadmill Needs Extra Caution
Backward walking flips your normal movement pattern. Your eyes can't help you balance the same way. The belt keeps moving toward you.
That's a recipe for a fall.
The U.S. Consumer Product Safety Commission reports that treadmill accidents cause more than 20,000 emergency room visits each year. Most happen during forward walking.
Backward walking stacks extra risk on top.
Here's why. When you face forward, you see the belt and console. You can reach the emergency stop.
When you turn around, your hands are on the rear handrails. The speed controls sit behind you. You lose quick access to the stop button.
Your body also relies on proprioception, the sense of where your joints are. Backward walking challenges that system. If your foot lands too far back, you can hyperextend your knee.
If you look down, you lose your balance point.
Key risk factors include:
- No visual feedback from the console or belt
- Emergency stop button is behind you
- Belt direction pulls your feet toward the rear
- Shorter stride length increases trip risk
- Handrails may be too low or too far apart
As of 2026, most home treadmills still lack a dedicated backward walking mode. That means you're using a machine designed for forward motion.
None of this means you should never try it. It means you need a plan. If you're looking for a lower-risk cardio alternative, consider low-impact cardio options instead.
Safety Checks Before You Start: Clip, Speed, and Setup
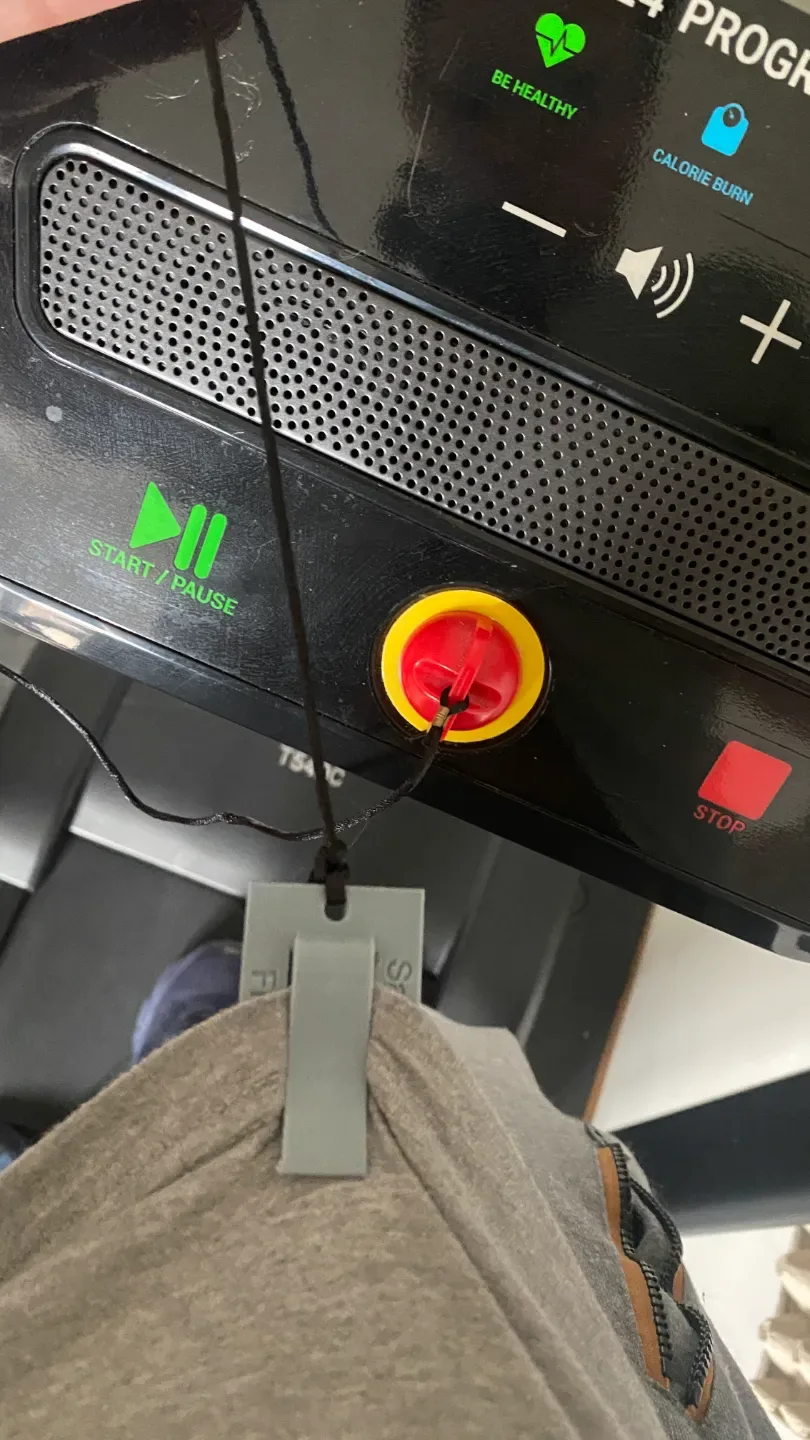
Image source: Bing (Web (fair-use with source credit))
Before you turn around, run through this checklist. Skip a step and you're asking for trouble.
- Safety clip: Attach the lanyard to your waistband or shirt. Test it. Pull it once. The belt must stop instantly. Per ASTM F2106, this is the one feature that prevents the worst falls.
- Speed: Set the speed to zero before you mount. Never step onto a moving belt. A belt moving at 0.5 mph can still knock you off balance.
- Incline: Keep it at 0% for your first few sessions. Even a 1% grade changes your stride and foot placement.
- Footwear: Wear closed-toe shoes with a snug fit. Loose soles or flip-flops can catch the belt and drag your foot.
- Clear zone: Make sure the area behind the treadmill is free of walls, furniture, or pets. You need at least three feet of empty space.
- Handrails: Wipe them down. Sweaty palms lose grip fast.
Just like routine equipment checks on any gym machine, a quick inspection keeps you safe.
Now think about your body. Are you dizzy? Tired?
On new medication? Any of those things raise your fall risk. Skip the backward walk that day.
Check the emergency stop button location. On most treadmills, it's a red button on the console. You need to know where it is without looking.
Set a timer for your first session. Five minutes is plenty. You can add time later.
One more thing: tell someone you're doing it. If you're at home alone, keep your phone nearby. If you're at the gym, pick a treadmill near the staff desk.
Step-by-Step: How to Walk Backward on a Treadmill Safely
Image source: Bing (Web (fair-use with source credit))
Follow these steps in order. Don't rush.
- Set the speed to zero. Set the incline to zero. Stand on the side rails, not the belt.
- Clip the safety key to your clothing. Give the lanyard a gentle tug to test it.
- Turn to face the rear of the treadmill. Keep both feet on the side rails.
- Grip both handrails. Your hands should rest naturally. Don't lean forward.
- Place one foot on the belt. Then the other. Keep your steps short.
- Start walking. The belt moves toward you. That means your feet must move backward to stay in place.
- Keep your eyes forward. Pick a spot on the wall or a mirror. Looking down ruins your balance.
- Stay centered. Don't drift to one side. If you feel yourself drifting, slow down.
- To stop, grab both handrails. Slow the belt to zero. Never jump off a moving belt.
- Step onto the side rails. Wait for the belt to stop completely. Then step off.
This mirrors adjusting the machine on any cardio equipment: you set the controls before you move.
First sessions should last five minutes. Add one minute per week. Speed should stay at 0.5 to 1.0 mph for at least two weeks.
When that feels boring, add 0.1 mph.
If you feel dizzy, stop. If your knee hurts, stop. If you can't keep your balance, stop.
Backward walking is not a competition.
Common Mistakes That Lead to Falls and Injuries
Most backward walking injuries come from avoidable errors. Here are the big ones.
- Starting too fast. Beginners often think 1 mph is slow. On a backward walk, it's not. Stick to 0.5 mph.
- Skipping the safety clip. It takes two seconds to attach. It can save you from a broken wrist.
- Hanging on the handrails. If you're hanging, you're not balancing. You're just holding on. That defeats the purpose.
- Looking down. Your feet won't tell you where to go. Your eyes need a fixed point ahead.
- Using an incline too soon. Incline shifts your weight forward. That's the opposite of what you want.
- Walking too long. Fatigue sets in fast. Your form breaks down. That's when you fall.
- Wearing the wrong shoes. Chunky soles catch the belt. Wear flat, snug trainers.
- Ignoring pain. Knee pain during backward walking means something is wrong. Stop and reassess.
Training frequency matters too. More sessions per week increase fatigue risk.
One more mistake: not having a mirror. A mirror gives you a visual anchor. Without it, you rely on feeling alone.
That's harder.
If you make one of these mistakes, reset. Slow down. Check your clip.
Stand on the side rails. Take a breath. Then try again.
Who Should Try Retro Walking (and Who Should Skip It)
Retro walking is the clinical term for walking backward. It's used in physical therapy for knee rehab. But it's not for everyone.
People who benefit most:
- Physical therapy patients with knee osteoarthritis. Backward walking reduces knee compression.
- People recovering from ACL reconstruction. It strengthens the quadriceps without heavy loading.
- Older adults working on balance. It challenges proprioception in a controlled setting.
- Runners with calf or Achilles issues. It shifts load to different muscles.
- Athletes looking for cross-training variety.
People who should skip it:
- Anyone with severe balance disorders. If you fall easily, don't add a new challenge.
- People with vertigo or inner ear issues. Backward motion can trigger dizziness.
- Recent knee or hip replacement patients. Get clearance from your surgeon first.
- Anyone on sedatives or muscle relaxants. These medications slow reaction time.
- People who can't stand on one foot for 10 seconds. That's a basic balance test.
If you're unsure, ask a physical therapist. They can assess your gait and balance. Just like comparing low-impact machines, you need to match the activity to your body.
Start with five minutes. If you feel stable, add time. If you feel wobbly, stop.
Progression Tips: Speed, Incline, and Session Length
Slow is safe. Fast is where falls happen. That's the golden rule for backward treadmill walking.
Start with 0.5 mph at 0% incline for 5 minutes. Do that for at least four sessions before changing anything. Then adjust one variable at a time.
Speed comes first. Increase by 0.1 mph. Stay there for 2-3 sessions.
If you feel stable, try 0.7 mph. Most people never need to exceed 1.0 mph. Backward walking rewards control, not speed.
Incline comes last. Keep it at 0% for the first month. When you can walk backward without holding the handrails, try 1%.
Be careful. Incline shifts your weight forward and changes foot placement.
Session length grows from 5 to 10 minutes over two weeks. Then add one minute per week. A 20-minute backward walk is plenty for most people.
Longer sessions bring fatigue, and fatigue causes falls.
| Week | Speed | Session Duration | Incline |
|---|---|---|---|
| 1-2 | 0.5 mph | 5 minutes | 0% |
| 3-4 | 0.6 mph | 7 minutes | 0% |
| 5-6 | 0.7 mph | 10 minutes | 1% |
| 7+ | 0.8-1.0 mph | 15-20 minutes | 1-2% |
Train two to three times per week. Never walk backward two days in a row. Your joints need recovery time, just like any other workout.
Dizziness, knee pain, or sloppy foot placement means you're progressing too fast.
Backward Treadmill Walking FAQs
Is walking backward on a treadmill good for you?
Yes, for certain people. Physical therapists use retro walking to strengthen quadriceps and improve knee stability. It helps with knee osteoarthritis and ACL rehab.
For healthy adults, it adds variety and challenges balance. Start slow and keep sessions short.
Why is walking backward on a treadmill so hard?
Because you lose visual feedback. When you walk forward, your eyes guide your feet. Backward, your brain relies on proprioception alone.
That's your body's sense of where it is in space. It's a skill, and skills take practice.
What is a good speed for walking backward on a treadmill?
0.5 mph is the right starting speed. That's about half a normal walking pace. After two weeks, you can try 0.6 mph.
Most people never need to go past 1.0 mph. Backward walking is about controlled foot placement, not speed.
Should I hold onto the handrails the entire time?
Yes, for your first few sessions. Your body needs time to adapt. Once you can walk ten minutes without gripping tightly, try releasing one hand for short stretches.
Keep your other hand ready. Full hands-free walking can wait until you're completely stable.
What if my treadmill doesn't have a safety clip?
Check the console for an emergency stop button. Most treadmills have one, even budget models. If your machine lacks both, don't attempt backward walking on it.
The risk isn't worth it.
How long until I feel comfortable walking backward?
Most people need four to six sessions before it feels natural. The first session feels awkward. The third session feels manageable.
By the sixth, your body starts to trust the movement. Don't rush it.
Final Verdict: Is It Worth the Risk?
Yes, when you follow the rules. No, when you improvise. The risk isn't the movement itself.
It's the mistakes around it: speed, missing the safety clip, and fatigue.
Here's what makes it worth trying. Backward walking strengthens your posterior chain. It improves knee stability.
It trains balance in a way forward walking can't. Physical therapists have used retro walking for decades.
Here's what kills the benefit. Starting too fast. Skipping the safety clip.
Pushing through dizziness. Walking too long. Any one of those can cause a fall.
Our advice is straightforward. If you're healthy, follow the progression plan. Start with 5 minutes at 0.5 mph.
Keep both hands on the rails. Stop at any sign of discomfort.
If you're rehabbing an injury, get clearance from a physical therapist first. They can assess your gait and balance. They'll tell you if backward walking fits your recovery plan.