How to Troubleshoot a Rice Cooker
So your rice cooker just gave up mid-meal. That's frustrating, especially when dinner is supposed to be a ten-minute job. But here's the good news: most common rice cooker failures are fixable at home with basic tools and about fifteen minutes of your time.
Learning how to troubleshoot a rice cooker comes down to matching the symptom to the faulty component. As of 2026, the most common failure points are the thermal fuse, the magnetic switch, and the heating plate. Replacement parts for budget cookers typically cost between $5 and $30, which beats dropping $40 to $150 on a new unit.
Quick Answer
Most rice cooker problems trace back to a burned-out thermal fuse, a weak magnetic switch, or a dirty heating plate. Check the power cord first. Test the outlet with another device.
Then inspect the heating plate for scorching. Replace the thermal fuse if the cooker shows no power. Clean the plate and switch contacts if rice burns or the switch won't hold.
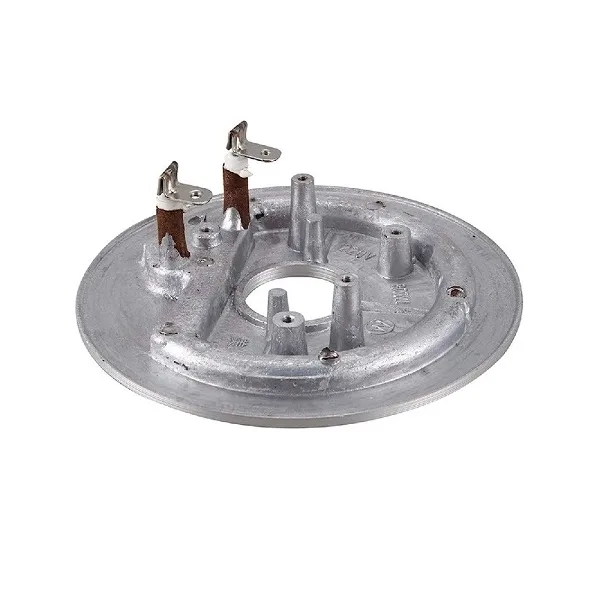
Image source: Bing (Web (fair-use with source credit))
Start Here: Match Your Symptom to the Fix
The fastest way to diagnose your cooker is to figure out what it's actually doing wrong. Each symptom points to a specific component, so you don't need to tear the whole unit apart.
| Symptom | Likely Culprit | Difficulty |
|---|---|---|
| No power at all | Power cord, thermal fuse | Easy |
| Switch won't stay down | Magnetic switch, heating plate corrosion | Moderate |
| Rice undercooked | Thermostat, sensor, or lid switch | Moderate |
| Rice burning on bottom | Dirty heating plate, warped inner pot | Easy |
| Keep-warm not working | Thermostat, control board | Advanced |
| Steam leaking heavily | Clogged vent, stuck float valve | Easy |
If your cooker shows no signs of life, start with the power path. If it powers on but cooks badly, focus on the heating and sensing components. A burning smell from the unit itself means stop immediately, unplug, and inspect before doing anything else.
A blown thermal fuse is the single most common failure across budget rice cookers. It's a one-time safety device that cuts power if the unit overheats. When it blows, the cooker appears completely dead.
That's actually good news because the fix is cheap and straightforward.
Safe First Checks Before You Open or Unplug Anything
Before you dig into the internals, eliminate the obvious causes. You'd be surprised how many "broken" cookers just need a different outlet.
First, unplug the cooker and plug something else into the same outlet. If that doesn't work, you've got an outlet problem, not a cooker problem. If the outlet works, inspect the power cord along its full length for cracks, kinks, or melted spots.
A damaged cord needs replacement, not patching.
Next, check where the cord enters the cooker body. That connection point takes a lot of bending stress over time. Wiggle it gently while the unit is unplugged.
If the cord feels loose or the connection is charred, stop there and replace the cord before testing anything else.
Finally, look at the heating plate underneath the inner pot. A dark layer of scorched food residue acts as an insulator, meaning heat transfers poorly. A quick clean with a nylon brush and white vinegar often fixes a rice cooker that mysteriously started burning rice.
For more on keeping kitchen gear clean, check out this guide to cleaning food scales properly.
Per the Consumer Product Safety Commission, small kitchen appliances account for a significant share of household electrical fires. If you see discolored prongs, a melted plug, or any burning smell from the unit itself, don't attempt a repair. Replace the whole cooker.
Won't Turn On or the Cook Switch Won't Stay Down
This is the "dead cooker" scenario, and it splits into two branches: totally unresponsive, or the switch clicks but won't latch.
If the cooker is totally dead, test the power cord with a multimeter set to continuity mode. Disconnect both ends, then touch the probes to each wire. No beep means a broken wire, so replace the cord.
If the cord tests fine, you're looking at the thermal fuse. It's a small white or metal cylinder with two wires attached, usually clipped near the heating plate. Set your multimeter to continuity and test across the fuse terminals.
No continuity means it's blown.
Replacing a thermal fuse is simple. Unscrew the clips, remove the wires, and install the new fuse with the same temperature rating. Using a higher-rated fuse defeats the safety purpose and could start a fire.
Check your model's service manual for the correct spec.
If the switch clicks but won't stay down, the culprit is usually the magnetic switch. This mechanism uses a magnet on a spring to hold the switch down while cooking. Once the rice absorbs enough water and the temperature rises above boiling, the magnet loses its hold and the switch pops up to warm mode.
Over time, the heating plate corrodes or gets coated in carbon, weakening the magnetic pull. The switch then pops up too early, leaving you with undercooked rice. Clean the heating plate with fine sandpaper or a scouring pad.
If that doesn't restore the grip, replace the switch assembly. It's a $10 part and a ten-minute job on most models. If you want to brush up on testing small appliance circuits, this troubleshooting guide covers the same multimeter approach.
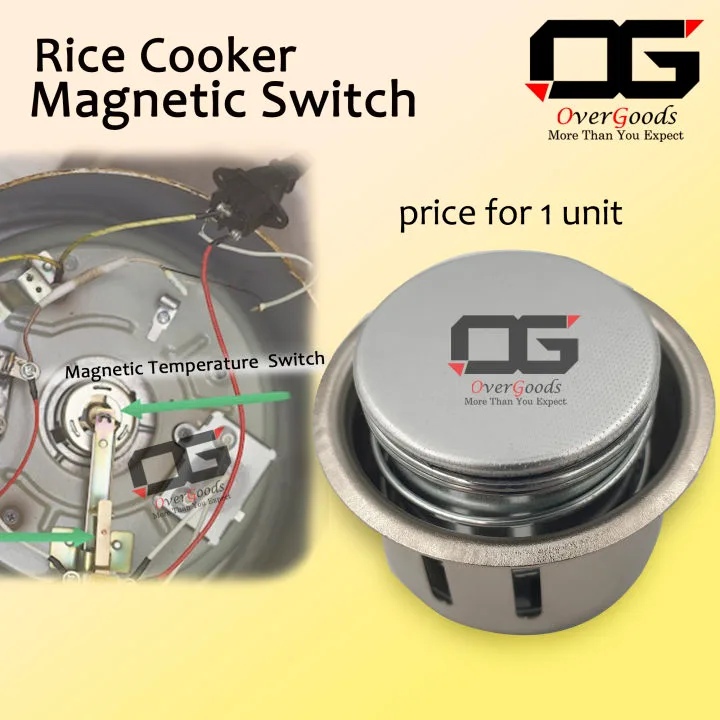
Image source: Bing (Web (fair-use with source credit))
Undercooked, Gummy, or Burnt Rice: Don't Blame the Recipe Yet
Before you second-guess your rice-to-water ratio, consider a few mechanical culprits that mimic bad recipes.
Burnt rice on the bottom almost always means the heating plate isn't making proper contact with the inner pot. Any gap between them creates hot spots. Warped pots are a leading cause, especially after years of thermal cycling.
Check if the pot rocks or spins on the plate. If it wobbles, it's warped, and a new pot is the fix.
Another common culprit is a sticky layer on the underside of the pot. That residue insulates against heat transfer just like residue on the heating plate. Turn the pot upside down and scrub off any brown, caramelized buildup with hot water and baking soda.
Dry it completely before using it again.
Undercooked or gummy rice with a proper pot and clean plate points to the thermostat. On a basic cooker, the thermostat is a small metal disc near the heating element. When it drifts out of calibration, the cooker shuts off too early, leaving rice crunchy.
Testing a thermostat requires a multimeter and a service manual. If the switch stays down too long and rice comes out gummy, the magnetic switch is holding past its limit due to a stuck spring or worn plate.
On digital models, a blocked lid sensor can also cause mid-cycle shutdowns. Most micom and induction cookers have a sensor confirming the lid is closed. If it's broken, the cooker may stop partway through.
Listen for the click when closing the lid. No click usually means a stuck microswitch.
Using a kitchen scale for your rice and water eliminates the biggest variable before you start swapping parts. If you're rebuilding your approach, here's how to pick a reliable scale for kitchen work.
Keep-Warm Failures, Steam Leaks, and Burning Smells
These three symptoms are less urgent than a dead cooker, but they still deserve attention before they become bigger problems.
Keep-warm mode failing means the cooker finishes its cycle but either stays scorching hot or cools down completely. On electromechanical models, a stuck thermostat usually causes this. On digital models, it's often the control board or a failing temperature sensor.
Neither is a simple $5 swap, but both are repairable if you're comfortable with a soldering iron.
Steam leaks are often just a clogged float valve or a worn lid gasket. The float valve is the plastic piece that seals the vent once pressure rises. Food debris traps over time and prevents it from seating.
Remove the valve, clean it with a toothpick and warm soapy water, and reinsert it. Check the gasket for cracks or hardening while you're there. A brittle gasket won't seal.
Replacement gaskets cost $8 to $15 and are model-specific.
Burning smells demand immediate action. Unplug the unit and don't use it again until you've inspected it. A smell like burning plastic suggests a wire overheating.
A scorched, acrid smell points to a failing heating element. Both often mean replacing the entire cooker. This is the one situation where professional repair rarely makes financial sense.
Regular maintenance prevents most of these issues. Keep the heating plate clean, wipe the inner pot's bottom dry before cooking, and clear the steam vent every few uses. For more on small appliance upkeep, this maintenance guide covers similar preventive habits.
The 15-Minute Troubleshooting Workflow: Tools, Tests, and Parts
You're ready to open things up. Here's what you need: a multimeter with continuity mode, a screwdriver set, a nylon brush, fine sandpaper, and white vinegar. That's the whole toolkit for 90% of fixes.
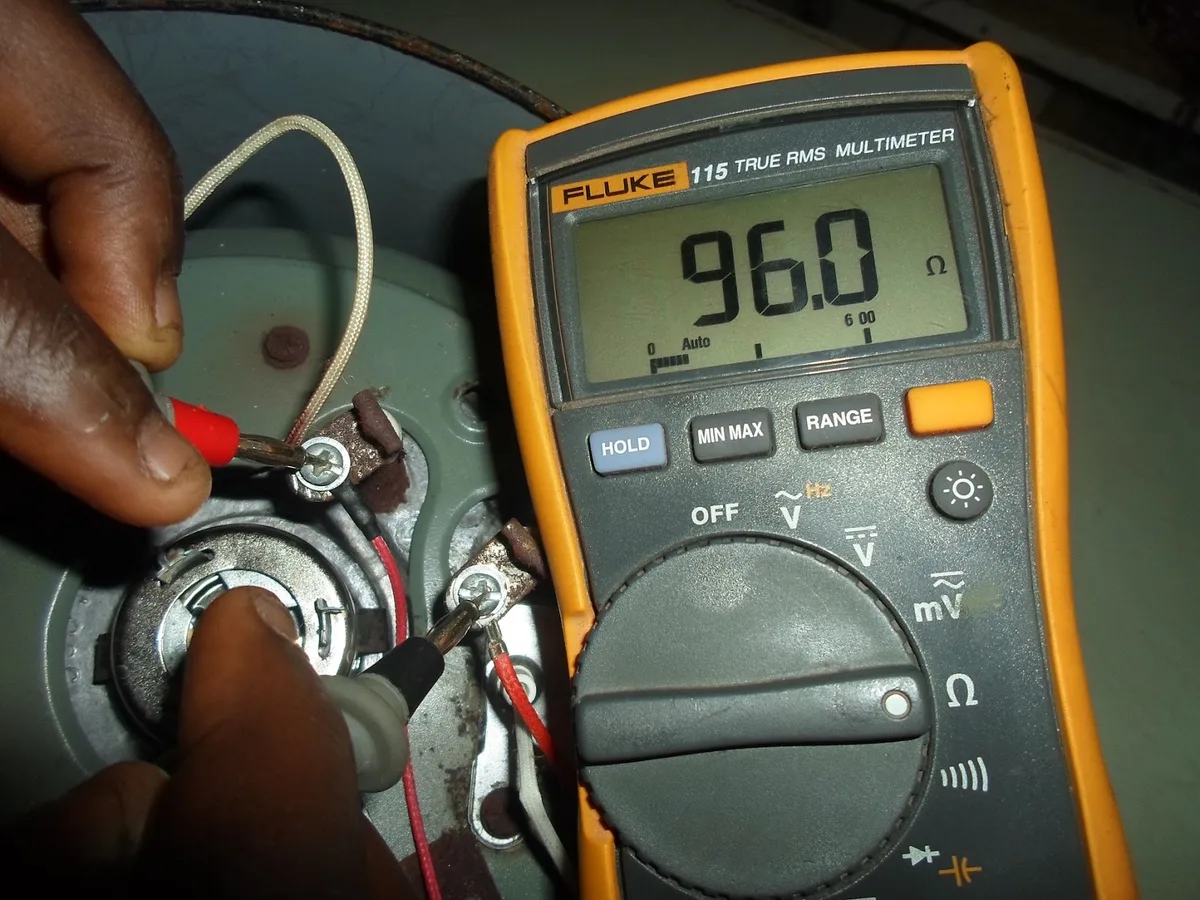
Image source: Bing (Web (fair-use with source credit))
Step 1: Unplug and disassemble. Remove the inner pot and flip the cooker upside down. You'll see a base plate held by four to six screws. Remove them and lift the base carefully.
On digital models, watch for wires connected to the control board. Go slow.
Step 2: Visually inspect everything. Look for burnt wires, scorched connections, or a blackened heating plate. A blistered plate means years of damage and isn't worth replacing. Skip to buying a new cooker at that point.
Step 3: Test the heating element. Set your multimeter to ohms and touch the probes to the element's terminals. A working element reads between 50 and 150 ohms. No reading at all means a broken element.
Step 4: Test the thermal fuse. Find the small cylinder near the heating plate. Set your multimeter to continuity and touch both fuse terminals. A beep means it's good.
Silence means it's blown. Replace it with the exact same temperature rating.
Step 5: Test the magnetic switch. Press the cook switch down manually with the base still open. If it won't latch, check the magnet contacts. Clean them with fine sandpaper and try again.
If it still won't hold, order a replacement. Most snap right in for under $12.
Step 6: Reassemble and water-test. Put everything back together, plug in the cooker, and add a cup of water. Run a full cook cycle without rice. If it boils and then switches to warm automatically, you've fixed it.
If not, you've confirmed the issue and can order the right part. For more on hands-on testing methods, this guide covers the same multimeter basics applied to small appliances.
Common Mistakes That Make a Rice Cooker Worse
One bad repair can turn a quick fix into a trip to the store. Watch out for these blunders.
Replacing the fuse with the wrong rating. A higher-rated fuse means the cooker can overheat dangerously before tripping. A lower-rated fuse blows instantly on the first cook. Always match the exact spec printed on the original.
Scrubbing the heating plate with metal tools. Steel wool and wire brushes gouge the aluminum surface, creating hot spots and poor pot contact. Use a nylon brush or fine sandpaper only.
Testing while plugged in. You cannot safely probe live circuits on a metal chassis. Shock risk is real, and capacitors in digital models can hold a charge long after unplugging. Wait ten minutes after disconnecting.
Ignoring a warped inner pot. A pot that rocks on the heating plate causes uneven cooking. Trying to hammer it back flat never works. Replace the pot or the whole cooker.
Skipping the water test. Testing with rice wastes food and masks electrical issues. Always do a water-only cycle first. It's the safest way to verify your fix works.
For more on proper scale and measurement technique, this guide walks through precise measuring basics.
Frequently Asked Questions
Why won't my rice cooker stay on warm mode?
The thermostat or a stuck relay on digital models usually causes this. First, clean the heating plate and check the magnetic switch spring. If the cooker works fine during cooking but won't hold warm, the thermostat likely needs replacing.
That's a $15 part requiring basic soldering.
Can I use a rice cooker with a damaged power cord?
No. A frayed or melted cord is a fire hazard. Per the Consumer Product Safety Commission, damaged cords cause a significant share of small appliance fires.
Replace the cord before using the cooker again. Most cords cost under $10 and attach with simple terminals.
How do I know if the thermal fuse is blown?
Set your multimeter to continuity mode and touch the probes to the fuse terminals. No beep means the fuse is dead. A blown fuse also explains a cooker with a good power cord that shows zero signs of life.
Why does my rice cooker turn off before the rice is done?
The magnetic switch is losing its grip, usually from corrosion on the heating plate. The plate can't hold the magnet down, so the switch pops up early. Clean the plate with fine sandpaper first.
If that fails, replace the switch assembly.
Is it worth repairing an old rice cooker?
Only if you own a premium model. Name-brand micom and induction cookers cost $150 to $400 new, so a $30 part is worth it. Budget cookers under $40 aren't worth repairing.
The parts and effort cost more than a replacement.