How to Make Chili in a Slow Cooker
Figuring out how to make chili in a slow cooker seems straightforward until you open ten recipe tabs and get ten different answers. Brown the meat first or skip it? Add beans at the start or the end?
Broth or no broth? It feels like every family has a different method. The good news is that most of them work, and knowing which choices actually affect the final pot matters more than finding the "perfect" recipe.
The USDA recommends cooking ground beef to a safe internal temperature of 160°F, though a slow cooker on low will hold around 200°F. That means safety isn't the hard part. Texture, flavor, and thickness are.
So let's walk through the decisions that matter, then lock in a workflow you can set and forget.
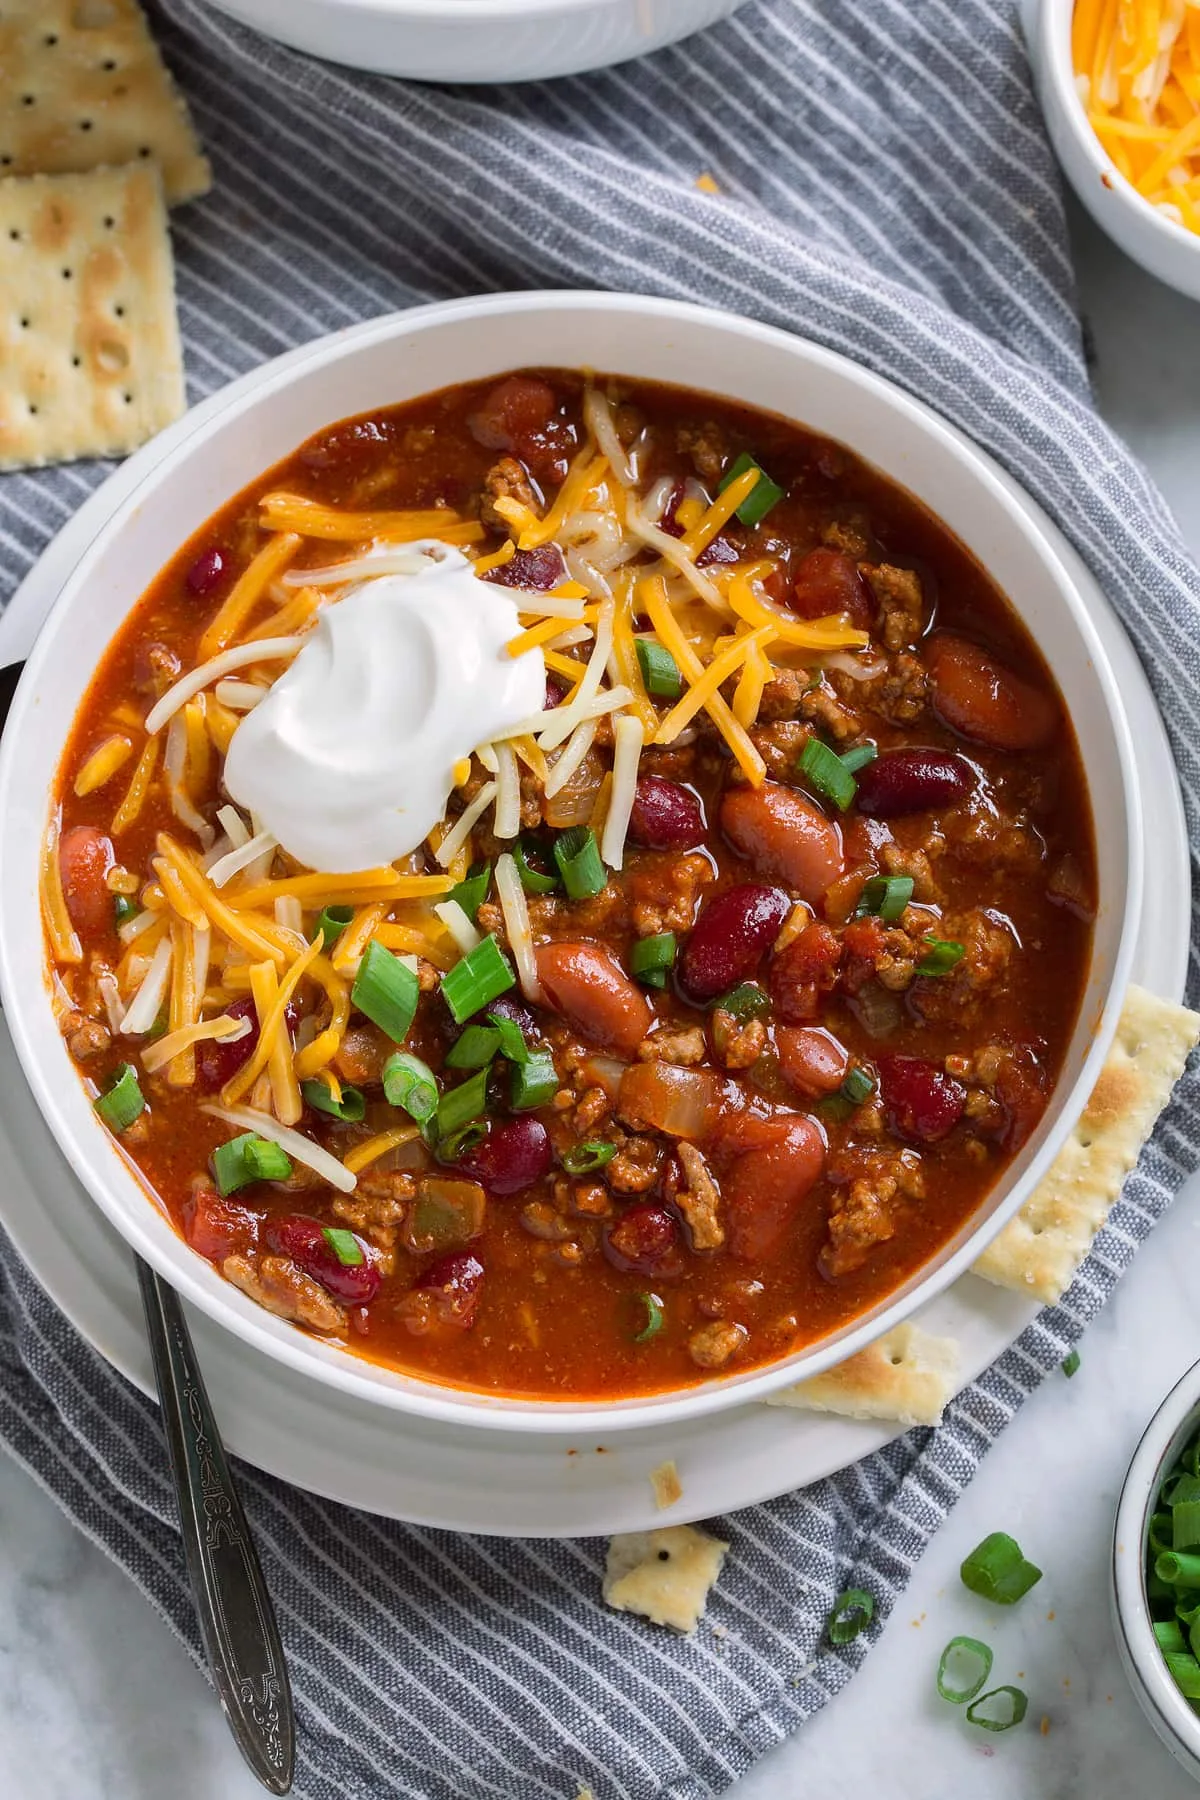
Image source: Bing (Web (fair-use with source credit))
Quick Answer
To make chili in a slow cooker, brown ground beef first. Layer aromatics, spices, tomatoes, and beans. Cook on low for 6 to 8 hours.
Use less liquid than you think. Thicken with masa if needed.
Pick Your Path: Meat, Beans, and Heat Level
Before anything touches the slow cooker, three decisions shape your entire pot. Make these early and the rest runs almost on autopilot.
Ground Beef, Stew Meat, or Turkey?
The classic choice is 80/20 ground beef. That fat ratio keeps chili rich and tender over a long cook. Leaner 90/10 beef can turn dry.
If you want a leaner bowl, ground turkey works, but add a splash of olive oil while browning. Weighing your meat portions keeps results consistent, and a digital scale makes it easy.
Stew meat is a quieter upgrade. Cut into 1-inch chunks, chuck or round breaks down after 8 hours on low. The texture lands closer to brisket than taco meat.
Choose stew meat for weekend cooking, ground beef for weeknights, and turkey when you're watching fat.
Beans or No Beans?
This is a texture call, not a moral one. Canned kidney beans, pinto beans, or black beans all work. Add them in the last 30 to 60 minutes so they hold their shape.
Texas-style chili skips beans entirely. If that's your camp, leave them out.
Choosing Your Heat Level
Start with 2 tablespoons of chili powder and 1 teaspoon of cayenne for medium heat. For mild, drop the cayenne to 1/4 teaspoon. For hot, double it.
Spices mellow over an 8-hour cook, so upfront heat fades into rounded warmth.
The Core Workflow: Brown, Layer, and Set It
Here's where most slow cooker chili goes sideways. People toss raw meat in the pot and expect the appliance to build flavor. It won't.
A quick sear changes everything.
Why Browning Before the Slow Cooker Matters (Even if It's Optional)
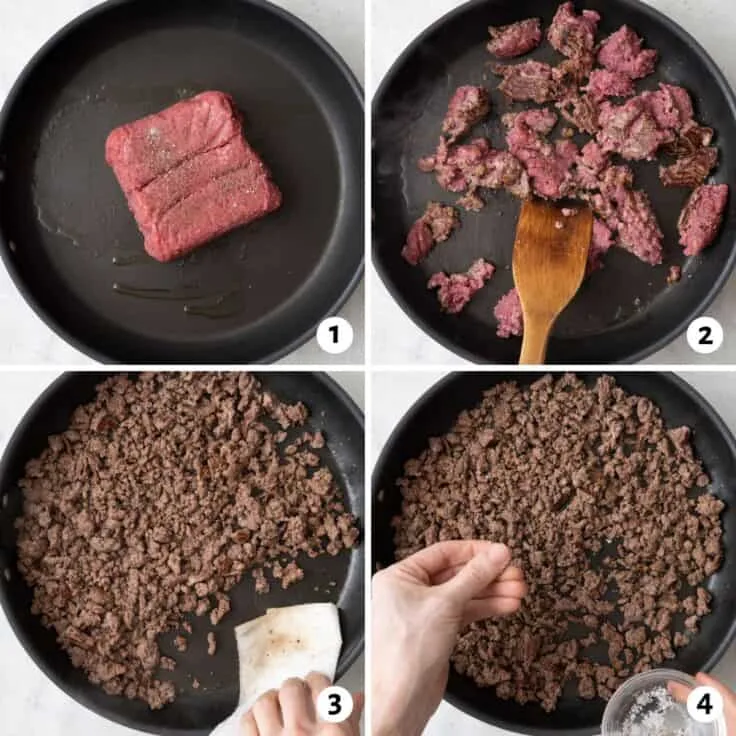
Image source: Bing (Web (fair-use with source credit))
Browning triggers the Maillard reaction, which produces hundreds of flavor compounds in minutes. Taste tests consistently favor the browned batch. Raw meat in a slow cooker turns gray, soft, and bland by comparison.
Brown the beef in a skillet over medium-high heat. Break it into crumbles and let it develop a crust. Drain most of the fat, then sauté onion and garlic in the same pan.
Every brown bit left behind carries flavor.
The Right Layering Order for Deep Flavor
Layer in this order: onions and garlic on the bottom, then tomato paste and spices, then canned tomatoes, then meat, with beans last. The slow cooker's gentle heat builds flavor gradually and prevents scorching.
The "Set It and Forget It" Timeline
Plan for 6 to 8 hours on low. That window fits a standard workday. If you're in a hurry, 4 to 5 hours on high works, but meat will have a looser texture.
For chuck steak, always choose the long window.
Liquid and Time: The Two Decisions That Make or Break It
Slow cooker chili fails in two predictable ways: too watery and too bland. Both come from liquid decisions made before you press start.
How Much Liquid Is Actually Enough?
Less than you think. A 15-ounce can of crushed tomatoes plus a 6-ounce can of tomato paste delivers the right base. Broth stays minimal.
Start with 1/2 cup and add more only if the pot looks dry. Taring your scale before measuring ingredients keeps ratios precise.
Why so little? Slow cookers trap steam and condensation, unlike a stovetop pot where moisture escapes. What goes in stays in.
A full cup of broth makes soup, not chili.
Low vs. High: When Each Setting Makes Sense
Low for 6 to 8 hours suits ground beef and makes tougher cuts silky. High for 4 to 5 hours works for weeknights but gives a slightly looser texture. If you seared the meat first, either setting turns out fine.
The Lid Rule: Why "Don't Peek" Is Real
Every time you lift the lid, 20 minutes of cooking time escapes. Resist the urge to stir every hour. One peek at hour 3 to check liquid is fine.
Propping the lid open to "let it thicken" is a mistake unless you're intentionally reducing.
Mistakes That Ruin Slow Cooker Chili (and How to Dodge Them)
Most chili disasters trace back to six common mistakes. Each has a fix.
Watery Chili (and How to Fix It with Time or Masa)
Your chili looks like soup. It happens. First fix: remove the lid for the final 30 to 60 minutes and let steam escape.
Second fix: stir in 2 tablespoons of masa harina or fine cornmeal mixed with 1/4 cup water. It thickens within five minutes.
Bland Chili (and the Flavor-Building You Skipped)
Bland chili almost always means you skipped browning or didn't bloom the spices. Warm chili powder, cumin, and smoked paprika in oil for 30 seconds. That step releases fat-soluble flavors that never surface otherwise.
Checking your scale's accuracy helps if measurements feel off.
Undercooked Beans and Burnt Edges
Dried beans don't soften properly in a slow cooker on low. They often never pass 180°F. If you insist on dried beans, boil them for 10 minutes first, per USDA food safety guidance, then add them to the pot.
Canned beans simply need warmth.
Burnt edges come from too much time on high. Stir the rim once halfway through. Consider the low setting for a full workday.
Real Scenarios: Game Day, Meal Prep, Vegetarian, and Freezer Batches
The same base recipe flexes for whatever occasion you're cooking for.
Feeding a Crowd on Game Day
Double the batch and use a 7-quart slow cooker. Keep beans on the side if your crew has picky eaters. Set out sour cream, shredded cheese, and sliced jalapeños for individual customization.
Chili always tastes better when people build their own bowl.
Make-Ahead and Freezer-Friendly Chili
Chili famously tastes better the next day. Batch-cook on Sunday and portion it out for weekday lunches. Freeze portions flat in zip-top bags and label them with the date.
Frozen chili holds its quality for about three months. If you're weighing out single-serving containers, using a kitchen scale keeps portions consistent and freezer storage honest.
Vegetarian or Turkey Chili in the Same Slow Cooker
Ground turkey needs a splash of olive oil at browning to avoid dryness. Vegetarian chili skips the meat step entirely. Sauté onions and garlic, then add mushrooms, bell peppers, pinto beans, black beans, and kidney beans.
The workflow stays identical.
Expert Fixes: Thicken, Brighten, and Rescue a Bad Batch
Your chili is too thin, too flat, or too spicy. None of those are fatal. Every problem has a fix.
Quick Thickeners: Masa, Cornmeal, and Crushed Tortillas
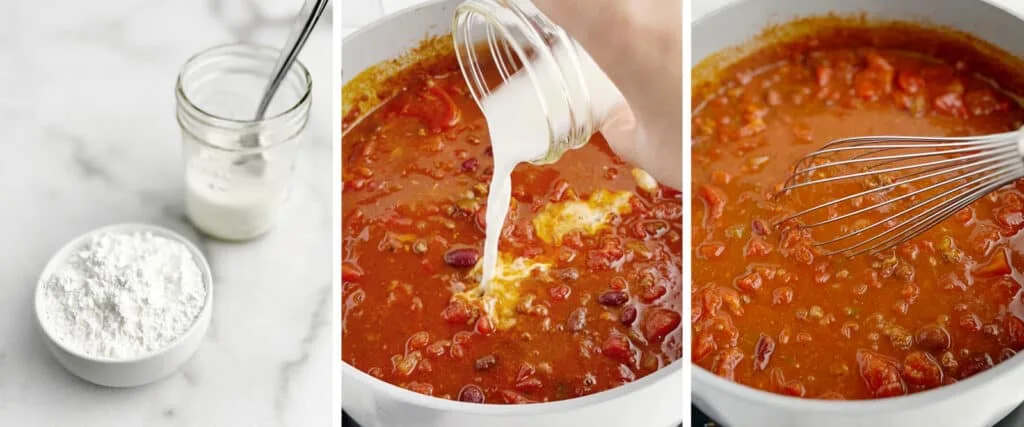
Image source: Bing (Web (fair-use with source credit))
Masa harina is the pro move. It is the same corn flour used for tortillas. Stir 2 tablespoons into 1/4 cup warm water, then whisk the slurry into the pot.
It thickens within five minutes without altering the flavor.
Fine cornmeal works as a backup. So do crushed tortilla chips, though they add extra salt. Skip flour slurry entirely.
It leaves a chalky texture and an unpleasant raw taste.
Balancing Flavor with Salt, Acid, and Heat
Flat chili usually needs acid, not salt. A squeeze of lime juice or a teaspoon of red wine vinegar wakes up the entire pot. Add, stir, wait five minutes, then taste again.
Too spicy? Stir in a tablespoon of brown sugar or drop a spoonful of sour cream into each bowl. Both sweetness and fat soften the heat.
When portions are measured by weight, maintaining your kitchen scale keeps those adjustments consistent every time.
Frequently Asked Questions
Can I put raw ground beef in a slow cooker?
Technically yes, but you trade flavor for convenience. Raw meat turns soft and gray in a slow cooker, and flavor stays flat. Browning in a skillet first triggers the Maillard reaction and adds depth.
If you skip it, drain the fat after cooking.
How long does chili need to cook in a slow cooker?
Six to eight hours on low is the sweet spot. High for four to five hours works in a pinch but leaves a looser texture. The longer window lets tougher cuts break down completely, so plan around it.
Why is my slow cooker chili watery?
Condensation builds under the lid and drips back into the pot. Slow cooker chili needs far less liquid than stovetop chili. Use canned tomatoes plus tomato paste, skip extra broth, and remove the lid for the final 30 minutes to reduce.
Do I need to cook dried beans before adding them?
Yes. The slow cooker's low setting rarely gets hot enough to soften dried beans. Boil them for 10 minutes first, then add them to the pot.
Canned beans are easier and just need to warm through.
Can I leave chili on warm overnight?
No. The warm setting sits below the safe holding temperature once food cools. Refrigerate leftovers within two hours of serving, and reheat to 165°F.
Final Decision Guide: The "It's Done" Checklist
You have cooked, stirred, and fixed. How do you know it is ready?
The Chopstick Test, the Thickness Test, and the Taste Test
Run a chopstick through the chili. If the line holds for a few seconds, it is thick enough. If liquid floods back immediately, leave the lid off for another 20 minutes.
Taste for salt, acid, and heat. Add lime juice for brightness, brown sugar for sweetness, or cayenne for more punch. Give each addition five minutes before judging.
Serving and Storage Quick Reference
Serve with shredded cheese, sour cream, sliced jalapeños, or cornbread. Leftovers keep in the fridge for three to four days in airtight containers.
For freezing, portion chili flat in zip-top bags. It holds quality for about three months. Label each bag with the date before stacking.