How to Maintain a Wooden Cutting Board
Your wooden cutting board is a kitchen workhorse, but it needs a little love to stay in top shape. Neglecting its care can lead to drying, cracking, and even potential hygiene issues. Giving your board regular attention ensures it lasts for years, looking and performing its best every time you chop, slice, or dice.
To keep your wooden cutting board healthy and safe for food prep, consistent cleaning and conditioning are key. For instance, aggregate user reviews show that most boards benefit from oiling at least once a month, depending on usage and wood type. This simple routine prevents common problems and maintains that satisfying feel of a well-cared-for kitchen tool.
Why Your Wooden Cutting Board Needs TLC (And What It Looks Like)
Every wooden cutting board, whether it's a thick end-grain butcher block or a sleek edge-grain board, will eventually show signs of wear. These aren't necessarily bad, but they're your cue that it's time for some maintenance. Ignoring these cues can shorten your board's lifespan dramatically.
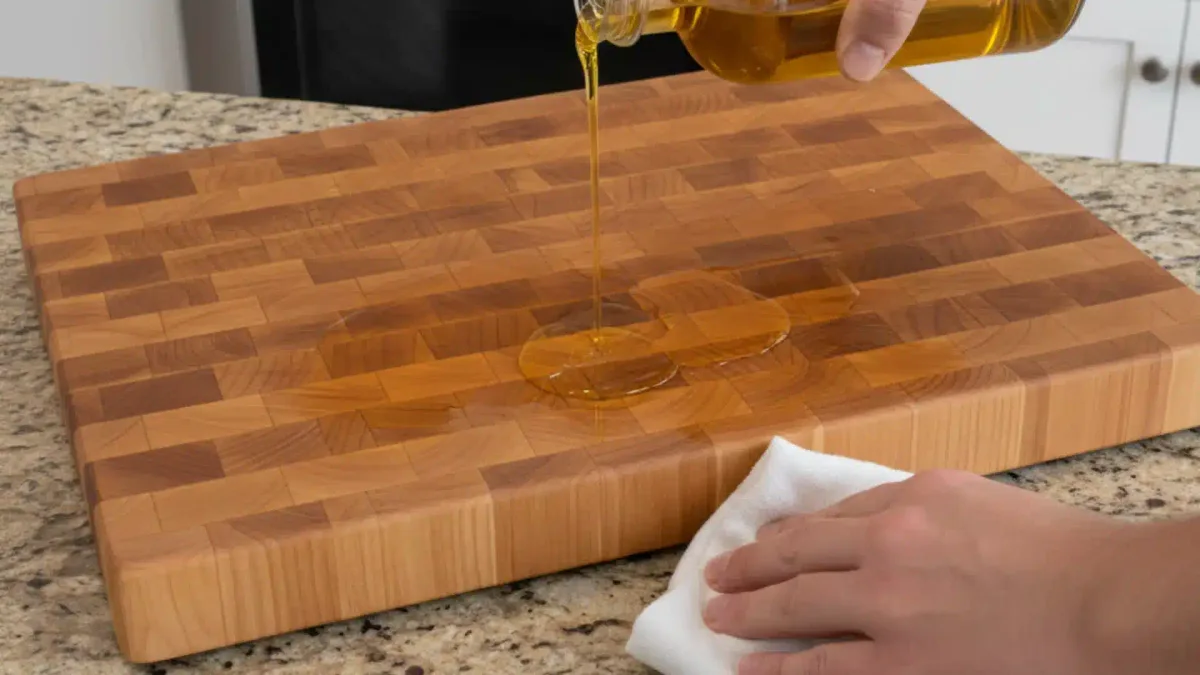
Image source: Bing (Web (fair-use with source credit))
Recognizing a Dry or Damaged Cutting Board
How can you tell if your board is thirsty? Look for a few key indicators.
- Dull, Chalky Appearance: The wood loses its natural luster and can look washed out or powdery. This is a sign that the natural oils have evaporated.
- Dryness and Lightness: The board feels lighter than usual and the wood itself might feel dry to the touch.
- Visible Gaps or Tiny Cracks: Especially along the grain lines or edges, small fissures can appear. These are often the first signs of significant dehydration.
- Roughness: The surface may start to feel a bit rough or fuzzy, even after a good wash.
If you notice any of these, your board is likely crying out for oil.
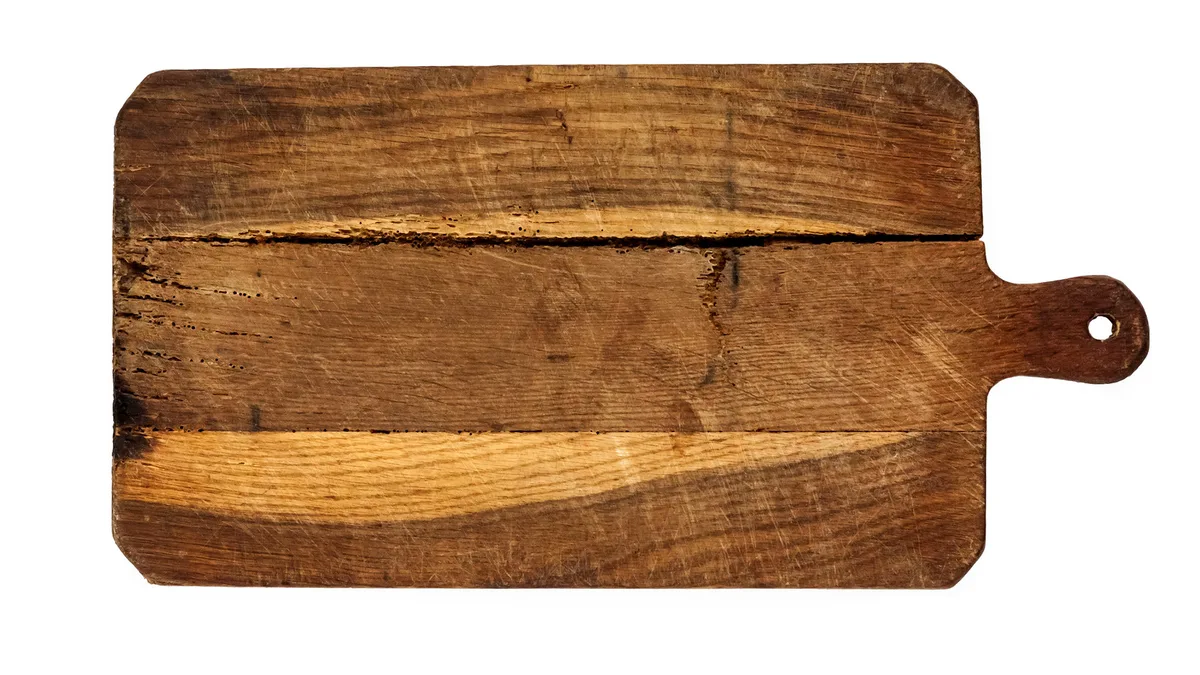
Image source: Bing (Web (fair-use with source credit))
Bringing Your Wood Back to Life: The Cleaning Step
Cleaning your wooden cutting board properly is the first and most crucial step in its maintenance. It’s not just about rinsing off food scraps; it's about preventing moisture damage that can lead to bigger problems down the line.
How to Wash Without Causing Warping
The cardinal rule here is never to soak a wooden cutting board or put it in the dishwasher. These methods introduce too much water, too quickly, which is the fastest way to warp or crack your board.
Here’s the right way to clean it:
- Immediate Rinse: After each use, rinse the board under warm running water.
- Gentle Scrubbing: Use a soft brush or a damp cloth to remove any food residue. For tougher spots, a bit of mild dish soap is fine, but don't let it sit for long.
- Sanitize (Optional but Recommended): For extra hygiene, especially after cutting raw meat, you can use a diluted solution of white vinegar or a very dilute bleach solution (1 teaspoon bleach per quart of water). Let it sit for a minute or two, then rinse thoroughly.
- Drain and Dry: Immediately after washing, stand the board upright on its edge to allow air circulation on all sides. This is critical for even drying. Never lay it flat, as this traps moisture and can cause one side to expand more than the other, leading to warping.
Aggregate user feedback suggests that many issues arise from improper drying. Allowing ample air exposure is non-negotiable.
Sanding Away Scars: Restoring a Smooth Surface
Over time, your cutting board will accumulate knife marks, minor cuts, and perhaps some stubborn stains. While these are natural signs of use, they can become breeding grounds for bacteria and make your board feel rough. Sanding is the answer to bringing back that smooth, pristine surface.
Choosing the Right Grit for the Job
The key to effective sanding is using the right sandpaper grits in the correct order. You’ll want to start with a coarser grit to remove damage and gradually move to finer grits for a smooth finish.
Here’s a typical progression, though you might adjust based on the board’s condition:
- Coarse Grit (e.g., 100-120): For deep knife marks, significant stains, or general reshaping. Use this sparingly if your board is in decent shape.
- Medium Grit (e.g., 150-180): To remove the scratches left by the coarse grit and smooth out moderate wear.
- Fine Grit (e.g., 220-320): To create a silky-smooth surface that’s pleasant to the touch and easy to clean.
- Extra-Fine Grit (e.g., 400+): For an ultra-smooth finish, often used before applying a final oil or wax.
How to Sand:
- Work with the Grain: Always sand in the direction of the wood grain. Going against the grain will create visible scratches that are hard to remove.
- Even Pressure: Apply even pressure across the surface. For larger boards, you might need to sand in sections.
- Clean Between Grits: After sanding with one grit, wipe down the board thoroughly with a slightly damp cloth to remove all dust. This prevents the coarser grit particles from scratching the surface as you move to finer grits.
Proper sanding can make an old, worn-out board feel brand new. It’s a bit of work, but the results are worth it.
The Magic of Oil and Wax: Protection and Polish
This is where the real magic happens. Oiling and waxing your wooden cutting board isn't just about making it look good; it's the most critical step in preventing damage and ensuring hygiene. It replenishes the wood's natural oils, which keeps it from drying out, cracking, and absorbing moisture and odors.
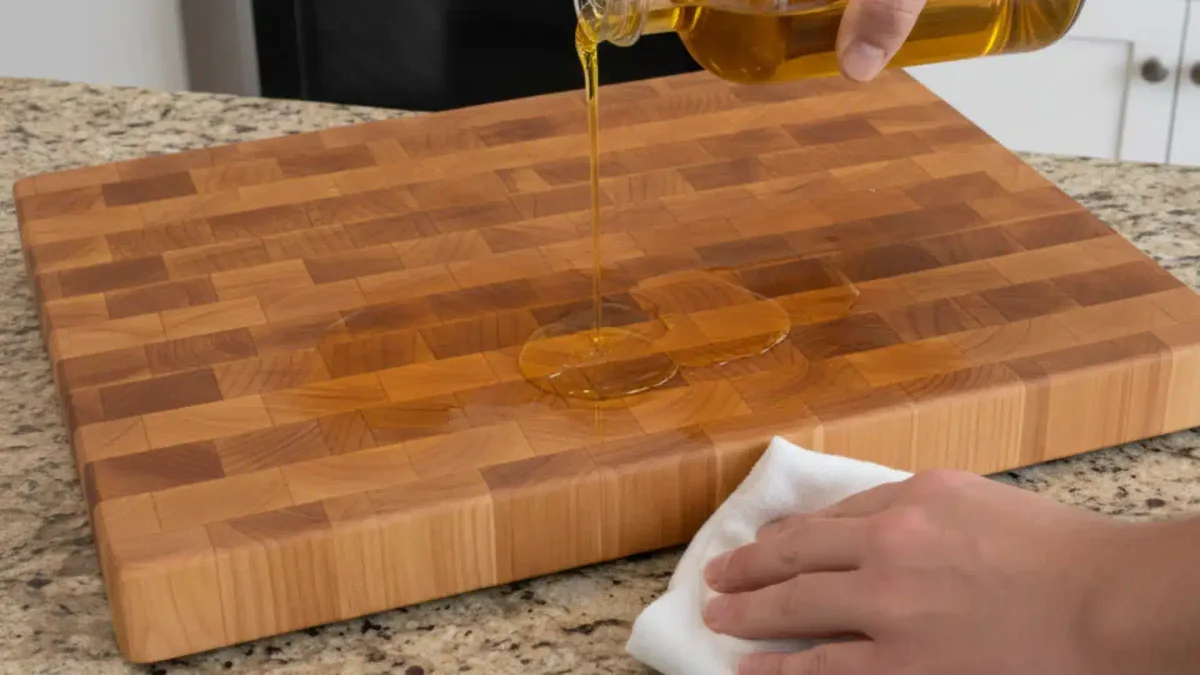
Image source: Bing (Web (fair-use with source credit))
How Often and How Much to Apply
The frequency of oiling depends on a few factors:
- Usage: Boards used daily for heavy chopping will need more frequent oiling than those used occasionally for serving.
- Wood Type: Denser woods like maple might hold moisture better than softer woods.
- Environment: Dry climates or kitchens with low humidity can cause wood to dry out faster.
General Guideline: Aim to oil your cutting board at least once a month. If it starts looking dull, feeling dry, or if water beads don't form on the surface, it’s time for an oiling.
Application:
- Ensure the Board is Clean and Dry: Make sure any washing or sanding is complete and the board is bone dry.
- Apply Generously: Pour a good amount of your chosen oil onto the board. For a standard 12×18-inch board, start with a couple of tablespoons.
- Spread Evenly: Use a clean, lint-free cloth or even your hands to spread the oil over all surfaces of the board, top, bottom, and sides.
- Let It Soak: Allow the oil to penetrate the wood for at least 30 minutes, or ideally, several hours (or even overnight).
- Wipe Off Excess: Use a clean, dry cloth to wipe away any oil that hasn't been absorbed. You don't want a sticky surface.
Best Oils and Waxes to Use (and What to Avoid)
Not all oils are created equal when it comes to cutting boards. You need something food-safe that won't go rancid.
Recommended:
- Food-Grade Mineral Oil: This is the go-to for most woodworkers and chefs. It’s inexpensive, readily available, odorless, colorless, and won’t go bad. It penetrates well and provides excellent protection.
- Fractionated Coconut Oil: This type of coconut oil has had the long-chain fatty acids removed, meaning it stays liquid and doesn't go rancid like regular coconut oil. It's a good alternative if you prefer a natural scent.
- Beeswax Blends: Many cutting board conditioners are a mix of mineral oil and beeswax. The wax adds a protective top layer and a bit of a water-repellent finish. It gives the board a lovely sheen and feel.
What to Avoid:
- Vegetable Oils (Olive Oil, Canola Oil, etc.): These oils will eventually go rancid, leading to a sticky, unpleasant odor and residue on your board.
- Linseed Oil (Unless "Boiled" and food-grade specific): Regular linseed oil can take a very long time to cure and may not be food-safe. If you use linseed oil, ensure it's specifically labeled as food-grade and "boiled" (which contains drying agents, but ensure those are also food-safe).
- Petroleum Jelly (Vaseline): While technically food-safe, it doesn’t penetrate well and can leave a waxy film. Mineral oil is a much better choice.
Storing Your Board for Longevity
Even with regular cleaning and conditioning, how you store your wooden cutting board plays a big role in its longevity. Proper storage prevents warping, ensures quick drying, and keeps it ready for your next culinary adventure.
The Dos and Don'ts of Cutting Board Storage
Think of storage as the final act of care. Doing it right prevents undoing all your hard work.
DO:
- Store Vertically: This is the golden rule. Stand your board up on its edge in a knife block, a specialized cutting board holder, or even prop it against a backsplash. This allows air to circulate freely around both sides, preventing moisture from getting trapped. It also stops one side from staying damp longer than the other, which is a prime cause of warping.
- Keep it in a Dry, Well-Ventilated Area: Avoid storing your board in damp areas like directly under the sink, inside a closed-off cabinet with no airflow, or near a dishwasher that frequently runs and emits steam. A spot on the counter with good airflow or in an open-air pantry is ideal.
- Ensure it's Completely Dry First: As mentioned, always make sure your board is fully dry after washing before storing it, especially if storing vertically.
DON'T:
- Lay it Flat: Never store your cutting board flat on a countertop or in a drawer. This traps moisture underneath, preventing even drying and encouraging mold or mildew growth. One side will be more exposed to air than the other, leading to uneven expansion and contraction.
- Store it in a Humid Environment: Basements, garages, or areas prone to high humidity aren't ideal for wood storage. The moisture in the air can affect the wood over time, even if the board itself isn't wet.
- Store it Immediately After Washing: Unless you've stood it on its edge for sufficient drying time, don't put it away wet. This is the most common mistake that leads to problems.
Frequently Asked Questions About Cutting Board Care
Why can't I just use any cooking oil on my cutting board?
Using standard cooking oils like olive or canola oil is a bad idea because they can go rancid. Rancid oils develop an unpleasant odor and can leave a sticky residue on your board, making it unsanitary and unpleasant to use. Stick to food-grade mineral oil or specially formulated board conditioners.
How do I get rid of really stubborn stains on my wooden cutting board?
For tough stains, you might need to do some light sanding. Start with a medium-grit sandpaper (around 150-180) and sand in the direction of the wood grain. After sanding, clean the board and re-oil it thoroughly.
If the stain is very deep, you may need to repeat the sanding process with a finer grit afterward.
My cutting board has a strong smell from onions or garlic. How can I fix it?
A common trick is to use half a lemon and rub it all over the board's surface, especially on areas with lingering odors. You can then sprinkle some coarse salt (like kosher salt) onto the lemon-moistened surface and scrub it in with a brush. Let it sit for about 10-15 minutes, then rinse thoroughly and dry.
Can I use my cutting board right after oiling it?
It’s best to let your cutting board soak up the oil for at least 30 minutes, and ideally, several hours or overnight, before using it. This allows the oil to penetrate the wood properly. Wiping off any excess oil before use prevents a sticky surface that could attract debris.
What's the difference between oiling and waxing a cutting board?
Oiling replenishes the wood's internal moisture, preventing it from drying and cracking. Waxing, often done with beeswax blends, adds a protective top layer that repels water and creates a smoother finish. Many cutting board conditioners combine both for comprehensive protection and a nice sheen.





5 Comments