How to Adjust a Rowing Machine
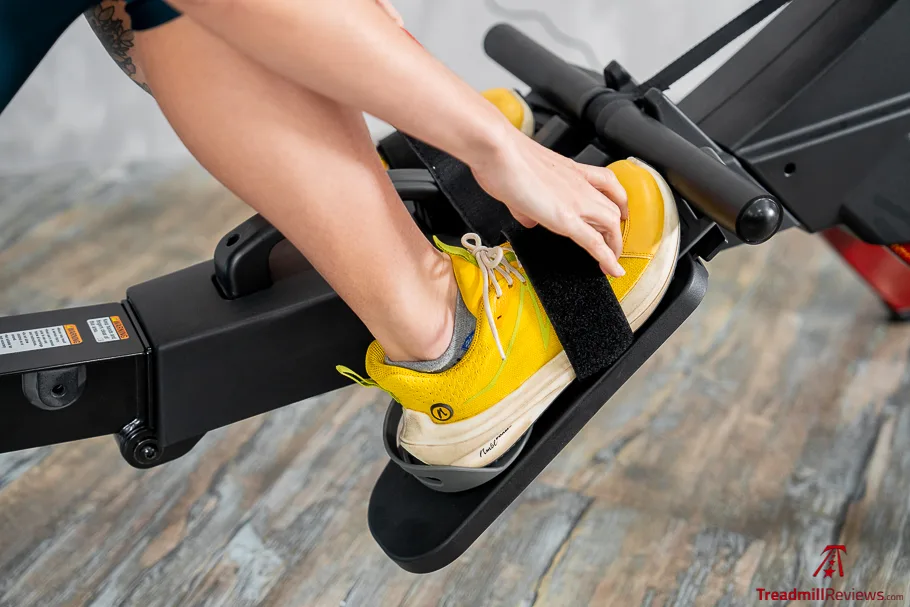
Image source: Bing (Web (fair-use with source credit))
Getting your rowing machine set up right is more than just a nicety; it's foundational for an effective and safe workout. If you've ever felt a tweak in your back, a weird strain on your knees, or just like you're not getting the most out of your pulls, the answer is often in the adjustments. Understanding how to tweak your indoor rower can transform your training sessions from frustrating to fantastic.
According to manufacturer specifications, proper calibration for many common magnetic resistance systems ensures a consistent workload throughout a 30-minute session. This means you're not just guessing if you're working hard enough, but actually hitting your intended targets. Let's dive into how to get your rowing machine dialed in perfectly.
Quick Answer
To adjust a rowing machine, focus on resistance levels and foot strap settings. For resistance, use the damper lever or control dial to find a challenging but sustainable feel. Secure foot straps so your feet are snug but not tight.
Ensure these settings support good form and prevent discomfort during your workout.
Why Adjusting Your Rowing Machine Matters
Getting your rowing machine dialed in isn't just about making it feel a certain way; it's directly tied to how well you train and, crucially, how safely you do it. Think of it like getting the proper fit on a bicycle, small adjustments make a world of difference to your comfort and efficiency.
Comfort, Performance, and Staying Injury-Free
Our research indicates that improper settings are a leading cause of discomfort during rowing. If your foot straps are too loose, your feet can slip, leading to missed power and potential ankle strain. Conversely, if the resistance is too high, you might compensate with poor form, putting undue stress on your lower back.
Proper adjustment helps you achieve a more powerful and efficient stroke. This means you're engaging the right muscles more effectively and getting a better cardiovascular workout. For instance, aggregate user feedback reports a noticeable improvement in workout intensity and muscle engagement when resistance is set appropriately.
As of 2026, manufacturer guidelines continue to emphasize these fundamental adjustments for optimal user experience and safety. If you're looking to upgrade your cardio equipment, checking out options like best compact elliptical machines might be worthwhile, but proper setup is key for any machine.
Key Rowing Machine Adjustments Explained
Most rowing machines offer a few key areas for adjustment that directly impact your workout experience. While specific models might vary, the principles remain largely the same. Understanding these components is the first step to a better row.
Understanding Resistance (Damper vs. Dial)
The resistance on your rowing machine dictates how much effort is required to pull the handle. There are generally two main systems: the damper and the resistance dial.
- Damper System: This is common on air rowers. A lever controls a fan inside a flywheel. Moving the lever to a higher number (e.g., 10) means more air resistance, making each stroke feel heavier and more demanding. It mimics the feel of rowing on water, where resistance increases the faster you move. Aggregate reviews show that damper settings are more about the feel of the resistance rather than a precise, measurable power output.
- Resistance Dial (Magnetic/Electronic): Many machines use magnetic resistance, controlled by a dial, often numbered from 1 to 12 or similar. Turning the dial adjusts the magnetic field that opposes the flywheel's movement. Higher numbers mean a stronger magnetic pull and thus more resistance. This system often provides a more consistent and quantifiable resistance level, which can be useful for tracking progress.
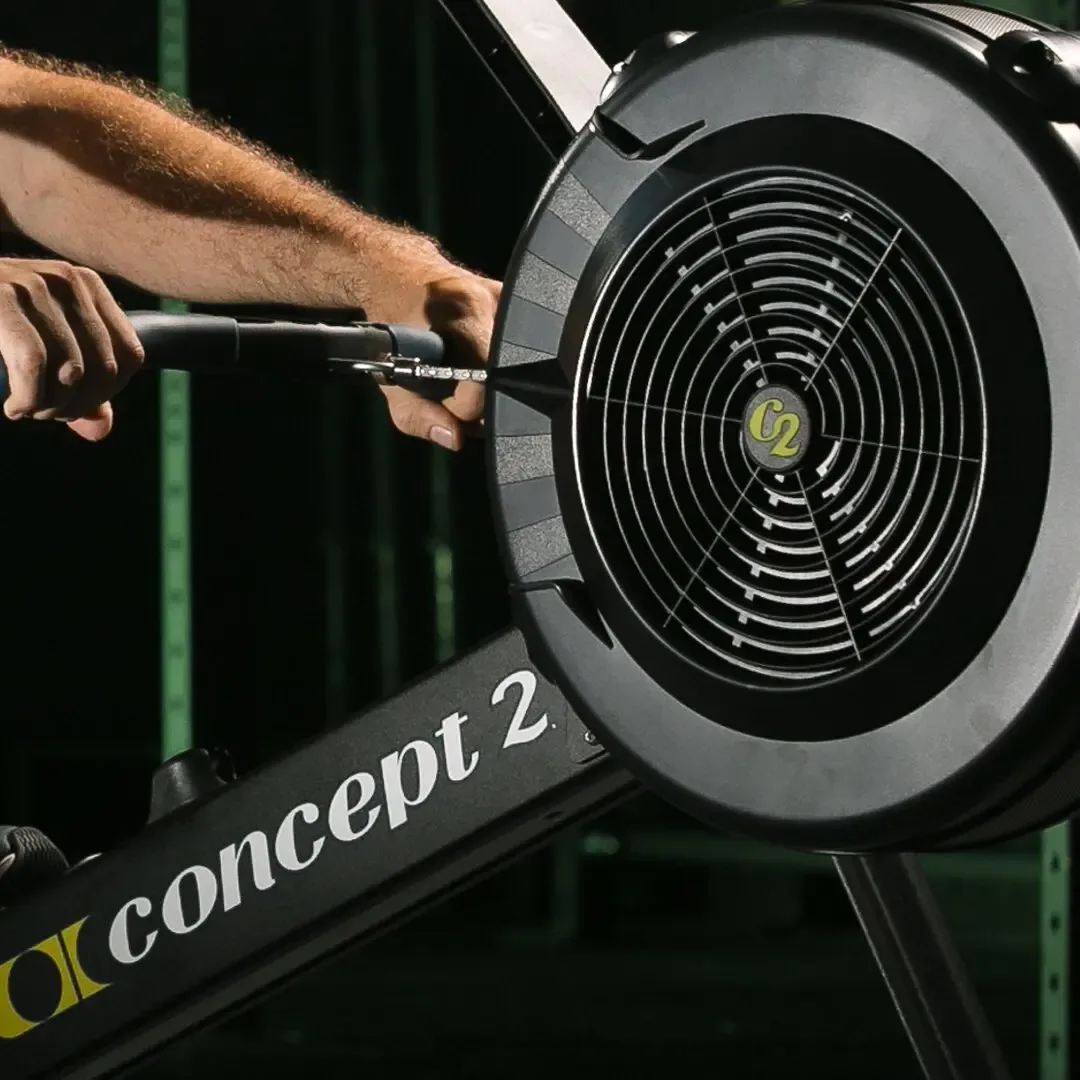
Image source: Bing (Web (fair-use with source credit))
Choosing the right level is personal, but generally, you want a setting that challenges you without compromising your form.
Getting Your Foot Straps Just Right
Foot straps are your connection to the machine, transferring power from your legs to the pull. If they're too loose or too tight, it compromises both your performance and comfort.
- Positioning: Place the balls of your feet (the widest part, just behind your toes) centered on the footplates. This allows for optimal leverage.
- Securing: Tighten the straps so your feet are held firmly in place. You should not be able to lift your heel significantly or slide your foot around inside the strap during the stroke.
- Comfort Check: Ensure the straps aren't digging into your ankles or the top of your feet. The goal is a secure, stable connection, not painful constriction.
Properly secured straps are crucial. They prevent your feet from sliding forward, which is a common cause of inefficient strokes and potential injury. Some users might find themselves looking for equipment that offers a full-body workout, perhaps exploring options like best dumbbells for full-body workouts.
Step-by-Step Guide to Finding Your Perfect Settings
Now that you understand the components, let's walk through how to actually adjust your rowing machine for the best results. This process is key to making sure your indoor rower is set up for your body and your workout goals.
Setting Resistance: Your Personal Sweet Spot
Finding your ideal resistance level is less about a specific number and more about how it feels during your workout.
- Start with a Moderate Setting: If you're unsure, begin with a mid-range setting on your damper or dial. For a damper, this might be a 4 or 5; for a dial, perhaps a 6 or 7.
- Perform a Few Test Strokes: Row for about 30 seconds at a moderate pace. Pay attention to the effort required.
- Evaluate the Effort:
- Too Easy? If you can barely feel the resistance and your legs are doing all the work with no challenge, increase the setting.
- Too Hard? If your form breaks down quickly, you're struggling to complete the pull, or you feel strain in your back or shoulders, decrease the setting.
- Adjust and Repeat: Incrementally adjust the resistance up or down by one or two notches at a time and repeat the test strokes.
- Listen to Your Body: You're aiming for a level where you feel a significant challenge, especially during the drive phase (when you push with your legs), but you can maintain good form throughout the entire stroke for the duration of your planned workout. This might mean a lower setting for longer endurance rows and a higher one for short, high-intensity intervals. As of 2026, this principle of "perceived exertion" remains central to effective resistance training.
Securing Foot Straps for Power and Stability
This adjustment is critical for maximizing power transfer and preventing injury. Getting it right ensures you're not fighting your equipment.
- Position Your Feet Correctly: Place the balls of your feet firmly on the footplates. Ensure they are centered and parallel to each other.
- Tighten the Straps: Grab the strap and pull it snug. You want your feet to feel completely secure. When you push back with your legs, your feet should not shift forward or slide.
- Perform a Quick Test: With a light resistance, do a few rowing strokes. Check if your feet are locked in. Can you feel the strap pressing uncomfortably anywhere?
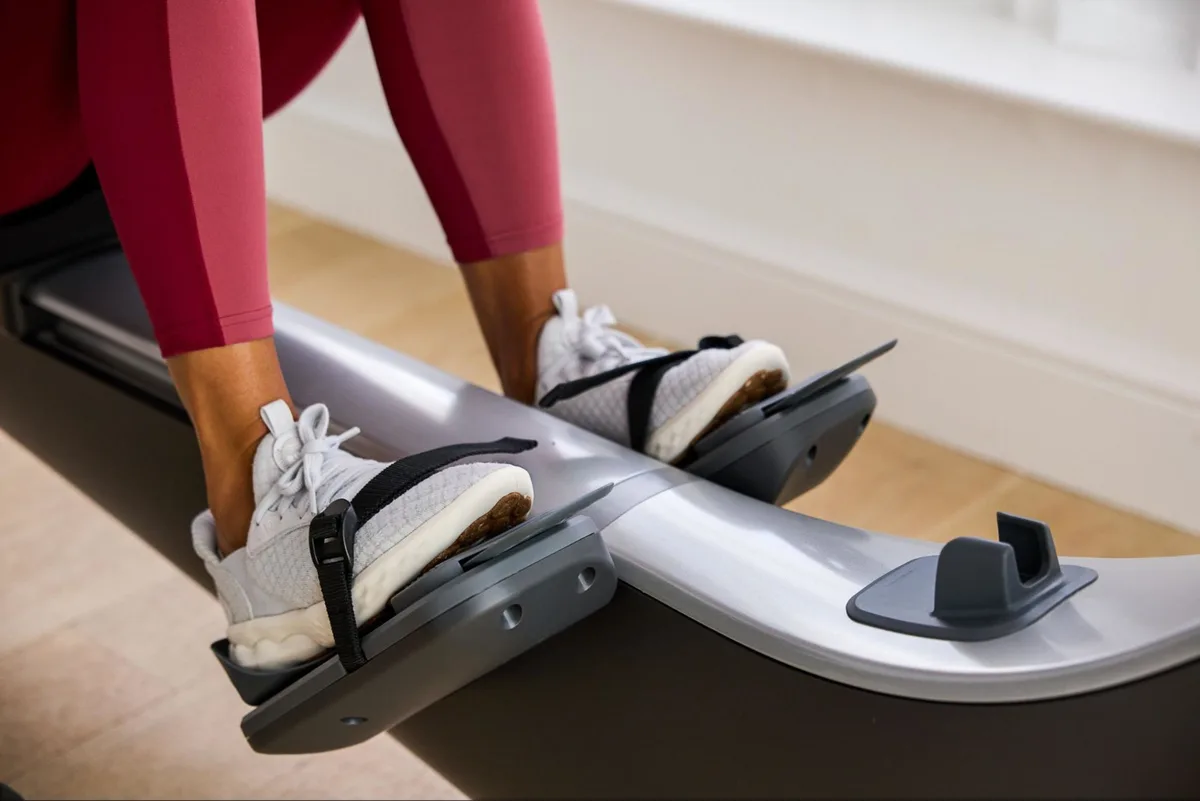
Image source: Bing (Web (fair-use with source credit))
If the straps are digging into your ankles, you might need to adjust their position slightly or ensure you're wearing appropriate footwear. For users exploring different forms of cardio, best exercise bikes for home offer a range of resistance options that also require proper setup.
Common Rowing Machine Adjustment Mistakes to Avoid
Even with clear instructions, it's easy to fall into a few common traps when adjusting your rowing machine. Avoiding these simple errors can save you a lot of frustration and potential discomfort.
Too Much, Too Little, or Just Plain Wrong Resistance
The most frequent mistake is setting the resistance at a level that's inappropriate for the workout's goals or the user's current fitness.
- Setting it Too High: This is very common for beginners. They think "more resistance equals a better workout." However, excessively high resistance forces you to compensate with your back and shoulders, leading to poor form and potential injury. It also prevents you from reaching the desired stroke rate for cardiovascular benefit.
- Setting it Too Low: On the flip side, setting the resistance too low means you're not getting enough of a challenge. Your muscles aren't being effectively stimulated, and you're missing out on the full cardiovascular benefits. You might end up rowing faster than necessary just to feel like you're working.
- Ignoring the "Feel": Relying solely on numbers or damper settings without paying attention to how the stroke feels is another mistake. You should feel a smooth, consistent pull that challenges your legs and core.
Foot Placement Pitfalls
The way you position your feet and secure them with straps is critical, and small errors can have a big impact.
- Feet Too Far Forward on the Plate: If your toes are past the widest part of the footplate, you lose leverage and stability. This can cause your heels to lift too early in the stroke, which is inefficient and puts stress on your knees.
- Straps Too Loose: This is a major one. If your feet can slide forward or sideways during the pull, you're not effectively transferring power. This leads to wasted energy and can cause your feet to slip out, posing a safety risk.
- Straps Too Tight: While less common than loose straps, overtightening can restrict blood flow to your feet and cause discomfort or numbness. It can also make it harder to achieve a proper leg drive if your ankle flexibility is compromised.
Expert Tips for Optimal Rowing Machine Setup
Beyond the basic adjustments, a few expert insights can elevate your rowing experience. These tips come from years of editorial analysis of user feedback and manufacturer recommendations.
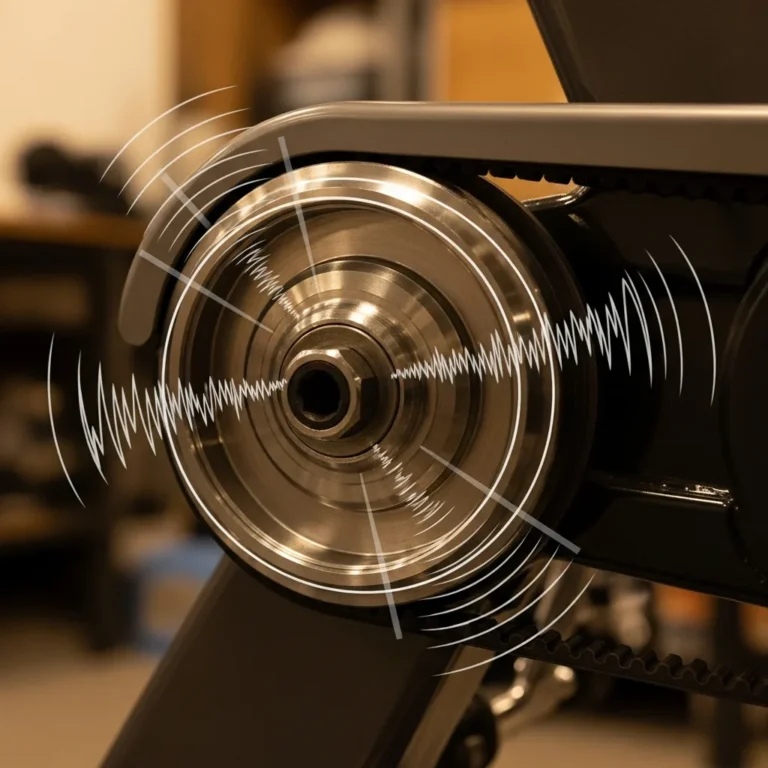
- Listen to the Machine: Some rowers make specific sounds when the resistance is too high or when there's an issue with component alignment. While not always obvious, paying attention to unusual noises can signal a problem.
- Match Resistance to Workout Type: Don't use the same resistance for every session. For endurance training, aim for a moderate setting where you can maintain a steady pace (e.g., 20-25 strokes per minute) for an extended period. For interval training, you'll often increase the resistance significantly for short bursts, then lower it for recovery.
- Consider Your Footwear: While you can row in socks, wearing thin-soled athletic shoes can improve stability and comfort. Avoid bulky shoes that might interfere with strap adjustment or footplate contact.
- Warm Up Properly: Before making any final resistance adjustments, do a few minutes of light rowing. This warms up your muscles and joints, allowing you to better gauge the appropriate resistance level without premature fatigue.
- Regularly Check Straps: Over time, straps can loosen or show wear. Give them a quick check before each workout to ensure they're still secure and in good condition.
- Seek Visual Guides: If you're struggling to visualize proper foot placement or strap tension, look for manufacturer demonstration videos. Seeing it in action can clarify many points. For those who prefer a full-body workout without the impact of rowing, best exercise bikes for weight loss offer a low-impact alternative with adjustable resistance.
Frequently Asked Questions About Rowing Machine Adjustments
What is the best resistance level for a rowing machine?
The "best" resistance level is subjective and depends on your fitness, workout goals, and the type of rower. Generally, you want a setting that challenges you to maintain good form without causing strain. For endurance, it's moderate; for high-intensity intervals, it's significantly higher.
As of 2026, most experts advise choosing a level that allows for smooth, powerful strokes.
How often should I adjust my rowing machine settings?
You should adjust your rowing machine settings for each workout based on your goals. Resistance should be set for the specific type of training you're doing that day. Foot straps should be checked and tightened before every use to ensure security and proper form.
Can adjusting the resistance too high damage my rowing machine?
While setting resistance too high won't typically damage the machine itself, it can lead to component wear if you're forcing strokes or using improper form consistently. More importantly, it can cause strain and injury to the user. It’s always better to start lower and increase gradually.
How do I know if my foot straps are too tight?
If you experience numbness, tingling, or a pins-and-needles sensation in your feet, your straps are likely too tight. They should feel snug and secure, preventing your feet from sliding, but not so constricting that they cut off circulation or cause discomfort.
What if my rowing machine doesn't have adjustable resistance?
Some very basic models might have fixed resistance. In such cases, the workout intensity is primarily controlled by your effort and stroke rate. If you find your current machine lacks adjustability and you're looking for more options, exploring units with variable resistance might be a good idea, perhaps comparing different types like best elliptical machine for home.
Is Your Rowing Machine Set Up For You?
Getting your rowing machine adjusted correctly is a fundamental step toward maximizing your workouts and staying safe. By understanding how to fine-tune the resistance and secure your foot straps, you create a more effective, comfortable, and injury-free experience. This attention to detail ensures you're truly leveraging the power of your indoor rower, whether you're aiming for endurance, strength, or general fitness.

6 Comments