How to Loosen a Treadmill Belt
If your treadmill belt feels stiff, jerky, or like you're running uphill on a flat setting, you're likely dealing with a tension issue. Learning how to loosen a treadmill belt is a straightforward maintenance fix that can save you a service call and keep your machine running longer. Before you reach for a wrench, though, it's worth figuring out whether the belt is actually too tight.
Sometimes the problem is tracking, not tension.
Standard maintenance guidelines suggest checking belt tension every 3 to 6 months. The typical diagnostic test involves lifting the belt at its center edge. It should deflect about 2 to 3 inches, per most manufacturer specifications.
If it lifts less, it's too tight. If it lifts more, it's too loose. Here's how to run through a quick diagnostic first.
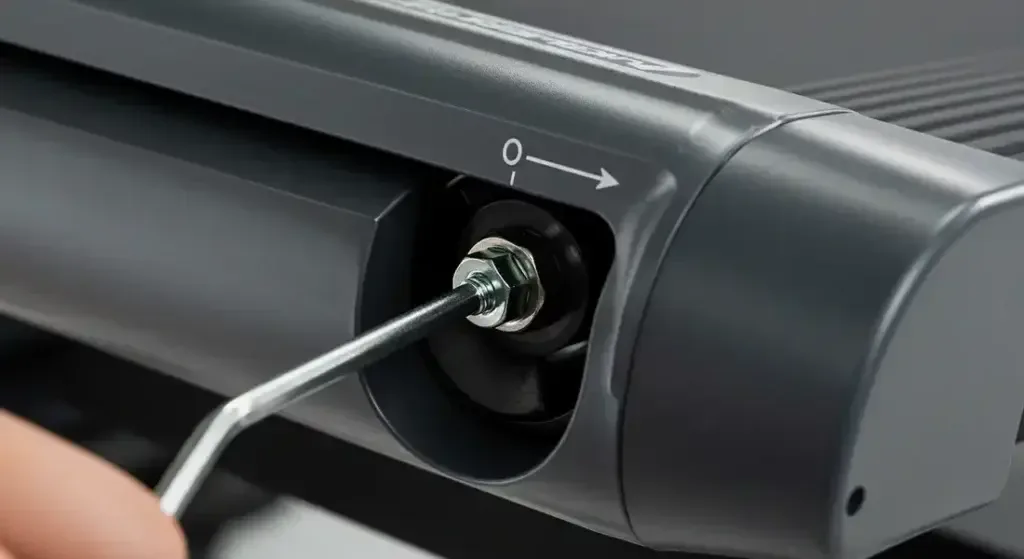
Image source: Bing (Web (fair-use with source credit))
Quick Answer
To loosen a treadmill belt, adjust the rear roller tension bolts. Unplug the machine first. Locate the hex bolts at the back of the frame, one on each side.
Using an Allen wrench, turn each bolt counter-clockwise an equal amount, typically a half-turn. Lift the belt at the center edge to check for proper deflection of about 2 to 3 inches.
First, Is the Belt Actually the Problem?
How do you know if the belt is too tight versus having a different issue? Start with a simple symptom check.
If the motor sounds strained or the belt hesitates when you step on it, that points to over-tension. If the belt rubs against the side frame or wanders left and right, that's a tracking problem. Tension and tracking are related but not the same thing.
If the belt slips underfoot during a run, that usually means it's too loose, not too tight. The drive belt inside the motor compartment is a separate component. If that's slipping, you're looking at a different repair.
A belt that's genuinely too tight creates excess friction on the deck and the motor. Manufacturer service bulletins note this can lead to premature motor burnout over time. If you've ruled out tracking and slipping, loosening is the correct path forward.
Related issues like unusual squeaking from your cardio equipment often have similarly simple mechanical causes. The diagnostic approach is the same: identify the symptom, then target the specific adjustment.
The Quick Answer: What "Loosening" Really Means
You're not making the belt floppy. You're reducing tension on the rear roller to its factory-spec range. The goal is to return the belt to proper deflection while maintaining enough grip for a safe, consistent stride.
The tension adjustment bolts sit at the very back of the treadmill frame. They thread into the ends of the rear roller assembly. Turning them clockwise tightens the belt by pulling the roller back.
Turning them counter-clockwise loosens it by releasing tension. The rule: half-turn increments, always equal on both sides.
Uneven adjustment is the number one mistake people make. If you loosen the left bolt a full turn and the right only a half-turn, the belt will track off-center. Always count your turns.
Brand-specific manuals from manufacturers like Sole and NordicTrack both emphasize this symmetrical principle.
What You Need Before You Start
Having the right tools prevents stripped bolts and wasted time. Most treadmills use either a 5/32-inch or a 1/4-inch Allen wrench for the tension bolts. Some older models use a standard hex-head bolt requiring a small socket or combination wrench.
Check your manual first.
Beyond the wrench, keep a clean rag handy. Wiping down the deck and belt edges while you have access is good practice. A flashlight helps you see the bolt heads in the often-dim frame area.
If your treadmill has a removable motor cover, have a Phillips screwdriver ready.
| Tool | Purpose | Common Size |
|---|---|---|
| Allen Wrench (Hex Key) | Adjusting tension bolts | 5/32" or 1/4" |
| Socket or Combo Wrench | Alternative bolt type | 3/8" or 10mm |
| Flashlight | Illuminating bolt area | Any |
| Clean Rag | Wiping deck and belt edges | Any |
| Phillips Screwdriver | Removing motor cover (if needed) | #2 |
The owner's manual is your most valuable resource here. It will show the exact diagram for your model's bolt locations and the precise deflection spec. If you've lost the manual, most manufacturers host PDF downloads on their support pages.
Step-by-Step: How to Loosen a Treadmill Belt
Step 1: Unplug and Prep. Safety is non-negotiable. Unplug the treadmill from the wall outlet. Remove the safety key if your model has one.
This ensures the machine cannot start while you're working near the rollers.
Step 2: Locate the Adjustment Bolts. They sit at the back of the treadmill. You'll find them on either side of the rear roller, accessible through the frame or under a plastic end cap. You typically won't need to remove the motor cover for this task.
Step 3: Make the Initial Adjustment. Fit your Allen wrench onto one bolt. Turn it counter-clockwise one half-turn. Move to the other side and repeat exactly one half-turn.
Always make equal adjustments to both sides.
Step 4: Check the Deflection. With the wrench removed, lift the belt at its center point along the side edge. It should give you roughly 2 to 3 inches of lift. If it's still stiff, repeat Step 3 with another quarter or half-turn on each bolt.
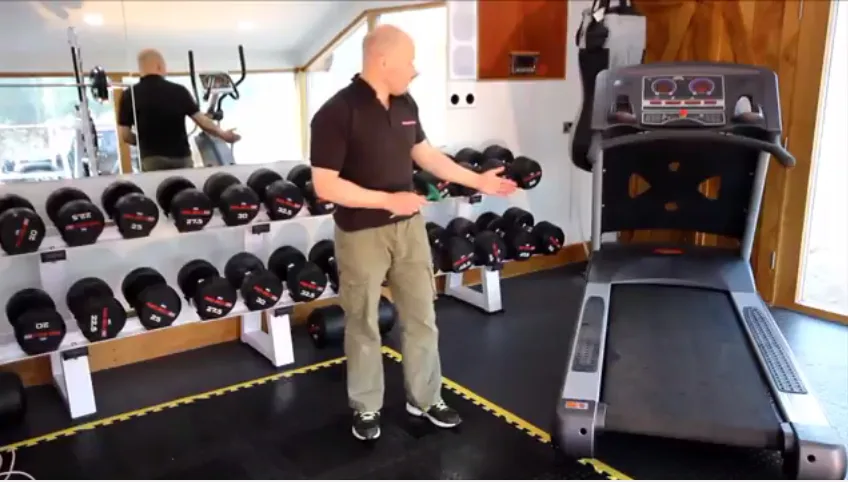
Image source: Bing (Web (fair-use with source credit))
Step 5: Hand-Test the Belt. Before plugging in, manually spin the belt with your hand. It should move freely without grinding or catching. Watch the edges to make sure it's tracking straight and not rubbing the frame.
Step 6: Power Up and Walk. Plug the treadmill back in and start it at 1 or 2 mph. Walk on it and watch the belt. Listen for any slipping or motor strain.
If it feels smooth, you're done. If not, repeat with smaller adjustments.
Consistent upkeep like this keeps cardio equipment in top shape. Routine maintenance for ellipticals follows the same principle: small, regular checks prevent big repair bills.
Tension vs. Tracking: What to Do If It's Off-Center
If your belt drifts to one side, you don't loosen it. You center it. This is a tracking adjustment, not a tension adjustment, though they use the same bolts.
The logic is counterintuitive. You tighten the side the belt is moving towards.
Say your belt drifts left. To bring it back center, turn the left adjustment bolt clockwise a quarter-turn. This increases tension on that side and pulls the belt right.
You might then loosen the right bolt a quarter-turn to maintain overall tension. It's an incremental process.
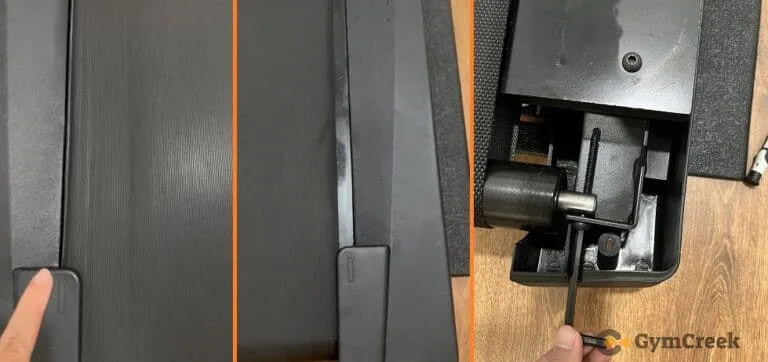
Image source: Bing (Web (fair-use with source credit))
Watch the belt run for several minutes after each adjustment. Tracking changes can take time to appear. The goal is a belt that runs true without constant correction.
Adjusting any cardio machine is about patience and small moves, not big dramatic turns.
If tracking won't stabilize, the belt may be worn unevenly or the frame could be out of alignment. Chronic tracking issues warrant a professional inspection. The ASTM F2115 standard for motorized treadmills covers alignment and safety requirements, and proper tracking is a key part of that.
A belt that wanders unpredictably is a tripping hazard.