What Muscles Does an Exercise Bike Work
If you’ve ever asked what muscles does an exercise bike work, the short answer is: a lot more than just your legs. The quadriceps, hamstrings, glutes, calves, hip flexors, and even your core all get involved. The exact muscles you feel burning depends on how you sit, how you pedal, and what kind of bike you’re on.
Our research, including EMG-based biomechanics studies, shows that muscle activation shifts significantly with posture and resistance. As of 2026, the American Council on Exercise lists cycling as a top low-impact option for building lower-body endurance. That makes it a great choice for joint-friendly cardio.
Let’s break down which muscles actually fire.
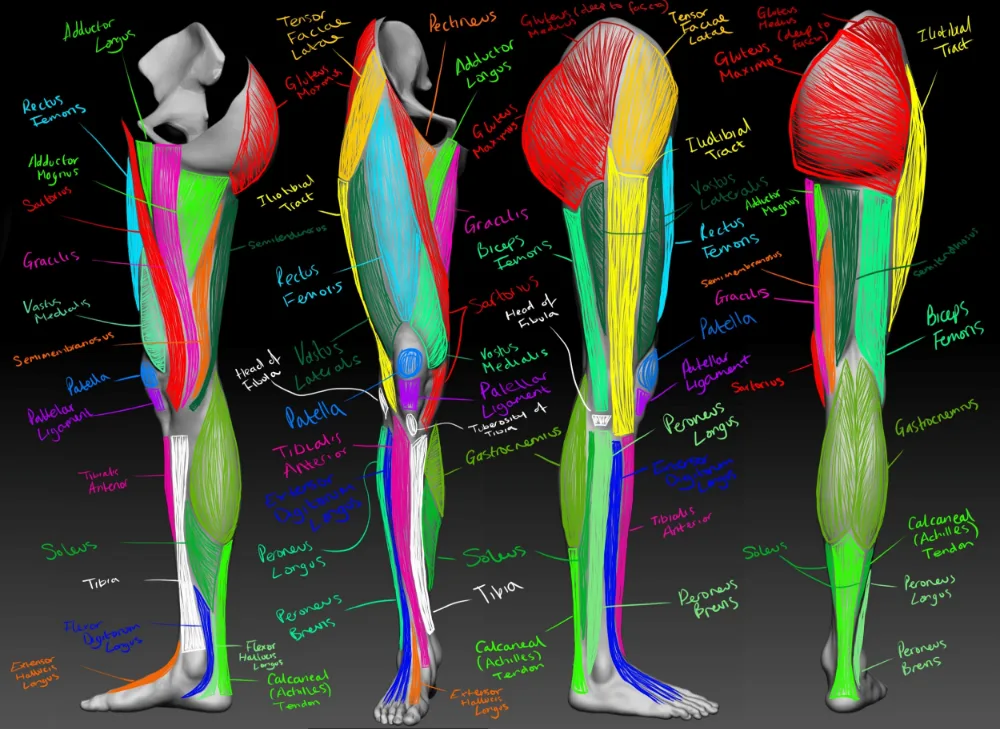
Image source: Bing (Web (fair-use with source credit))
Quick Answer
The main muscles are your quadriceps, hamstrings, glutes, and calves. Your core stabilizes your pelvis, and your hip flexors assist the upstroke. Upright bikes emphasize the quads.
Recumbent bikes shift more work to the glutes and hamstrings. Spin bikes add core and upper-leg variety through standing climbs.
Why the Bike Isn’t a “Leg Machine”
Most people assume a stationary bike isolates the quads. It does, but that’s only part of the story. The pedal stroke is a full 360-degree movement pattern, not just a hard push down.
Every rotation involves distinct muscle groups working in sequence.
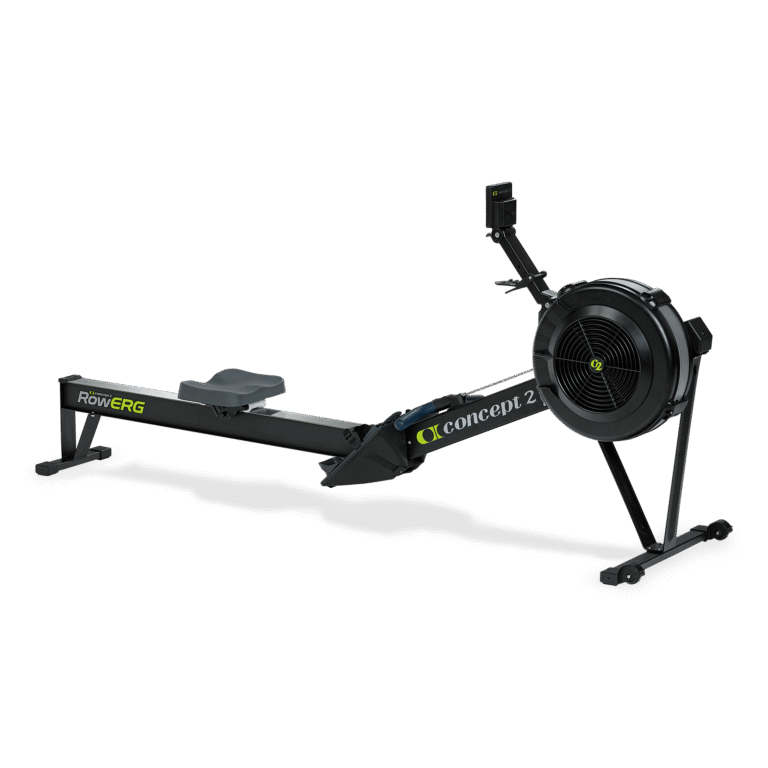
Think of it like a rowing stroke. On a rower, you push with your legs, then swing your torso, then pull with your arms. A bike works similarly.
The downstroke handles the power, the upstroke recovers, and your core keeps everything stable. Understanding that rhythm changes how you train.
The Push Phase vs. Pull Phase
- The downstroke (push) is driven by the quadriceps and glutes.
- The upstroke (pull) involves the hamstrings and hip flexors.
- The transition at the bottom recruits the calves for ankle control.
Peer-reviewed biomechanics research indicates that untrained riders rely heavily on the downstroke. Skilled cyclists learn to pull up, which makes the hamstrings work harder. That’s why riding technique matters just as much as leg strength.
Cadence and resistance also change the muscle emphasis. Slow, heavy resistance at a low cadence feels like a squat. It builds strength in the quads and glutes.
Fast, light pedaling at high cadence demands more hamstring and core coordination. The bike can be a strength tool, an endurance tool, or both. It just depends on how you set it up.
If you want to see how that differs from a full-body movement, our take on the rowing machine’s muscle groups explains the contrast.
The Pedal Stroke: When Each Muscle Actually Fires
The pedal stroke is often split into four phases. Each phase has a primary mover and a supporting cast. Let’s walk through a full rotation, referencing what a motion diagram would clearly show.
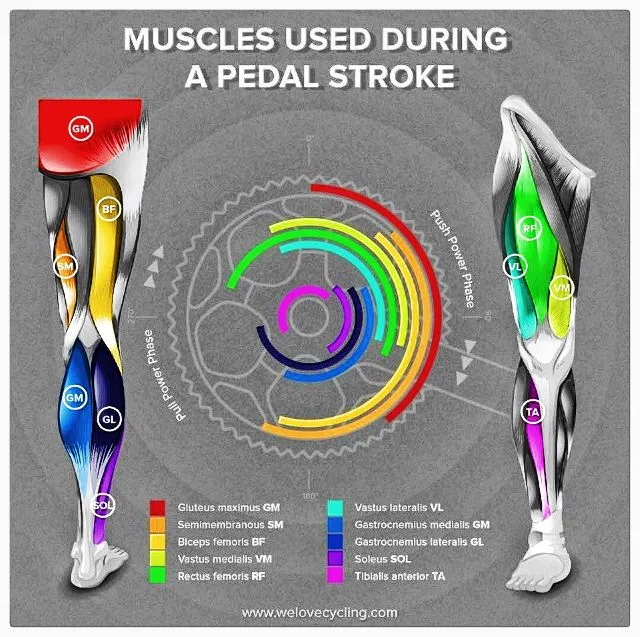
Image source: Bing (Web (fair-use with source credit))
Phase 1: The Downstroke (12 o’clock to 5 o’clock)
This is the power phase. The quadriceps extend the knee, and the gluteus maximus extends the hip. You push down and slightly forward.
This produces the bulk of your pedal force, especially at high resistance.
Phase 2: The Bottom Transition (5 o’clock to 7 o’clock)
The calves, specifically the gastrocnemius and soleus, fire to control the ankle as it moves through the bottom. The hamstrings begin to engage here, preparing to pull the pedal back and up. Think of scraping mud off your shoe.
Phase 3: The Upstroke (7 o’clock to 11 o’clock)
The hamstrings flex the knee, while the hip flexors (iliopsoas and rectus femoris) lift the thigh. This phase is often neglected. If you use clipless pedals or toe straps, you can actively pull up here.
That adds meaningful hamstring and hip flexor workload.
Phase 4: The Top Transition (11 o’clock to 12 o’clock)
The hip flexors finish lifting the knee, and the quads prepare to start the next push. Your core stabilizes your pelvis so you don’t rock side to side. A helpful visual cue is to imagine drawing a smooth oval, not two hard circles.
Upright vs. Recumbent vs. Spin: How Posture Changes Muscle Work
The biggest variable isn’t the bike brand. It’s the bike style. Upright, recumbent, and spin bikes each place your body in a different position.
That shifts which muscles lead the movement.
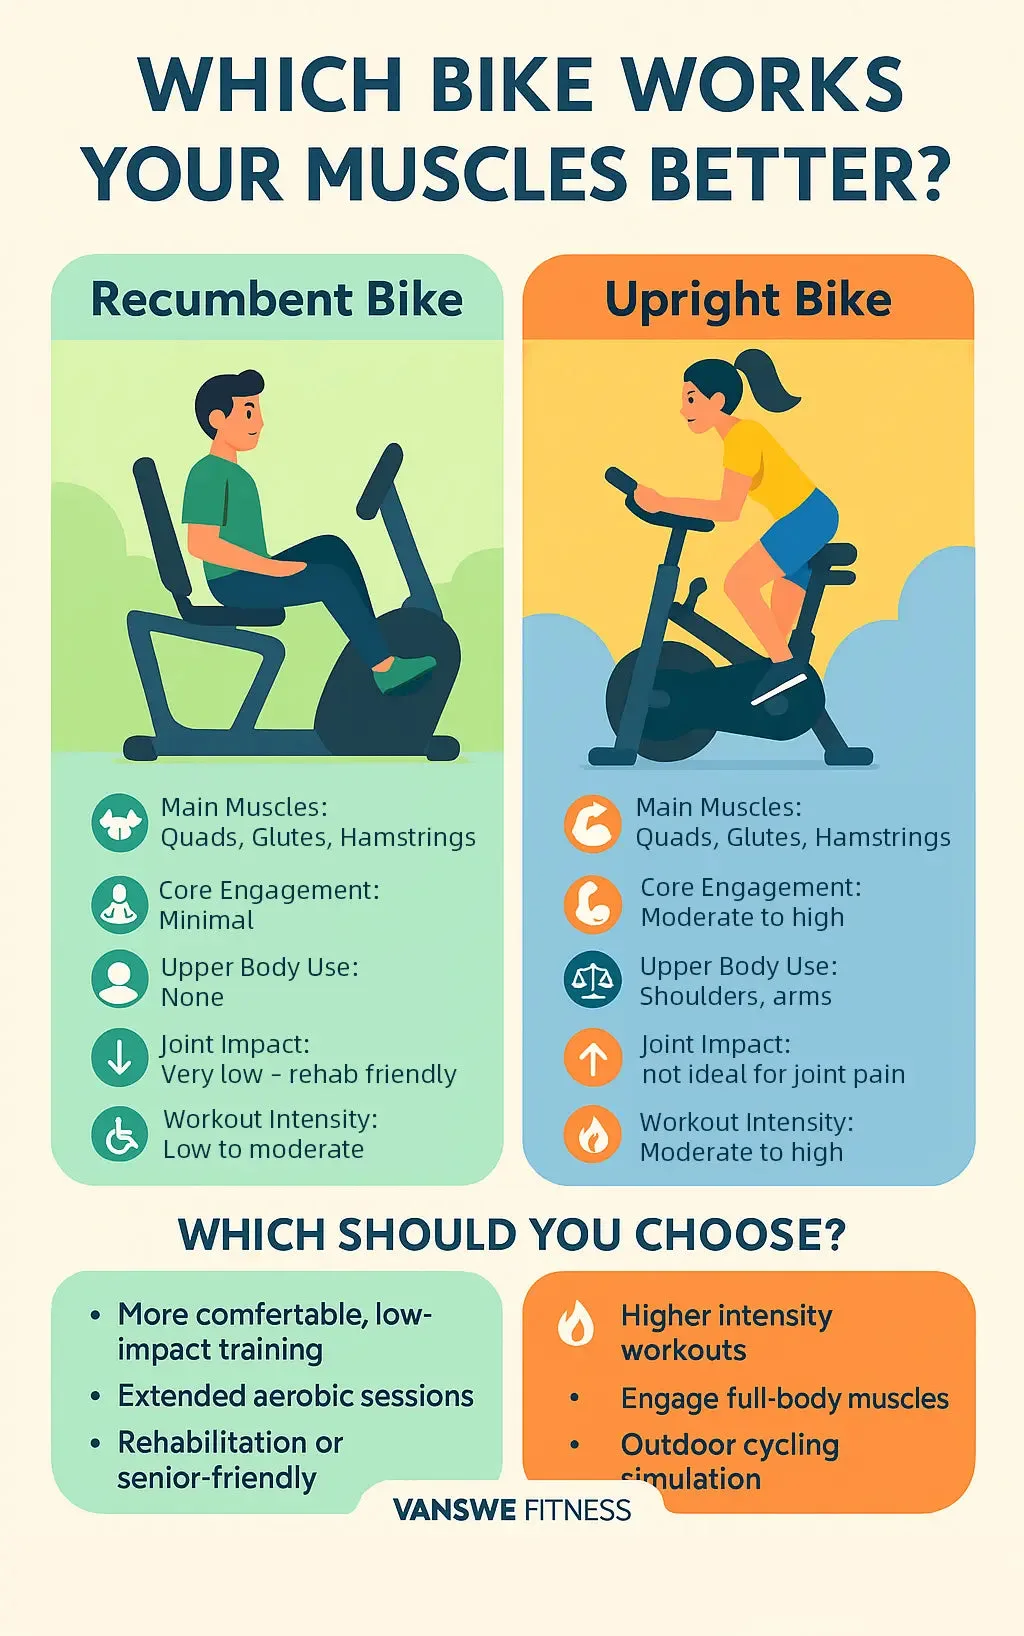
Image source: Bing (Web (fair-use with source credit))
- Upright bikes mimic a traditional road bike position. You sit upright or lean slightly forward. The quads do most of the work because your hips are flexed and your body weight isn’t supported by a backrest.
- Recumbent bikes have a reclined seat and a backrest. Your legs reach forward instead of down. This position biases the glutes and hamstrings. It also drastically reduces lower back strain, making it a solid choice for older adults or anyone with spinal issues.
- Spin bikes are the most versatile. You can sit or stand, lean forward or ride tall. Standing climbs shift heavy load onto the glutes and core. Seated sprints let you engage the hamstrings through the pull phase.
Side-by-Side Muscle Focus
| Bike Type | Primary Muscles | Core Involvement | Low-Back Support |
|---|---|---|---|
| Upright | Quads, calves | Moderate | Minimal |
| Recumbent | Glutes, hamstrings | Low | High |
| Spin | Quads, glutes, hamstrings, core | High | Moderate |
Aggregate reviews report that many riders pick the wrong bike style for their goal. If you want glute activation without back pain, the recumbent bike is the logical pick. If you want a full lower-body workout with core involvement, a spin bike gives you more options.
If you just want simple cardio, an upright bike is fine.
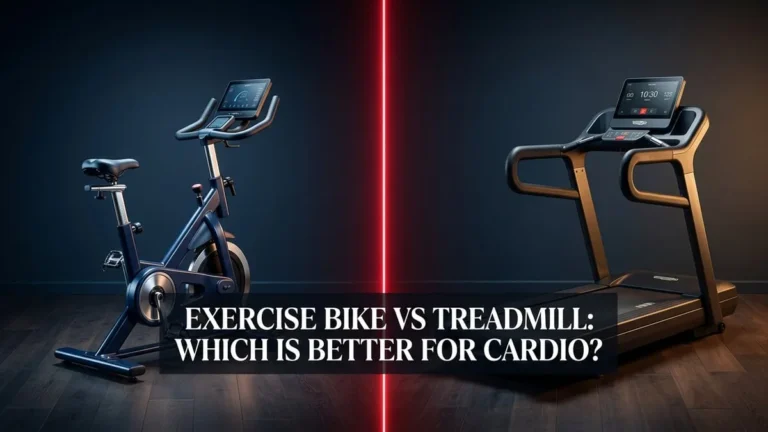
If you’re torn between an exercise bike and another low-impact machine, this look at how a rower compares on cardio and strength can help you decide.
The Biggest Mistake: Saddle Height and the Knee Angle
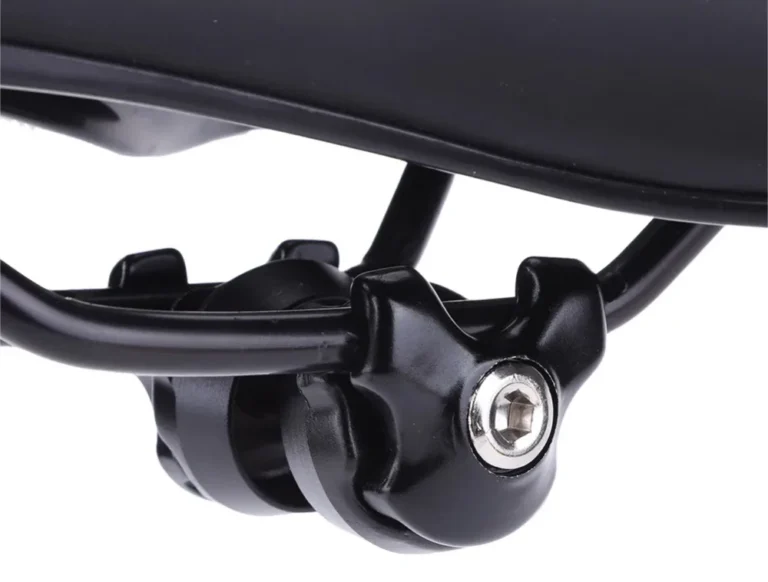
Saddle height is the single most important adjustment on any exercise bike. Get it wrong, and you’ll either feel chronic knee pain or you’ll never truly engage your glutes. It’s that simple.
A saddle that’s too low forces your knee to stay bent at a sharp angle. That makes the quadriceps do everything. It also puts excessive pressure on the patellofemoral joint, which leads to front-of-knee pain.
A saddle that’s too high causes your hips to rock side to side. That steals power from your glutes and strains your lower back.
The Heel-on-Pedal Method
This is the standard benchmark recommended in bike fitting guides. It takes ten seconds.
- Set the resistance to a low, comfortable level.
- Sit on the saddle and place your heel on the pedal.
- Rotate the pedal to the 6 o’clock position (bottom of the stroke).
- Adjust the seat height until your leg has a slight bend at the knee, not fully locked.
- Switch to the ball of your foot and pedal normally.
If your pelvis rocks, the saddle is too high. If your knee tracks outward or feels jammed, it’s too low. The goal is a knee angle between 25 and 30 degrees at the bottom of the stroke.
That range allows the quads and glutes to share the work.
Warning Signs Your Setup Is Wrong
- Pain on the front of the knee: saddle is too low.
- Pain behind the knee: saddle is too high.
- Numb toes: saddle is too high or the pedal straps are too tight.
- Hip rocking: saddle is too high.
- Excessive quad burn after short rides: saddle is too low.
Proper setup is the difference between a workout and an injury. The same logic applies to a rower, where improper positioning changes which muscles lead the workout. This guide to proper rowing machine setup covers the basics.
How to Use the Bike to Target Your Glutes (Instead of Just Your Quads)
The bike doesn’t have to be a quad-only machine. With a few tweaks, you can shift the load to your glutes and hamstrings. This is especially useful for runners, cyclists, or anyone who sits all day and has weak glutes.
The “Sit Back, Chest Proud” Drill
Scoot your hips back towards the widest part of the saddle. Lift your chest slightly, and brace your core. Push the pedals with your mid-foot or heel rather than the ball.
You’ll feel the glutes fire much earlier in the downstroke.
Standing Climbs With Weighted Heels
Stand up, lean forward slightly, and push through your heels. Keep your hips over the pedals, not behind the saddle. Climb for 30 to 60 seconds, then return to a seated position.
This is the fastest way to wake up your glutes and hamstrings.
Why Pulling Up Changes Everything
If you use clipless pedals or toe cages, focus on pulling the pedal up at the back of the stroke. This recruits the hamstrings, which are often undertrained in indoor cyclists. Start with 5 minutes of high-cadence, low-resistance pedaling to practice the skill.
A Simple 20-Minute Glute-Focused Session
- Warm-up: 5 minutes easy, high cadence.
- Seated steady: 5 minutes at moderate resistance, mid-foot push.
- Standing climbs: 5 rounds of 30 seconds hard, 30 seconds easy.
- Seated pull-ups: 4 rounds of 1 minute with an active hamstring pull.
- Cool-down: 3 minutes easy.
Try this once or twice a week. If you have knee issues, skip the high-resistance standing climbs and stick to seated work with a smooth cadence.
When Should You Use the Bike? (And When You Shouldn’t)
Exercise bikes are one of the most forgiving cardio machines you can buy. They don’t jar the joints, and they’re simple to use. But they aren’t the best tool for every goal.
Who It’s Right For
- People with knee or hip sensitivity who want low-impact cardio.
- Beginners and seniors who need a stable, seated position.
- Runners and cyclists looking for sport-specific endurance.
- Anyone doing short HIIT sessions at home.
- Rehabilitation patients, once cleared by a physical therapist.
Who Should Think Twice
- Advanced strength athletes seeking substantial leg mass. The bike builds endurance muscle, not huge thighs.
- People with severe spinal instability may need a recumbent model, not an upright one.
- Anyone wanting a full-body workout. The bike skips the upper body almost entirely.
For a full-body alternative, a rowing machine hits the arms, back, core, and legs in one movement. It’s a different stimulus, but a valuable one if you want more coverage per minute.
If you have a heart condition or a recent joint surgery, check with your doctor before starting a regular cycling routine.
Frequently Asked Questions
Does an exercise bike build muscle or just tone?
Both, depending on resistance and progression. High resistance at a low cadence creates tension similar to strength training. That builds hypertrophy in the quads, glutes, and hamstrings.
Low resistance with high cadence builds muscular endurance instead. You need to increase resistance over time to keep building muscle.
Will it actually give you bigger legs?
Not like heavy squats or leg presses. Cycling builds dense, endurance-oriented muscle, but it won’t dramatically bulk your thighs unless you train with very heavy resistance and progressive overload. Genetics also play a role.
For most riders, the bike firms and strengthens more than it grows.
Is the recumbent bike “cheating” compared to upright?
No. A recumbent bike works the glutes and hamstrings more directly because of the reclined posture. It lowers core demand and spinal loading, which is ideal for back sensitivity.
It’s not easier. It just targets a different movement pattern. If your goal is glute activation, it may be the better choice.
Can you get a full-body workout on an exercise bike?
Not really. The bike focuses on the lower body and core stabilizers. Your arms and upper back get minimal work.
If you want a full-body session, a rowing machine or an elliptical with moving handles adds upper-body involvement. The bike is best paired with strength training for the upper body.
Why do my feet go numb or my hands tingle?
Feet go numb usually from a saddle that’s too high, straps that are too tight, or stiff shoes with poor arch support. Hand tingling comes from gripping the handlebars too hard or resting your full weight on them. Adjust your setup, soften your grip, and shift positions often.
Is 30 minutes a day enough to see leg changes?
Yes, if you push yourself. Thirty minutes of moderate-to-vigorous cycling, four to five days a week, can improve leg strength and endurance. For visible hypertrophy, you need progressive resistance and a calorie-appropriate diet.
Two short hard sessions plus one longer ride works well.


One Comment