How To Use A Hydraulic Floor Jack: Safe Steps
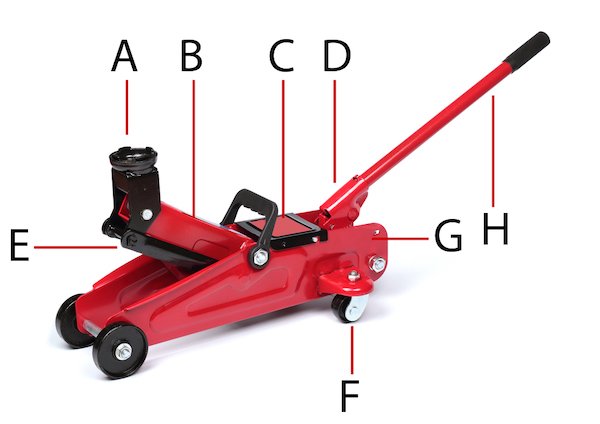
A hydraulic floor jack lifts a vehicle safely by using fluid pressure and a stable rolling frame.
If you have ever needed to change a tire, inspect the undercarriage, or do basic garage work, learning how to use a hydraulic floor jack correctly is one of the most useful skills you can have. I’ve used plenty of floor jacks over the years, and the difference between a smooth lift and a stressful one usually comes down to setup, safety, and patience. In this guide, I’ll walk you through how to use a hydraulic floor jack the right way, with practical steps, common mistakes, and real-world tips that make the job safer and easier.
What a hydraulic floor jack is and how it works
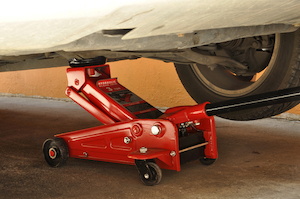
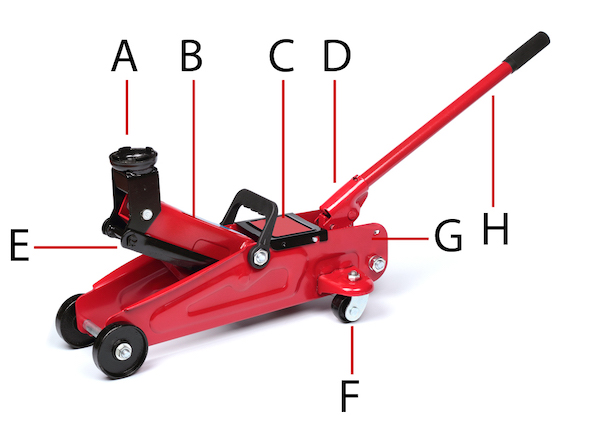
A hydraulic floor jack is a low-profile lifting tool that uses hydraulic pressure to raise a vehicle off the ground. It has a long handle, wheels, a lifting arm, and a saddle that contacts the lifting point under the car. When you pump the handle, hydraulic fluid moves through the cylinder and creates the force needed to lift heavy weight with less effort.
This tool is popular because it is stable, fast, and easier to control than many small emergency jacks. It is also a standard piece of equipment in many home garages and professional shops. Most models are designed to lift a car far enough to place jack stands underneath, which is the real safety step that matters most.
In simple terms, the jack does the lifting, but the jack stands do the holding. That is one of the first lessons I learned early on, and it saved me from making a very expensive mistake.
Before you use a hydraulic floor jack
Before you start lifting, take a minute to check the jack, the vehicle, and your work area. A few small checks can prevent big problems. I always treat this part like laying a solid foundation before building a house.
Here is what to inspect first:
• Check the jack’s weight rating to make sure it can handle your vehicle
• Read the vehicle owner’s manual for approved jack points
• Park on a flat, hard surface whenever possible
• Put the vehicle in park or in gear, then set the parking brake
• Chock the wheels that will stay on the ground
• Look for leaks, bent parts, or low hydraulic fluid in the jack
• Make sure the saddle and wheels roll freely
A floor jack should never be used on soft dirt, loose gravel, or an incline unless you have a proper safe setup. I have seen people try to lift on sloped driveways, and it always adds risk. The jack may roll, tilt, or sink.
How to use a hydraulic floor jack step by step
Using a hydraulic floor jack is not complicated, but it does reward careful work. The process is mostly the same whether you are lifting for a tire change or a repair job. Once you do it a few times, the motions feel natural.
1. Prepare the vehicle
Start by turning off the engine and removing the key if needed. Set the parking brake and place wheel chocks behind or in front of the wheels that will stay on the ground. This keeps the vehicle from moving while you lift it.
If you are lifting the front of the vehicle, chock the rear wheels. If you are lifting the rear, chock the front wheels. That simple habit adds a lot of safety.
2. Find the correct jack point
Use the manufacturer’s recommended lift point. These are usually reinforced areas near the pinch welds, frame rails, or subframe. If you are not sure, check the owner’s manual or look for markings near the underside of the car.
Never place the saddle under thin sheet metal, fuel lines, brake lines, or body panels. Those parts are not designed to support the vehicle’s weight. One bad contact point can cause damage fast.
3. Position the hydraulic floor jack
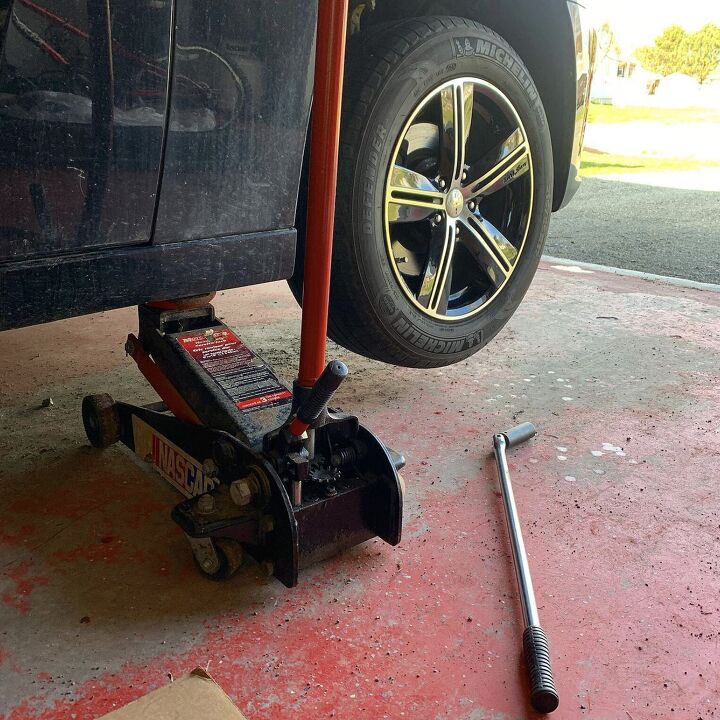
Roll the jack under the vehicle so the saddle lines up with the lift point. Make sure the jack is centered and sits flat on the ground. The handle should move freely, and the wheels should not be caught on debris.
I like to do one last visual check here. If the saddle looks off-center, I move it before lifting. It takes seconds and avoids a lot of trouble.
4. Raise the vehicle slowly
Pump the handle smoothly until the saddle touches the jack point. Keep pumping until the tire or part you need is off the ground. Lift only as high as you need for the job.
Do not rush this part. A slow lift gives you time to notice any shifting or instability. If anything looks wrong, stop and reset.
5. Place jack stands under the vehicle
Once the vehicle is at the right height, slide jack stands into position under approved support points. Lower the vehicle gently onto the stands by slowly opening the jack’s release valve. Then give the car a light shake to confirm it is stable.
This is the step many beginners skip, and it is the most important one. A hydraulic floor jack is for lifting, not for safely supporting a car for long periods. The jack can fail, leak, or settle over time.
6. Do your work safely
After the vehicle is supported by jack stands, keep your body clear of pinch points. Use proper tools and stay aware of where your hands and feet are. If you are changing a tire, loosen lug nuts before lifting and tighten them in the correct pattern after the wheel goes back on.
7. Lower the vehicle carefully
When you finish, raise the vehicle slightly with the jack to remove pressure from the jack stands. Move the stands away, then lower the vehicle slowly by opening the release valve. Once the tires are on the ground, remove the chocks and store the jack.
A slow descent matters just as much as a slow lift. I have seen people drop a car too fast and end up with a jarring thud, which is hard on both the vehicle and the nerves.
Safety tips every driver should know
Safety is the real skill behind how to use a hydraulic floor jack. The tool itself is simple, but mistakes can turn a basic task into a dangerous one. A little caution goes a long way here.
Keep these safety tips in mind:
• Never crawl under a vehicle supported only by a floor jack
• Always use jack stands for support
• Do not exceed the jack’s rated capacity
• Keep children and pets away from the work area
• Wear gloves and eye protection when needed
• Use a solid, level surface
• Do not use a damaged jack
• Lower the vehicle slowly and in a controlled way
I also recommend keeping your body to the side when lifting and lowering. That way, if a part shifts unexpectedly, you are not directly in the danger zone. It is a small habit with a big payoff.
Common mistakes to avoid
Most jack problems come from rushed setup, not from the jack itself. When I first started working on cars, the biggest errors I saw were almost always simple ones. The good news is that they are easy to avoid once you know what to watch for.
Common mistakes include:
• Using the wrong jack point
• Lifting on soft or uneven ground
• Forgetting wheel chocks
• Trusting the floor jack instead of jack stands
• Lifting too high when only a small amount of clearance is needed
• Ignoring leaks or weak pump action
• Using a jack with too little capacity
Another mistake is assuming all vehicles lift the same way. SUVs, trucks, sports cars, and sedans may each have different jack points and clearance issues. Always check the vehicle-specific instructions first.
Choosing the right hydraulic floor jack
Not all hydraulic floor jacks are the same. Some are low-profile for sports cars, while others are built for heavier trucks and SUVs. Choosing the right model makes the job easier and safer.
Here are the main things to compare:
• Weight capacity, usually 2 ton, 3 ton, or more
• Lift range, which affects how high it can raise the vehicle
• Low-profile design for cars with less ground clearance
• Frame quality and wheel stability
• Handle length and pumping effort
• Safety features like overload protection
• Build quality and warranty support
For most passenger cars, a 2 ton or 3 ton jack is often enough, but capacity depends on the vehicle you own. Always remember that the jack rating should exceed the portion of the vehicle you are lifting, not just the total vehicle weight. If you are unsure, choose the more capable jack.
Maintenance tips to keep your jack working well
A hydraulic floor jack needs basic care to stay reliable. Like any tool with moving parts and fluid, it works best when it is clean and checked often. Neglect usually shows up as slow pumping, poor lifting, or leaking fluid.
Good maintenance habits include:
• Wiping dirt and grease off after use
• Checking for hydraulic fluid leaks
• Storing the jack in a dry place
• Keeping the wheels clean and free of debris
• Lubricating moving parts when needed
• Bleeding air from the system if the jack feels spongy
• Following the manufacturer’s service instructions
If the jack stops holding pressure, leaks oil, or will not lift smoothly, do not keep using it as-is. A faulty jack is not something to gamble with. In my experience, it is better to fix or replace a questionable jack than to take chances under a vehicle.
Real-life example from the garage
One winter, I was helping a friend replace a flat tire in a cold driveway. The jack seemed fine at first, but the car sat on a slight slope we did not notice right away. We stopped, repositioned to flatter ground, and restarted the lift with wheel chocks in place.
That small reset probably prevented a bad day. The lesson was simple: even a good hydraulic floor jack cannot make up for a bad setup. The tool matters, but the ground under it matters just as much.
How to know when not to use a hydraulic floor jack
There are times when a hydraulic floor jack is not the right tool. If the ground is too soft, the surface is unstable, or the vehicle is damaged in a way that changes lift points, pause and reassess. A bad setup is not worth forcing.
Avoid using the jack if:
• The ground is muddy, sandy, or very uneven
• The jack point is damaged or missing
• The jack shows signs of failure
• The vehicle is overloaded beyond the jack’s rating
• You do not have jack stands for safe support
If you are working on a very low vehicle or a lifted truck, you may also need a specialized jack with a better lift range. The right tool saves time and reduces stress.
Frequently Asked Questions of How to use a hydraulic floor jack
How do you position a hydraulic floor jack correctly?
Place the saddle directly under the vehicle’s recommended jack point and make sure the jack sits flat on the ground. The jack should be centered and stable before you start pumping.
Can you stay under a car supported by a hydraulic floor jack?
No, you should never rely on a hydraulic floor jack alone to support a vehicle. Always use jack stands before going underneath.
How high should you lift a car with a floor jack?
Lift it only as high as needed for the job. Extra height does not make the work safer and can actually make the vehicle less stable.
Why is my hydraulic floor jack not lifting?
Common causes include low hydraulic fluid, air in the system, overloading, or a release valve that is not fully closed. If the jack still does not work after basic checks, it may need repair or replacement.
Do I need wheel chocks when using a floor jack?
Yes, wheel chocks are strongly recommended because they help keep the vehicle from rolling. They are a simple safety step that can make a big difference.
Conclusion
Knowing how to use a hydraulic floor jack is one of those basic skills that pays off again and again. When you choose the right jack, use the correct lift points, and rely on jack stands for support, the whole process becomes safer and much less stressful. A few careful habits can protect both you and your vehicle.
The big takeaway is simple: lift slowly, support properly, and never skip the safety steps. If you are planning your next garage project, take a moment to review your setup before you begin. Leave a comment with your own jack tips, or keep learning by exploring more car maintenance guides.