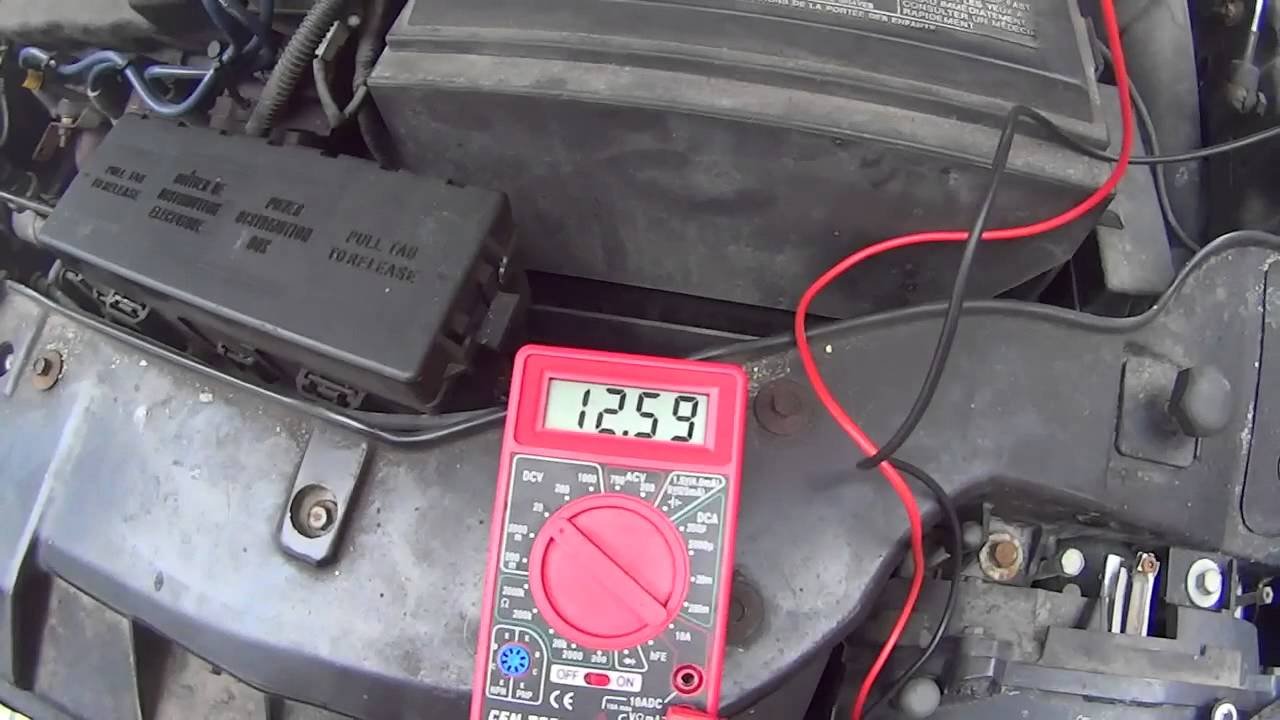
How To Use A Digital Multimeter On A Car: Easy Guide
A digital multimeter helps you test car voltage, continuity, resistance, and faulty electrical parts fast.
If you have ever chased a dead battery, a bad fuse, or a stubborn sensor, learning how to use a digital multimeter on a car can save you time, money, and stress. I have used one on everything from weak batteries to alternator checks, and the same tool that looks simple at first can tell you a lot about what your car is really doing under the hood. Get the basics right, and you can diagnose problems with more confidence and fewer guesswork repairs.

What a digital multimeter does on a car
A digital multimeter, often called a DMM, is a handheld testing tool that measures electrical values. On a car, it is most useful for checking voltage, resistance, and continuity. Those three tests help you spot weak power, broken wires, bad grounds, and failing components.
Most car electrical problems are not dramatic at first. A light may flicker. A window may move slowly. A battery may seem fine one day and dead the next. A digital multimeter helps you see what is happening before a small issue turns into a tow truck moment.
Here is what it can help with:
- Checking battery voltage
- Testing alternator output
- Finding blown fuses
- Checking continuity in wires and circuits
- Measuring sensor or switch behavior
- Verifying grounds and power feeds
In my experience, this is one of the best tools a car owner can keep in the glove box or tool bag. It is like a flashlight for electricity. You cannot see current with your eyes, but you can measure its clues.
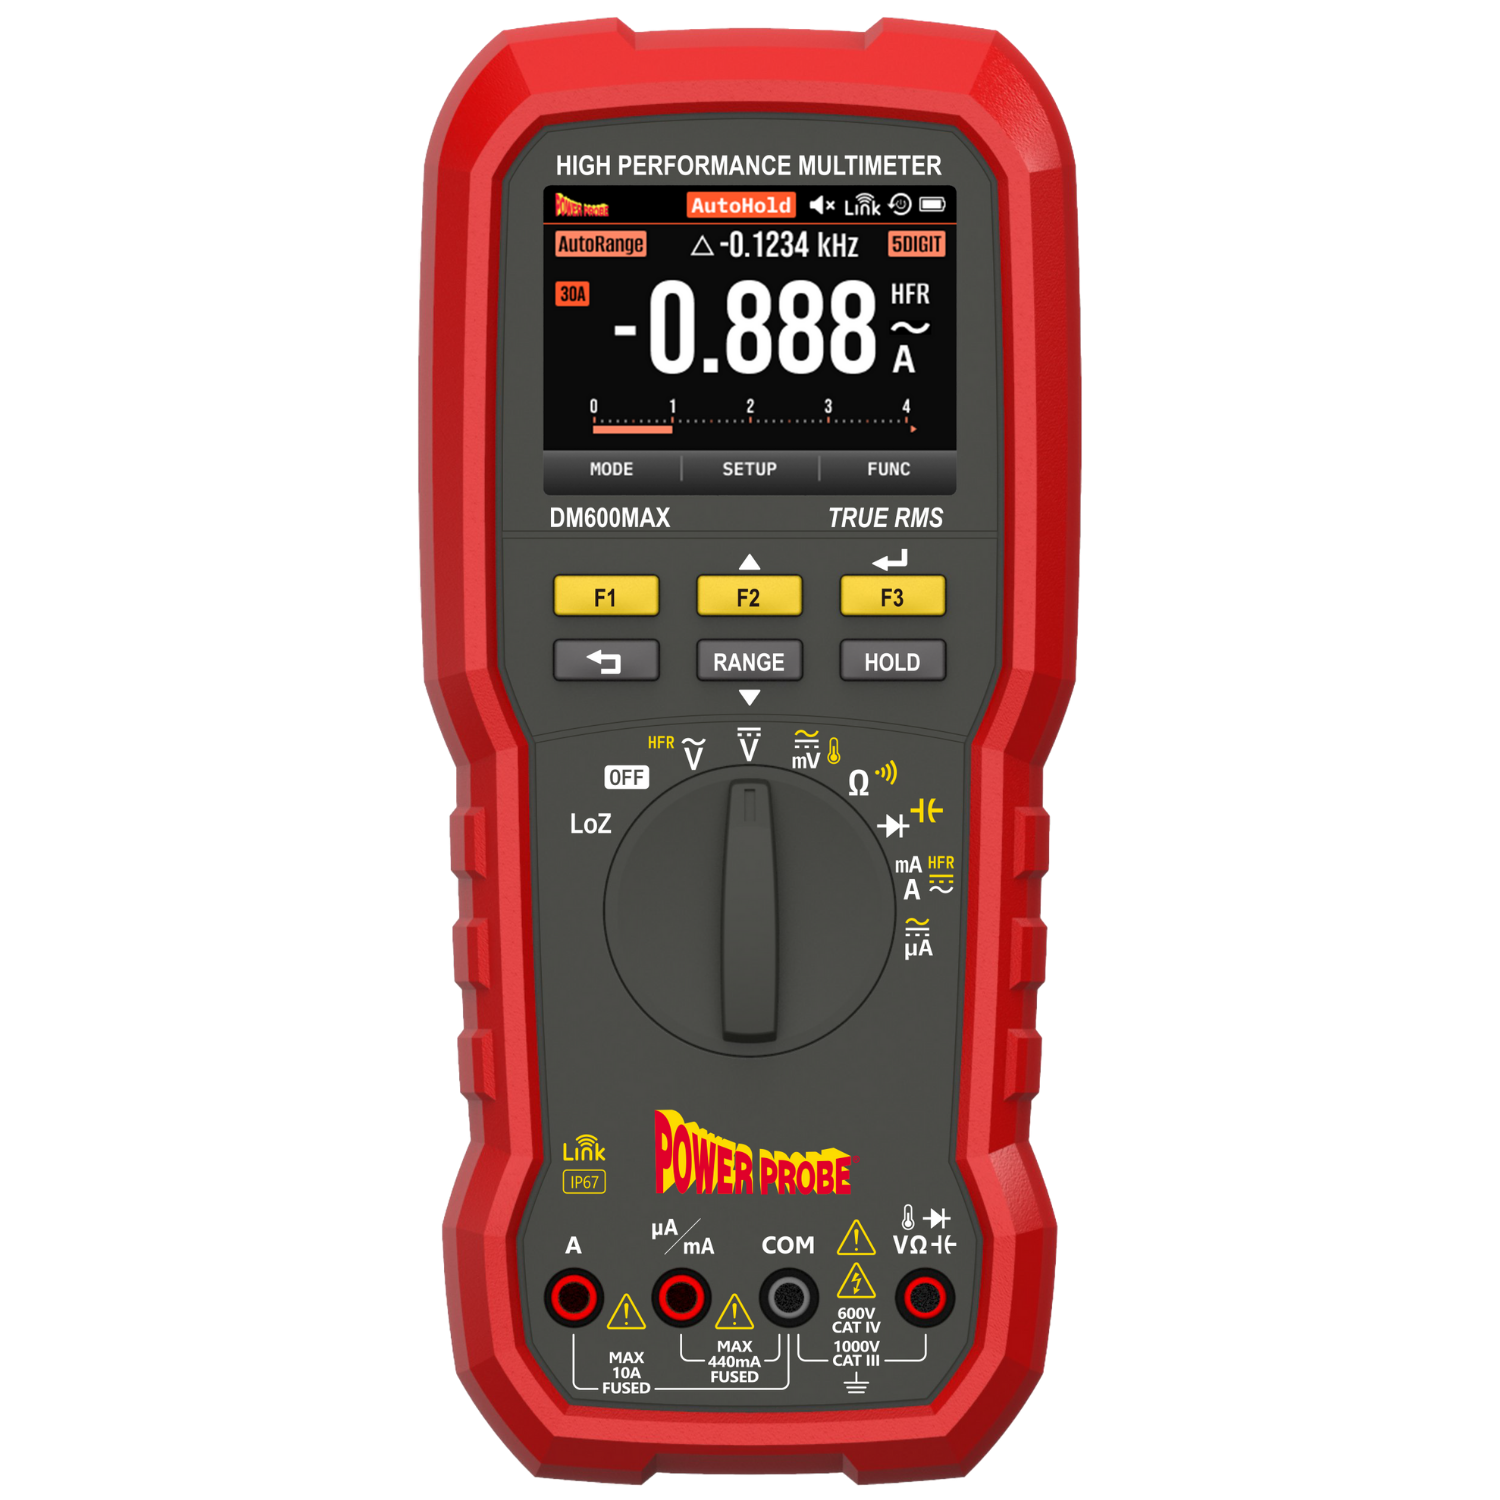
Choose the right digital multimeter for automotive use
Not every meter is equally useful for cars. You do not need the most expensive model, but you do want one that is safe, easy to read, and accurate enough for basic auto testing. A good automotive digital multimeter should handle DC voltage, resistance, and continuity with no problem.
Look for these features:
- Auto ranging for easier readings
- DC voltage range that includes 20V or higher
- Continuity beep
- Ohms measurement
- Backlit screen for low-light engine bays
- Good quality test leads
- Fused current ports if you plan to test amps
For most people, a basic meter is enough. I have seen many beginners buy a fancy model with features they never use. What matters most is clear display, reliable probes, and simple operation.
If you work on newer cars, a meter with min/max capture or frequency testing can be helpful. But for battery, fuse, and wire checks, the simple stuff gets the job done.
Safety first before testing a car with a multimeter
Before you use a digital multimeter on a car, take a few safety steps. Car electrical systems are low voltage compared with home wiring, but they can still cause damage if you short something by mistake. A small slip with a probe can blow a fuse or create a spark.
Keep these safety habits in mind:
- Set the meter to the right function before touching the car
- Start with the highest safe range if you are unsure
- Never test resistance on a live circuit
- Keep probes apart when connected to power
- Avoid poking around near moving belts or fans
- Wear safety glasses when working near a battery
One mistake I made early on was testing the wrong setting on a battery. The meter was set to measure current instead of voltage, and I nearly caused a fuse issue. That taught me a simple lesson: always double-check the dial first. A few seconds of care can prevent a lot of frustration.
How to use a digital multimeter on a car battery
The battery is the best place to start because it tells you a lot about the whole electrical system. If the battery is weak, many other tests will look confusing. A healthy 12V car battery is usually the first thing to confirm.
Follow these steps:
- Turn the meter to DC voltage.
- Set the range above 12 volts if needed.
- Touch the red probe to the battery positive terminal.
- Touch the black probe to the battery negative terminal.
- Read the screen.
What the numbers mean:
- About 12.6V or higher means the battery is usually fully charged
- Around 12.4V means it is somewhat charged
- Around 12.2V or lower means it is getting weak
- About 10V or less often means a serious battery problem or a dead cell
I like to test batteries with the car off and again while the engine is running. That gives a fuller picture. A battery can look okay sitting still but fail under load or while the alternator is charging.
How to test alternator output with a digital multimeter
The alternator charges the battery while the engine runs. If it fails, the battery will slowly run down even if it started strong. This is one of the most useful checks you can do with a digital multimeter on a car.
Here is the process:
- Start the engine.
- Set the multimeter to DC voltage.
- Place the probes on the battery terminals again.
- Check the reading at idle.
- Turn on headlights, blower fan, and rear defrost.
- Watch if voltage stays steady.
Typical charging voltage is often around 13.5V to 14.7V, depending on the vehicle and temperature. If the reading stays near battery voltage, the alternator may not be charging well. If it climbs too high, the voltage regulator could be faulty.
I have found that testing with accessories on gives a more honest result than testing at idle alone. A weak alternator may pass a no-load test and fail the real-world one. That is why this step matters.
How to check fuses with a digital multimeter
A fuse may look fine, but looks can fool you. Sometimes the metal strip inside is cracked in a place that is hard to see. Using a digital multimeter makes the test much more reliable.
You can check a fuse two ways:
- Continuity test
- Voltage test across the fuse
For a continuity test:
- Turn off the car.
- Remove the fuse.
- Set the meter to continuity.
- Touch one probe to each fuse blade.
- Listen for the beep or check for a near-zero reading.
For a voltage test in the fuse box:
- Leave the fuse installed.
- Set the meter to DC voltage.
- Touch the black probe to a known ground.
- Probe both test points on top of the fuse.
- Both sides should show power if the fuse is good and the circuit is live.
This is one place where using a digital multimeter on a car saves real time. Instead of pulling every fuse, you can test faster and with less guessing. That matters when you are tracking down an intermittent problem.
How to test continuity and wiring on a car
Continuity testing checks whether electricity can travel through a wire or part of a circuit. If a wire is broken, corroded, or disconnected, the meter will show no continuity. This is especially helpful for tracing bad connections in lights, sensors, and switches.
Use this method:
- Turn off power to the circuit.
- Set the meter to continuity or ohms.
- Touch one probe to one end of the wire or component.
- Touch the other probe to the far end.
- Listen for a beep or look for low resistance.
A beep usually means the path is complete. No beep or very high resistance means there may be a break. In a car, that break can be inside a wire, at a connector, or at a corroded terminal.
One tip from real-life work: do not trust continuity alone if a connector is dirty. A wire can beep and still fail under load. That is why voltage testing is often the next step.
How to test grounds with a digital multimeter
Bad grounds cause all kinds of strange car problems. Lights may dim. A starter may click. Sensors may act up. Grounds are the hidden plumbing of the car’s electrical system, and a digital multimeter helps you see if they are flowing well.
A simple ground test:
- Set the meter to DC voltage.
- Place the red probe on battery positive.
- Place the black probe on the ground point you want to test.
- Turn on the circuit if possible.
- Check the voltage reading.
A good ground should usually show very low voltage drop. If the reading is higher than expected, the ground path may be dirty, loose, or damaged. You can also test voltage drop directly across the ground side while the circuit is active.
This is one of those tests that feels a little backward at first. You are not looking for full battery voltage. You are looking for very little loss. Once that clicks, ground testing becomes much easier.
How to measure resistance on car parts
Resistance is measured in ohms and tells you how much a part opposes electrical flow. It is useful for checking sensors, coils, and some motors. But remember this key rule: resistance testing must be done with power off.
Use it like this:
- Turn the ignition off.
- Disconnect the part if needed.
- Set the meter to ohms.
- Touch the probes to the part’s terminals.
- Compare the reading with the service spec.
Examples where resistance helps:
- Ignition coils
- Temperature sensors
- Fuel injectors
- Solenoids
- Wiring repairs
Always compare against the manufacturer spec when possible. Resistance values vary a lot by part and vehicle. A number that looks normal on one car may be wrong on another.
How to test a car battery for voltage drop while cranking
A battery can show good resting voltage and still fail when the starter needs power. That is why cranking tests are so useful. They show what happens when the system is under stress.
Here is the process:
- Set the meter to DC voltage.
- Connect the probes to the battery terminals.
- Have someone start the engine.
- Watch the voltage while cranking.
A healthy battery usually should not drop too low during crank. If it falls sharply, the battery may be weak or the starter may be pulling too much current. This test gives you a better real-world picture than a simple resting check.
I have used this test many times to catch batteries that seemed fine in the driveway but failed on cold mornings. Cold weather makes weak batteries show their true colors very fast.
Common mistakes when using a digital multimeter on a car
Many bad readings come from setup mistakes, not broken parts. The good news is that these are easy to avoid once you know them. I have seen beginners blame the car when the real problem was the meter setting.
Watch out for these mistakes:
- Using the wrong mode, such as amps instead of volts
- Testing resistance on a live circuit
- Not touching the correct terminals
- Forgetting that a weak battery can skew other readings
- Ignoring corrosion on probe tips
- Comparing readings without checking the service spec
Clean probe tips matter more than many people think. A dirty probe can give a shaky reading and waste your time. If a reading looks odd, test again before assuming the part is bad.
Practical examples of how to use a digital multimeter on a car
Here are a few common situations where a multimeter helps a lot.
If the headlights are dim:
- Check battery voltage
- Check alternator output
- Test the ground path
- Look for voltage drop in the circuit
If a power window does not work:
- Test for power at the switch
- Check continuity in the wiring
- Verify the motor receives voltage
- Inspect the ground connection
If a car will not start:
- Check battery voltage
- Test the starter circuit
- Inspect fuses and relays
- Verify the alternator was charging before the failure
These examples show why learning how to use a digital multimeter on a car is so valuable. It turns random problems into a step-by-step search. That is much better than replacing parts and hoping for the best.
Limitations of a digital multimeter
A digital multimeter is powerful, but it cannot do everything. It tells you numbers, not the full story. Some problems only show up under vibration, heat, or heavy load.
Its limits include:
- It cannot always catch intermittent faults
- It may not show a weak part under real driving conditions
- It does not replace a scan tool for modern diagnostic trouble codes
- It cannot directly measure current without the right setup
That is why a multimeter works best as part of a bigger diagnosis. Pair it with visual checks, service info, and, when needed, an OBD2 scan tool. Together, they give you a much clearer picture.
Tips from hands-on experience
After years of testing car electrical systems, a few habits have saved me time again and again. Small habits make a big difference when you are learning how to use a digital multimeter on a car.
Here are my best tips:
- Start with the battery first
- Check the meter setting before every test
- Use the vehicle service manual for expected values
- Test both power and ground, not just one side
- Recheck questionable readings before replacing parts
- Keep your probes steady for a cleaner reading
One practical trick: if you are testing a connector, wiggle the harness gently while watching the meter. If the reading jumps around, you may have an intermittent wire or loose pin. That kind of fault can be hard to find any other way.
Frequently Asked Questions of How to use a digital multimeter on a car
What setting should I use on a multimeter for a car battery?
Use DC voltage for a car battery. Set the range above 12 volts if your meter is not auto-ranging, then place the red probe on positive and the black probe on negative.
Can I test a car fuse without removing it?
Yes, you can test many fuses while they are installed. Use the voltage test on the small test points on top of the fuse to see if power is present on both sides.
Is continuity the same as resistance?
Not exactly, but they are related. Continuity gives a simple yes or no answer, while resistance shows how much the circuit resists electrical flow.
Why does my multimeter show 0 volts on a car part?
That may mean the circuit is off, the part has no power, or the connection is bad. Check the meter setting, the probe placement, and whether the circuit should be live.
Can a digital multimeter test an alternator?
Yes, it can test alternator output by measuring battery voltage while the engine is running. A healthy charging system usually reads higher than resting battery voltage.
Conclusion
Learning how to use a digital multimeter on a car gives you real control over electrical troubleshooting. You can check the battery, alternator, fuses, wiring, grounds, and many parts without guessing. That makes repairs faster, smarter, and often much cheaper.
The best way to get good at it is to practice on simple tests first. Start with your battery, then move to fuses and continuity, and build confidence one reading at a time. If you want to keep improving, try testing a few known-good circuits on your own vehicle and compare the numbers with service specs.