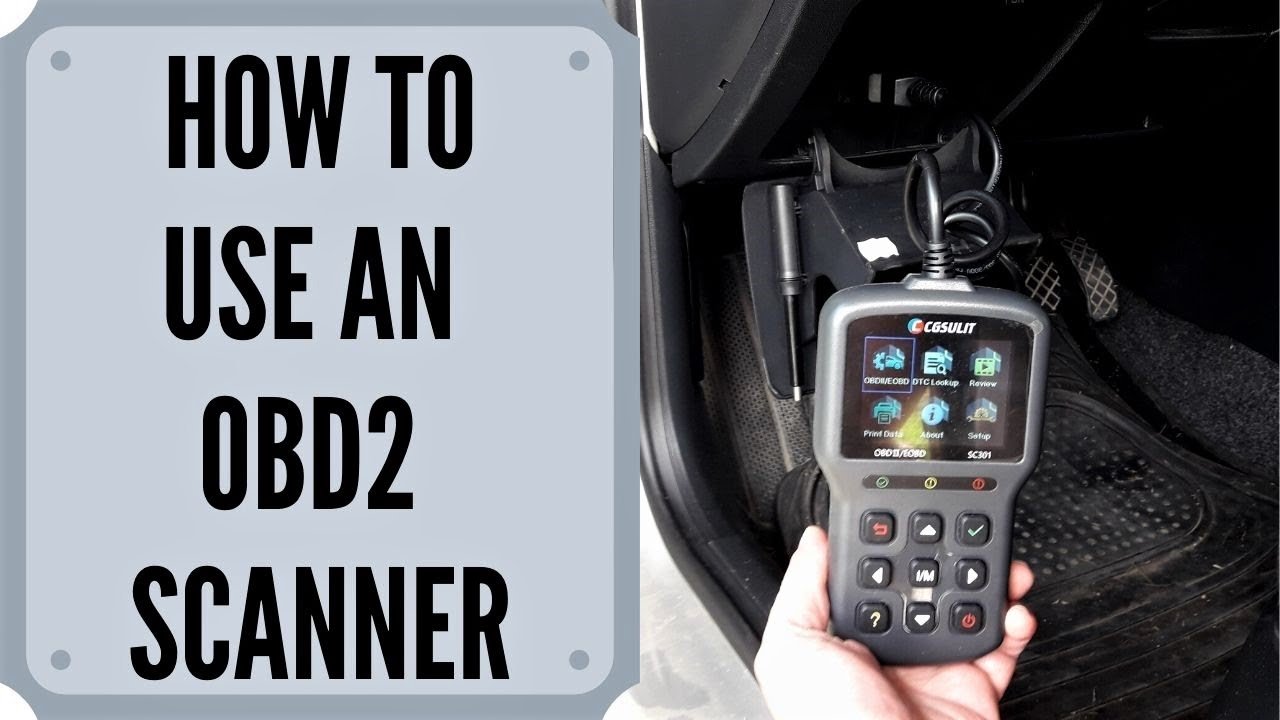
How To Use A Code Reader: Step-By-Step Guide
A code reader helps you find car trouble codes fast, so you can diagnose problems before repairs get expensive.
If you have ever seen a check engine light and felt that little wave of dread, you are not alone. I have been there too, and I know how useful a code reader can be when you want clear answers without guessing. In this guide, I’ll walk you through how to use a code reader in a simple, practical way, so you can read trouble codes, understand what they mean, and make smarter repair decisions.

What a code reader is and why it matters
A code reader is a small diagnostic tool that plugs into your vehicle’s OBD2 port. It reads error codes stored by the car’s computer when something is not working right. Most modern vehicles sold in the United States since 1996 use the OBD2 system, which makes a code reader one of the easiest tools a driver can own.
A code reader does not magically fix your car. Think of it like a flashlight in a dark room. It helps you see the problem area, but you still need to understand what you are looking at. In my experience, that is where people get the most value from a code reader: it saves time, reduces guesswork, and helps you avoid paying for repairs you do not need.
Here are the main reasons people use one:
- Check why the check engine light is on
- Read diagnostic trouble codes, also called DTCs
- Clear codes after a repair
- Check if a car is ready for an emissions test
- Spot issues early before they turn into bigger repairs

What you need before using a code reader
Before you start, make sure you have the right tools and a little patience. The process is simple, but it helps to be prepared. A code reader works best when you know where to plug it in and what the codes mean.
You will usually need:
- A compatible code reader or OBD2 scanner
- Your vehicle key or push-button start access
- Your car owner’s manual, if you need help finding the port
- A phone, notebook, or app to record the codes
- A repair manual or trusted database for code lookup
Most code readers are easy to use right out of the box. Some basic ones show only simple codes, while more advanced OBD2 scanners can display live data, freeze frame data, and readiness monitors. If you are just starting out, a basic reader is often enough.
How to use a code reader step by step
Using a code reader is usually a quick process. The first time may feel a little awkward, but once you do it once or twice, it becomes routine. I remember my first time using one on an older sedan; I expected a complicated setup, but it took less than five minutes.
1. Find the OBD2 port
The OBD2 port is usually under the dashboard on the driver’s side. It is often near the steering column, below the fuse panel, or close to the pedals. If you cannot find it, check the owner’s manual.
The port has a shape that only fits one way, so you do not need to force anything. If it feels stuck, stop and realign it.
2. Plug in the code reader
Insert the code reader firmly into the OBD2 port. Most readers power on as soon as they connect, but some may need the ignition turned on first. Make sure the connection is secure so the tool can communicate with the vehicle computer.
This step is where many beginners rush. I have seen people unplug and replug the device three times just because it was not seated fully. A steady, firm connection is all it usually takes.
3. Turn the ignition on
Turn the key to the on position without starting the engine, or press the start button once without pressing the brake, depending on your car. This allows the vehicle’s diagnostic system to wake up. Some code readers will not work unless the ignition is on.
If your tool has a screen, it should light up and begin reading vehicle data. If nothing happens, check the port, ignition, and battery voltage.
4. Select the diagnostic option
Use the menu on the code reader to choose the option for reading codes. Common choices may include:
- Read codes
- Stored codes
- Pending codes
- Clear codes
- Vehicle information
If your reader supports it, start with stored codes first. These are the main trouble codes that triggered the warning light. Pending codes are problems the car has seen but has not fully confirmed yet.
5. Write down the trouble codes
The scanner will show one or more codes, such as P0420 or P0301. Write them down before doing anything else. This is important because you may want to compare the codes later or check them after a repair.
The code itself is just the starting point. It tells you which system has a problem, not always the exact part that failed. That is one of the biggest mistakes I see people make with a code reader.
6. Look up what the codes mean
Once you have the codes, look them up in a trusted source or repair guide. Many codes start with:
- P for powertrain
- B for body
- C for chassis
- U for network or communication
For example, a P0301 code often points to a misfire in cylinder 1. That does not always mean the spark plug is bad. It could also be a coil, injector, vacuum leak, or wiring issue.
7. Inspect likely causes
After reading the code, look for common causes based on the system involved. Start with the simplest checks first. That can save you time and money.
For example, if you get a misfire code, check:
- Spark plugs
- Ignition coils
- Fuel injectors
- Vacuum hoses
- Loose electrical connectors
For an emissions-related code, look at:
- Gas cap condition
- EVAP hoses
- Oxygen sensors
- Catalytic converter performance
This is where a code reader becomes useful in real life. It narrows the field so you can inspect the right parts instead of replacing random pieces and hoping for the best.
8. Clear the code only after repairs
If you fixed the issue, you can clear the code with the reader. Some scanners have a clear or erase function. Use it only after the problem has been corrected, not just to turn off the light.
A common mistake is clearing the code too early. The light may go off for a while, but the problem usually comes back. In some cases, clearing codes can also erase helpful data that a mechanic may need.
9. Drive and recheck
After clearing the code, drive the car normally and watch for the light to return. Some systems need a full drive cycle to reset readiness monitors. If the code comes back, the issue was not fully solved.
I always tell people to treat the code reader like a guide, not a verdict. If the light returns, the car is telling you the problem is still there.

How to read code reader results the smart way
The code reader gives you clues, but the real skill is knowing how to use those clues. A single code can point to several possible causes. That is why a careful check matters more than a quick guess.
Here is the best way to interpret results:
- Start with the exact code number
- Check whether it is stored or pending
- Notice whether there are multiple codes
- Look at freeze frame data if your scanner supports it
- Compare the code with the symptoms you feel while driving
For example, if you see a P0171 code, that often suggests a lean air-fuel condition. But the root cause could be a vacuum leak, weak fuel delivery, or a faulty sensor. The code reader tells you where to look, not always what to replace.
If you want to work like a pro, ask three questions:
- What code is stored?
- What system does it affect?
- What are the most common causes for this code?
That simple process prevents a lot of unnecessary repairs.
Common mistakes to avoid when using a code reader
A code reader is easy to use, but it is also easy to misuse. I have seen people get frustrated because they expected instant answers from a tool that was only meant to point them in the right direction.
Avoid these common mistakes:
- Clearing codes before writing them down
- Assuming one code means one bad part
- Ignoring pending codes
- Using the reader with a weak vehicle battery
- Skipping basic checks like loose wires or cracked hoses
- Buying parts before confirming the cause
The biggest error is jumping straight to replacement. A code reader is like a map. It shows you the area, but you still need to walk the road.
Benefits and limits of a code reader
A code reader can be a big help, but it is not perfect. Knowing both the strengths and the limits makes you a smarter car owner.
Benefits
- Saves money on unnecessary diagnostics
- Helps you understand warning lights
- Speeds up basic troubleshooting
- Gives you confidence before visiting a mechanic
- Helps with emissions readiness checks
Limits
- It may not show the exact broken part
- It may miss mechanical problems with no stored code
- Basic readers often lack live data and advanced testing
- Some issues need professional tools or hands-on inspection
In other words, a code reader is a great first step, not always the final answer. That is why experienced technicians use it together with visual checks, test drives, and live data analysis.
When to use a code reader and when to call a mechanic
A code reader is useful for many common problems, especially when the check engine light is on. It is also great if your car seems to run normally but you want to understand what triggered the code.
You should consider a mechanic if:
- The engine is shaking badly
- The car will not start
- You see flashing warning lights
- There are multiple codes and poor drivability
- The issue returns after clearing the code
- You suspect a fuel, transmission, or electrical failure
I like to think of it this way: if the code reader is the thermometer, the mechanic is the doctor. The thermometer tells you there is a fever. The doctor figures out why.
Best practices for better results
If you want more useful results from your code reader, a few habits can make a big difference. These small steps can help you get cleaner information and avoid confusion later.
- Check the battery and charging system first if the car acts strange
- Record the code, date, mileage, and symptoms
- Look at more than one code if the scanner shows several
- Search for technical bulletins or known issues for your vehicle
- Use the scanner after a repair to confirm the fix
- Keep your reader updated if it supports software updates
These habits are especially helpful if you plan to use the tool more than once. Over time, you start spotting patterns, and that makes diagnosis much easier.
Frequently Asked Questions of How to use a code reader
How do I use a code reader for the first time?
Plug the code reader into the OBD2 port under the dashboard, turn the ignition on, and select the option to read codes. Write down the codes before clearing anything so you do not lose important diagnostic information.
Can a code reader tell me exactly what part is bad?
Not always. A code reader usually identifies the system or circuit with the problem, but you often need more testing to find the exact failed part.
Will a code reader clear the check engine light?
Yes, most basic code readers can clear stored codes and turn off the light. If the problem is not fixed, the light will likely come back after you drive the vehicle.
Is it safe to drive with a check engine light on?
Sometimes, but it depends on the symptom and whether the light is steady or flashing. A steady light may mean a less urgent issue, while a flashing light can signal a serious problem that needs immediate attention.
Do I need a professional scanner, or is a basic code reader enough?
A basic code reader is enough for simple code reading and clearing. If you want live data, advanced tests, or deeper diagnostics, a professional scan tool is a better choice.
Conclusion
Using a code reader is one of the easiest ways to take control of car trouble without feeling overwhelmed. Once you know how to plug it in, read the codes, and look at the results the right way, you can make smarter choices about repairs and avoid a lot of guesswork.
The real value is not just turning off a light. It is understanding what your car is trying to tell you and responding before a small issue becomes a bigger one. If you have a code reader at home, try using it the next time a warning light appears, and keep learning from the results.