How to Make Cappuccino With an Espresso Machine
Making a cappuccino at home can feel like a challenge, especially when you're aiming for that velvety texture and perfect balance. It’s easy to end up with something too milky or with foam that’s too airy. But with a good espresso machine and a little practice, you can recreate that cafe-quality drink right in your own kitchen.
The key lies in mastering two distinct components: a well-pulled espresso shot and perfectly steamed milk. To get started, you'll want to ensure your espresso machine is capable of both high-pressure extraction and consistent steam output, typically around 9 bars of pressure for the former. This guide will walk you through the visual cues and steps needed for both.
Quick Answer
To make a cappuccino with an espresso machine, you'll first pull a shot of espresso directly into your cup. Then, you'll steam and texture cold milk using the machine's steam wand to create microfoam, a dense, glossy foam. Finally, you'll pour the steamed milk over the espresso, allowing the foam to settle on top for a balanced drink.

Image source: Bing (Web (fair-use with source credit))
Why Visuals Are Key to Your Perfect Cappuccino
When you're making a cappuccino, especially if you're new to it, relying solely on text instructions can leave you guessing. The subtle changes in milk texture, the appearance of espresso crema, and the way the milk integrates with the coffee are all best understood by seeing them. For instance, what "microfoam" actually looks like, that glossy, wet-paint sheen, is hard to describe perfectly in words, but immediately recognizable when you see it.
This guide focuses on those visual checkpoints to help you nail your cappuccino every time. We'll highlight what to look for in your espresso’s crema, how to gauge the milk's texture as it steams, and how to recognize when you've got the right balance of liquid milk and airy foam. By paying attention to these visual cues, you’ll develop an instinct for what makes a truly great cappuccino, moving beyond just following steps to understanding the craft.
Getting Your Espresso Machine Ready
Before you even think about coffee beans, it's crucial to ensure your espresso machine is prepped and ready to go. This means making sure it's clean and properly heated. A cold machine won't extract espresso properly, leading to a weak, sour shot.
For machines that use boilers, aggregate manufacturer specifications indicate a warm-up time of at least 15-30 minutes is often recommended to reach stable brewing temperatures and steam pressure.
Also, purging the steam wand and group head before brewing is a vital step. Purging the steam wand clears out any residual water, ensuring you get pure steam for frothing. Purging the group head (running hot water through it without coffee) heats it up and flushes out any old coffee grounds.
These simple actions make a big difference in the quality of your final drink.
Choosing the Right Beans and Grinding for Espresso
The foundation of any good cappuccino is a quality espresso shot, and that starts with your beans. For espresso, most experts recommend using whole beans that have been roasted relatively recently, typically within the last few weeks. Medium to dark roasts are common choices because they tend to have richer, more intense flavors that stand up well to milk.
The grind size is absolutely critical for espresso. You need a very fine grind, almost like powdered sugar but not quite so powdery that it turns into a paste. If your grind is too coarse, the water will pass through too quickly, resulting in an under-extracted, weak shot.
Too fine, and the water might struggle to pass through, leading to an over-extracted, bitter shot. You’ll want a coffee grinder specifically designed for espresso, capable of producing a consistent, fine grind. Many home baristas find they need to adjust their grinder settings slightly based on the specific beans and even the humidity of the day.
What a Perfect Espresso Shot Looks Like
Pulling the perfect espresso shot is an art, and its appearance is your biggest clue to its flavor. When you extract an espresso properly, you should see a rich, reddish-brown liquid flowing from the portafilter. The most telling sign of a good shot is the crema, that beautiful, dense, reddish-brown foam that forms on top.
Manufacturer specifications for a standard double espresso shot often cite a target extraction time of 25 to 30 seconds, yielding about 1.5 to 2 ounces (45-60 ml) of liquid. The crema should be thick and consistent, not wispy or disappearing too quickly. If your crema is thin and pale, your grind might be too coarse or your espresso wasn't tamped firmly enough.
If it's very dark or appears almost black and bubbles excessively, your grind might be too fine, or the water temperature too high. Seeing a well-formed crema tells you the pressure, grind, and tamping were just right.
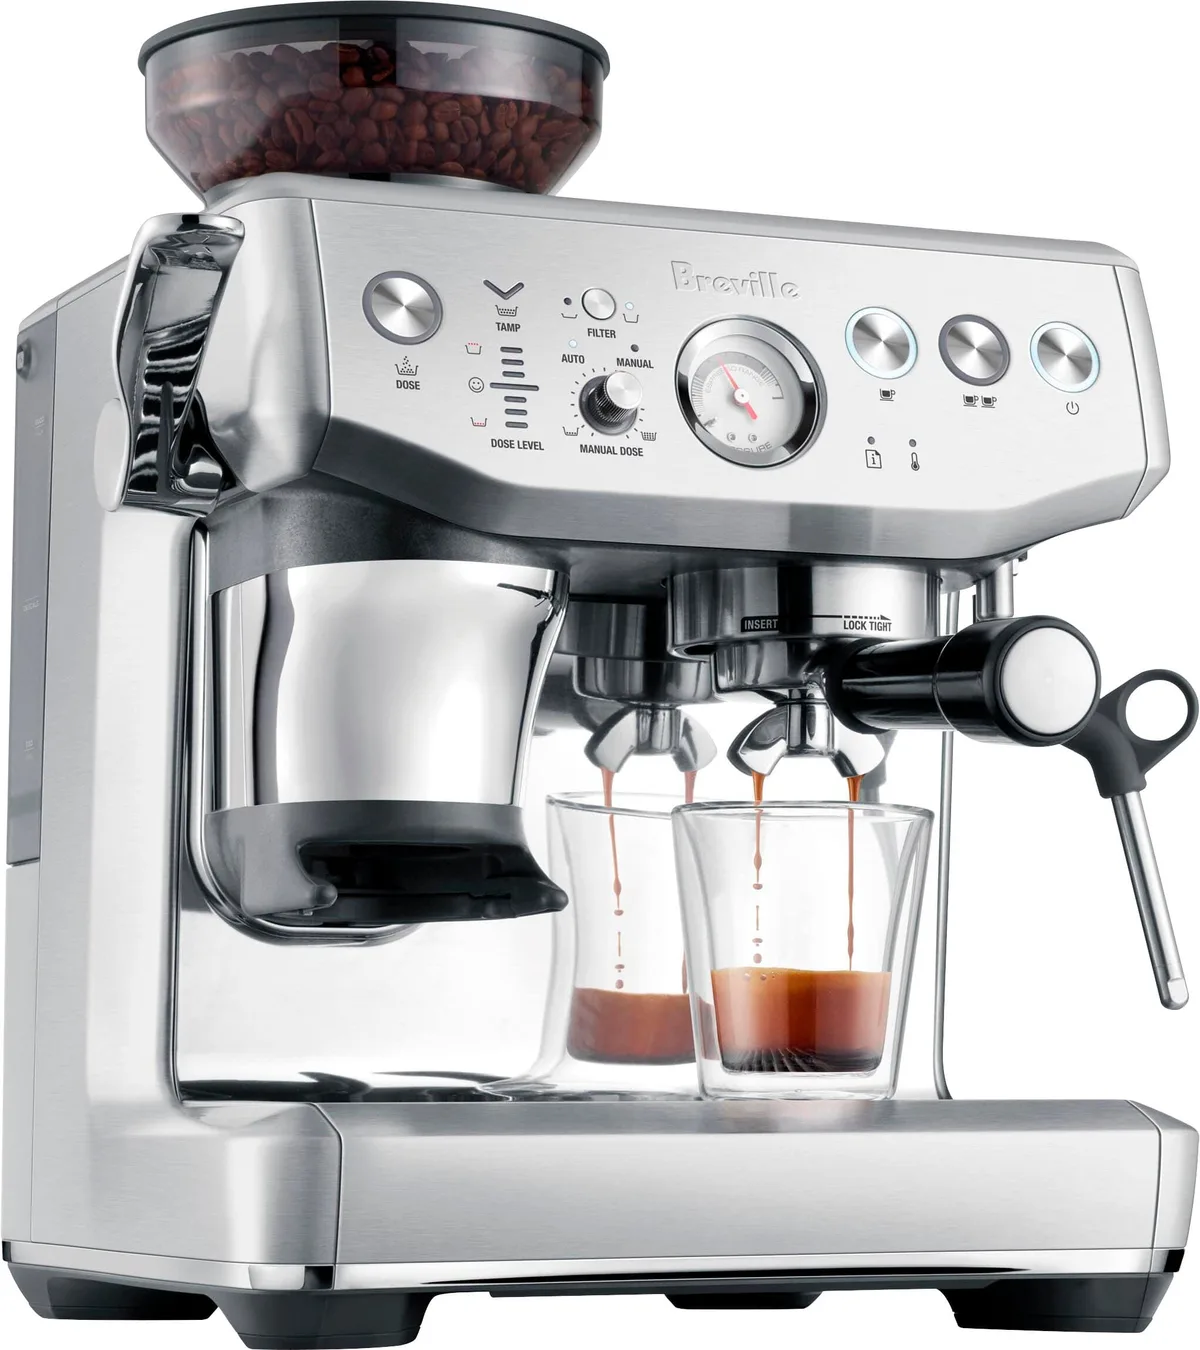
Image source: Bing (Web (fair-use with source credit))
Steaming and Texturing Milk: The Art of Microfoam
This is where many aspiring home baristas find their biggest challenge. The goal isn't just hot milk; it's creating microfoam. Microfoam is steamed milk that has been aerated just enough to create tiny, consistent bubbles, resulting in a smooth, velvety texture and a glossy sheen, almost like wet paint.
This is what allows you to pour latte art and gives your cappuccino its signature creamy mouthfeel.
To achieve this, you'll need cold milk and a clean, cold milk pitcher. Start by placing the tip of your steam wand just below the surface of the milk. Turn on the steam fully.
You’ll hear a gentle, consistent hissing sound, like a quiet paper tear. This is the sound of air being introduced. You want to keep the tip near the surface for only a few seconds, just enough to slightly increase the milk's volume.
Then, you'll submerge the wand deeper into the milk to create a vortex, heating the milk and breaking down those larger bubbles into tiny ones.
The Visual Cues of Ideal Milk Texture
As you steam the milk, your eyes are your best guide. In the initial few seconds, you should see tiny bubbles appearing and the milk swirling. If you see large, angry bubbles forming, the steam wand is likely too far out of the milk, or you've introduced too much air.
As you submerge the wand to heat the milk, watch for the milk to start spinning in a whirlpool. This vortex motion is crucial for breaking down those larger bubbles and creating that desirable microfoam.
You're aiming for a smooth, creamy appearance. The milk should start to gain a subtle shine. When you hold the pitcher up, the milk should look fluid and homogenous, not like a bubbly cappuccino froth you might find in some older cafes.
A good visual indicator is when the milk reaches the desired temperature (around 140-155°F or 60-68°C), the spinning motion will become less pronounced, and the milk will appear to have a velvety texture. Too hot, and the milk can scald and lose its sweetness.
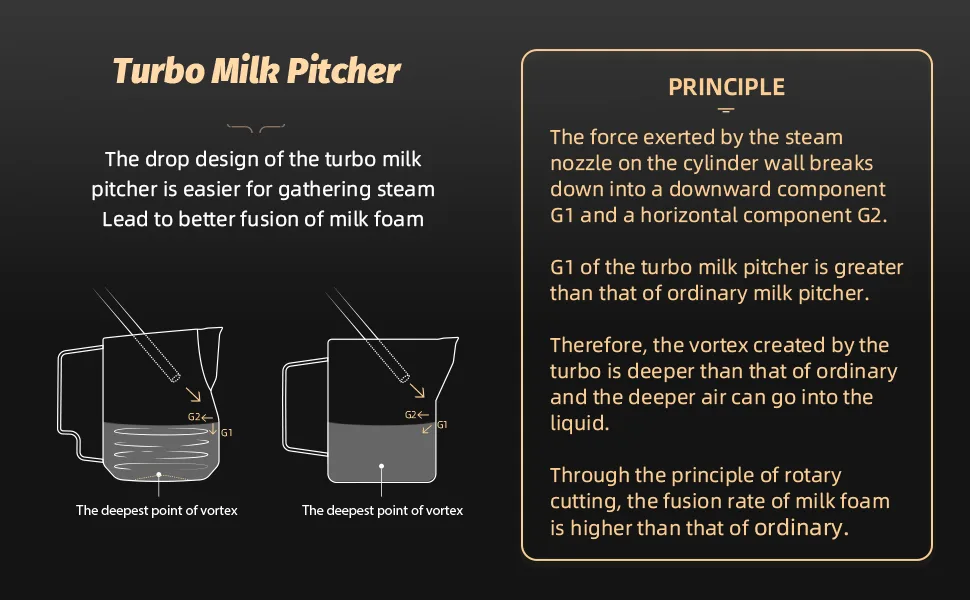
Image source: Bing (Web (fair-use with source credit))
What Scalded or Over-Aerated Milk Looks Like
It's easy to go too far with steaming, and the visual cues tell you when you've messed up. If you see large, persistent bubbles that look like soap suds, you've likely over-aerated the milk. This type of foam is stiff, dry, and tends to separate quickly from the liquid milk, making it impossible to pour latte art.
It also imparts a "cooked" or burnt flavor to your drink, which is definitely not what you want.
Another common mistake is overheating the milk, often called "scalding." When milk is heated much beyond 160°F (71°C), its proteins break down in a way that destroys its natural sweetness and creates an unpleasant, sometimes metallic or burnt taste. Visually, milk that's too hot might start to look slightly yellow or brown, and it loses that beautiful glossy sheen. If you've accidentally scalded the milk, unfortunately, there's no way to fix it; you'll need to start over with fresh, cold milk.
Pouring Your Cappuccino: From Pitcher to Cup
This is the grand finale, where your perfectly extracted espresso meets your beautifully textured milk. The goal is to create a harmonious blend of liquid coffee and creamy foam. For a traditional cappuccino, the ratio is roughly equal parts espresso, steamed milk, and foam, though personal preference can adjust this.
The pouring technique is what brings it all together and allows for decorative latte art if you’re feeling ambitious.
Start by swirling the milk in the pitcher. This keeps the microfoam integrated with the liquid milk and ensures a smooth pour. Hold the pitcher relatively low over your espresso cup.
Begin pouring a thin, steady stream of milk into the center of the espresso. As the cup fills, you can gradually increase the height of your pour and adjust the flow to create your desired pattern, finishing with the foam.
Visualizing the Layers: Espresso, Milk, Foam
As you pour, pay attention to how the milk integrates with the espresso. Initially, a thin stream of milk will dive under the crema, lightening the coffee's color. As you continue to pour, the foam will start to sit on top.
A well-poured cappuccino will show distinct layers: the dark espresso at the bottom, a lighter brown layer of milk in the middle, and a cap of white foam on top.
If you're aiming for latte art, you’ll be manipulating the flow of milk and foam to create shapes. A common starting point is a simple heart. This involves pouring a thin stream to incorporate the milk, then widening the pour as the cup fills, bringing the foam to the surface and finishing with a flick of the wrist to create the heart shape.
The key is a consistent pour and milk that has the right viscosity, not too watery and not too stiff.
Spotting Common Pouring Mistakes
One of the most common pouring mistakes is introducing too much air too late in the process, resulting in a dollop of stiff foam on top of otherwise well-integrated milk. This usually happens if you've waited too long to pour or if your milk was over-aerated to begin with. Another issue is pouring too quickly or too high, which can cause the milk and foam to splash and break apart, rather than creating a smooth, integrated finish.
If your milk is too thin or you didn't texture it properly, it might just sink into the espresso, leaving you with a very weak layer of foam. On the flip side, if the foam is too stiff and dry, it will sit on top like a meringue and won't blend with the coffee. The visual cue for a successful pour is a smooth transition from the liquid milk into the foam, with a pleasant dome or pattern on top.
Troubleshooting Your Cappuccino
Even with the best intentions, your cappuccino might not turn out perfectly every time. It’s completely normal to encounter a few hiccups along the way, and knowing how to address them is part of becoming a proficient home barista. Most issues stem from problems with either the espresso extraction or the milk steaming process.
For example, if your espresso is consistently too bitter, it might be over-extracted. You can often resolve this by adjusting your grind size to be slightly coarser or reducing the brew time.
Conversely, a sour or weak espresso often indicates it's under-extracted. This could be due to a grind that's too coarse, not enough coffee grounds, or insufficient tamping. For milk-related problems, think about temperature and aeration.
If the milk is too watery or lacks foam, you likely didn't introduce enough air initially or didn't froth long enough. If it's too bubbly and dry, you might have over-aerated it or held the steam wand incorrectly.
When Your Foam Isn't Right
When your milk foam is off, it usually falls into one of two categories: too much dry foam or not enough of the right kind of foam. If you've got a lot of large, bubbly foam that looks like it belongs on a bubble bath rather than a cappuccino, you probably introduced too much air for too long. This happens when the steam wand tip is held too high out of the milk.
To fix this for your next attempt, try submerging the tip a bit deeper and only aerating for a very short period at the beginning.
On the other hand, if your milk is hot but lacks that velvety texture and just seems like regular hot milk, you likely didn't introduce enough air, or you submerged the wand too quickly and didn't allow for aeration. You might also have steamed it to temperature too fast without building that microfoam. For a cappuccino, you want that glossy, paint-like consistency.
If you’re struggling with milk texturing, consider checking out detailed video guides to see the visual process in action. For more general equipment issues, how to troubleshoot a coffee maker can offer broader insights.
If Your Espresso Is Off
An espresso shot that doesn't taste right is often the biggest source of a disappointing cappuccino. If your espresso tastes overly bitter, it's usually a sign of over-extraction. This means the water has spent too long in contact with the coffee grounds, pulling out bitter compounds.
The visual cue for this can be a very dark stream, sometimes with little to no crema, or a crema that dissipates almost instantly. To remedy this, try grinding your beans a bit coarser. This allows water to flow through more quickly.
You might also shorten the extraction time, aiming for that 25-30 second window.
If your espresso tastes sour, weak, or watery, it’s likely under-extracted. This happens when the water passes through the coffee grounds too quickly. Visually, you might see a very light brown, thin stream, possibly with a pale or bubbly crema.
The fix here is often to grind your beans finer. This creates more resistance, slowing down the water flow. Ensure you're using enough coffee grounds and that they are tamped evenly and firmly.
If you consistently have trouble with your machine, how to fix a coffee maker may offer some solutions.
Caring for Your Espresso Machine
Keeping your espresso machine in good working order is essential for consistent, high-quality cappuccinos. Regular maintenance not only prevents costly repairs but also ensures that the machine performs at its best. Neglecting cleaning can lead to mineral buildup from water, which can affect taste and clog internal components.
Manufacturer recommendations often suggest a deep descaling every 1-3 months, depending on water hardness and usage, as indicated by user manuals.
The cleaning process involves a few key areas: the group head, the steam wand, and the drip tray. After each use, you should purge the steam wand with steam and wipe it clean immediately to prevent milk residue from hardening. Flushing water through the group head after pulling a shot also helps remove coffee oils and grounds.
Periodically, you'll need to backflush the group head using a cleaning solution designed for espresso machines; this process forces water and cleaner through the internal pathways to dislodge coffee oils. For detailed steps, how to clean a coffee maker water reservoir or general how to clean a coffee maker can offer related insights.
Daily Cleaning vs. Deep Cleaning
Daily cleaning is about quick maintenance after each use. This includes wiping down the steam wand, rinsing the portafilter, and emptying and rinsing the drip tray. These simple steps take mere minutes but prevent buildup that can affect flavor and machine longevity.
Deep cleaning, on the other hand, is a more thorough process that tackles internal components.
This deeper cleaning involves backflushing the group head, descaling the machine to remove mineral deposits, and cleaning the shower screen. Descaling, specifically, is crucial for machines in areas with hard water. Mineral buildup can reduce steam pressure and water flow, impacting both espresso extraction and milk steaming.
If your machine’s performance dips, it’s a strong sign that it's time for a descaling treatment. For machines exhibiting persistent issues, how to troubleshoot a coffee maker may offer solutions beyond basic cleaning.
Frequently Asked Questions
How long does it take to make a cappuccino?
Making a single cappuccino typically takes about 3-5 minutes once your espresso machine is heated up. This includes pulling the espresso shot, steaming and texturing the milk, and pouring the drink.
Do I need a special kind of milk for frothing?
Whole milk generally froths best because its fat and protein content create a stable, creamy foam. However, many dairy alternatives like oat milk, soy milk, and almond milk can also be frothed effectively with practice, though results can vary by brand.
What's the difference between a cappuccino and a latte?
A cappuccino traditionally has a more distinct separation of espresso, steamed milk, and a thicker layer of foam, often in equal thirds. A latte has a thinner layer of foam and a higher ratio of steamed milk to espresso, resulting in a creamier, milkier drink.
How often should I clean my espresso machine?
You should perform quick daily cleaning after each use, focusing on the steam wand and portafilter. A more thorough cleaning, including backflushing and descaling, is recommended every 1-3 months, depending on your water's hardness and how often you use the machine.
Can I use pre-ground coffee for my cappuccino?
While you can use pre-ground coffee, it's not ideal for espresso. Espresso requires a very fine, consistent grind that pre-ground coffee often doesn't provide. Grinding fresh beans just before brewing yields significantly better results for both espresso extraction and overall flavor.