How to Clean a Coffee Maker
Let's talk about that morning cup of coffee. You love the taste, the aroma, the kickstart it gives your day. But have you ever stopped to think about what might be lurking inside your coffee maker?
Over time, mineral deposits from your water and oily residues from the coffee itself can build up, affecting not just the flavor but also the lifespan of your machine. Knowing how to clean a coffee maker properly is key to enjoying consistently great coffee.
Regular cleaning ensures your brewer performs optimally and keeps your coffee tasting its best. In fact, manufacturer specifications often recommend a descaling cycle at least once a month, especially in areas with hard water, to prevent internal damage. This guide will walk you through exactly what you need to do to keep your coffee maker sparkling and your brews delicious, covering everything from daily rinses to deep descaling.
Quick Answer
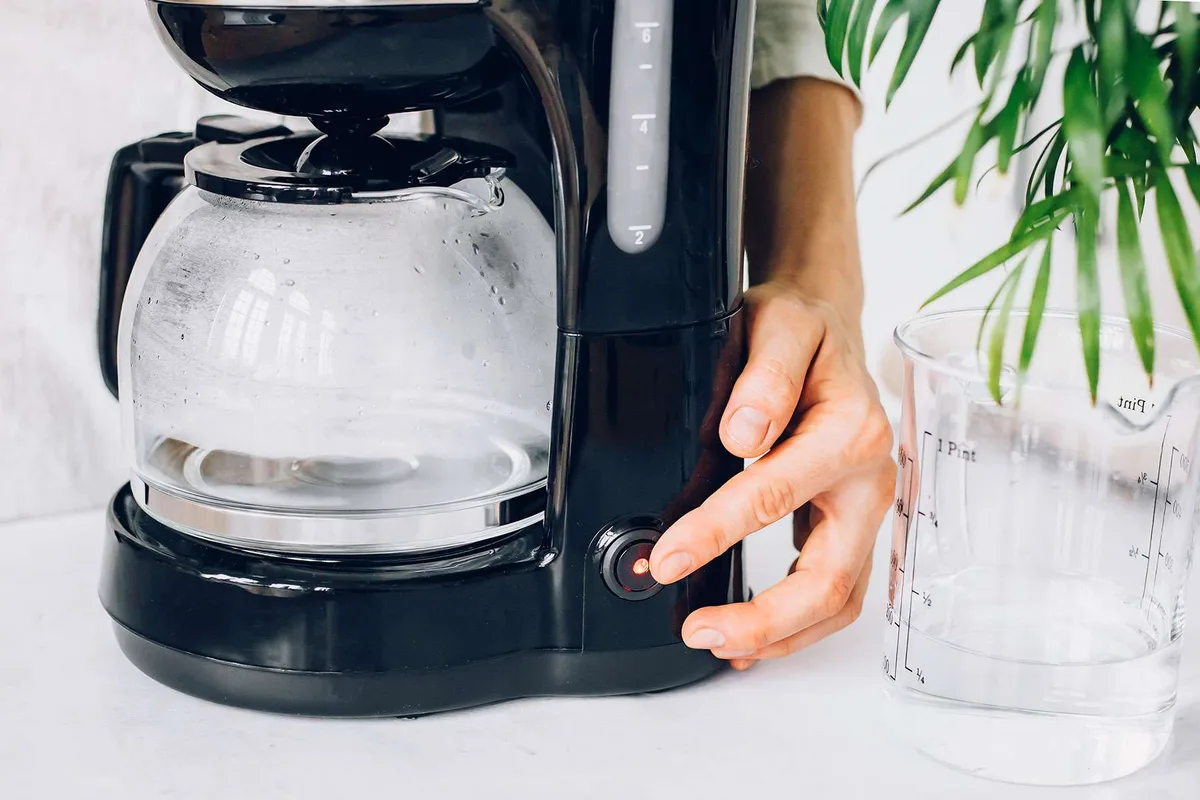
To clean a coffee maker, you'll typically need to perform a deep descaling. This involves running a cleaning solution, like a vinegar-water mix or a commercial descaler, through the brew cycle. Afterwards, rinse thoroughly by running plain water through multiple times.
Regular daily rinsing of removable parts also prevents buildup and keeps your machine hygienic.
Is Your Coffee Maker Dirty? Spotting the Signs
You might think your coffee maker is clean enough, but often, the signs of buildup are subtle until they impact your coffee. The most common culprit is mineral deposits, often called limescale, left behind by the water you use. This gunk isn't just unsightly; it can actually clog the internal components of your coffee maker, affecting water flow and brewing temperature.
Here are the tell-tale signs that it's time for a good cleaning:
- Slower Brewing: If your coffee maker is taking noticeably longer to brew a pot than it used to, that's a strong indicator of internal clogs.
- Changes in Taste: Does your coffee suddenly taste bitter, burnt, or just plain off? Buildup can impart unpleasant flavors. You might also notice a "chemical" taste.
- Visible Buildup: Look closely at the water reservoir, filter basket, and around the brew head. You might see white, chalky deposits or a slimy film.
- Strange Noises: A coffee maker that's struggling with blockages might start making unusual gurgling or sputtering sounds during the brew cycle.
- Mold or Mildew: In damp, dark environments like a coffee maker's reservoir, mold can grow. This is a serious hygiene issue and will make your coffee taste terrible and could be unhealthy.
Your Coffee Maker's Components: What to Clean
Even if you're just running a quick clean cycle, it's helpful to know all the parts of your coffee maker that need attention. Understanding these components helps you ensure a thorough job and spot potential issues during cleaning.
- Water Reservoir: This is where the water sits before brewing. It's a prime spot for mineral buildup and mold, especially if you don't empty it daily.
- Carafe (Pot): Coffee oils and sediment can coat the inside of your carafe, leaving a brown film and affecting taste.
- Filter Basket: This holds your coffee grounds. It can get clogged with grounds and develop oily residue.
- Brew Head: The part where hot water drips onto the coffee grounds. Mineral deposits can harden here, impacting water distribution.
- Showerhead/Dispenser: In some machines, this is a separate piece that disperses water. It's prone to clogs.
- Removable Parts: Lids, filters, and other detachable pieces should be washed regularly.
- Exterior: Don't forget the outside! Drips and spills can accumulate on the housing.
The Two Main Cleaning Paths: Quick Rinse vs. Deep Descale
When it comes to keeping your coffee maker clean, there are generally two levels of cleaning you'll perform: a quick rinse for daily or weekly maintenance, and a deeper descaling process to tackle accumulated mineral deposits and oils. Choosing the right method depends on how often you use your machine and the water quality in your area.
Quick Rinse: Daily/Weekly Maintenance
This is your regular upkeep, designed to prevent major buildup before it starts. It's simple, takes only a few minutes, and makes a big difference.
- Daily: After each use, remove the filter basket and grounds, rinse them thoroughly under warm water, and let them air dry. If you have a removable reservoir, give it a quick rinse and wipe. Leaving water sitting in the reservoir overnight can encourage mold growth.
- Weekly: Give the carafe a good scrub with warm, soapy water. You can also wipe down the exterior of the coffee maker with a damp cloth. For single-serve machines, run a cycle with just water and perhaps a small amount of dish soap on the removable parts, then rinse.
This basic maintenance prevents most issues and ensures your coffee tastes fresh. It's like washing your dishes after every meal; it prevents a huge scrubbing job later.
Deep Descale: Tackling Buildup (Vinegar vs. Descaling Solution)
Over time, even with regular rinsing, mineral deposits from your water will inevitably build up inside the heating element and water lines of your coffee maker. This process is called descaling. Descaling is crucial for maintaining performance and flavor.

There are two primary solutions for deep descaling:
- White Vinegar: This is a common, inexpensive household item that works effectively. Its acidity breaks down mineral deposits.
- Commercial Descaling Solutions: These are specifically formulated for coffee makers. They often work faster and may be less likely to leave a strong lingering smell compared to vinegar. Manufacturer specifications for some units, like certain Breville espresso machines, recommend using only approved descaling solutions to avoid voiding warranties.
Choosing between them often comes down to what you have on hand or your preference for scent. Both methods require running the solution through a brew cycle and then rinsing thoroughly.
Step-by-Step Deep Cleaning Workflow
Now that we know why cleaning is important and what parts are involved, let's get into the actual process. The exact steps can vary slightly depending on your coffee maker type, so we'll cover the most common ones. Remember to always unplug your coffee maker before performing any deep cleaning that involves disassembly or handling electrical components.
For Drip Coffee Makers
This is the classic setup most people are familiar with. Deep cleaning a drip machine is straightforward and will revive its brewing power.
- Prepare the Cleaning Solution: Fill the water reservoir with a mixture of equal parts white vinegar and water. For a standard 12-cup coffee maker, this might mean about 6 cups of vinegar and 6 cups of water. If using a commercial descaling solution, follow the package instructions for the correct ratio.
- Run a Brew Cycle: Place an empty filter in the filter basket (to catch any loosened debris) and place the empty carafe on the warming plate. Turn on the coffee maker and let it run through about half of the cleaning solution.
- Let It Sit: Turn off the coffee maker and let the solution sit in the reservoir and internal components for at least 30 minutes to an hour. This allows the vinegar or descaler time to work on breaking down mineral buildup.
- Complete the Brew Cycle: Turn the coffee maker back on and let it finish brewing the remaining cleaning solution.
- Discard and Rinse: Discard the solution from the carafe and rinse it thoroughly. Rinse the filter basket as well.
- Rinse Cycles: Fill the water reservoir with fresh, clean water. Run at least two full brew cycles with just water to flush out any residual vinegar smell or taste. You might need a third cycle if you detect any lingering odor.
- Clean Removable Parts: Wash the carafe, filter basket, and lid in warm, soapy water. Dry them completely before reassembling.
- Wipe Down Exterior: Use a damp cloth to wipe down the outside of the machine.
This thorough process ensures all internal parts are cleared of buildup, leading to better-tasting coffee. If your machine has an integrated grinder, consult your manufacturer's instructions for cleaning that specific component, as it often requires separate attention.
For Single-Serve Machines (Keurig-style)
Single-serve coffee makers, like those using K-Cups or similar pods, have a slightly different internal system, but the cleaning principles are much the same. These machines can be prone to mold in the water reservoir and clogs in the needle that pierces the pod. Regular cleaning is crucial to prevent these issues and maintain good coffee flavor.
- Prepare the Cleaning Solution: If using vinegar, fill the water reservoir with about half vinegar and half water. If using a specialized descaling solution for single-serve machines, follow its specific instructions regarding dilution.
- Run a Brew Cycle (No Pod): Place a large mug on the drip tray. Ensure no K-Cup or pod is in the machine. Run a brew cycle on the largest cup setting.
- Discard and Let Sit: Discard the hot liquid from the mug. Let the machine sit for at least 30 minutes to allow the solution to work internally.
- Repeat Brew Cycles: Run several more brew cycles with the cleaning solution until the reservoir is empty.
- Rinse Thoroughly: Fill the reservoir with fresh, clean water and run multiple brew cycles (at least 3-4) to completely flush out any vinegar or descaling solution. Check the water dispensing area for any residual cleaner.
- Clean Removable Parts: Wash the drip tray, pod holder, and water reservoir with warm, soapy water. Ensure all parts are completely dry before reassembling.
- Clean the Needle (Optional but Recommended): Some machines have a removable needle assembly. Consult your manual for instructions on how to safely detach and clean this with a small brush or pin to remove any coffee grounds or mineral deposits.
Keeping the pod-piercing needle clean is key for consistent brewing and to prevent grounds from getting lodged inside.
For Espresso Machines
Espresso machines, whether manual, semi-automatic, or super-automatic, have more complex internal systems, including pumps, boilers, and group heads. They require a more involved cleaning routine, often including daily wipes, weekly backflushing, and regular descaling. Manufacturer instructions are paramount here, as incorrect cleaning can damage delicate components.
For instance, Breville espresso machines often come with specific descaling tablets and instructions to protect their internal electronics.
- Daily Maintenance: After each use, purge the group head with hot water and wipe it down. Rinse the portafilter and basket. Empty the drip tray.
- Weekly Backflushing: This is crucial for cleaning the group head and shower screen. Use a blind filter (a portafilter basket without holes) and a cleaning solution (either espresso machine cleaner or a vinegar solution). Run short cycles of water through the portafilter, letting it build pressure, then release. Repeat this several times.
- Deep Descaling: For descaling, always refer to your specific machine's manual. Generally, you'll fill the water reservoir with a descaling solution (often a specific brand recommended by the manufacturer, as using the wrong type can cause damage) and run it through brew and steam cycles. This process can take a while, often involving multiple runs and rinses.
- Cleaning the Steam Wand: Wipe the steam wand after each use. For stubborn milk residue, soak a cloth in hot water and vinegar and wrap it around the wand for a few minutes before wiping.
- Other Parts: Regularly clean the portafilter, baskets, drip tray, and water reservoir with warm, soapy water. For super-automatic machines, follow instructions for cleaning the coffee bean hopper and brew unit.
Espresso machines require diligence. Neglecting them can lead to clogged water lines, malfunctioning pumps, and, ultimately, poor espresso quality.
Common Coffee Maker Cleaning Mistakes to Dodge
Even with the best intentions, a few common slip-ups can hinder your cleaning efforts or even damage your coffee maker. Being aware of these pitfalls can save you time, money, and the frustration of a malfunctioning machine.
- Skipping Regular Rinsing: Not rinsing removable parts like the filter basket and carafe daily is a fast track to oily buildup and stale coffee flavors. It's the easiest thing to do, and ignoring it causes bigger problems later.
- Using Harsh Chemicals: Never use abrasive cleaners, steel wool, or harsh detergents not approved for coffee makers. These can scratch surfaces, leave behind toxic residues, or damage internal seals and plastics. Stick to food-grade options like vinegar or recommended descaling solutions.
- Not Rinsing Enough After Descaling: This is a big one, especially with vinegar. If you don't run enough plain water cycles after descaling, your next pot of coffee might taste strongly of vinegar. Manufacturer specifications for some units, like certain Nespresso machines, emphasize multiple rinse cycles.
- Forgetting the Water Reservoir: This is a hidden hotspot for mold and mineral deposits. Not emptying and rinsing it regularly means you're brewing with potentially unsanitary water.
- Ignoring Manufacturer Instructions: Every coffee maker is different. What works for one model might not be suitable for another. Always consult your user manual for specific cleaning recommendations, especially for high-end espresso machines or complex single-serve units.
- Putting Non-Dishwasher-Safe Parts in the Dishwasher: Some parts, especially those made of certain plastics or with sensitive finishes, can warp or degrade in a dishwasher. Always check if parts are labeled "dishwasher safe."
Avoiding these common errors ensures your cleaning efforts are effective and your coffee maker stays in top working condition.
Expert Tips for Fresher Coffee and a Longer-Lasting Machine
Beyond the basic cleaning routine, a few extra steps and habits can elevate your coffee experience and extend the life of your brewing equipment. These are the kinds of tips that seasoned baristas and coffee aficionados swear by. They're simple but impactful, turning a functional machine into a well-maintained one.
- Use Filtered Water: This is perhaps the single biggest step you can take to reduce mineral buildup. Filtered water contains fewer minerals, meaning less limescale will accumulate inside your coffee maker over time. Studies from university extension programs highlight the benefits of filtered water for appliances.
- Empty the Water Reservoir Daily: Don't let water sit in the reservoir overnight. Stagnant water is a breeding ground for bacteria and mold, and it can also start to develop an unpleasant odor. Dumping it out and giving the reservoir a quick rinse will go a long way.
- Clean All Removable Parts Thoroughly: Beyond just rinsing, make sure to scrub the carafe, filter basket, and any other removable components with warm, soapy water at least weekly. Coffee oils can build up quickly, leaving a residue that impacts flavor. Proper upkeep prevents oil absorption and rancidity, similar to how you'd maintain a wooden cutting board.
- Descaling Frequency is Key: Don't wait until your coffee tastes bad or the machine slows down. As a general rule, descale your coffee maker once a month if you use it daily. If you live in an area with very hard water, you might need to do it more often, perhaps every two weeks.
- Consider a Timer: Set a monthly reminder on your phone for descaling. Treating it like an important appointment ensures it doesn't get forgotten amidst your busy schedule.
These proactive measures are not just about cleaning; they're about proper maintenance that ensures you get the best possible coffee and keep your investment working for years to come.
FAQs About Coffee Maker Cleaning
Why does my coffee maker need to be descaled?
Your coffee maker needs to be descaled to remove mineral deposits, primarily calcium and magnesium, that build up from the water used in brewing. This limescale can clog internal components, slow down brewing, affect water temperature, and impart a bitter taste to your coffee. Regular descaling, as recommended by most manufacturers, ensures optimal performance and longevity.
How often should I deep clean my coffee maker?
Most experts recommend deep cleaning (descaling) your coffee maker at least once a month. If you use your machine heavily, have very hard water, or notice a change in taste or brewing speed, you might need to clean it more frequently, perhaps every two weeks. Daily rinsing of removable parts is also essential for ongoing hygiene.
Can I use something other than vinegar to clean my coffee maker?
Yes, you can use commercial descaling solutions specifically designed for coffee makers. These often work faster and may leave less of a scent than vinegar. Some manufacturers, like those for high-end espresso machines, may recommend or even require using their proprietary descaling agents to maintain warranty coverage.
Always check your machine's manual.
What happens if I don't clean my coffee maker?
If you don't clean your coffee maker, mineral buildup will continue to clog internal parts, leading to slow brewing, inconsistent temperature, and ultimately, machine failure. Oily residues and potential mold growth will also negatively impact the taste of your coffee, making it bitter or even sour. In severe cases, a neglected machine can become a health hazard due to mold and bacteria.




2 Comments