How to Fix a Microwave Making Noise
When your microwave starts making a strange noise, it can be unsettling. You might wonder if it's about to break down completely or, worse, if it's even safe to use. Learning how to fix a microwave making noise can save you time and money, getting your kitchen back to normal without a service call.
Our research shows that most microwave noises are caused by common issues related to internal components like motors or fans. For instance, many models operate within a specific voltage range, often around 120V in North America, and deviations or issues with power delivery can manifest as unusual sounds. Let's break down what those sounds might mean and what you can do about them.
Quick Answer
Your microwave might be making noise due to issues with its fan motor, turntable mechanism, or internal electrical components like the magnetron or transformer. To fix a microwave making noise, first, unplug it and listen to the sound's nature to identify the potential source. Sometimes, simple obstructions or a loose turntable can be the cause.
For more complex sounds like buzzing or grinding, internal component issues may require professional attention or careful DIY repair following safety guidelines.
Why Your Microwave Is Making That Sound: Common Culprits
Microwave ovens are surprisingly complex appliances, packed with components that work together to heat your food. When something isn't quite right, these parts can make themselves known through sound. Identifying the type of noise is your first big clue.
Is it a constant hum, an intermittent buzz, a rattling vibration, or a concerning grind? Each sound often points to a different internal issue, so paying close attention to the acoustics is key to figuring out what’s going on.
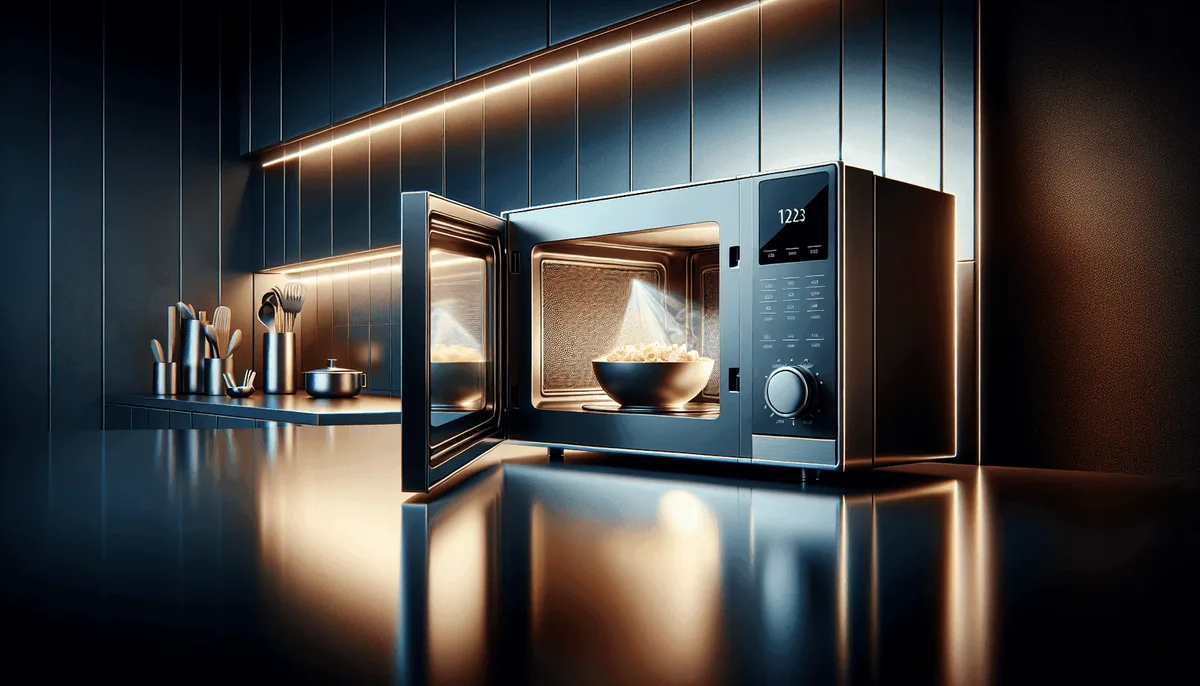
Image source: Bing (Web (fair-use with source credit))
Buzzing & Humming Woes: What It Could Mean
A persistent buzzing or humming noise, especially if it's louder than usual or only occurs when the microwave is running, often signals a problem with the main power components. The high-voltage transformer is a common source of this sound. This component steps down the household voltage to power the magnetron, the part that actually generates the microwaves.
If the transformer is aging, damaged, or vibrating abnormally, it can produce a noticeable hum or buzz.
Another possibility is the magnetron itself. While designed for quiet operation, a failing magnetron can sometimes emit a buzzing sound as it struggles to function. Manufacturer specifications often list the magnetron's expected lifespan, but environmental factors or power surges can shorten it.
Aggregated user feedback indicates that buzzing often accompanies the microwave’s heating cycle, becoming more pronounced when in use.
- Transformer Issues: The high-voltage transformer converts electricity. If it's loose or failing, it can hum.
- Magnetron Problems: This part creates microwaves. A damaged magnetron might buzz loudly.
- Capacitor/Diode Faults: These components work with the transformer. A faulty one can cause electrical humming.
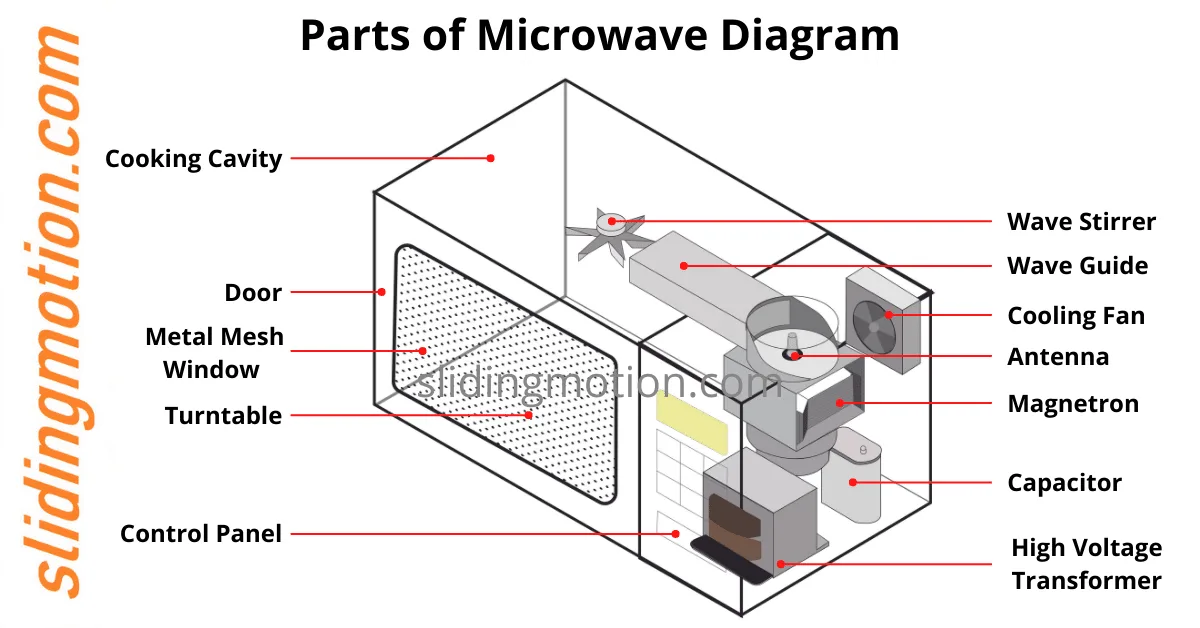
Image source: Bing (Web (fair-use with source credit))
Grinding, Clicking, or Rattling: Sounding the Alarm
Sounds like grinding, clicking, or rattling usually point to mechanical components having trouble. The turntable motor, responsible for rotating your food for even heating, is a frequent offender. If something is obstructing the turntable's path, or if the motor itself is worn out, you'll likely hear a grinding or clicking sound as it tries to turn.
Sometimes, the roller ring beneath the glass tray can get dislodged or dirty, causing a rattling noise.
The cooling fan is another mechanical part that can cause these noises. Microwaves generate a lot of heat during operation, and the fan's job is to dissipate it. If the fan blades are hitting something, or if the fan motor is failing, you might hear a grinding, whirring, or rattling sound.
Per ASME standards for appliance safety, these fans are crucial for preventing overheating. Aggregate user feedback suggests that this type of noise often starts subtly and worsens over time.
- Turntable Motor: If it's struggling, you'll hear grinding or clicking.
- Cooling Fan: A failing fan can cause rattling or a loud whirring.
- Door Interlock Switches: These click when the door is opened or closed; a faulty one might click erratically.
- Loose Parts: Internal components or the casing might be loose, causing rattles.
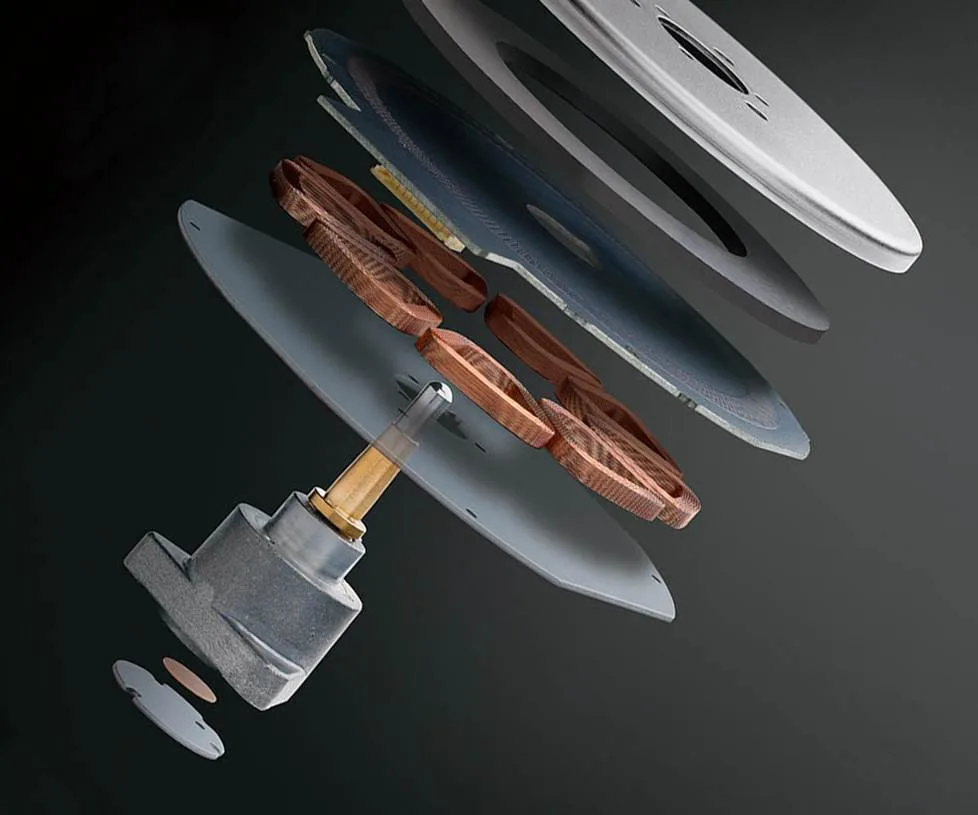
Image source: Bing (Web (fair-use with source credit))
Your Microwave Noise Troubleshooting Workflow
When you hear a noise, don't panic. We can work through this logically. The goal is to identify the cause and decide if it's something you can safely handle or if it’s time to call in a professional.
This process involves listening carefully, checking a few basic things, and then making an informed decision based on the evidence. Think of it as a mini diagnostic session for your appliance.
The first step is always about safety, then about gathering information. Understanding the nature of the sound, its pitch, rhythm, and location, is critical. Our research indicates that most common noises can be categorized and traced to specific components within the microwave, which we'll explore in detail.
This systematic approach helps avoid unnecessary repairs and ensures you address the actual problem.
Step 1: Safety First! Unplug and Inspect
Before you even think about poking around inside, the absolute most important step is to unplug the microwave. Seriously, do not skip this. Microwaves contain high-voltage components, like capacitors, that can store a dangerous electrical charge even when the appliance is unplugged.
Manufacturer safety guidelines universally stress this point for user protection.
Once unplugged and safe to approach, give the exterior a good look. Are there any obvious signs of damage? Is the door closing properly and latching securely?
Sometimes, a simple obstruction under the door, or a slightly ajar door, can cause rattling or prevent the microwave from operating correctly, leading to unusual sounds. Also, check the turntable and roller ring. Is the glass tray seated correctly?
Is the roller ring clean and in place? A dislodged roller or a bent track can easily cause grinding or rattling.
- Unplug the unit: Always disconnect power before inspection.
- Check the door: Ensure it closes fully and latches.
- Inspect turntable: Make sure the glass tray and roller ring are seated properly and clean.
- Look for obvious damage: Check the exterior casing for dents or cracks.
Step 2: Listen Closely – Pinpointing the Noise
Now that it's unplugged, you can't directly test the sounds. But before you plug it back in for a quick test, try to recall exactly when the noise happened. Was it when you opened or closed the door?
When you pressed buttons on the control panel? Or only when it was actively heating food? This context is invaluable.
If you decide to plug it back in for a brief test to identify the sound's origin (and only if you feel comfortable doing so after confirming safety precautions), do so cautiously. Stand back and listen. Does the sound seem to come from the front, near the control panel?
From the back, where the vent is? Or from the center, where the turntable is located? This spatial clue can narrow down the possibilities considerably.
For example, a noise near the back likely involves the cooling fan or transformer. Aggregate reviews suggest that precise sound localization is the most effective first step in diagnosis.
- When did it happen? Door open/close, button press, or cooking cycle?
- Where does it seem to come from? Front (controls), back (fan/transformer), or center (turntable)?
- What does it sound like? Buzz, hum, grind, click, rattle? (This is the most crucial clue.)
Step 3: Internal Inspection – What to Look For (When You're Comfortable)
If the external checks and sound pinpointing don't immediately solve the issue, and you're comfortable with basic DIY, you might consider a peek inside. Remember: Only proceed if you're confident and have taken all safety precautions, including ensuring the microwave is unplugged. If you're hesitant about electrical components, it's always best to stop here and consult a professional.
To access the internal components, you'll typically need to remove the outer casing. This usually involves unscrewing fasteners on the back and sides of the unit. Once the cover is off, you can get a clearer view of the internal layout.
Look for anything obviously out of place: loose wires, debris near fan blades, or signs of burnt material around electrical components like the transformer or magnetron. Check if the fan motor is obstructed or if the turntable motor appears to have loose mounting screws. Manufacturer documentation often provides diagrams of component placement, which can be helpful.
- Accessing Internals: Remove outer casing screws (usually at the back).
- Visual Scan: Look for loose wires, dust build-up, or burnt spots.
- Fan Check: Ensure the cooling fan spins freely and isn't blocked.
- Turntable Motor: Verify it's securely mounted and free of debris.
- Component Integrity: Note any signs of corrosion or damage on transformers, capacitors, or the magnetron.
When to Call It Quits: Knowing Your Limits
While many microwave noises can be addressed with simple fixes, some indicate more serious issues that are best left to the pros. If you’ve done your initial checks and the noise persists, or if you're uncomfortable opening up the appliance, it's time to know when to stop. High-voltage components like the capacitor and transformer can hold a dangerous electrical charge even after unplugging.
Working with them requires specialized knowledge and safety equipment.
For example, if you hear loud buzzing combined with arcing (sparks) inside the microwave, it could signal a failing magnetron or an issue with the high-voltage system. According to standards from organizations like UL, which tests electrical safety, such conditions can pose significant risks. Similarly, if the microwave is no longer heating food effectively along with the noise, it points to a deeper problem.
As of 2026, replacement microwaves often cost less than complex repairs, making it a practical decision to consider.
- Loud buzzing with sparks: Indicates severe electrical issues.
- No heating along with noise: Suggests a failure in the core heating components.
- Unfamiliarity with electrical components: Safety first; don't risk shock.
- Cost of repair vs. replacement: Weigh the expense of parts and labor against a new unit.
Fixing It Yourself vs. Professional Help
Deciding whether to tackle a noisy microwave repair yourself or call a service technician often comes down to a few factors: the nature of the noise, your DIY comfort level, and the potential cost. Simple issues like a misaligned roller ring or a loose turntable are usually easy fixes. For these, you might just need a screwdriver and a bit of patience.
You can find guides on how to troubleshoot a rice cooker that won’t turn on, and similar diagnostic steps apply to other appliances.
However, if the noise points to internal electrical components like the magnetron, transformer, or high-voltage capacitor, the situation changes. These parts operate at extremely high voltages, often thousands of volts, making them hazardous. Professional appliance repair services have the training and tools to safely diagnose and replace these parts.
While hiring a technician can cost more upfront, it ensures the repair is done correctly and safely, potentially saving you from greater damage or injury.
| Repair Type | Potential Cause(s) | DIY Difficulty | Professional Cost Estimate (Parts & Labor) | When to Consider |
|---|---|---|---|---|
| Simple Mechanical | Turntable obstruction, roller ring issue, fan debris | Low | $0 – $75 | If you're comfortable removing the outer casing. |
| Electrical (Internal) | Magnetron, transformer, capacitor, fan motor failure | High | $150 – $400+ | If noise persists after simple checks or indicates power issues. |
| Control Panel | Faulty buttons, circuit board issues | Medium to High | $100 – $300+ | If button presses trigger unusual sounds or malfunctions. |
Common Microwave Noise Mistakes to Dodge
When you're trying to fix a noisy microwave, it's easy to make a few missteps that can turn a minor issue into a bigger problem, or worse, a safety hazard. The most critical mistake is not unplugging the appliance before attempting any inspection or repair. As mentioned, the high-voltage capacitor can hold a lethal charge for a significant time after unplugging.
Always confirm the power is disconnected.
Another common pitfall is forcing parts during disassembly or reassembly. Microwave components are often made of plastic or delicate metal. Applying too much pressure can break clips, bend panels, or damage the very parts you're trying to fix.
Also, be careful not to lose small screws or misplace wiring harnesses; keeping track of everything is vital for putting it back together correctly. Trying to bypass safety interlock switches is incredibly dangerous and should never be attempted.
- Forgetting to unplug: This is the biggest safety risk.
- Forcing parts: Leads to broken components and more complex repairs.
- Losing screws or parts: Makes reassembly difficult or impossible.
- Ignoring safety interlocks: These are critical for safe operation and should never be bypassed.
- Not cleaning thoroughly: Debris can cause new noises or impede function.
Frequently Asked Questions About Microwave Sounds
### What does a buzzing sound usually mean?
A buzzing sound often indicates an issue with the high-voltage transformer or the magnetron, the components responsible for generating microwaves. It could also be related to the capacitor or diode in the power supply circuit.
### Can a dirty microwave cause noise?
Yes, a dirty turntable, roller ring, or cooling fan can definitely cause grinding, rattling, or humming noises as these parts struggle to move or operate freely. Cleaning these areas is a good first step.
### Is it safe to use a microwave that is making noise?
It depends on the noise. Simple mechanical noises like a slightly off-kilter turntable might be okay for a short period. However, loud buzzing, grinding, or noises accompanied by sparks or failure to heat indicate a potentially unsafe condition, and the microwave should not be used.
### How long do microwave repairs typically take?
Simple mechanical repairs, like clearing debris from a fan, might take less than an hour. However, if components like the magnetron or transformer need replacing, and you're waiting for parts, the total time could stretch from a few days to a couple of weeks, depending on part availability.
### Can I fix a microwave myself if it's making a grinding noise?
If the grinding comes from the turntable mechanism and you're comfortable unplugging the unit and removing the outer casing, you might be able to fix it. Check for obstructions around the turntable motor or the roller ring. If the grinding sounds like it's from the cooling fan, that might also be accessible for cleaning or checking for obstructions.
Your Next Steps: Getting Back to Quiet Cooking
So, you've listened to the sounds, checked the basics, and maybe even peeked inside. Where you go from here depends on what you found. If you discovered a simple fix, like realigning the turntable or clearing some debris from the fan, congratulations!
You've likely silenced the noise and saved yourself a service call. Just remember to reassemble everything carefully and test it out.
If the noise persists, or if you identified a more serious issue like a failing transformer or magnetron, it's time to make a call. For many, the best course of action is to contact a qualified appliance repair technician. They have the expertise and specialized tools to handle the high-voltage components safely.
Alternatively, if the microwave is older or the repair cost is high, you might consider replacing it, especially since many newer models offer improved efficiency and features.
Ultimately, the goal is to have a safe, functional microwave that doesn't make you jump every time you heat up leftovers. Whether you're a seasoned DIYer or prefer to hand off the technical stuff, understanding these common noises is the first step toward a quieter, more peaceful kitchen.