How to Troubleshoot an Ice Maker
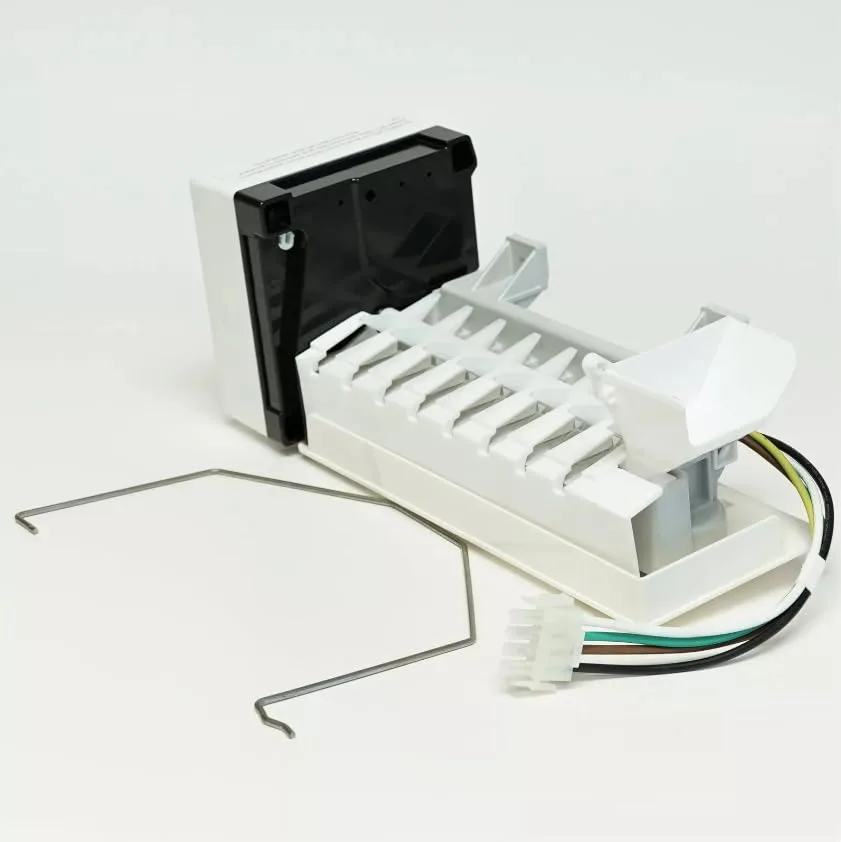
Image source: Bing (Web (fair-use with source credit))
Fridge Ice Maker Not Working? Let's Fix It!
Your fridge's ice maker has suddenly stopped producing cubes, leaving you thirsty for a cold drink. Learning how to troubleshoot an ice maker is a common kitchen skill that can save you time and money on service calls. Most ice maker issues stem from simple mechanical or water supply problems that are usually fixable with basic tools.
Manufacturer specifications indicate that most ice makers require a freezer temperature of 0°F (-18°C) or colder to operate correctly. If your unit isn't maintaining this temperature, it won't freeze water into ice. We'll walk through the most frequent reasons why your ice maker might be on strike, starting with the easiest fixes.
Quick Answer: How to Troubleshoot an Ice Maker
Check for power and freezer temperature. Ensure the water line is connected and on. Inspect for frozen lines, clogged filters, or jammed mechanisms.
Test the water inlet valve and thermistor if issues persist. For deeper problems, consult your refrigerator's manual or a technician.
Quick Checks: Is the Ice Maker Actually On?
Before we get too deep into the mechanics, let's cover the absolute basics. Sometimes, the simplest solutions are overlooked when you're frustrated by a lack of ice.
Is the Freezer Cold Enough?
Your ice maker needs a seriously cold environment to work its magic. Manufacturer specifications confirm that most ice makers function best when the freezer is set to 0°F (-18°C) or colder. If your freezer isn't holding this temperature, the water won't freeze properly, regardless of what the ice maker is doing.
Check your freezer's temperature setting and use a separate thermometer if you suspect it's not accurate. If the freezer is too warm, you'll need to address that issue first, which might involve checking door seals, ensuring vents aren't blocked, or even calling for service if the cooling system itself is failing.
Is the Water Line Connected and On?
This sounds incredibly basic, but it's a surprisingly common oversight. The water supply line that feeds your refrigerator (and therefore your ice maker) needs to be properly connected and the shut-off valve fully open. Trace the line from the wall connection to the back of your refrigerator.
Make sure it's not kinked or pinched, which would restrict water flow. Also, confirm that the valve controlling water flow to the fridge is in the "on" position. These valves are often found under the sink or in the basement, and they can sometimes get bumped or accidentally turned off.
Why Isn't My Ice Maker Making Ice? Common Issues
When those initial checks don't solve the problem, it’s time to dig into the more specific reasons your ice maker might be refusing to cooperate. These typically fall into two main categories: a problem with water getting to the ice maker, or a problem with the ice maker itself.
Problem: No Water Reaching the Ice Maker
This is arguably the most frequent reason for a silent ice maker. If water can't get into the ice maker's tray, it can't freeze.
Frozen Water Line
One of the most common culprits for a lack of water is a frozen supply line. This can happen if the water line running from the inlet valve to the ice maker freezes inside your refrigerator's freezer compartment or behind the unit. This is particularly prevalent in colder homes or if the freezer's temperature fluctuates significantly.
As the water freezes, it creates a blockage, preventing any new water from reaching the ice maker.
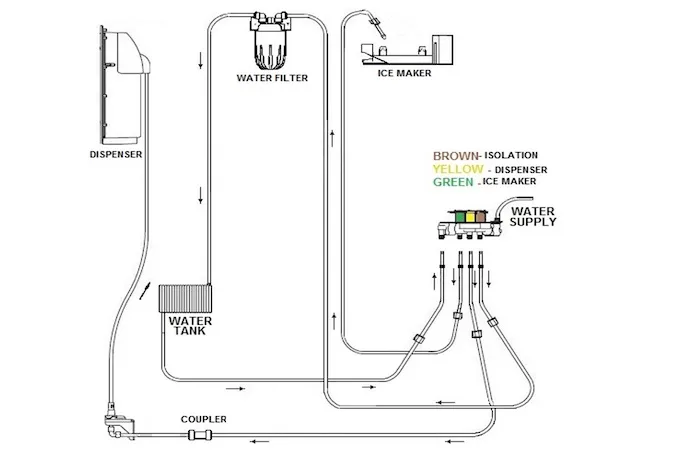
Image source: Bing (Web (fair-use with source credit))
Clogged Water Filter
If your refrigerator has a water filter, a clogged filter is a prime suspect for low or no water flow to the ice maker. Over time, these filters trap sediment, minerals, and other impurities from the water. Once the filter reaches its capacity, it can significantly restrict water pressure.
Manufacturer recommendations often suggest replacing water filters every six months, but this can vary based on water quality and usage. A severely blocked filter can effectively shut off the water supply to the ice maker.
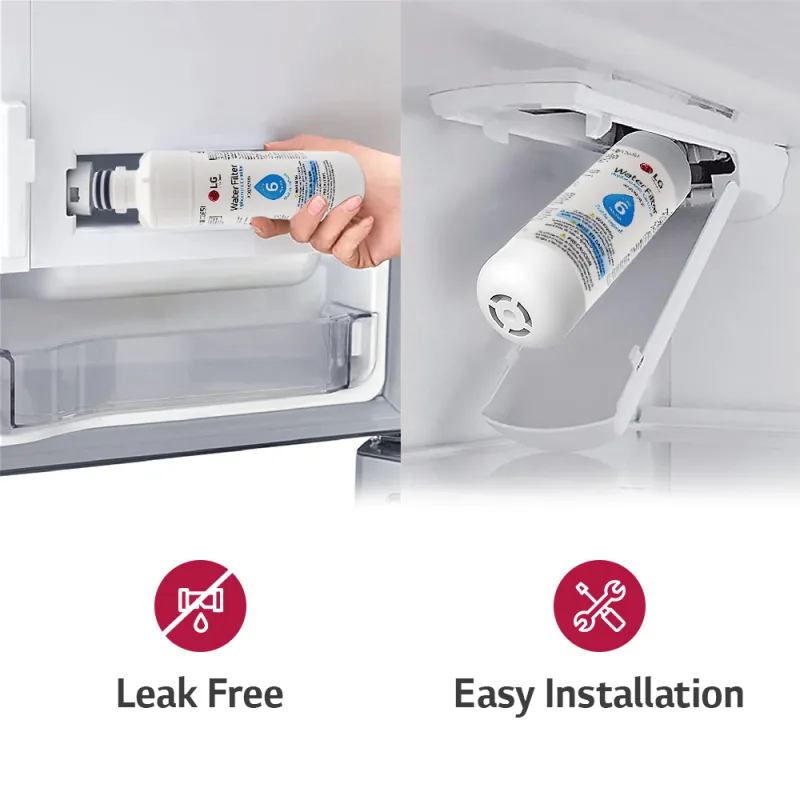
Image source: Bing (Web (fair-use with source credit))
Inlet Valve Problems
The water inlet valve is the component that controls water flow into the refrigerator. It’s usually an electrically controlled valve connected to your home's water supply. If this valve fails, it won't open to allow water into the fridge, or it might not open fully, resulting in reduced water flow.
You might sometimes hear a faint buzzing sound from the valve if it's trying to open but is stuck. If the valve is completely faulty, no water will enter the system.
Step-by-Step Troubleshooting Workflow
Since we're dealing with a process where conditions change based on what you find, a step-by-step workflow is the best way to tackle this. We’ll start with the easiest things to check and move towards more involved solutions.
Action: Check Water Flow to the Ice Maker
The first step in diagnosing a non-ice-making unit is confirming water is actually getting to where it needs to go. This involves a few key checks.
Inspect the Water Filter
If your refrigerator has a water filter, this is the first place to look for flow issues.
- Locate the filter: Most refrigerator water filters are found inside the refrigerator compartment, often at the top right, or sometimes in the base grille at the front. Check your owner's manual if you're unsure.
- Remove and inspect: Carefully remove the filter. If it looks dirty, discolored, or you haven't replaced it in over six months, it's likely the culprit.
- Test without the filter: If you can’t tell visually, you can try running the ice maker without the filter for a short period. If ice production resumes, you've found your problem.
- Replace if needed: Purchase a new, compatible water filter and install it according to the manufacturer's instructions. It's a good idea to run a few gallons of water through the new filter to flush out any air and fine particles before the ice maker starts using it. You can typically find replacement filters from your refrigerator's manufacturer or reputable third-party suppliers.
Trace the Water Line
Following the path of the water can reveal obvious blockages or kinks.
- Locate the water line: This is the flexible tube that connects your home's water supply to the back of the refrigerator.
- Check for kinks: Gently inspect the entire length of the line for any sharp bends, twists, or kinks that could restrict water flow. Straighten any kinks you find.
- Look for ice: In freezing conditions, the line can develop ice blockages. If you suspect this, you may need to disconnect the line and attempt to thaw it. This often involves carefully using a hairdryer on a low setting directed at the frozen section, or allowing the refrigerator to defrost for a period if the freeze is internal. Ensure you've turned off the water supply before disconnecting anything.
Test the Inlet Valve
The water inlet valve is where water enters the refrigerator's system.
- Locate the valve: It's typically found at the back of the refrigerator, near where the water line connects to the appliance.
- Listen for a hum: With the water supply to the fridge turned on, you can sometimes hear a faint humming or buzzing sound when the refrigerator calls for water. If you don't hear anything, the valve might not be receiving power or it could be faulty.
- Check for power: This requires a multimeter and some electrical knowledge. If you're comfortable, you can test if voltage is reaching the valve when the ice maker cycle should be initiating. If voltage is present but the valve doesn't open, the valve itself is likely bad.
- Consult your manual: Your refrigerator's service manual will have specific instructions and diagrams for testing the water inlet valve on your model.
Action: Address Ice Maker Freezing or Jams
If water is getting to the ice maker but it's still not producing, the issue might be within the ice maker mechanism itself.
Clear Ice Jams
Ice jams are one of the most straightforward problems to fix.
- Locate the ice maker: Open the freezer or ice dispenser compartment to access the ice maker.
- Identify stuck ice: Look for any ice cubes that appear to be lodged in the mold, the ejector arm, or the dispensing chute. Sometimes, a cube might not have fully formed or ejected, causing subsequent cycles to fail.
- Carefully remove: Use a plastic utensil or your hand to gently dislodge any stuck ice. Avoid using metal tools, as they can scratch or damage the plastic components of the ice maker. If the ice is firmly frozen in place, you might need to let the area thaw slightly.
- Ensure free movement: After clearing any jams, ensure the ejector arm (the part that pushes ice out of the molds) can move freely.
Examine Thermistor Function
The thermistor is a temperature-sensitive resistor that tells the ice maker’s control board the current temperature.
- Location: The thermistor is typically located within or near the ice maker assembly, often sensing the temperature of the ice mold or the surrounding air.
- Role in function: If the thermistor is faulty, it might send incorrect temperature readings. For example, it could tell the control board the ice maker is already cold enough when it's not, preventing the water fill cycle. Conversely, it might tell the board it's too warm when it's actually cold, causing premature ejection of not-fully-formed ice.
- Testing: Testing a thermistor usually requires a multimeter to check its resistance at different temperatures and comparing those readings against specifications found in your refrigerator's service manual. If its resistance readings are outside the expected range, it needs replacement.
Action: Fix Bad-Tasting or Smelly Ice
Sometimes, ice is made, but it’s not something you’d want in your drink. This usually points to environmental factors or filtration issues.
- Replace the water filter: As mentioned earlier, a saturated or old water filter is a primary cause of off-tasting ice. A new filter can often resolve this quickly.
- Check for odor absorption: Ice is porous and can absorb odors from strongly scented foods stored in the freezer. Ensure items like onions, garlic, or leftover dishes are sealed tightly in airtight containers.
- Clean the ice bin and maker: If the ice bin itself has absorbed odors or has residue, wash it thoroughly with mild soap and water. Rinse well and ensure it’s completely dry before reinserting.
- Flush the system: After replacing a filter or cleaning components, it's a good practice to discard the first few batches of ice. This helps flush out any residual tastes or odors from the water lines and the ice maker itself.
When to Call a Pro: Knowing Your Limits
While many ice maker issues are DIY-friendly, some problems require specialized knowledge or tools. If you've gone through the troubleshooting steps and still have no ice, or if you're uncomfortable performing any of the checks, it's time to consider professional help. Trying to force components or work with electrical parts without proper understanding can lead to further damage or safety hazards.
Mistakes to Avoid During Troubleshooting
- Forcing components: Never use excessive force to remove parts or clear ice jams. This can break plastic pieces.
- Ignoring safety: Always disconnect power to the refrigerator before attempting any internal repairs. Water and electricity are a dangerous combination.
- Using the wrong parts: Ensure any replacement parts, like water filters or the entire ice maker assembly, are compatible with your specific refrigerator model.
- Not checking the simple things: Double-check power, temperature, and water supply before assuming a complex mechanical failure.
Maintenance: Keeping Your Ice Maker Running Smoothly
Once you've successfully troubleshooted and fixed your ice maker, a little routine maintenance can go a long way in preventing future headaches. Think of it like regular upkeep for your car; it keeps things running efficiently and can head off bigger problems. Consistent care ensures your ice maker continues to churn out cubes reliably, as of 2026.
The most crucial aspect of ice maker maintenance is managing your water filter and keeping the system clean. A clogged filter not only impacts ice production but can also lead to poor tasting ice. Beyond that, periodic cleaning of the ice bin and the ice maker components themselves prevents buildup of grime and mold.
How Often Should I Check My Water Filter?
Manufacturer guidelines typically recommend replacing your refrigerator's water filter every six months. However, this can vary based on your local water quality and how much water your household uses. If you notice a decrease in water pressure to your dispenser or ice maker, or if your ice starts tasting or smelling off, it's a good indicator that the filter needs immediate replacement, even if it hasn't reached the six-month mark.
Keeping a spare filter on hand can save you from an ice-making emergency.
Cleaning the Ice Bin and Ice Maker Mechanism
The ice bin and the ice maker assembly can accumulate residue and potentially develop mold or mildew over time, especially if there's residual moisture.
- Remove and wash the ice bin: Most ice bins can be easily removed from the freezer compartment. Wash them thoroughly with warm, soapy water. Rinse them well to ensure no soap residue remains, as this can affect ice taste.
- Dry completely: It's essential to dry the ice bin completely before putting it back. Any lingering moisture can lead to premature refreezing or promote mold growth.
- Wipe down accessible parts: While the bin is out, use a damp cloth to wipe down any accessible parts of the ice maker mechanism itself. Be gentle and avoid spraying water directly onto electrical components.
- Sanitize if needed: For deeper cleaning or if you suspect mold, a mild solution of vinegar and water can be used for wiping, followed by a thorough rinse and drying.
Flushing the Water System
After replacing a water filter or if you've experienced taste issues, it's a good idea to flush the water system. This involves dispensing several cups of water from your refrigerator's water dispenser (if applicable) or discarding the first few batches of ice your ice maker produces. This process helps clear out any air bubbles, fine sediment from the new filter, or lingering tastes from the water lines.
This ensures that your next batch of ice is fresh and clean.
FAQ: Your Ice Maker Questions Answered
### How long should it take for a new ice maker to start producing ice?
It typically takes anywhere from 12 to 24 hours for a new or recently serviced ice maker to produce its first batch of ice. This allows sufficient time for the water line to fill and the freezer to reach the optimal freezing temperature.
### Can I bypass the water filter if I don't want to use one?
While you can technically bypass or remove the water filter, it's generally not recommended. A filter removes impurities that can affect the taste of your ice and, more importantly, can build up sediment and mineral deposits within the ice maker and water lines, potentially causing clogs and damage over time.
### My ice maker is making hollow ice cubes. What's wrong?
Hollow ice cubes, also known as "belly-buttoned" cubes, usually indicate a problem with the water fill. This could be due to low water pressure, a partially clogged water filter, or an issue with the water inlet valve not allowing enough water into the ice mold.
### How often should I clean my ice maker?
It’s a good practice to clean your ice maker and ice bin every six months, or whenever you replace your water filter. This helps prevent odor absorption and ensures hygienic ice production.
### Is it worth repairing a faulty ice maker, or should I replace it?
For many refrigerators, replacing the entire ice maker assembly is often more cost-effective and less time-consuming than trying to repair individual components if a major part like the motor fails. However, simple issues like clogged filters or minor jams are definitely worth fixing yourself.