How to Fix an Ice Maker Not Making Ice
No ice in your drinks? You're probably wondering how to fix an ice maker not making ice, and thankfully, it's often a fixable problem. Many common issues stem from simple blockages or settings that can be resolved with a bit of DIY know-how.
While some ice makers can produce over 25 pounds of ice per day, according to manufacturer specifications, a sudden stop means you're missing that essential chill. Let's dive into the most likely reasons your ice maker has gone quiet and what you can do about it.
Quick Answer
To fix an ice maker not making ice, first check for power and a clear water supply line. Ensure the shut-off arm or sensor isn't stuck, and the freezer temperature is low enough (around 0°F or -18°C). If these are clear, a clogged water filter or a frozen water line are the next most common culprits to address.
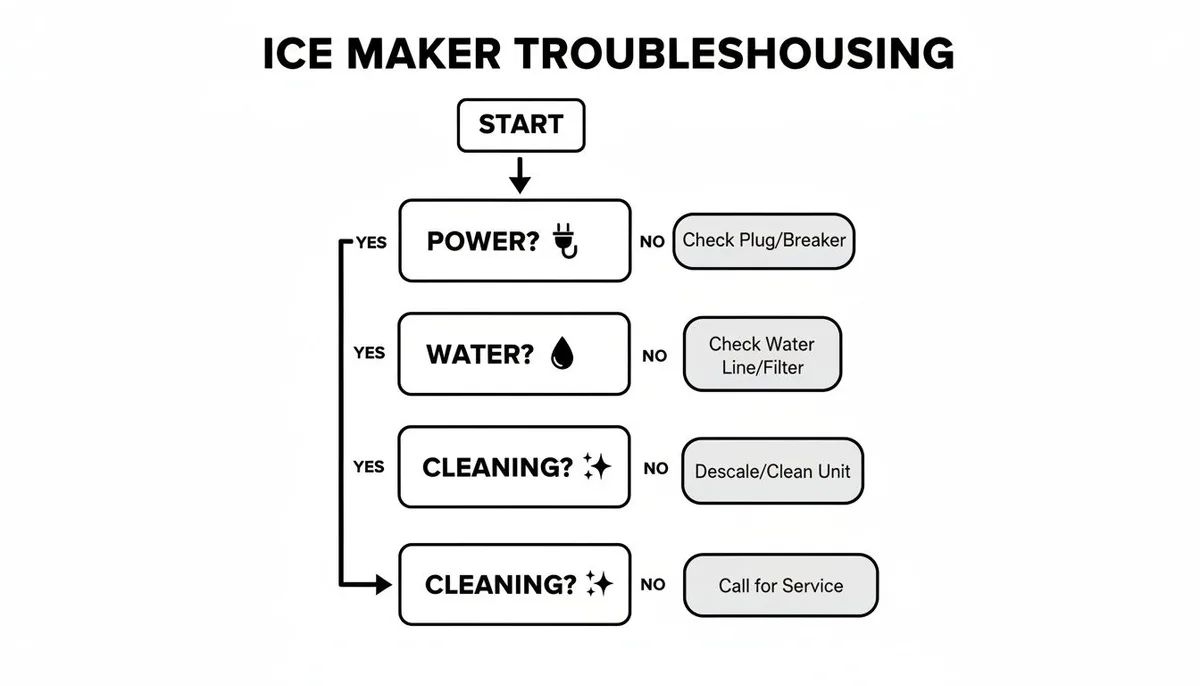
Why Your Ice Maker Isn't Making Ice: A Troubleshooting Workflow
When your ice maker grinds to a halt, it’s usually not a sign of a major component failure, but rather a specific issue that’s preventing ice production. Think of it like a puzzle; each piece needs to be in place for the whole system to work. We'll walk you through a logical sequence of checks, starting with the simplest and most common problems, before moving on to more involved steps.
This workflow approach helps you pinpoint the exact cause and apply the right solution, saving you time and potential repair costs.
Quick Checks: Is It Really Broken?
Before you start pulling apart panels or calling for service, let's cover the absolute basics. Sometimes, the solution is surprisingly simple, and you can avoid a lot of unnecessary work. These initial checks ensure the ice maker is even supposed to be working right now.
- Is the ice maker turned on? Most refrigerator ice makers have a switch or a sensor arm that needs to be in the 'on' position. For standalone units, check the power button or any ice-making mode settings.
- Is the freezer cold enough? Ice makers require a consistently cold environment, typically around 0°F (-18°C). If your freezer isn't reaching this temperature, the ice maker won't cycle. Check your freezer's temperature setting and make sure the door is sealing properly.
- Is the water supply connected and turned on? For refrigerators with ice makers, ensure the water line is properly connected to both the fridge and the house water supply. Check that the shut-off valve for the water line is fully open. Standalone units need to be filled with water to their indicated level.
The Most Common Culprits: Starting Your Diagnosis
If the initial quick checks don't reveal an obvious fix, it's time to dig a little deeper. These are the issues our research indicates cause the vast majority of ice-making failures. Addressing them systematically will get you back to a steady supply of cubes.
Power & Water Supply Issues
This is where most problems begin. Without sufficient power or water, your ice maker simply can't do its job. For refrigerator models, this often means a problem with how water gets from your tap to the machine itself.
Refrigerator Models:
- Water Line Connection: The ice maker connects to your home’s water supply via a thin tube, usually found behind the refrigerator. Make sure this tube isn't kinked, crushed, or disconnected. A kinked line restricts water flow, preventing the ice maker from filling its mold.
- Water Inlet Valve: This is the valve that controls water flow into your refrigerator and subsequently to the ice maker. If it's faulty or clogged, it won't allow water through. You might hear a humming sound if it's trying to open but can't.
- Power Supply: Ensure the refrigerator itself is plugged in and receiving power. If the refrigerator is working, the ice maker is getting power too, but a tripped breaker could affect both.
Standalone Ice Makers:
- Power Cord and Outlet: Verify that the power cord is securely plugged into a working electrical outlet. Try plugging another small appliance into the same outlet to confirm it has power.
- Water Reservoir: These units typically have a built-in water reservoir. Ensure it's filled to the proper level as indicated by the manufacturer. Many units have a sensor that prevents operation if the water level is too low.
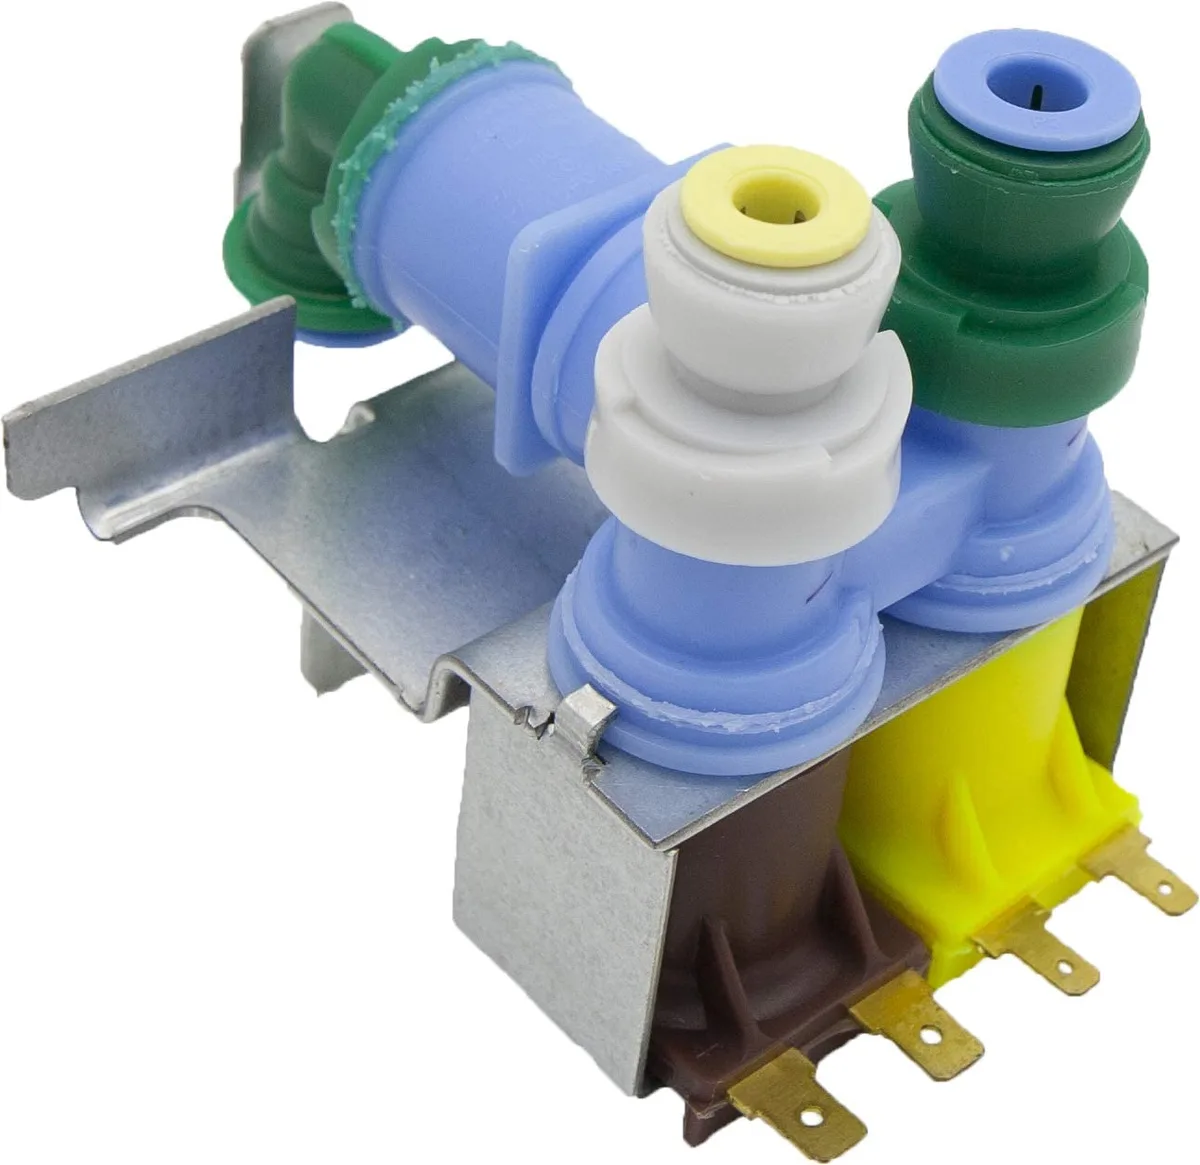
Frozen Lines & Water Inlet Valve Problems
A frozen water line is a frequent offender, especially in colder climates or if your freezer temperature fluctuates. When water freezes inside the line, it blocks the flow to the ice maker. Similarly, issues with the water inlet valve can mimic this problem.
Frozen Water Line: This often happens at the point where the water line enters the freezer compartment or where it connects to the ice maker itself. The cold air inside the freezer can cause this to freeze over time, especially if the freezer door isn't sealing correctly or if there's a temperature issue.
- Symptoms: You might hear gurgling sounds as water struggles to get through, or no water at all. Ice production will halt completely.
- Solution: The simplest way to fix this is to allow the ice maker and the surrounding area to defrost. You can speed this up by turning off the ice maker and freezer, leaving the doors open for a few hours, and placing towels to catch melting water. Once defrosted, monitor it closely. If it refreezes quickly, there might be a persistent temperature problem or an issue with the water inlet valve not shutting off completely, allowing a small trickle that freezes.
Water Inlet Valve Malfunction: The water inlet valve is an electrically controlled solenoid that opens to allow water into the ice maker when needed and closes when the bin is full or the cycle is complete. If this valve fails, it can cause a variety of issues.
- Won't Open: If the valve doesn't open, no water will reach the ice maker, leading to no ice production.
- Won't Close: Conversely, if it stays open, it can lead to overfilling the ice bin or, more critically, a continuous trickle of water that can freeze and create a blockage in the water line. This is especially true for refrigerator models where the valve is located outside the direct freezing environment of the freezer.
Temperature & Sensor Glitches
Ice makers rely on precise temperature control and functional sensors to operate correctly. If the freezer isn't cold enough, or if a sensor is malfunctioning, it can prevent ice from forming or the unit from even starting its cycle.
- Freezer Temperature Too High: As mentioned, ice makers need a very cold environment, ideally around 0°F (-18°C). If your freezer temperature is higher, the water won't freeze efficiently, or at all. This could be due to a faulty thermostat, a malfunctioning defrost system, or a door seal that's allowing warm air in. Check your freezer's internal temperature with a thermometer if you suspect this is the issue.
- Defrost System Issues: Most refrigerators have an automatic defrost system that prevents ice buildup on the evaporator coils. If this system fails (e.g., a faulty defrost heater, thermostat, or timer), excessive frost can form. This frost can block airflow to the freezer, making it run constantly but not cool efficiently, or it can directly interfere with the ice maker's operation by freezing components.
- Ice Maker Sensor or Shut-off Arm: Refrigerator ice makers have a mechanism to stop production when the ice bin is full. This is typically a metal wire arm that physically pushes up a switch, or an optical sensor. If this arm is bent, stuck in the 'up' position, or if the sensor is dirty or faulty, it can trick the ice maker into thinking the bin is full when it's not, or prevent it from starting a cycle at all. Ensure this arm can move freely and is in the down position when you want ice.
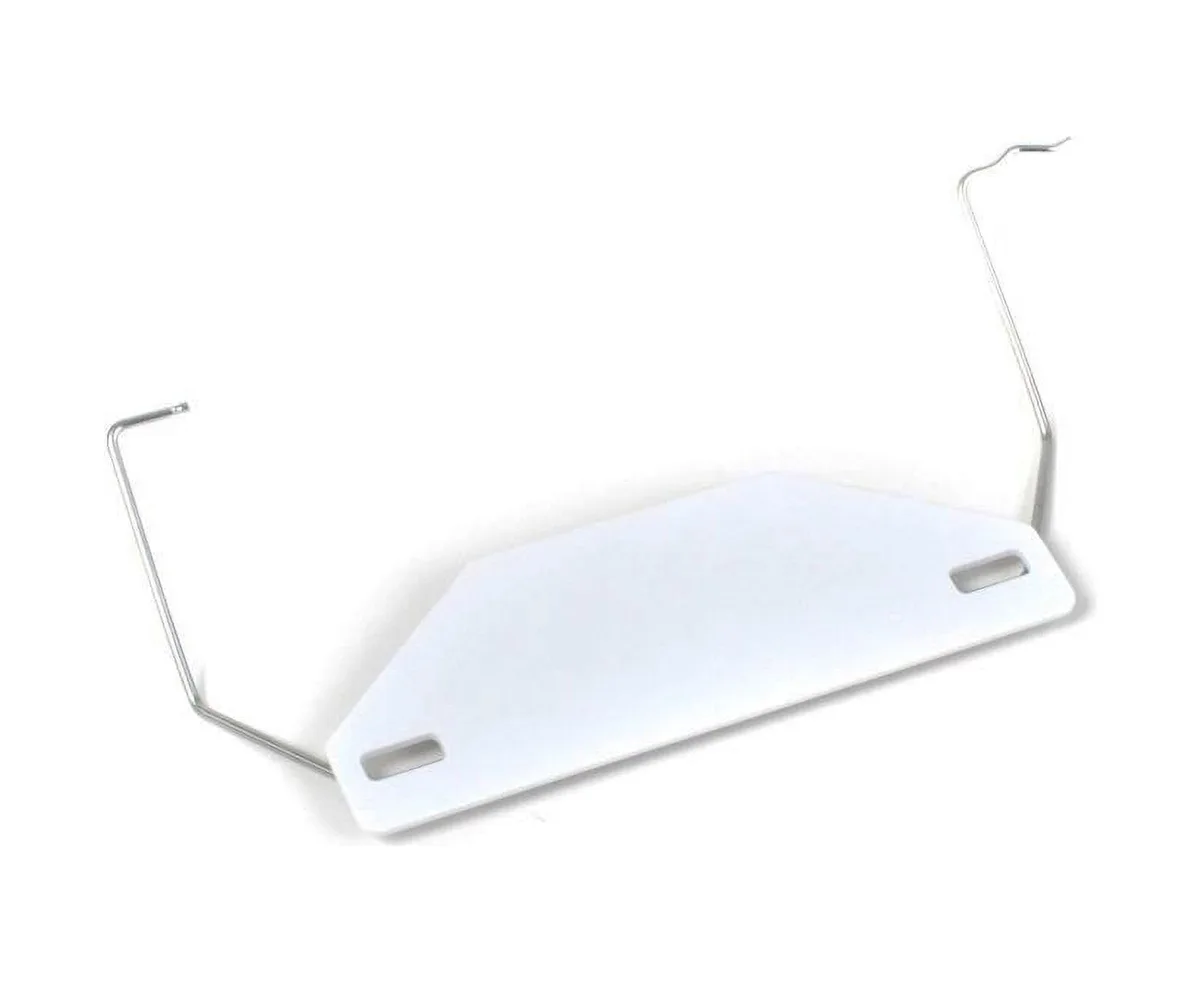
Checking the Ice Maker Shut-off Arm/Sensor
This is a straightforward check that can often resolve the problem quickly. The shut-off arm, or its electronic sensor counterpart, is designed to tell the ice maker when to stop producing ice, preventing overflow. If this mechanism is stuck or misaligned, it will halt ice production.
- Location: On refrigerator ice makers, you'll find this arm extending from the ice maker unit itself. It usually swings up as the ice bin fills. Some newer models use an infrared sensor, which is a small optical lens on the ice maker unit.
- The Problem: If the arm is bent down too far or stuck in the 'up' position, it signals the ice maker that the bin is full, even if it's empty. For optical sensors, dust or ice buildup can interfere with the signal.
- The Fix:
- For Arm Shut-offs: Gently try to move the arm up and down. If it feels loose or stuck, ensure it's in the down position. If it’s bent, you can carefully try to straighten it, but be gentle as they can be brittle.
- For Optical Sensors: Clean the sensor area with a soft, dry cloth. You can also try wiping it with a slightly damp cloth and then drying it thoroughly. Ensure there's no ice buildup around the sensor.
- Testing: After adjusting or cleaning, give the ice maker a few hours to see if it starts producing ice. You may need to reset the ice maker by turning it off and on again, or by unplugging the refrigerator for a minute.
Cleaning the Ice Maker Assembly
Over time, mineral deposits from your water can build up within the ice maker assembly, affecting its performance. Regular cleaning is a key part of maintenance and can prevent many common issues, including slow or no ice production.
- Why Clean? Mineral scale, often calcium and magnesium deposits, can clog small water passages, interfere with moving parts, and even affect the taste of your ice.
- For Refrigerator Ice Makers:
- Turn off the ice maker: Locate the shut-off arm or switch and put it in the 'off' position. Unplug the refrigerator to be safe.
- Remove the ice bin: Slide out the ice bin and empty it.
- Access the ice maker: You may need to remove a front panel or cover, depending on your model. Consult your owner's manual if unsure.
- Clean the unit: Use a soft cloth or sponge dampened with a mild solution of water and white vinegar (a 1:1 ratio is usually effective) or a commercial ice maker cleaner. Gently wipe down the entire ice maker assembly, including the mold and any ejector arms. Avoid getting excessive moisture into electrical components.
- Rinse: Wipe down with a clean, damp cloth to remove any vinegar residue.
- Dry: Allow the assembly to air dry completely or wipe it with a dry cloth.
- Reassemble and power on: Reinstall the ice bin, replace any panels, plug the refrigerator back in, and turn the ice maker back on.
- For Standalone Ice Makers:
- Turn off and unplug: Switch off the unit and unplug it.
- Drain water: Most standalone units have a drain plug or mechanism. Drain all water from the reservoir and any internal tubing.
- Clean reservoir and ice bin: Wash the water reservoir, ice bin, and any removable parts with warm, soapy water or a mild vinegar solution. Rinse thoroughly.
- Wipe down exterior and interior: Use a damp cloth to clean the exterior and any accessible interior surfaces. For stubborn mineral buildup inside, a soft brush might be helpful.
- Dry: Ensure all parts are completely dry before reassembly.
- Reassemble and power on: Put everything back together, plug it in, and refill the reservoir.
For both types, follow any specific cleaning instructions found in your appliance's user manual. Manufacturer specifications often recommend cleaning every 3 to 6 months, depending on water hardness.
Step-by-Step: Fixing a Refrigerator Ice Maker That Won't Work
When your refrigerator's ice maker stops producing, it can be frustrating, especially on a hot day. Unlike standalone units, refrigerator ice makers are integrated systems, meaning their issues can sometimes be linked to the refrigerator's overall function. We'll walk through the common diagnostic steps specific to these models.
Checking the Ice Maker Shut-off Arm/Sensor
This is a straightforward check that can often resolve the problem quickly. The shut-off arm, or its electronic sensor counterpart, is designed to tell the ice maker when to stop producing ice, preventing overflow. If this mechanism is stuck or misaligned, it will halt ice production.
- Location: On refrigerator ice makers, you'll find this arm extending from the ice maker unit itself. It usually swings up as the ice bin fills. Some newer models use an infrared sensor, which is a small optical lens on the ice maker unit.
- The Problem: If the arm is bent down too far or stuck in the 'up' position, it signals the ice maker that the bin is full, even if it's empty. For optical sensors, dust or ice buildup can interfere with the signal.
- The Fix:
- For Arm Shut-offs: Gently try to move the arm up and down. If it feels loose or stuck, ensure it's in the down position. If it’s bent, you can carefully try to straighten it, but be gentle as they can be brittle.
- For Optical Sensors: Clean the sensor area with a soft, dry cloth. You can also try wiping it with a slightly damp cloth and then drying it thoroughly. Ensure there's no ice buildup around the sensor.
- Testing: After adjusting or cleaning, give the ice maker a few hours to see if it starts producing ice. You may need to reset the ice maker by turning it off and on again, or by unplugging the refrigerator for a minute.
Cleaning the Ice Maker Assembly
Over time, mineral deposits from your water can build up within the ice maker assembly, affecting its performance. Regular cleaning is a key part of maintenance and can prevent many common issues, including slow or no ice production.
- Why Clean? Mineral scale, often calcium and magnesium deposits, can clog small water passages, interfere with moving parts, and even affect the taste of your ice.
- For Refrigerator Ice Makers:
- Turn off the ice maker: Locate the shut-off arm or switch and put it in the 'off' position. Unplug the refrigerator to be safe.
- Remove the ice bin: Slide out the ice bin and empty it.
- Access the ice maker: You may need to remove a front panel or cover, depending on your model. Consult your owner's manual if unsure.
- Clean the unit: Use a soft cloth or sponge dampened with a mild solution of water and white vinegar (a 1:1 ratio is usually effective) or a commercial ice maker cleaner. Gently wipe down the entire ice maker assembly, including the mold and any ejector arms. Avoid getting excessive moisture into electrical components.
- Rinse: Wipe down with a clean, damp cloth to remove any vinegar residue.
- Dry: Allow the assembly to air dry completely or wipe it with a dry cloth.
- Reassemble and power on: Reinstall the ice bin, replace any panels, plug the refrigerator back in, and turn the ice maker back on.
- For Standalone Ice Makers:
- Turn off and unplug: Switch off the unit and unplug it.
- Drain water: Most standalone units have a drain plug or mechanism. Drain all water from the reservoir and any internal tubing.
- Clean reservoir and ice bin: Wash the water reservoir, ice bin, and any removable parts with warm, soapy water or a mild vinegar solution. Rinse thoroughly.
- Wipe down exterior and interior: Use a damp cloth to clean the exterior and any accessible interior surfaces. For stubborn mineral buildup inside, a soft brush might be helpful.
- Dry: Ensure all parts are completely dry before reassembly.
- Reassemble and power on: Put everything back together, plug it in, and refill the reservoir.
For both types, follow any specific cleaning instructions found in your appliance's user manual. Manufacturer specifications often recommend cleaning every 3 to 6 months, depending on water hardness.
Replacing the Water Filter
Many modern refrigerators equipped with ice makers also feature a water filter. This filter cleans the water before it reaches the ice maker and water dispenser, improving taste and preventing sediment buildup. A clogged filter can severely restrict water flow, leading to slow ice production or no ice at all.
- Location: Water filters are typically found inside the refrigerator compartment, often behind a panel at the bottom, or in the base grille at the front of the refrigerator. Check your owner's manual for the exact location.
- Symptoms of a Clogged Filter: Reduced water pressure at the dispenser, slow ice production, or no ice at all. You might also notice a change in the taste or smell of the ice and water.
- Replacement Process:
- Purchase the correct filter: Ensure you have a replacement filter that is compatible with your specific refrigerator model. Using the wrong filter can cause leaks or poor performance.
- Turn off water supply (recommended): For some models, it's advisable to turn off the main water supply valve to the refrigerator before replacing the filter.
- Remove the old filter: Most filters have a push-button release or a twist-and-pull mechanism. Follow your manual's instructions carefully to avoid spills. Be prepared for a small amount of residual water to drain out.
- Install the new filter: Insert the new filter, ensuring it clicks or twists securely into place.
- Flush the system: After installation, run the refrigerator's water dispenser for several minutes (usually 2-3 minutes or about a gallon of water) to flush out any air and carbon fines from the new filter.
- Reset the filter indicator: Most refrigerators have a filter indicator light or message. You'll need to reset this according to your manual's instructions.
- Filter Lifespan: Water filters typically need replacement every 6 months, though this can vary based on water hardness and usage. Many manufacturers recommend replacement after filtering approximately 200 gallons of water.
Addressing Water Line Freezing
A frozen water line is a common and frustrating issue that can halt ice production entirely. This usually occurs when the water line runs through a particularly cold part of the freezer or if there's an issue with the refrigerator's temperature regulation.
- How It Happens: The water line is typically a thin plastic tube that carries water from your home's supply to the ice maker. If this line passes through an area that drops below freezing for an extended period, the water inside can freeze, creating a blockage. This is more likely if the freezer's temperature is set too low, if the door seal is compromised, or if there's an imbalance in the cooling system.
- Signs of a Frozen Line:
- No water filling the ice maker mold.
- Occasional gurgling sounds from the water line.
- Ice maker may stop producing ice abruptly.
- You might notice frost or ice buildup around where the water line enters the freezer.
- The Solution (Defrosting):
- Turn off the ice maker: Locate the shut-off arm or switch and place it in the 'off' position.
- Turn off the refrigerator: Unplug the refrigerator from the power outlet.
- Open freezer door and ice bin: Allow full access to the ice maker and water line area.
- Use a hairdryer (carefully): Set a hairdryer to a low or medium heat setting and gently direct warm air onto the suspected frozen area of the water line. Do not overheat or use excessive force, as this can damage the plastic tubing or surrounding components. Move the hairdryer constantly.
- Alternative: Warm cloths: You can also use towels soaked in warm water and gently press them against the frozen section of the line.
- Wait and check: Once you believe the ice has melted, wait a few minutes and then try to manually fill the ice maker mold with a small amount of water to see if it flows freely.
- Power back on: Plug the refrigerator back in, turn the ice maker back on, and monitor for ice production over the next 12-24 hours.
- Preventing Refreezing: If the line refreezes quickly, it suggests a persistent temperature problem. Ensure your freezer is set to the correct temperature (around 0°F or -18°C), check that the door seals are clean and forming a tight seal, and make sure there isn't excessive frost buildup within the freezer compartment, which could indicate a defrost system issue.
Fixing a Standalone Ice Maker That Won't Work
Standalone ice makers, the countertop or under-counter units designed purely for ice production, have their own set of common issues. While they share some similarities with refrigerator ice makers, their self-contained nature means troubleshooting often focuses on different components.
- Check Water Reservoir and Fill Level: The most basic check for a standalone unit is ensuring it has enough water. These units rely on a water reservoir that you fill manually. If the water level is below the minimum indicator line, the ice maker won't start its cycle. Always ensure the reservoir is filled appropriately.
- Clean the Condenser Coils: Like refrigerators, standalone ice makers have condenser coils that help dissipate heat. If these coils become dusty or dirty, the unit's efficiency drops significantly. This can lead to it not freezing water properly or taking too long to produce ice, eventually causing it to stop altogether.
- Location: The condenser coils are usually located on the back or underneath the unit.
- Cleaning: Unplug the unit and use a vacuum cleaner with a brush attachment or a specialized coil brush to gently remove dust and debris. Do this every 3-6 months for optimal performance.
- Test the Water Pump/Dispenser: Some units have an internal water pump that moves water from the reservoir to the ice-making mechanism. If this pump is clogged or has failed, water won't reach the freezing area. Similarly, standalone units that dispense ice and water may have issues with their dispensing mechanisms. Listening for the pump running when it should be is a good first step in diagnosis. If you don't hear it, or if it makes a grinding noise, it might need cleaning or replacement.
When to Call a Pro: Knowing Your Limits
While many ice maker issues can be fixed with a bit of DIY effort, it's crucial to recognize when a problem requires professional attention. Attempting repairs beyond your skill level can lead to further damage, void warranties, or even create safety hazards.
- Electrical Issues: If you suspect a problem with the internal wiring, control board, or a faulty motor that you can't easily access or identify, it's best left to a qualified technician. Working with electrical components without proper knowledge or safety precautions can be dangerous.
- Complex Component Failure: Issues like a failed compressor (in some high-end standalone units), a malfunctioning thermostat that consistently reads incorrectly, or a damaged water inlet valve that requires soldering or specialized tools might be beyond the scope of a typical homeowner repair.
- Persistent Problems: If you've gone through the common troubleshooting steps, including defrosting, cleaning, and checking simple mechanical parts, and the ice maker still isn't working, a deeper, more systemic problem may be at play. This could involve internal leaks, refrigerant issues, or complex electronic failures.
- Safety Concerns: If you notice any signs of electrical shorts, unusual smells like burning plastic, or water leaking near electrical components, stop immediately and call for professional help. The cost of a service call is often less than the expense of repairing extensive damage caused by a DIY attempt gone wrong.
- Warranty Considerations: For newer appliances, attempting repairs yourself might void the manufacturer's warranty. Always check your warranty terms before proceeding with any repair. For refrigerator models, the ice maker is often integrated, and issues might be covered under the refrigerator's overall warranty.
Frequently Asked Questions About Ice Maker Woes
Why is my ice maker making hollow cubes?
Hollow ice cubes often indicate a problem with the water fill level or temperature. If the freezer isn't cold enough, the water might freeze too quickly on the outside before the inside solidifies. Alternatively, the water inlet valve may not be filling the mold completely, or the water filter could be severely clogged, reducing flow.
How often should I replace my ice maker's water filter?
Most refrigerator water filters are designed to be replaced every six months, or after filtering approximately 200 gallons of water. However, this can vary depending on your water quality and usage. If you notice a drop in water pressure or a change in ice taste, it might be time for a replacement sooner.
Can I use vinegar to clean my ice maker?
Yes, a mild solution of white vinegar and water (usually 1:1) is a common and effective way to clean ice maker assemblies and remove mineral buildup. Always rinse thoroughly with clean water afterward to remove any residual vinegar taste or smell, and ensure the unit is completely dry before powering it back on.
My ice maker is noisy, what could be wrong?
Noises can stem from various issues. A grinding noise might suggest the auger or ejector arm is stuck or hitting something. Buzzing or humming could indicate the water inlet valve is trying to open but can't, or the water pump is struggling.
Rattling might be due to loose components or ice buildup.
How long does it take for an ice maker to start making ice after fixing it?
After performing troubleshooting steps or repairs, it typically takes 12 to 24 hours for a refrigerator ice maker to produce a full bin of ice. Standalone units may produce ice faster, often within 1 to 3 hours for the first batch, with continuous production thereafter. Ensure the unit has power, water, and is set to the correct mode.
Making Ice Again: What to Do Next
You've gone through the troubleshooting steps, identified the issue, and hopefully, your ice maker is back in action. The key to preventing future problems lies in proactive maintenance. Regularly cleaning the ice maker assembly and replacing the water filter as recommended by the manufacturer will ensure a consistent supply of clean, crisp ice.
For standalone units, keeping the condenser coils clean is just as important.
If, after all these steps, your ice maker still isn't performing, it might be time to consult the appliance's user manual for advanced diagnostics or to contact a qualified service technician. Sometimes, a component failure is unavoidable, and professional repair or replacement is the most efficient path forward. Enjoy that cold drink!