How to Use a Santoku Knife
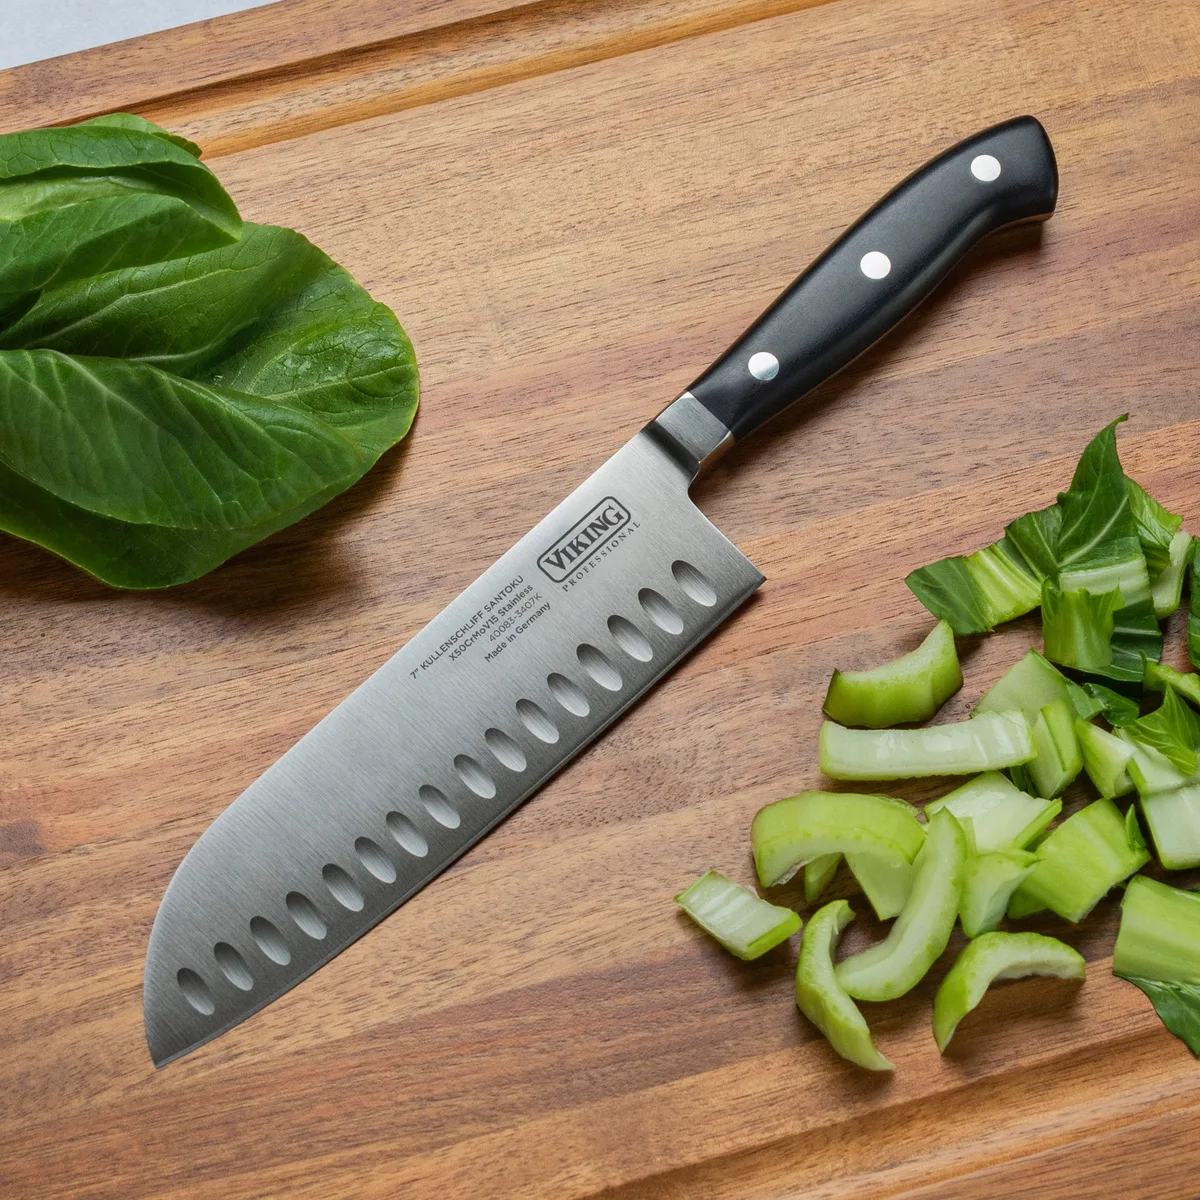
Image source: Bing (Web (fair-use with source credit))
The Santoku knife is a versatile kitchen tool that can make prep work feel effortless. Understanding how to use a Santoku knife correctly isn't just about efficiency; it's also about safety and getting the most out of your blade. These knives, originating from Japan, are designed for a variety of tasks, from slicing delicate fish to dicing robust vegetables.
Mastering this essential kitchen companion involves more than just holding it right. It requires knowing the basic cuts, understanding the unique features of the blade, and practicing good knife maintenance. Per general kitchenware standards, a Santoku blade often features a sharper angle, typically around 10-15 degrees per side, compared to a Western chef's knife.
Quick Answer
To use a Santoku knife, grip it firmly with a pinch grip, keeping your thumb and index finger on the blade. Use a rocking or straight chopping motion for slicing, dicing, and mincing, letting the knife's weight do the work. Always cut on a stable board, keep your fingers tucked under when guiding ingredients, and maintain a sharp edge for safety and efficiency.
Holding Your Santoku: The Right Grip for the Job
Your grip on a Santoku is probably the most crucial aspect of using it safely and effectively. A good hold translates directly to control, precision, and less fatigue, especially when you're doing a lot of chopping. It’s not just about comfort; it’s about leverage and safety.
Why a Good Grip Matters More Than You Think
When you’re holding your Santoku, you want to feel in control of the blade. A slippery or awkward grip means less precision, which can lead to uneven cuts or, worse, an accident. The same applies here.
Proper grip ensures your blade moves where you intend it to.
The Pinch Grip: Your Go-To Hold
The most common and recommended grip for a Santoku knife is the pinch grip. Here’s how it works:
- Your Thumb and Index Finger: Wrap your index finger and thumb around the blade itself, just in front of the handle. Your index finger should be on one side of the blade, and your thumb on the other, creating a firm pinch.
- Your Other Fingers: Your remaining three fingers should wrap comfortably around the handle. This grip gives you excellent control over the blade's angle and movement.
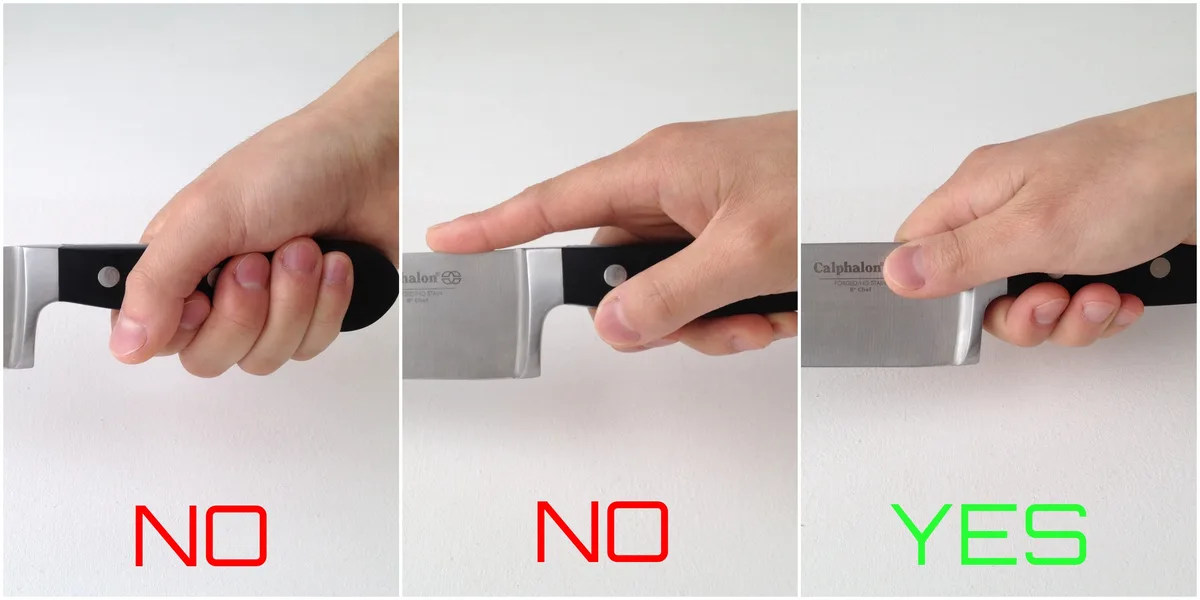
Image source: Bing (Web (fair-use with source credit))
This grip keeps your wrist aligned and allows you to use the full length of the blade with ease. It might feel a little different at first if you're used to holding a knife only by the handle, but it's worth practicing.
Avoiding Common Grip Mistakes
Many people naturally grab the handle and don't extend their fingers to the blade. This is often called a "handle grip." While it feels secure initially, it gives you far less control over the blade's angle and can lead to the knife being less stable. You might also grip too tightly, which can cause hand fatigue and cramping over time.
Focus on a relaxed but firm pinch. Another mistake is not tucking your guiding fingers under. When you're holding the food you're cutting, curl your fingertips inward, creating a "claw" shape.
Your knuckles should then act as a guide for the blade, preventing accidental cuts.
Master the Santoku Blade: Key Cuts Explained
The Santoku knife, translating to "three virtues" or "three uses" in Japanese, is designed for slicing, dicing, and mincing. Its broader blade and often straighter edge compared to a Western chef's knife lend themselves well to specific cutting techniques. Understanding these core uses will help you leverage the knife's full potential.
Slicing Like a Pro
For slicing, you can use a gentle rocking motion or a straight, clean cut. When slicing vegetables like cucumbers or zucchini, a slight forward and downward motion works best. If your Santoku has a Granton edge, it helps food release more easily from the blade, preventing sticking.
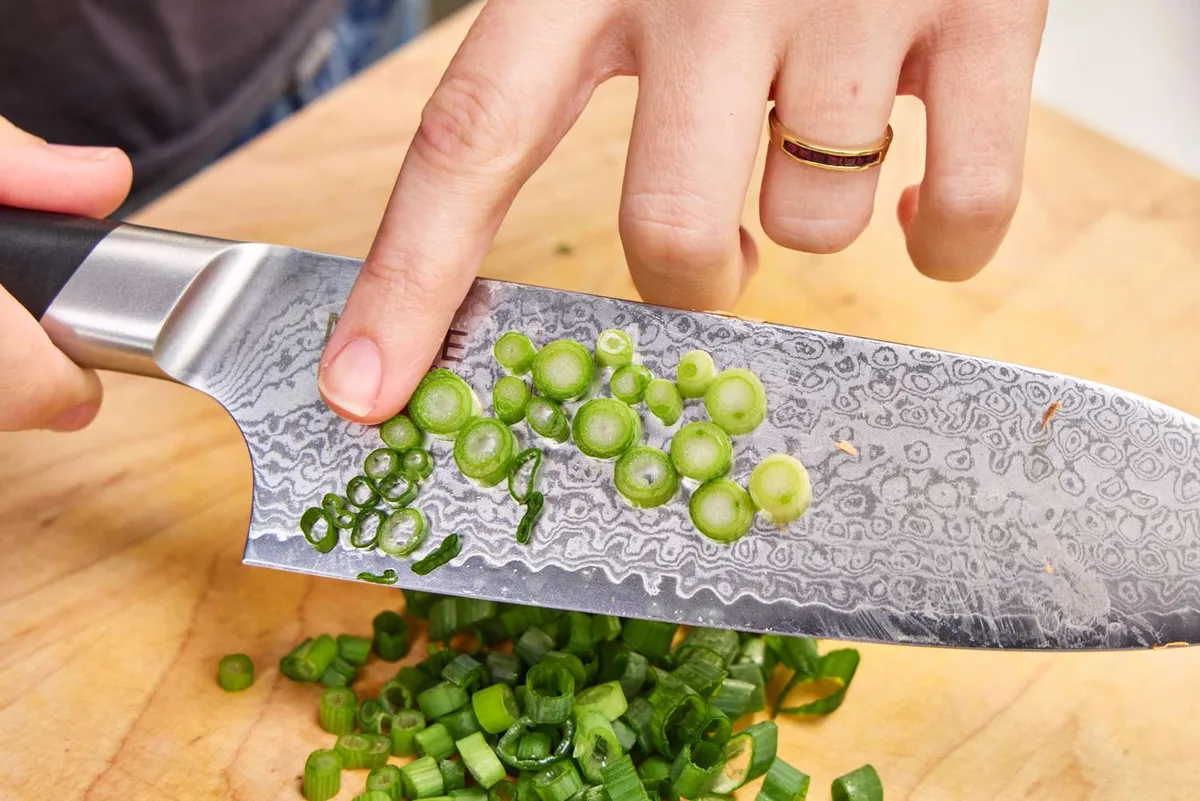
Image source: Bing (Web (fair-use with source credit))
For meats or fish, a smooth, single drawing motion can provide cleaner cuts. The key is to use the full length of the blade where appropriate and maintain a consistent angle. This is where that pinch grip really shines, giving you the fine control needed for precise slices.
Dicing with Precision
Dicing involves cutting ingredients into uniform cubes. You'll typically start by slicing your ingredient, then follow up with cuts perpendicular to the first to create cubes. For example, when dicing an onion:
- Halve and Slice: Cut the onion in half through the root. Lay each half flat and make several parallel slices, stopping just before the root to keep it intact.
- Make Perpendicular Cuts: Now, make cuts perpendicular to your slices, going down towards the cutting board. The root end will hold the onion together, allowing you to dice it uniformly.
- Chop: Finally, chop through the onion to create your dice.
The broadness of the Santoku blade makes it great for gathering chopped ingredients. Once you're done dicing, you can use the flat of the blade to sweep the pieces off your cutting board and into your pan or bowl.
Mincing with Ease
Mincing is about reducing ingredients, like garlic or herbs, into very fine pieces. For garlic, you can smash the cloves with the flat of the blade first to loosen the skin and make it easier to chop. Then, use a rocking motion with the Santoku, keeping the tip of the blade on the board.
Move the heel of the blade up and down in a rhythmic motion, gathering the garlic as you go. For herbs, a similar rocking motion or a rapid up-and-down chop works well. The goal is to create tiny particles.
Keeping Your Santoku Sharp and Ready
A sharp knife is a safe knife. This common saying holds true for your Santoku. A dull blade requires more force to cut, increasing the risk of slipping.
Regular maintenance, including honing and sharpening, is key to keeping your Santoku performing at its best and ensuring your safety in the kitchen. It also makes your cooking prep significantly more enjoyable.
The Art of Honing
Honing is not the same as sharpening; it's a maintenance task that realigns the microscopic edge of your blade. Over time, even a sharp knife's edge can get slightly bent or wavy. Honing uses a steel rod to gently straighten this edge, bringing back its sharpness and cutting efficiency.
- Frequency: It's a good practice to hone your Santoku before or after each use. This quick step takes less than a minute.
- Technique: Hold the honing steel vertically or horizontally. Place the heel of your Santoku blade against the top of the steel at the correct angle (usually 10-15 degrees). Draw the blade down the steel in one smooth motion, from heel to tip. Repeat this on the other side of the blade, alternating sides for a balanced result.
Sharpening for Peak Performance
While honing realigns the edge, sharpening actually removes a small amount of metal to create a new, sharp edge. This process is necessary when honing alone isn't enough to restore sharpness. There are several methods for sharpening a Santoku:
- Whetstones: These are traditional sharpening stones that offer the most control and the best results when used correctly. They come in various grits, with lower grits for repairing significant damage and higher grits for fine-tuning the edge. Using a whetstone requires practice to maintain the correct angle consistently.
- Electric Sharpeners: These are convenient and fast, often featuring multiple slots for different sharpening stages. They are generally easier to use than whetstones but can remove more metal, potentially shortening the knife's lifespan if used too frequently.
- Pull-Through Sharpeners: These are the simplest to use, with pre-set angles. They are quick and effective for basic touch-ups but may not achieve the same level of sharpness as whetstones or high-quality electric sharpeners.
Regardless of the method, always follow the manufacturer's instructions for your specific sharpener. For a Santoku, aim for an angle of around 10-15 degrees per side to match its typical Japanese edge.
Cleaning and Storing Your Knife
Proper cleaning and storage are essential for protecting your Santoku's edge and preventing rust or damage.
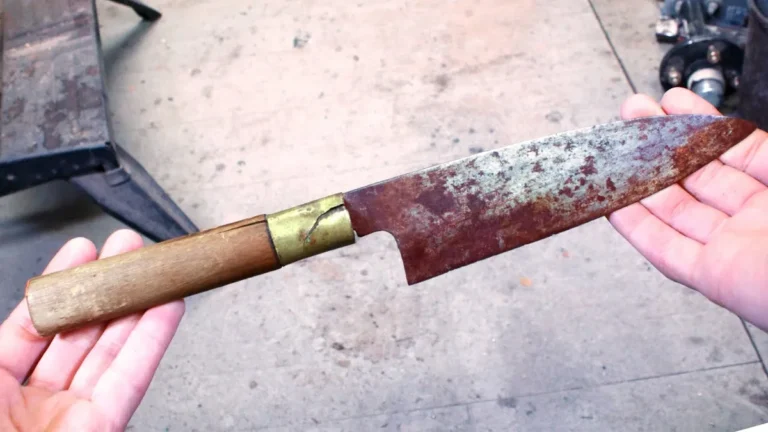
- Cleaning: Never put your Santoku knife in the dishwasher. The high heat, harsh detergents, and bumping against other items can dull the blade, damage the handle, and potentially cause rust or corrosion. Instead, wash it by hand immediately after use with warm, soapy water and a soft sponge.
- Drying: Dry the knife thoroughly with a clean, soft towel immediately after washing. Water left on the blade can lead to rust spots, especially on carbon steel knives.
- Storage: Store your Santoku safely to protect the blade. Options include a knife block, a magnetic wall strip, or blade guards for drawer storage. Avoid tossing it loose in a drawer, where it can bump against other utensils and become damaged or dangerous.
Santoku vs. Chef's Knife: What's the Real Difference?
Many home cooks wonder if they really need both a Santoku and a Western chef's knife, or if one can do the job of the other. While they share common purposes, they have distinct differences in design and how they feel in your hand. Understanding these distinctions helps you choose the right tool for the job and appreciate what each brings to your kitchen.
Here's a quick look at how they stack up:
| Feature | Santoku Knife | Western Chef's Knife |
|---|---|---|
| Blade Shape | Broader, flatter belly, often a rounded tip. | Taller, more curved belly, pointed tip. |
| Edge Angle | Typically a sharper, more acute angle (10-15°). | Generally a wider angle (15-20°). |
| Weight | Often lighter, more nimble. | Can be heavier, more substantial. |
| Cutting Style | Best for straight chopping and slicing. | Excels at a rocking motion for slicing and dicing. |
| Food Release | Often features a Granton edge for better release. | Less common to have a Granton edge. |
| Origin | Japanese | European |
In essence, the Santoku's straighter edge and often lighter weight make it fantastic for precise, straight cuts and repetitive tasks like dicing. You'll find it very efficient for chopping vegetables. The Western chef's knife, with its curved belly, is designed for a rocking motion that's great for mincing and can handle a wider variety of tasks with less effort, especially for cooks who prefer that chopping style.
For many home cooks, owning both offers flexibility, but if you had to pick one, the Santoku is an incredibly capable all-rounder for most everyday prep. If you're setting up a new kitchen, a good 7 Best Dishwasher can handle the cleanup afterwards.
Putting Your Santoku to Work: Common Kitchen Tasks
The "three virtues" of a Santoku, slicing, dicing, and mincing, cover a huge range of everyday kitchen jobs. It’s not just for fancy Japanese cooking; it's a workhorse for preparing all sorts of meals. Knowing what tasks it excels at will help you reach for it more often.
Tackling Veggies: From Onions to Carrots
Vegetables are where the Santoku truly shines. Its broad, sturdy blade is excellent for chopping onions, carrots, bell peppers, and potatoes into uniform pieces for stir-fries, stews, or salads. The straight edge allows for clean cuts through firm vegetables without crushing them.
For softer items like tomatoes, the Santoku can slice cleanly, especially if the blade is sharp. You can also use the blade's side to flatten garlic cloves or scrape ingredients from a cutting board. Its versatility means you can handle most common vegetable prep with just this one knife.
For example, dicing a bell pepper can be done efficiently. Cut the pepper in half, remove the seeds and membrane, then slice it into strips. Stack a few strips and then chop them crosswise into dice.
The Santoku’s width makes gathering these diced pieces simple. If you're preparing a large salad, a good Santoku will make short work of the greens and veggies, speeding up your meal prep.
Handling Meat and Fish
While it's not typically used for heavy butchering like a cleaver, the Santoku is perfectly suited for portioning and preparing proteins. You can slice boneless chicken breasts, trim fat from steaks, or portion fish fillets with precision. The sharper edge common on Santoku knives allows for clean cuts through muscle fibers, resulting in less tearing and a more appealing final product.
When working with raw fish for sushi or sashimi, the thin, sharp blade ensures delicate slices without damaging the flesh.
For instance, when preparing thin slices of chicken for stir-fry, you'd use a slicing motion. Lay the chicken breast flat, hold it steady with your guiding hand (fingers tucked, of course), and use a smooth draw cut with your Santoku. This results in even, thin pieces that cook quickly and uniformly.
Similarly, removing the skin from fish or trimming excess fat from a pork chop is a straightforward task with a well-maintained Santoku. For delicate fish, a sharp Santoku rivals the performance of specialized filleting knives.
Frequent Questions About Santoku Knives
Can I chop bones with a Santoku?
No, you should not chop bones with a Santoku knife. Santoku blades are designed for slicing, dicing, and mincing softer materials like vegetables, fruits, and boneless meats. Attempting to cut through bone can chip, bend, or even break the blade, as it’s not built for that kind of impact or hardness.
For bone-in meats, a heavy-duty cleaver or a specialized butcher knife is the appropriate tool.
Is a Santoku good for left-handed people?
Yes, a Santoku knife can be very good for left-handed people, especially those with a Granton edge. The blade's design is largely symmetrical, and the sharpness is applied evenly to both sides, making it ambidextrous. Unlike some Western knives that might have a more pronounced curve favoring right-handed use, the Santoku's straighter profile and sharper edge angle work well for either hand.
The key is the pinch grip, which is natural for both left and right hands.
How often should I sharpen my Santoku?
How often you sharpen your Santoku depends on how frequently you use it and the materials you cut. For heavy daily use by a professional chef, sharpening might be needed every few weeks or even more often. For a home cook using it a few times a week, sharpening every 2-6 months is a good general guideline.
You can tell it needs sharpening when it starts to drag through ingredients rather than slice cleanly. Regular honing, which realigns the blade's edge, should be done before or after each use to prolong the time between actual sharpenings.
What's that wavy pattern on some Santoku blades?
That wavy pattern you might see on some Santoku blades is called a Granton edge, or sometimes a hollow-ground edge. It’s made up of small indentations or dimples ground into the side of the blade. These hollows create air pockets between the blade and the food being cut, reducing friction and preventing ingredients from sticking to the knife.
This makes slicing softer or moist foods, like potatoes, cucumbers, or cooked meats, much easier and cleaner.