How to Use an Espresso Machine
Making espresso at home can seem like a complex ritual, but at its heart, it’s a straightforward process. Once you understand the fundamental steps and what to look for, you can consistently pull delicious shots that rival your favorite coffee shop. It's all about mastering the technique, from grinding your beans to steaming your milk.
Understanding how to use an espresso machine involves more than just pushing buttons; it’s about observing what's happening in real-time. For instance, manufacturer specifications often indicate that optimal extraction for a double shot should yield around 36-40 grams of liquid espresso from 18-20 grams of coffee grounds, typically within 25-30 seconds. This foundational knowledge is key as we move through the process.
Quick Answer
To use an espresso machine, first preheat it and your portafilter. Grind fresh beans finely, dose and tamp them evenly into the portafilter. Lock it in and start the brew cycle, aiming for 25-30 seconds.
Watch for a steady, honey-like flow. Clean immediately after each shot.
Why Visuals Are Your Best Friend for Espresso
When you're learning how to use an espresso machine, your eyes are arguably your most important tool. It’s not just about following a recipe; it’s about observing what's happening in real-time. The color, the flow, and the texture of the espresso and steamed milk all provide instant feedback on your technique.
Being able to recognize these visual indicators is what separates a good shot from a great one, and it’s far more reliable than just relying on timers alone.
Understanding the Look of a Good Shot
A truly great espresso shot has a distinct visual profile. It starts with a rich, dark stream that gradually lightens in color. You're looking for a viscosity that resembles warm honey or molasses, not watery and thin, nor thick and syrupy.
The presence of a consistent, reddish-brown crema on top is also a key indicator of freshness and proper extraction.
Identifying Key Visual Cues During Brewing
During the brewing process, pay close attention to the initial few seconds. A properly ground and tamped puck will allow water to flow through evenly, creating twin streams from the portafilter spouts. If you see one stream gush out much faster than the other, that often signals an uneven tamp or distribution, which can lead to a sour shot.
As the shot progresses, the color should lighten progressively; a sudden blonding or pale stream means the shot is likely over-extracted.
Image source: Bing (Web (fair-use with source credit))
Step-by-Step: Pulling That Perfect Espresso Shot
This is the core of learning how to use an espresso machine. Each step builds on the last, and getting them right makes all the difference. We'll walk through the entire process, focusing on what to look for visually and tactilely.
Consistency is the name of the game here, and it starts with preparation.
Warming Up Your Machine and Gear
Before you even think about grinding beans, turn on your espresso machine. Manufacturer specifications often recommend at least 15-20 minutes of warm-up time. This isn't just for the boiler; it ensures the group head, portafilter, and even your espresso cup are thoroughly heated.
A cold machine and portafilter will rapidly cool your brew water, leading to under-extraction and a weak, sour shot. Your portafilter should feel warm to the touch before you start.
Grinding, Dosing, and Distributing Your Coffee
This is where the magic truly begins. You need a fine grind, resembling granulated sugar but with a slightly more powdery feel. Aggregate reviews from coffee enthusiasts report that the ideal dose for a double espresso typically falls between 18-20 grams.
Using a scale to measure your beans before grinding ensures accuracy. After grinding, use a distribution tool or a gentle tap on the counter to create an even bed of coffee grounds in the portafilter. This prevents channeling, where water finds easy paths through the coffee, leading to uneven extraction.
Tamping Technique: The Foundation of Your Shot
Tamping is crucial for creating a dense, uniform puck that resists water flow evenly. Place the portafilter on a level surface and apply firm, consistent pressure. The goal is not brute strength, but even compression.
Aim for about 30 pounds of pressure, then give the tamper a slight twist to "polish" the surface. A level tamp is more important than extreme force. A well-tamped puck ensures water pressure is distributed uniformly across all the coffee grounds.
Locking In and Starting the Brew
Once tamped, carefully wipe any stray grounds from the rim of the portafilter. This prevents them from getting caught in the group head seal, which can cause leaks or improper sealing. Firmly lock the portafilter into the group head of your espresso machine.
Then, place your pre-warmed espresso cup(s) onto the drip tray. Start the brew cycle.
Pulling the Shot: What to See
As the pump engages, you should see the first dark, syrupy droplets appear within 5-10 seconds. This is the start of your extraction. The flow should ideally resemble warm honey pouring from a spoon.
For a double espresso, you're generally aiming for 36-40 grams of liquid espresso in about 25-30 seconds. This entire process is a visual cue: if the liquid appears too quickly and looks watery, your grind is likely too coarse. If it drips out extremely slowly or not at all, the grind is too fine, or you've tamped too hard.

Image source: Web (Bing) / hqsoftwarelab.com (Web image (fair-use with source credit))
Troubleshooting: Common Espresso Mistakes and Fixes
Even with the best intentions, your espresso might not turn out perfectly every time. That's completely normal when learning how to use an espresso machine. The good news is that most issues have visual or taste-based cues that tell you exactly what needs adjusting.
Recognizing these problems is the first step to fixing them and improving your shots.
When Your Espresso Tastes Off: Sour vs. Bitter
Taste is your ultimate guide, and it's directly linked to extraction. If your espresso tastes overly sour, sharp, or acidic, it's likely under-extracted. This usually means the water flowed through the coffee too quickly, not extracting enough flavor compounds.
To fix this, try grinding your beans finer. If your espresso tastes bitter, harsh, or burnt, it's probably over-extracted, meaning the water spent too much time dissolving bitter compounds. For this, try grinding coarser or stopping the shot a few seconds sooner.
Espresso Flow Problems: Too Fast or Too Slow
The speed at which espresso flows from the portafilter is a critical visual indicator. If espresso gushes out within 10-15 seconds and looks pale and watery, your grind is too coarse. You'll need to adjust your grinder to a finer setting.
If the espresso only drips out a few dark drops over a long period or does not come out at all, your grind is likely too fine, or your tamp pressure was excessive. In this case, adjust your grinder to a coarser setting. Some machines may also require descaling if low pressure is a persistent issue.
Milk Steaming Struggles: Getting That Silky Texture
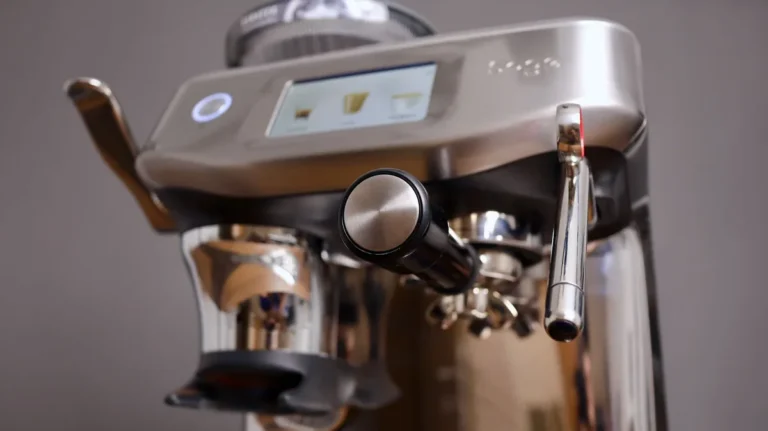
Steaming milk for lattes and cappuccinos is an art form in itself, and visual cues are paramount here too. If you're getting large, bubbly foam instead of smooth, glossy microfoam, you might be introducing too much air for too long, or not submerging the steam wand tip correctly. To achieve silky milk, you need to introduce air briefly at the surface to create foam, then submerge the wand to heat the milk and create a whirlpool effect.
The milk should feel warm to the touch, around 140-155°F (60-68°C), and have a texture that resembles wet paint.
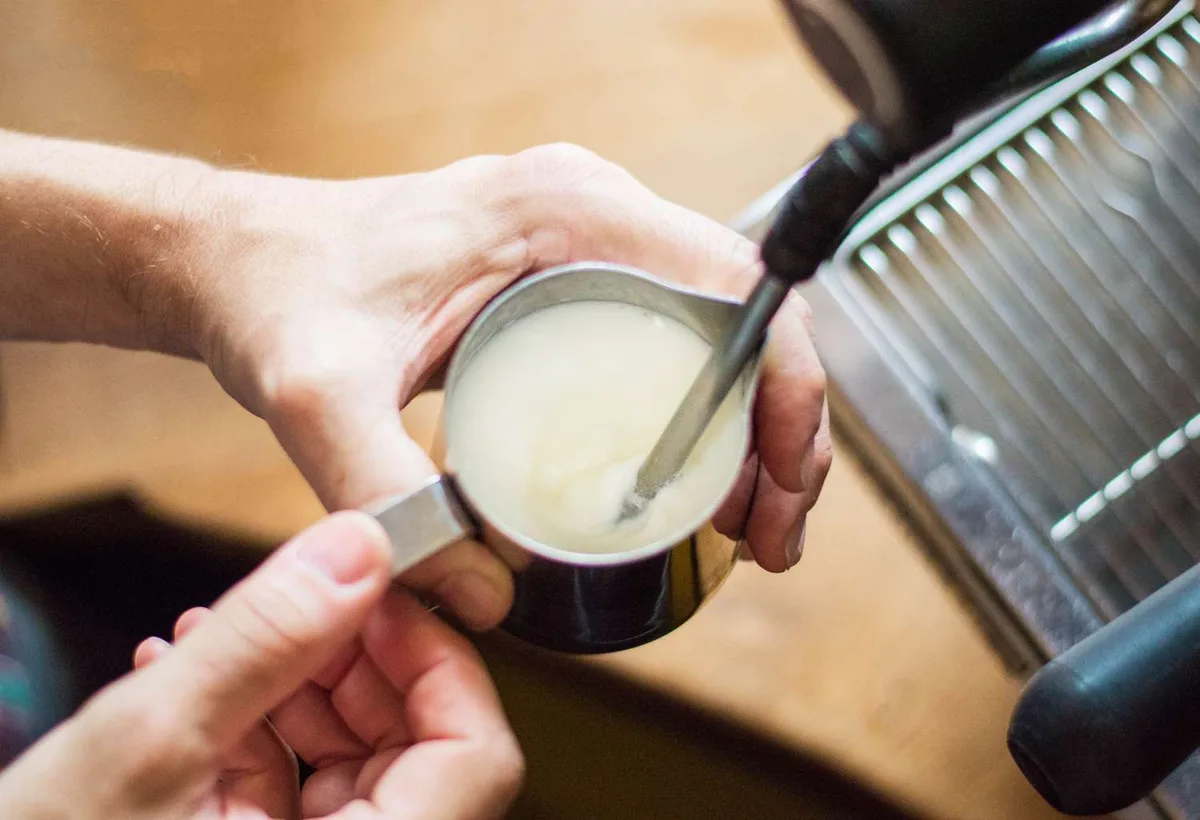
Image source: Bing (Web (fair-use with source credit))
Pro Tips for Better Home Espresso
Once you've got the basic steps down for how to use an espresso machine, a few key elements can significantly elevate the quality of your shots. These aren't complex gadgets, but rather fundamental aspects of the espresso-making process that many home baristas overlook. Focusing on these can make a world of difference.
The Importance of Your Grinder and Fresh Beans
Our research consistently shows that the grinder is the single most impactful piece of equipment after the espresso machine itself. For espresso, you need a grinder capable of producing a very fine, consistent grind. A burr grinder is essential; blade grinders produce an inconsistent powder and chunk mix that leads to uneven extraction.
Paired with this, always use fresh, whole coffee beans. Coffee starts losing its volatile aromatic compounds within minutes of being ground, so grinding right before you brew is non-negotiable for optimal flavor.
How to Dial In Your Grind Size
"Dialing in" refers to the process of adjusting your grinder to achieve the perfect grind size for your specific coffee beans and espresso machine. This is an iterative process. Start by setting your grinder to a medium-fine setting.
Pull a shot and observe its flow rate and taste. If it's too fast and sour, grind finer. If it's too slow and bitter, grind coarser.
This adjustment is typically done in very small increments on your grinder. As of 2026, many modern grinders offer precise micro-adjustments that make this process much easier.
Using a Scale for Consistent Doses
While not strictly mandatory, using a digital kitchen scale to weigh your coffee beans and your espresso output is the most reliable way to achieve consistency. Weighing your dose (e.g., 18-20 grams) ensures you're using the same amount of coffee for every shot. Similarly, weighing the liquid espresso (your yield) helps you control the brew ratio.
For instance, a 1:2 ratio (18g coffee in, 36g espresso out) is a common starting point. This precision removes guesswork and makes it easier to replicate successful shots or troubleshoot problems.
Essential Espresso Machine Maintenance
Keeping your espresso machine in top condition is vital for both the quality of your coffee and the longevity of the machine. Regular cleaning and maintenance are not optional if you want consistent, great-tasting espresso. Neglecting this can lead to mineral buildup, decreased performance, and even damage.
Daily Cleaning Routine
After every use, a few simple steps will keep your machine ready for next time.
- Purge the group head: Run water through the group head for a few seconds to flush out any loose coffee grounds.
- Rinse the portafilter: Knock out the used coffee puck and rinse the portafilter thoroughly under hot water.
- Wipe down steam wand: If you steamed milk, immediately wipe the steam wand with a damp cloth and then purge it again to clear any milk residue.
- Clean the drip tray: Empty and rinse the drip tray as needed.
Periodic Deep Cleaning and Descaling
Beyond daily tasks, espresso machines require deeper cleaning at regular intervals. This often involves using specialized espresso machine cleaning solutions.
- Backflushing: This process uses a blind filter (a portafilter basket without holes) and cleaning solution to force hot water backward through the group head, cleaning internal components. Manufacturer documentation typically recommends this weekly or bi-weekly, depending on usage. You can find guidance on how to clean a coffee maker for general principles.
- Descaling: Mineral deposits from water can build up inside your machine, affecting temperature and pressure. Descaling involves running a descaling solution through the machine's water system. The frequency depends on your water hardness, but it's often recommended every 2-3 months. For general coffee maker descaling, consult resources on how to descale a coffee maker. Neglecting this can lead to how to fix a coffee maker leaking water issues.
Frequently Asked Questions About Home Espresso
How long does setup take for a new espresso machine?
Initial setup typically takes about 30-60 minutes. This includes unboxing, reading the manual, attaching any necessary components like the water reservoir or portafilter handle, and performing an initial cleaning cycle as recommended by the manufacturer.
What is the ideal water temperature for espresso?
The ideal water temperature for brewing espresso generally ranges between 195°F and 205°F (90°C to 96°C). Too cool and you risk under-extraction; too hot and you can scorch the coffee grounds, leading to a bitter taste.
How often should I descale my espresso machine?
Descaling frequency depends heavily on your local water hardness and how often you use your machine. A common recommendation is every 2-3 months, but it's best to consult your machine's manual. Hard water areas may require more frequent descaling.
Can I use tap water in my espresso machine?
While you can use tap water, it's often not recommended due to mineral content that can lead to scale buildup. Filtered water or distilled water (sometimes with added mineral packets specifically for espresso machines) is generally preferred to protect your machine and improve coffee taste.
What's the difference between espresso and regular coffee?
Espresso is made by forcing a small amount of nearly boiling water under pressure through finely-ground coffee beans. This results in a concentrated beverage with a distinct crema layer. Regular coffee is typically brewed using gravity with coarser grounds, yielding a larger volume and less intense flavor.