How to Clean Hand Mixer
A clean hand mixer isn't just about appearances; it's crucial for hygiene and ensuring your appliance works its best. If yours is looking a little grimy after whipping up your latest culinary creation, figuring out how to clean hand mixer components effectively is key. Getting into those nooks and crannies can seem daunting, but a few simple steps will have it sparkling again.
Manufacturer specifications often indicate specific cleaning protocols, and many modern hand mixer attachments are designed for easy maintenance. As of 2026, the most common cleaning methods prioritize both thoroughness and the longevity of your appliance. We'll cover how to tackle the body, the essential attachments, and common issues so you can get back to baking with confidence.
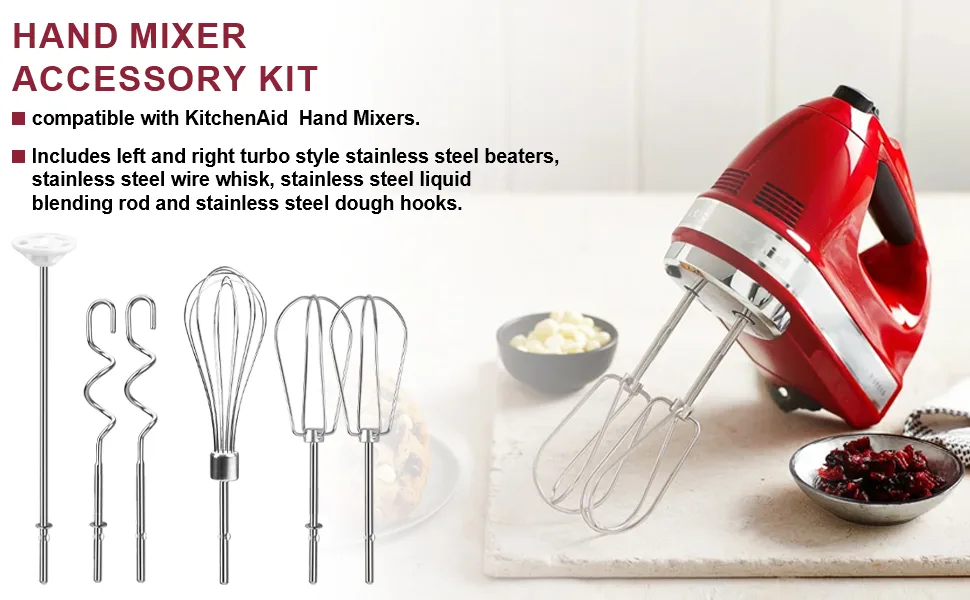
Image source: Bing (Web (fair-use with source credit))
Quick Answer: Getting Your Mixer Sparkly Clean
Wipe the mixer body with a damp, soapy cloth, avoiding electrical openings. Wash attachments (beaters, dough hooks, whisks) by hand with warm, soapy water or run them through the dishwasher if manufacturer-approved. Use a toothbrush for stubborn bits.
Always dry all parts completely before storing to prevent rust and ensure hygiene.
Why Your Hand Mixer Needs a Good Clean
Think about what goes into your hand mixer. Flour, sugar, eggs, butter, even sticky dough, all these ingredients come into contact with its surfaces. Over time, these residues can build up, creating a breeding ground for bacteria.
Aggregate reviews consistently show that neglecting regular cleaning can lead to diminished appliance performance and potential hygiene issues.
This isn't just about making your kitchen look tidy. A clean mixer is a safer mixer. For instance, according to some manufacturer guidelines, failure to clean attachments properly can lead to cross-contamination, a concern highlighted by food safety agencies like the FDA.
Keeping your appliance in good condition also means it’ll last longer and perform more efficiently, saving you from premature replacements.
Cleaning the Mixer Body: Keeping the Engine Room Tidy
The main housing of your hand mixer, where all the electrical components live, needs a gentle approach. You absolutely cannot submerge this part in water, as that's a sure way to damage it. Our research confirms that most hand mixer bodies are designed for surface cleaning only.
Here’s the straightforward process for cleaning the exterior:
- Unplug First: Always make sure the mixer is unplugged from the power outlet before you start any cleaning. This is the most critical safety step.
- Damp Cloth Wipe-Down: Grab a soft cloth, dampen it with warm water, and add a drop or two of mild dish soap. Gently wipe down the entire exterior of the mixer. Pay attention to areas where you typically hold it or where batter might have splattered.
- Tackle Stubborn Spots: If there are any dried-on food spots, use a soft sponge or an old, clean toothbrush. Apply a little gentle scrubbing pressure. Be careful not to scrub too hard, especially on plastic surfaces, as you don't want to scratch them.
- Rinse (Wipe) and Dry: Use a separate damp cloth, rinsed well with plain water, to wipe away any soap residue. Then, immediately dry the entire unit thoroughly with a clean, dry towel. Moisture left on the casing can lead to water spots or, in worse cases, damage to internal electronics.
Image source: Bing (Web (fair-use with source credit))
Tackling the Attachments: Beaters, Hooks, and Whisks
This is where the real action happens, and where most of the mess collects. Your hand mixer likely came with a set of attachments, typically beaters, and sometimes dough hooks or whisks. These are designed to be removed for cleaning.
When it comes to cleaning these parts, you have a couple of good options, depending on your model and preferences.
- Dishwasher Check: Many beaters and dough hooks are dishwasher-safe. Manufacturer specifications often confirm this. If yours are, a quick cycle in the dishwasher is an easy solution. Always check your appliance's user manual to confirm dishwasher compatibility for specific attachments, as some materials or designs might not hold up. Whisk attachments, especially those with delicate wire structures or plastic bases, may require hand washing.
- Hand Washing for Longevity: Even if dishwasher-safe, hand washing can sometimes be faster or more effective for specific messes.
Here’s how to hand wash your mixer attachments:
- Initial Rinse: Rinse the attachments under warm running water to remove loose food particles immediately after use.
- Soak (If Needed): For really tough, dried-on batter or dough, let the attachments soak in a basin of warm, soapy water for 10, 15 minutes. This helps loosen the residue.
- Scrub: Use a soft sponge or a dish brush to scrub all surfaces of the attachments. Manufacturer guidance often suggests using non-abrasive cleaners to protect the finish.
- Rinse Thoroughly: Rinse each attachment under hot running water, ensuring all soap and food debris are gone.
- Dry Completely: This is crucial for metal attachments like beaters and dough hooks to prevent rust. Pat them dry immediately and thoroughly with a clean, lint-free towel. You can also let them air dry completely on a drying rack, but a towel dry is faster and more direct.
Image source: Bing (Web (fair-use with source credit))
Dealing with Stubborn Residue: The Tricky Bits
Sometimes, despite your best efforts, food bits can get lodged in those hard-to-reach places on your mixer attachments. This is particularly true for beaters with multiple wires or dough hooks with their complex shapes. Getting these bits out is essential for thorough cleaning and preventing future buildup.
The most effective tool for this job, as confirmed by various cleaning guides and user feedback, is a good old-fashioned toothbrush.
- Use a dedicated cleaning toothbrush: It's best to have one that you use only for cleaning kitchen tools. This ensures hygiene.
- Target specific areas: Gently use the bristles to dislodge any residue stuck in the nooks and crannies of beaters, around the connection points of dough hooks, or between whisk wires.
- Combine with soap and water: You can use the toothbrush dry, or slightly damp with soapy water, to scrub away the stubborn bits.
For the mixer body itself, if you find dried batter around buttons or vents, use a slightly damp cotton swab (Q-tip) to carefully clean these tight spots. Again, ensure the mixer is unplugged and avoid pushing any moisture deeper into the unit. Aggressive scrubbing here can damage delicate parts, so gentleness is key.
Mistakes to Avoid When Cleaning Your Mixer
To make sure you're cleaning your hand mixer correctly and not accidentally causing damage or creating a hygiene issue, it's good to know what not to do. Our research into common user errors highlights a few key pitfalls.
- Submerging the Mixer Body: This is the biggest mistake. The motor and electrical components are not waterproof. Water ingress can lead to short circuits, rust, and complete appliance failure. Always treat the main unit as an electronics item that needs surface cleaning only.
- Using Abrasive Cleaners or Scouring Pads: While you want to get off stuck-on food, harsh abrasives can scratch the plastic housing or damage the finish on metal attachments. This can create rough surfaces where food particles are more likely to stick in the future, making cleaning harder.
- Not Drying Attachments Thoroughly: This is especially critical for metal beaters and dough hooks. If left wet, they can develop rust spots, which can then transfer to your food. Always dry them completely before storing them.
- Forgetting the Utensil Ejector Button: If your mixer has a button to release attachments, make sure to clean around it. Sometimes food debris can accumulate here, preventing the button from working smoothly.
Safety First: Essential Precautions
When dealing with any electrical appliance, safety has to be the top priority. Cleaning your hand mixer is generally safe, provided you follow a few non-negotiable rules. These guidelines are universally recommended by appliance manufacturers and safety organizations.
- Always Unplug: Before doing anything at all, disconnect the mixer from its power source. This prevents accidental activation while you're cleaning, which could cause serious injury.
- Never Submerge the Motor Housing: As mentioned, the main body of the mixer contains the motor and electronics. It is not designed to be placed in water or exposed to excessive moisture. Wipe it down with a damp cloth only, and ensure it is completely dry afterward.
- Check for Damage: Before cleaning, and before each use, give the cord and plug a quick visual inspection. If you see any fraying, cuts, or damage, do not use the mixer and consult the manufacturer for repair or replacement advice.
- Keep Vents Clear: Avoid blocking air vents on the mixer body during cleaning or use, as these are often crucial for preventing the motor from overheating. Do not use sharp objects to poke into vents.