How to Fix an Espresso Machine
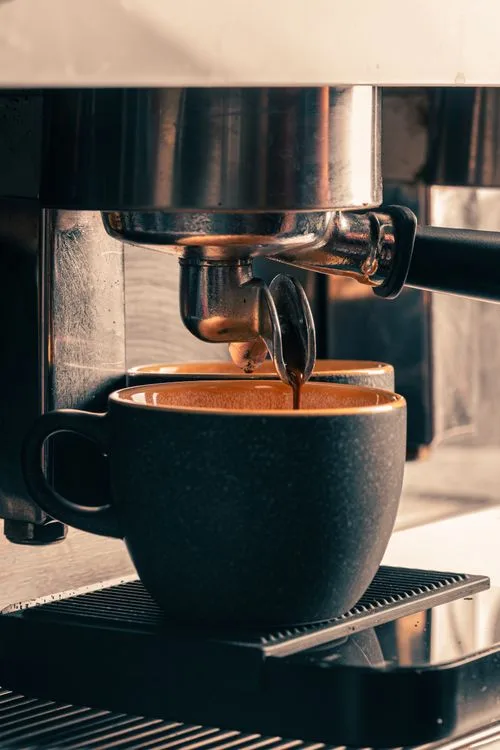
Image source: Bing (Web (fair-use with source credit))
How to Fix Your Espresso Machine: A Troubleshooting Guide
When your espresso machine starts acting up, that dream of a perfect morning brew can quickly turn into a frustrating mess. The good news is, many common espresso machine problems are fixable without needing a technician. You can often get back to crafting those rich shots by understanding a few key components and following a logical troubleshooting process.
Our research indicates that by pinpointing the symptom and working through a series of checks, you can resolve most issues. For instance, manufacturer specifications for standard home espresso machines often cite a typical operating pressure of around 9 bars, and deviations from this can signal a problem. Let's get your machine back to its best.
Quick Answer
Most espresso machine problems can be fixed by troubleshooting common issues like scale buildup or minor blockages. Start by identifying the symptom: no heat, leaks, low pressure, or strange noises. Often, cleaning, descaling, or ensuring parts are properly seated resolves the issue.
What's Wrong? Pinpointing Your Espresso Machine's Problem
Figuring out exactly what’s ailing your espresso machine is the first, and arguably most crucial, step in fixing it. Just like a doctor needs to know your symptoms before diagnosing an illness, you need to identify the specific malfunction to guide your repair efforts. Most issues fall into distinct categories that point towards particular parts or processes.
If your machine is acting up, try to categorize the problem. Is it failing to heat up, is it leaking, or is it producing weak espresso? This initial assessment will help you navigate the troubleshooting steps more efficiently.
Common Espresso Machine Issues
- No Heating: The machine powers on, but the water stays cold, and the steam wand is useless.
- Water Leaks: Water is appearing where it shouldn't, whether from the base, the group head, or the water tank.
- Low Pressure/Slow Shots: The water flows too slowly, or there's not enough pressure to extract a proper shot, resulting in a weak or diluted brew.
- No Water Flow: The pump runs, but nothing comes out of the brew group.
- Strange Noises: Unusual grinding, loud buzzing, or excessive sputtering that isn't part of normal operation.
- Steam Wand Malfunction: The wand doesn't produce steam, or the steam is weak and inconsistent.
Quick Fixes for Simple Glitches
Before diving into complex repairs, consider these immediate checks. These can often solve minor annoyances and save you time.
- Power Check: Ensure the machine is securely plugged into a working outlet. Try another appliance in the same outlet to confirm it’s functional.
- Water Tank: Verify the water tank is full and seated correctly. An improperly seated tank can prevent water from reaching the pump.
- Portafilter Seating: Make sure the portafilter is locked firmly into the group head. A loose portafilter can cause leaks and reduce brewing pressure.
- Drip Tray: Ensure the drip tray is not overflowing, as this can sometimes lead to perceived leaks.
Espresso Machine Anatomy: Understanding the Parts That Matter
To effectively fix your espresso machine, it’s helpful to know the basic anatomy of how it works. Think of it as a miniature plumbing and heating system designed for a very specific task: forcing hot water through finely ground coffee at high pressure. Understanding these core components makes it easier to diagnose where things might be going wrong.
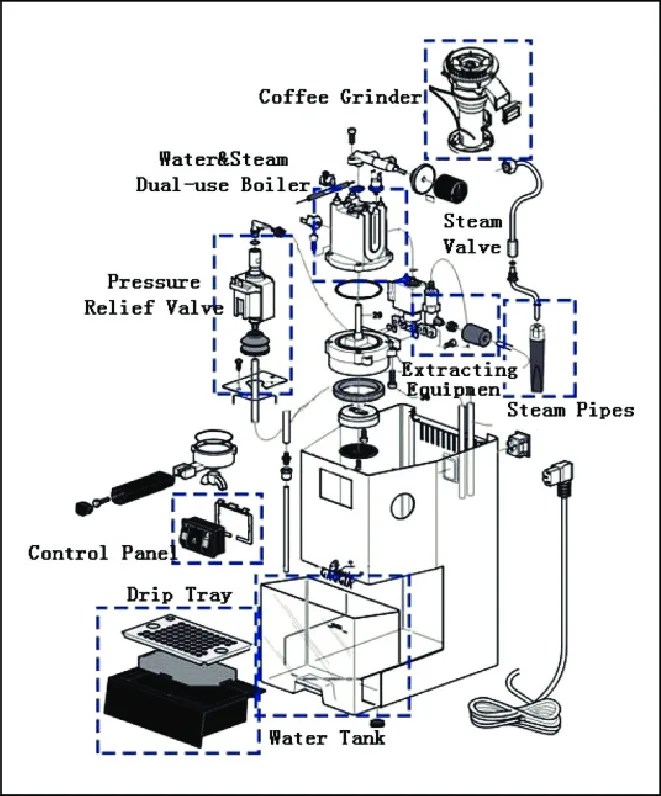
Image source: Bing (Web (fair-use with source credit))
The Brew Group and Portafilter
The brew group, often called the group head, is where the magic happens. It's the part where the hot water is channeled to the coffee grounds. Your portafilter is the handle that locks into the brew group, holding the basket filled with coffee.
A good seal between these two is critical for pressure. The shower screen is a metal disc within the brew group that disperses water evenly over the coffee puck.
The Water System: Tank, Pump, and Heater
Your machine's water tank holds the water supply. This water is then drawn by the pump, which creates the pressure needed for extraction. The heating element (or thermoblock in some models) heats the water to the optimal brewing temperature, typically around 195, 205°F (90, 96°C).
If any of these components fail or become blocked, your espresso will suffer.
Steam Wand and Pressure Release
The steam wand uses steam generated by the heating system to texture milk. It's essentially a nozzle that releases pressurized steam. A pressure release valve is also present in many machines to prevent over-pressurization, which is a safety feature.
Issues with steam production usually stem from blockages or problems with the heating system responsible for generating steam.
Troubleshooting Workflow: Solving Specific Problems
Now that you’re familiar with the parts, let’s get into the step-by-step process of diagnosing and fixing common issues. This workflow uses a decision tree approach: if you see symptom X, try action Y. This way, you're not randomly guessing but following a logical path to the solution.
No Heat? Checking Power and Heating Elements
If your machine turns on but stays cold, it’s usually a problem with the heating system.
- Confirm Power: As mentioned, double-check the power cord and outlet. Is the power light on?
- Thermostat Check: The thermostat tells the heating element when to turn on and off. If it fails, the element won't heat. This often requires consulting your machine's manual to locate and test it, or it may need replacement.
- Heating Element Failure: The heating element itself can burn out over time. If the thermostat is functional, and the machine still won't heat, the element is the likely culprit. Replacing a heating element can be a more involved repair, often requiring specialized tools and knowledge. Manufacturer specifications typically detail the wattage and expected lifespan of these elements, which can vary greatly by model.
Leaks? Identifying and Sealing the Source
Leaks can be messy and, if from the bottom, could indicate a serious internal issue.
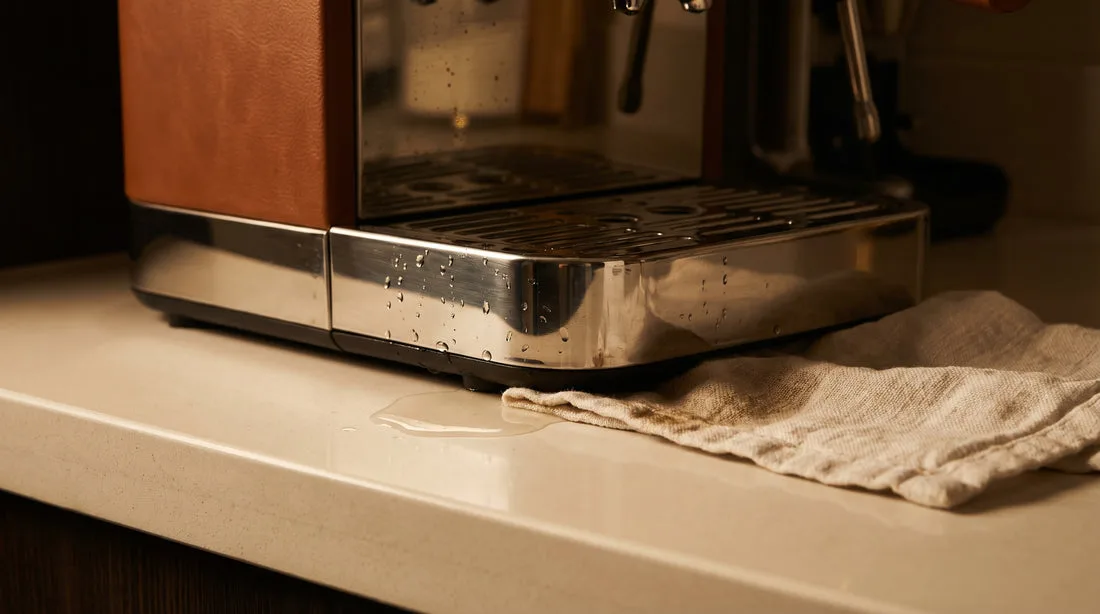
Image source: Bing (Web (fair-use with source credit))
- Group Head Leak: If water spills from around the portafilter when brewing, check the portafilter seal (gasket). It might be worn out, dirty, or improperly seated.
- Water Tank Leak: Ensure the water tank is properly in place and the seal at its base is intact. Cracks in the tank itself will require replacement.
- Drip Tray Overflow: This is the simplest fix. Just empty and clean the drip tray more frequently.
- Internal Leaks: If water pools under the machine, it’s likely an internal hose or seal has degraded or come loose. You’ll need to inspect visible hoses (when cool and unplugged!) and potentially disassemble parts of the machine. Referring to your machine’s manual or online diagrams is essential here. Some machines, like certain drip coffee makers, might have issues with their water reservoir seals that are easily addressed; such as a faulty seal on a water reservoir, which might require referencing guides on how to clean a coffee maker water reservoir.
Low Pressure? Grinds, Tamps, and Blockages
Low pressure results in weak, watery espresso and is often linked to airflow or water flow restrictions.
- Grind Size: Coffee ground too coarsely will allow water to pass through too quickly. Try grinding finer.
- Tamping: Over-tamping, pressing down too hard on the coffee grounds, can create too much resistance. Aim for firm, consistent pressure, not extreme force.
- Blocked Shower Screen: Coffee fines can clog the tiny holes in the brew group's shower screen. Unscrew it (when cool!), scrub it thoroughly with a brush, and rinse.
- Blocked Portafilter Basket: Similarly, the holes in the portafilter basket can become clogged. Clean this thoroughly after each use.
- Scale Buildup: This is a major culprit. Mineral deposits from tap water can narrow internal water lines and restrict flow. Regular descaling a coffee maker (and espresso machines!) is crucial. For espresso machines, this often involves running a descaling solution through the system.
No Water? Clearing Air Locks and Blockages
When you press the brew button and hear the pump whirring but get no water, it's usually one of two things: an air lock or a blockage.
- Air Lock: If the water tank ran dry, or if you’ve recently replaced it, air can get trapped in the pump system, preventing it from drawing water. Try running hot water through the steam wand (if available) for a minute or two to help push the air out and prime the pump. Some machines have a dedicated priming function; check your manual.
- Blocked Water Line: Scale buildup or a foreign object can obstruct the water path from the tank to the pump or from the pump to the brew group. A thorough descaling is your first defense. If that doesn't work, you might need to inspect the intake valve on the water tank or internal tubing for obstructions.
Strange Noises? What They Mean and How to Address Them
Unusual sounds from your espresso machine can be unnerving, but they often provide clues.
- Loud Buzzing/Grinding (Pump Active): This is a classic sign the pump is trying to work but can't draw water. This points back to the "No Water" issues: check the water tank level, ensure it's seated properly, and look for air locks or blockages in the intake line. Aggregate reviews report this is most common after the machine has run dry.
- Hissing or Sputtering: While some operational sounds are normal, excessive hissing could indicate a small leak somewhere in the pressurized system. Listen closely to try and pinpoint the location. It might be a loose connection on an internal hose or a faulty valve.
- Rattling: This could be something as simple as the drip tray not being seated correctly, or it might indicate a loose internal component. Check accessible parts first.
Essential Espresso Machine Maintenance for Prevention
Taking good care of your espresso machine is the best way to avoid needing these fixes in the first place. Regular maintenance keeps it running smoothly and ensures consistent, delicious espresso. Think of it as an investment in your morning ritual, preventing those frustrating troubleshooting sessions down the line.
The Power of Filtered Water
Tap water contains minerals like calcium and magnesium, which lead to scale buildup. This scale can clog your machine’s internal waterways, reducing pressure and affecting heating. Using filtered water, whether from a pitcher or a built-in machine filter, significantly reduces scale formation.
According to testing standards for water quality, high mineral content directly correlates with increased scale.
Regular Descaling: A Must-Do
Even with filtered water, some mineral deposits are inevitable over time. Descaling is the process of removing this buildup. Your machine's manual will specify how often to descale, but for most home users, every 1-3 months is a good guideline, depending on your water hardness and how frequently you use the machine.
Using a dedicated espresso machine descaling a coffee maker solution is key.
Daily Cleaning Rituals: Keeping Things Flowing
Small cleaning habits performed daily prevent bigger problems later.
- Flush the Group Head: After each shot, run hot water through the brew group for a few seconds. This clears out coffee oils and grounds.
- Wipe the Portafilter and Basket: Clean out any remaining coffee grounds and wipe dry.
- Purge and Wipe the Steam Wand: Immediately after steaming milk, run a quick burst of steam to clear the tip and then wipe it clean with a damp cloth. Dried milk residue is tough to remove and can clog the wand.
- Empty and Rinse the Drip Tray: This prevents odors and potential overflow issues.
When to Backflush: A Deeper Clean
Many semi-automatic espresso machines are designed for backflushing. This process uses a blind basket (a portafilter basket with no holes) and a cleaning solution to force water backward through the group head and dispersion screen. This effectively scrubs away coffee oils and residue that daily flushing can't reach.
As of 2026, manufacturer documentation strongly recommends this periodic deep clean, often weekly or bi-weekly depending on usage, for optimal performance. It's a vital step in how to clean a coffee maker at a more professional level.
When to Call the Cavalry: Knowing Your Limits
Even with the best intentions and a good troubleshooting guide, some espresso machine problems are simply beyond a DIY fix. It's wise to recognize when you've reached your limit and when it's time to hand the reins over to a professional. Pushing too hard on a complex repair can sometimes cause more damage, turning a minor issue into a costly one.
Signs You Need a Professional
If you encounter any of the following situations, it's best to seek expert help. These issues often involve internal components that are difficult to access or require specialized knowledge and tools. Trying to force a repair can be dangerous or lead to further damage.
- Electrical Issues: If you suspect a problem with the wiring, circuit board, or internal power supply, leave it to a qualified technician. Electrical components can be dangerous if mishandled, and incorrect repairs could lead to shocks or fire hazards.
- Major Component Failure: If the pump has completely died, the heating element won't heat even with a new thermostat, or there’s significant internal damage, it often requires specialized diagnostics and replacement parts. Manufacturer specifications often list component lifespans, and when these are exceeded, failure is more likely.
- Persistent Leaks from the Base: While minor drips can sometimes be sealed, persistent leaks originating from the machine's base often point to internal hose ruptures or seal failures that are hard to access.
- Overwhelming Complexity: If you’ve followed all the common troubleshooting steps and the machine still isn't working, or if the problem seems unidentifiable, it’s time for an expert opinion. Your machine's manual might detail complex disassembly procedures, but these are best left to those with experience.
Finding a Qualified Espresso Machine Repair Tech
When you decide to call in the pros, you'll want to find someone reliable. Look for repair shops that specialize in espresso machines specifically, rather than general appliance repair. A good technician will be able to diagnose the issue efficiently, order the correct parts, and perform the repair safely.
Ask for recommendations from local coffee shops or consult online reviews from other espresso machine owners.
Frequently Asked Questions About Espresso Machine Fixes
### My espresso machine is making a loud grinding noise. What could it be?
This often indicates the pump is working but cannot draw water. It could be an air lock in the water line, a dry water tank, or a blockage in the intake valve. Ensure the water tank is full and properly seated, and try priming the pump by running water through the steam wand.
### Is it safe to use vinegar to descale my espresso machine?
Vinegar is generally not recommended for espresso machines. Its acidity can potentially damage internal seals and components over time. Stick to a commercial descaling solution specifically designed for coffee makers and espresso machines.
### My espresso shots are pulling too fast and are very weak. What’s wrong?
This is a classic sign of insufficient pressure, often caused by coffee ground too coarsely, inadequate tamping, or blockages. Check your grind size, ensure you’re tamping with consistent pressure, and clean your shower screen and portafilter basket thoroughly.
### How often should I descale my espresso machine?
The frequency depends on your water hardness and usage. A general guideline is every 1-3 months. If you use very hard tap water, you might need to descale more often.
Using filtered water significantly extends the time between descaling.
### Can I replace the heating element myself?
For some machine models, yes, if you have basic DIY skills and the right tools. However, it can be a complex repair involving electrical components. If you're uncomfortable with electrical work or disassembling parts, it's safer to seek professional help.
Making the Decision: DIY vs. Professional Repair
Deciding whether to tackle an espresso machine repair yourself or hire a professional involves weighing a few factors. Your comfort level with tools and electrical components is paramount. If you’re handy and the problem seems straightforward, a DIY approach can save you money.
For instance, cleaning a clogged steam wand tip with a pin is a simple, cost-effective fix.
However, if the issue involves intricate internal parts, potential electrical hazards, or requires specialized tools you don't have, professional repair is the safer and often more economical choice in the long run. A professional repair shop, as of 2026, might charge anywhere from $75 to $250 for a typical repair, depending on the complexity and parts needed, which can be less than the cost of a new machine for minor to moderate issues. It’s about assessing the risk, the potential savings, and the value you place on your time and the machine itself.