How to Adjust a Spin Bike
If your knees ache after a spin class or your hands go numb around minute ten, your bike is telling you something. Learning how to adjust a spin bike properly is the fix. It's not just about comfort.
It's about injury prevention.
As of 2026, most spin bikes still use the same basic adjustment system: a quick-release seat post, a fore-aft saddle clamp, and a sliding handlebar stem. Most machines accommodate riders from about 5'0" to 6'4", but your body doesn't care about the spec sheet. The right setup is personal.
Let's walk through it.
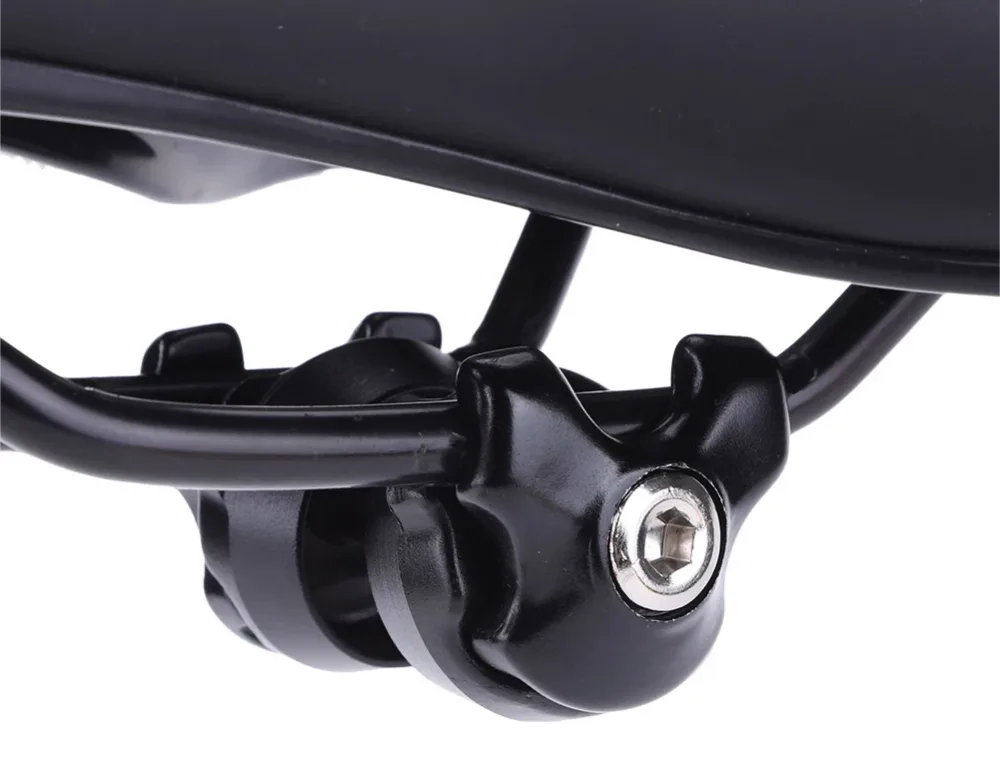
Image source: Bing (Web (fair-use with source credit))
Why a "Quick Fit" Fails Most Spin Bike Riders
The classic advice is simple: set the saddle at hip height and ride. That's a fine starting point. It's a terrible final setting.
Two riders of the same height can need completely different saddle positions because of leg length and flexibility.
Knee pain is the top complaint we see in our research. Physical therapy sources point to a saddle that's too low or too far forward. When your knee stays too bent at the bottom of the stroke, your kneecap takes repeated compression.
Over thousands of revolutions, that adds up fast.
The fore-aft saddle adjustment matters just as much. If your saddle sits too far back, you overreach for the handlebars and load your lower back. Too far forward, and your wrists and shoulders feel it first.
The hip-height shortcut fixes none of this.
Flexibility also comes into play. Tight hamstrings make you rock your hips at the bottom of the stroke. That rocking twists your lumbar spine on every pedal revolution.
In a 30 minute class, that's thousands of small, bad loads on the same joints.
When your fit is right, you feel stable and centered from the first stroke. That stability lets you focus on effort and cadence rather than pain. The same principle applies to other cardio equipment.
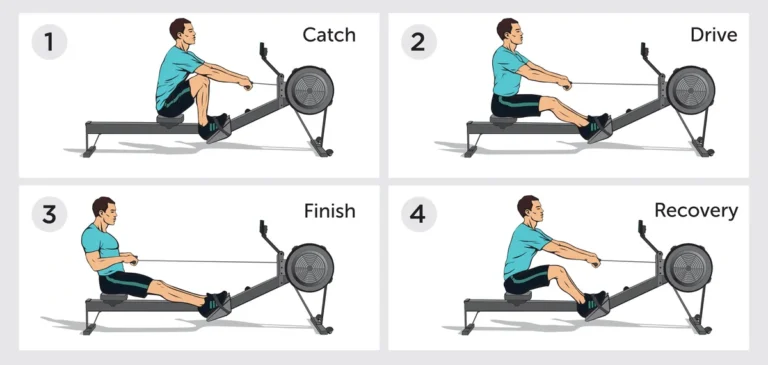
You wouldn't ignore the adjusted rowing machine settings, so don't ignore these. Fixing the fit first costs fifteen minutes and saves you from real joint strain later.
Measure First: Know Your Inseam, Flexibility, and Goal
Before you touch a quick release, gather two measurements and set one intention. These inputs determine every adjustment you'll make.
Inseam Length
Stand barefoot against a wall. Place a book between your legs, spine against the wall, and pull it up firmly like you're sitting in a saddle. Measure from the floor to the top of the book.
That's your true inseam.
Multiply that number in inches by 0.883. The result is a solid baseline for saddle height, measured from the center of the bottom bracket to the top of the saddle. It's not perfect, so treat it as a starting point, not law.
Flexibility Check
Sit on the floor with your legs straight and reach for your toes. If you can't get past your knees, your hamstrings are tight. Plan for a slightly higher handlebar and a neutral saddle tilt.
If you can press your palms flat, you'll handle a more aggressive, flat-backed position.
Here's a quick reference table for the initial setup:
| Rider Input | Baseline Setting | Fine-Tune Based On |
|---|---|---|
| Inseam × 0.883 | Saddle height from bottom bracket | Knee angle at full extension |
| Touch toes easily | Handlebar level with saddle | Hip angle and wrist pressure |
| Tight hamstrings | Handlebar 1-2 inches higher | Lower back comfort |
| Beginner or recovering | Handlebar above saddle | Shoulder and wrist pressure |
| Performance focus | Handlebar level or slightly lower | Power output and spine angle |
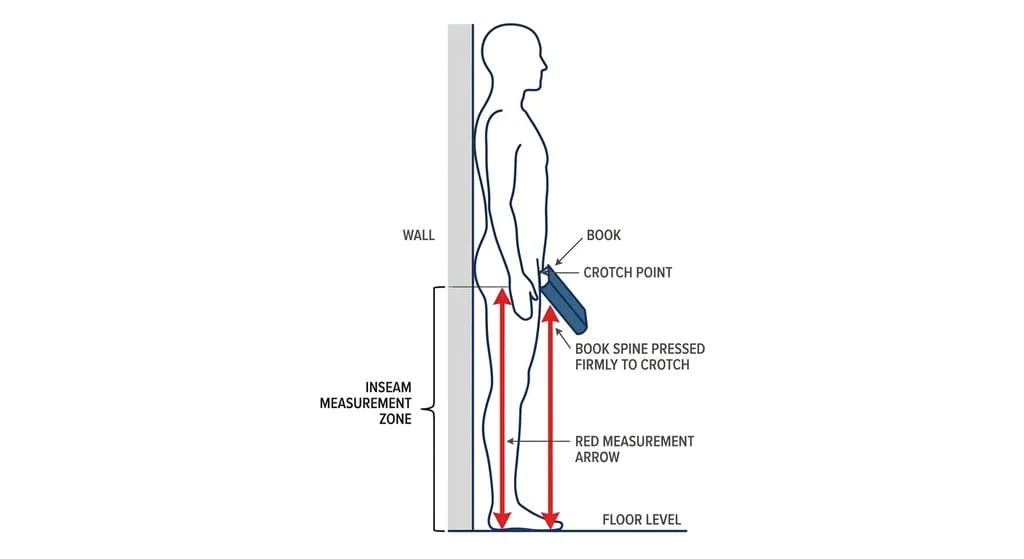
Image source: Bing (Web (fair-use with source credit))
The Spin Bike Adjustment Decision Tree
Work in order. Each step sets up the next. Skip ahead and you'll chase a problem that started two steps earlier.
Step 1: Saddle Height
Use the heel-on-pedal method. Sit on the saddle and place your heel on the pedal at six o'clock. Your leg should lock out straight with a flat foot.
That means your saddle height is close.
Now ride with the ball of your foot. At the bottom of the stroke, your knee should have a 25 to 35 degree bend. If your knee locks, lower the saddle.
If your hips rock, raise it slightly.
Use this if/then branch:
- Knee feels compressed and thigh is above parallel? Saddle is too low.
- Hips rocking side to side? Saddle is too high.
- One leg feels stiffer than the other? Check crank arm lengths first.
Step 2: Saddle Fore-Aft Position
Set the pedals horizontal at three and nine o'clock. Drop a vertical line from the front of your kneecap. That line should pass through the pedal spindle of your forward foot.
This is the KOPS rule, knee over pedal spindle.
If your knee is behind the spindle, slide the saddle forward. If it's ahead, slide it backward. Recheck after every small change.
Step 3: Saddle Tilt
Keep the saddle level or tilted down no more than two degrees. A nose tilted up causes groin pressure and numbness. A nose tilted down hard forces your weight onto your hands.
Use a small level if you've got one. Otherwise, press on the saddle nose and feel for any sliding.
Step 4: Handlebar Height
For most people, the right starting point is handlebars level with the saddle. That's neutral. If you're new to spinning or tight in the hamstrings, raise the bars one to two inches.
If you want an aggressive position, lower them in small steps.
If your hands tingle or your wrists ache, the bars are too low or too far away. Trust that signal. The American Council on Exercise recommends the same approach for avoiding joint strain on stationary bikes.
Step 5: Handlebar Reach
Sit in your riding position and look at your hands. Your elbows should have a slight bend. Your shoulders should sit relaxed.
If you're reaching, pull the bars closer. If you feel crowded, push them forward.
A quick check: have someone look at your spine from the side. It should form a straight line from hip to shoulder. If it curves like a C, you're overreaching.
Correct body position matters here just as much as it does on a properly set up rower.
After every adjustment, do a slow 10 minute test ride. Change one thing at a time. If the discomfort moves but doesn't go away, keep moving down the decision tree.
Troubleshooting by Symptom: Knee Pain, Hip Rocking, Numb Hands, Back Strain
Most people don't know what to fix because they can't name the problem. Use this table to map your symptom to the correct adjustment:
| Symptom | Root Cause | Correct Adjustment |
|---|---|---|
| Front of knee pain | Saddle too low or too far forward | Raise saddle, slide back slightly |
| Back of knee pain | Saddle too high | Lower saddle in small steps |
| Hip rocking | Saddle too high | Lower until your pelvis stays still |
| Numb hands | Handlebars too low or too far | Raise bars, pull them closer |
| Lower back strain | Saddle tilted forward or reach too long | Level the saddle, shorten reach |
| Foot numbness | Saddle too high or toe cage too tight | Lower saddle, loosen straps |
| Wrist pain | Handlebars too far away | Slide bars closer |
| Saddle chafing | Nose tilted up | Level the saddle or tilt it 1° down |
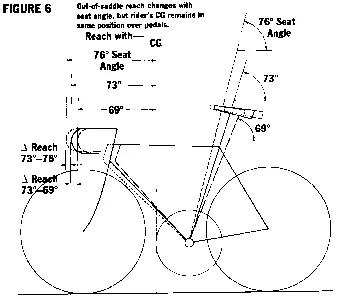
Image source: Bing (Web (fair-use with source credit))
Front-of-knee pain is the most common issue. Check KOPS alignment first. If your knee sits ahead of the pedal spindle, your patellar tendon takes extra load on every stroke.
Slide the saddle back a quarter inch at a time and retest.
Back pain that doesn't improve after a week of correct setup means the problem isn't just fit. Core strength and hip mobility play a big role. Raise the handlebars temporarily and focus on posture.
That's a recovery position, not a permanent fix.
One thing to remember: a spin bike doesn't move under you. Road vibrations mask small fit flaws outdoors. Inside, every tiny misalignment repeats itself for the full ride.
So be precise.
Common Setup Mistakes That Create Long-Term Strain
Some mistakes are small. Others are dangerous.
Ignoring the Minimum Insertion Line
Every seat post and handlebar post has a printed line near the bottom. Inserting the post above that line means the clamp is grabbing a thin, unsupported tube. Under hard pedaling, it can break.
This happens most often when someone raises the seat a few inches to accommodate a taller partner, then leaves it there for months.
Cranking the Seat Nose Down
Aggressive nose-down angles look professional. They wreck your alignment. A dropped nose pitches your pelvis forward, rounds your lower back, and shifts all your weight onto your wrists.
Keep the nose within two degrees of level. No exceptions.
Setting Handlebars Without Checking Your Wrists
Straight wrists are the goal. If your hands bend upward to reach the bar, tension builds in your forearms and shoulders. Raise the bar until your wrist is neutral, even if it looks low.
Over-Tightening Quick Releases
A quick release should be firm, not maxed out. If you crank it down with full force, you can strip the clamp threads. Then the post slips anyway, making the problem worse.
Reusing Old Settings After a Break
Your flexibility changes from week to week. A saddle height that felt perfect in January can feel tight in March. Do a quick check every six to eight weeks.
Small tweaks are normal.
Letting Sweat and Grime Build Up
Sweat drips onto the seat post and handlebar stem. Mixed with dust, it becomes a gritty paste that makes posts stick or slip unexpectedly. A quick wipe after each ride prevents most of these problems.
If you already own cardio gear with rails and sliding parts, you know how much keeping the rails clean helps. The same logic applies here.
Making Big Jumps Instead of Micro-Adjustments
Move the saddle a half inch at a time. Test for ten minutes. Adjust again.
Your body needs time to adapt. Big jumps overwhelm your joints and make it impossible to know what actually worked.
How to Lock In and Reuse Your Perfect Settings
Once your bike feels right, record it. Memory is unreliable. Exact numbers are not.
Mark Your Numbers
Most seat posts and handlebar stems have marked increments. Write yours down. If your bike doesn't have markings, use a tape measure from the saddle top to the bottom bracket center and note that number.
Take a Photo
A side-on photo of your setup is worth more than you'd think. Stand far enough back to capture the whole bike. If you share your bike with a partner, you now have a visual reset reference for both riders.
Label Your Home Gym Bike
Use a piece of painter's tape on the frame. Write the rider's name and the key numbers. It sounds low-tech, but it works, especially in a busy household.
Recheck After the First Three Rides
New bikes settle. Bolts find their seating. Foam grips compress.
After your first week, retighten every clamp. That locks in the settings and prevents drift. The same upkeep principles that keep a rowing machine in good shape apply to your spin bike, so make it part of your routine.
Frequently Asked Questions
How long does it take to adjust a spin bike?
Fifteen to twenty minutes for a full setup, assuming you know your inseam. The first time always takes longer. Once you know your numbers, a fresh setup takes under two minutes.
Should my saddle be perfectly level?
Yes, or as close to level as you can get. A nose tilted up causes chafing and pressure. A nose tilted down shifts your weight onto your hands.
Stay within two degrees of flat.
Why do my knees hurt after spinning?
Usually a saddle height or fore-aft problem. Front of knee pain means the saddle is too low or too far forward. Back of knee pain means the saddle is too high.
Check KOPS first, then adjust in tiny increments.
Is it normal for my hips to rock when I ride?
No. That's the top sign that your saddle is too high. Lower it until your pelvis stays perfectly still through the entire pedal stroke.
If the rocking continues, check your handlebar reach as well.
How often should I recheck my spin bike setup?
Every six to eight weeks, and after any long break from riding. If you share a spin bike with someone else, recheck every single time before you start. The same joint protection principles you'd apply to any fitness machine apply here.