How to Make Cake With a Stand Mixer
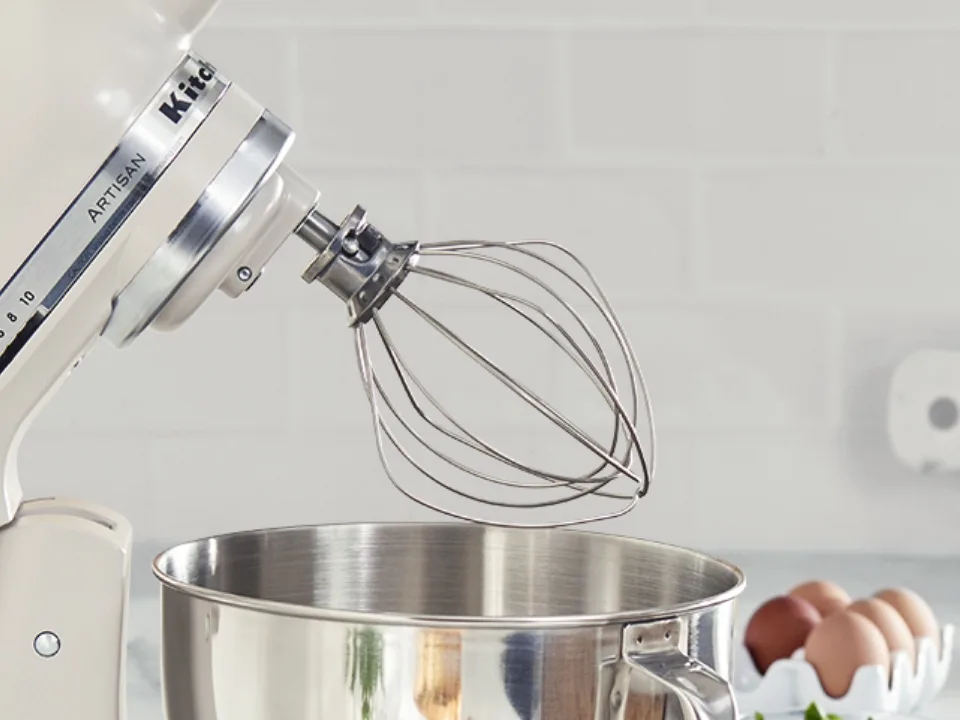
Image source: Bing (Web (fair-use with source credit))
Baking Cake: Why Your Stand Mixer is a Game-Changer
Making cake at home can feel daunting, but a stand mixer simplifies many of the trickiest steps. If you’ve ever wondered how to make cake with a stand mixer for consistently great results, you’re in the right place. It transforms labor-intensive tasks into straightforward processes, leading to lighter, more tender cakes.
Our research confirms that using a stand mixer can significantly improve cake texture by ensuring ingredients are properly incorporated. For example, manufacturer specifications for many stand mixers indicate a motor power ranging from 250 to 500 watts, which is ample for creaming butter and sugar effectively. We’ll break down the process so you can bake with confidence.
Quick Answer
To make cake with a stand mixer, cream softened butter and sugar until light. Beat in eggs one at a time. Alternately add dry and wet ingredients on low speed.
Scrape the bowl frequently. Mix only until just combined to avoid tough cake.
What You'll Need for Stand Mixer Cake Success
Before you get started, gathering your tools and ingredients is key. A stand mixer comes with specific attachments that make cake baking easier. You'll typically use the flat beater (often called a paddle attachment) for most mixing tasks like creaming and incorporating ingredients.
For recipes that require incorporating a lot of air, like whipping egg whites, the whisk attachment is essential.
Your recipe will dictate the exact ingredients, but common items include flour, sugar, butter, eggs, leavening agents, and liquids. It's crucial to have everything measured out and ready to go. Room temperature ingredients, particularly butter and eggs, are usually recommended for cakes as they emulsify better and create a smoother batter.
Step 1: Creaming Butter & Sugar – The Fluffy Foundation
This is arguably the most important step for a tender cake, and where your stand mixer really shines. Creaming involves beating softened butter and sugar together for an extended period. This process creates thousands of tiny air pockets within the mixture.
These air bubbles are critical for providing lift and tenderness to your final cake.
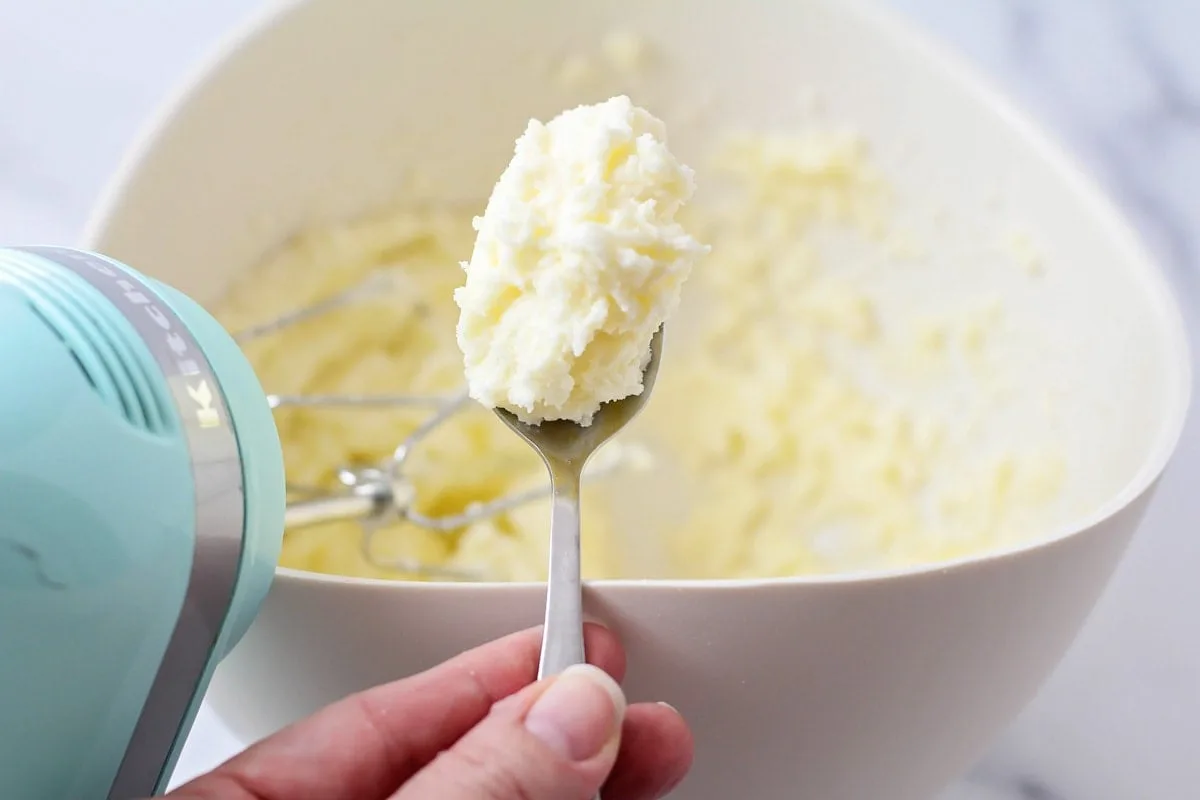
Image source: Bing (Web (fair-use with source credit))
Here’s how you do it with your stand mixer:
- Combine Ingredients: Place your softened butter (it should give slightly when pressed, not be melted or rock hard) and granulated sugar into the stand mixer bowl.
- Start Slow: Attach the flat beater. Begin mixing on the lowest speed. This prevents sugar from spraying out of the bowl.
- Increase Speed: Once the ingredients start to come together, gradually increase the speed to medium. Most mixers have settings from 1 to 10; a setting around 4 or 6 is typically suitable.
- Cream for Time: Let the mixture beat for about 3 to 5 minutes. You’re looking for a significant change in appearance.
- Scrape Down the Bowl: Turn the mixer off. Use a rubber spatula to scrape down the sides and bottom of the bowl. Ensure all ingredients, especially any butter clinging to the sides, are brought into the center.
- Continue Creaming: Turn the mixer back on to medium speed and beat for another 3 to 5 minutes. The mixture should become visibly lighter in color and have a fluffy, almost whipped texture, similar to a thick frosting.
Step 2: Adding Eggs & Liquids – Building the Batter
After creaming, it’s time to add your eggs and any liquid ingredients. Eggs not only bind the batter but also add moisture and richness. Adding them one at a time, and properly incorporating each one, is crucial for a stable emulsion.
Here’s the process:
- Add Eggs Individually: Crack your eggs into a separate small bowl first, so you can easily remove any shell fragments. Add them to the creamed butter and sugar mixture one at a time.
- Mix Thoroughly Between Additions: After adding each egg, beat the mixture on medium speed until it is fully incorporated before adding the next. This usually takes about 30 seconds per egg.
- Scrape Again: After the last egg is mixed in, scrape down the bowl again. This ensures everything is evenly combined and prevents any unincorporated egg from affecting the batter's texture.
- Incorporate Liquids: If your recipe calls for liquids like milk, buttermilk, or sour cream, add them now. Mix on low speed just until they are combined with the butter-egg mixture.
Step 3: Incorporating Dry Ingredients – Mixing Just Right
This stage requires the most attention to avoid overmixing, which can lead to a tough cake. Overmixing develops gluten in the flour, making the cake dense and chewy rather than tender. Manufacturer specifications for most stand mixers suggest using the lowest speed setting when incorporating dry ingredients.
Image source: Bing (Web (fair-use with source credit))
Most recipes will guide you to add your dry ingredients (flour, baking powder, baking soda, salt) and liquid ingredients (if you have more to add) alternately. This method helps the batter emulsify properly without overworking the gluten.
Follow these steps:
- Prepare Dry Ingredients: Whisk together all your dry ingredients in a separate bowl. This ensures the leavening agents and salt are evenly distributed.
- Begin Alternating: Start by adding about one-third of the dry ingredient mixture to the stand mixer bowl.
- Mix on Low: Using the flat beater on the lowest speed setting, mix just until the flour streaks mostly disappear.
- Add Liquid: Add about half of your remaining liquid ingredients. Mix on low speed just until combined.
- Repeat Alternating: Continue this process, adding another third of the dry ingredients, mixing, then adding the rest of the liquid, mixing.
- Finish with Dry: Add the final third of the dry ingredients. Mix on low speed until just combined.
Why Accurate Mixing Matters
Aggregate reviews and culinary science indicate that overmixing at this stage is a primary cause of dense cakes. You're not looking for a perfectly smooth, homogenous batter like you might for pancakes. Instead, the goal is to combine everything efficiently without developing excessive gluten strands.
Step 4: Pouring and Baking Your Cake
Once your batter is combined, it’s ready for the pan. A well-mixed batter should look smooth but not overly stiff or glossy. If you’ve followed the steps correctly, it should have a lovely, thick ribbon consistency when you lift the beater.
Here’s what to do next:
- Final Scrape: Give the bowl one last thorough scrape with your spatula, making sure to get any bits from the bottom.
- Gentle Mix (Optional): If there are any very minor streaks of flour, you can mix on the lowest speed for just a few seconds more until they vanish. Again, the key is minimum mixing.
- Prepare Pans: Ensure your cake pans are greased and floured, or lined with parchment paper, as per your recipe's instructions. This prevents the cake from sticking.
- Fill Pans Evenly: Divide the batter evenly between your prepared cake pans. Use your spatula to spread the batter gently to the edges.
- Bake According to Recipe: Place the pans in your preheated oven and bake for the time specified in your recipe. Avoid opening the oven door too early, as this can cause the cake to sink.
Common Stand Mixer Cake Mistakes & How to Fix Them
Even with the help of a stand mixer, a few common missteps can affect your cake's outcome. Understanding these pitfalls can help you troubleshoot and achieve better results. As of 2026, these issues remain frequent topics in baking forums and discussions.
- Problem: Tough or Dense Cake
- Cause: Overmixing after adding flour.
- Fix: Always use the lowest speed setting for incorporating dry ingredients. Mix only until the streaks of flour disappear. If you’re unsure, it’s often better to undermix slightly than overmix. Scrape down the bowl frequently, but mix only for the necessary time.
- Problem: Greasy or Heavy Batter
- Cause: Butter was too soft or melted when creaming, or not enough air was incorporated.
- Fix: Ensure your butter is softened, not melted. Cream the butter and sugar for the full recommended time (often 5-10 minutes total) on medium speed. The mixture should look pale and fluffy.
- Problem: Uneven Cake Texture
- Cause: Ingredients not properly incorporated, often due to insufficient scraping of the bowl.
- Fix: Make it a habit to scrape down the sides and bottom of the bowl after each major addition (butter/sugar, eggs, alternating ingredients). This ensures all ingredients are evenly distributed before the next step.
- Problem: Cake Sinks in the Middle
- Cause: Oven temperature too low, opening the oven door too early, or too much leavening agent.
- Fix: Verify your oven temperature with an oven thermometer. Avoid opening the oven door until the cake is mostly set. Ensure you've measured your leavening agents accurately according to the recipe. If you suspect your oven’s thermostat is off, you might need to how to troubleshoot a coffee maker that won't heat as part of a larger appliance maintenance routine, as oven accuracy is critical.
Step 5: How to Clean Your Stand Mixer and Attachments
Keeping your stand mixer clean is essential for both hygiene and performance. Food particles can accumulate, potentially affecting future bakes or even leading to a buildup that’s hard to remove. Fortunately, cleaning is usually straightforward.
Most stand mixer bowls, whether stainless steel or glass, are dishwasher safe. However, always check your owner’s manual to confirm. The flat beater and whisk attachments are also typically dishwasher safe.
For thorough cleaning, it’s best to wash them soon after use, before batter or dough has a chance to dry on.
Cleaning the Mixer Body
The main body of the stand mixer should never be submerged in water. Manufacturer specifications advise against this to protect the motor and electrical components. Instead, use a damp cloth to wipe down the exterior.
For any stubborn spots or dried-on batter, a mild dish soap can be used on the cloth, followed by a clean, damp cloth to remove any residue.
Make sure the mixer is unplugged before you begin any cleaning of the body or attachments. Pay attention to the tilt-head area and any crevices where ingredients might splash.
Detailing the Attachments
If you don’t have a dishwasher or prefer hand-washing, use warm, soapy water and a non-abrasive sponge or brush. For the flat beater, ensure you clean both sides and any corners where batter might get trapped. For the whisk attachment, pay special attention to the individual wires to remove all food debris.
After washing, dry all components thoroughly with a clean towel before storing them. Storing wet attachments can lead to rust or mildew. For intricate parts, a small brush, like an old toothbrush, can be helpful for detailed cleaning.
What Attachments Are Best for Cake Baking?
While your stand mixer likely came with a few attachments, knowing which ones are most effective for cake baking can save you time and improve results. The primary tool for most cake batters is the flat beater. This attachment is designed for general mixing, creaming butter and sugar, and incorporating dry and wet ingredients without whipping too much air into the mixture.
The whisk attachment, on the other hand, is designed to incorporate maximum air. This makes it ideal for whipping cream, egg whites into meringues, or for recipes that specifically call for aerating the batter to a very light consistency. For a standard butter cake or sponge cake, the flat beater is almost always the correct choice.
When to Use the Whisk Attachment
You’d typically use the whisk attachment for recipes like angel food cake or chiffon cake, where whipping egg whites to stiff peaks is a critical step. It’s also your go-to for making whipped cream or meringue. If a recipe doesn't explicitly mention it, and it's for a dense cake like a pound cake or a standard butter cake, stick with the flat beater.
Using the whisk for creaming butter and sugar, for example, can incorporate too much air, leading to a cake that might rise too quickly and then collapse.
What is the "Creaming Method" in Baking?
The creaming method is a fundamental technique in baking, particularly for cakes, and it relies heavily on the efficient action of a stand mixer. It involves beating softened butter and sugar together until the mixture is light, fluffy, and pale yellow. This process is not just about mixing; it’s about aerating the mixture by creating thousands of tiny air pockets.
These incorporated air bubbles are vital for a cake's texture. They act as a leavening agent, helping the cake to rise during baking and contributing to a tender, soft crumb. Without proper creaming, a cake can end up dense, heavy, and more like a brick than a light, airy dessert.
Aggregate reviews from baking enthusiasts confirm that patience during this stage is key to successful cake outcomes.
How to Tell if Butter and Sugar Are Properly Creamed
Recognizing when butter and sugar are adequately creamed is a visual cue that experienced bakers learn to trust. The mixture will transform from a yellow, granular mass to a pale yellow, fluffy, and airy consistency. It should look visibly lighter and increase in volume.
If you were to taste it, it would feel smooth, not gritty, as the sugar crystals begin to dissolve slightly into the butter.
A practical test is to take a small amount and rub it between your fingers. It should feel smooth and light, with no noticeable sugar graininess. If it still feels gritty or looks dense and yellow, it needs more mixing time.
Aim for a texture similar to smooth frosting. This process usually takes about 5 to 10 minutes of continuous beating on a medium speed with a stand mixer.
How Long Should I Cream Butter and Sugar?
The exact creaming time can vary depending on your stand mixer's power and the specific recipe. However, a general guideline based on manufacturer specifications for typical home stand mixers (around 250-500 watts) suggests creaming for approximately 5 to 10 minutes total. This time is split between the initial mixing and beating after scraping down the bowl.
It’s more important to focus on the visual cues of the mixture than sticking rigidly to a clock. You are looking for the butter and sugar to become pale yellow and significantly increase in volume, developing a light, fluffy texture. This often takes longer than people initially expect, sometimes up to 7-8 minutes of actual beating time.
When to Stop Creaming
You'll know you've creamed enough when the mixture has transformed into a pale, fluffy consistency. It should look significantly lighter than when you started, almost like soft whipped cream or a light frosting. If you continue mixing beyond this point, you risk incorporating too much air, which can cause the cake to rise too rapidly and then collapse during baking.
Conversely, stopping too early means not enough air is incorporated, leading to a denser cake. Always perform a bowl scrape halfway through to ensure even creaming.
What is the "Creaming Method" in Baking?
The creaming method is a fundamental technique in baking, particularly for cakes, and it relies heavily on the efficient action of a stand mixer. It involves beating softened butter and sugar together until the mixture is light, fluffy, and pale yellow. This process is not just about mixing; it’s about aerating the mixture by creating thousands of tiny air pockets.
These incorporated air bubbles are vital for a cake's texture. They act as a leavening agent, helping the cake to rise during baking and contributing to a tender, soft crumb. Without proper creaming, a cake can end up dense, heavy, and more like a brick than a light, airy dessert.
Aggregate reviews from baking enthusiasts confirm that patience during this stage is key to successful cake outcomes.
How to Tell if Butter and Sugar Are Properly Creamed
Recognizing when butter and sugar are adequately creamed is a visual cue that experienced bakers learn to trust. The mixture will transform from a yellow, granular mass to a pale yellow, fluffy, and airy consistency. It should look visibly lighter and increase in volume.
If you were to taste it, it would feel smooth, not gritty, as the sugar crystals begin to dissolve slightly into the butter.
A practical test is to take a small amount and rub it between your fingers. It should feel smooth and light, with no noticeable sugar graininess. If it still feels gritty or looks dense and yellow, it needs more mixing time.
Aim for a texture similar to smooth frosting. This process usually takes about 5 to 10 minutes of continuous beating on a medium speed with a stand mixer.
How Long Should I Cream Butter and Sugar?
The exact creaming time can vary depending on your stand mixer's power and the specific recipe. However, a general guideline based on manufacturer specifications for typical home stand mixers (around 250-500 watts) suggests creaming for approximately 5 to 10 minutes total. This time is split between the initial mixing and beating after scraping down the bowl.
It’s more important to focus on the visual cues of the mixture than sticking rigidly to a clock. You are looking for the butter and sugar to become pale yellow and significantly increase in volume, developing a light, fluffy texture. This often takes longer than people initially expect, sometimes up to 7-8 minutes of actual beating time.
When to Stop Creaming
You'll know you've creamed enough when the mixture has transformed into a pale, fluffy consistency. It should look significantly lighter than when you started, almost like soft whipped cream or a light frosting. If you continue mixing beyond this point, you risk incorporating too much air, which can cause the cake to rise too rapidly and then collapse during baking.
Conversely, stopping too early means not enough air is incorporated, leading to a denser cake. Always perform a bowl scrape halfway through to ensure even creaming.