How to Remove Burnt Crumbs From Toaster
That unpleasant smell of burnt toast or, worse, smoke curling from your toaster is a clear sign it's time for a clean-up. Ignoring accumulated crumbs isn't just about the smell; it's a genuine fire hazard. Knowing how to remove burnt crumbs from toaster interiors is a straightforward process that can be done in minutes.
Manufacturer specifications for small kitchen appliances often don't detail crumb removal beyond a removable tray. However, aggregate reviews and common sense point to regular cleaning as key to both safety and performance. Let's get your toaster back to its prime, safely.
Quick Answer
To remove burnt crumbs from your toaster, first, unplug it and let it cool completely. If you have a removable crumb tray, slide it out, empty it, and wash it. For burnt residue inside, use a soft brush or cloth, and for stubborn spots, a damp cloth or a paste of baking soda and water can work.
Always ensure the toaster is dry before plugging it back in.
When Do You Need to Clean Burnt Crumbs?
You've probably experienced that moment: you pop in some bread, and instead of golden-brown toast, you get a wisp of smoke and a burnt aroma. That’s your cue. Aggregate user reviews indicate that a noticeable burnt smell or visible smoke during toasting is the primary signal.
If your toast consistently comes out unevenly toasted or has black flecks, it points to debris interfering with the heating elements.
Recognizing the Signs of Trouble
- Distinct Burnt Smell: This is the most obvious indicator. If you smell burning food that isn't the toast itself, it's likely trapped crumbs igniting.
- Visible Smoke: Small wisps of smoke during the toasting cycle are a clear sign something is burning inside. Don't ignore this; it can quickly escalate.
- Uneven Toasting: Crumbs can build up and block heat from reaching all parts of the bread. This leads to pale spots and burnt edges on the same slice.
- Popping/Sparking Noises: Less common, but accumulated debris can sometimes cause minor electrical arcing, leading to small popping sounds.
- Black Flecks on Toast: If your toast consistently has small black specks, these are likely pieces of burnt crumb residue.
Common Culprits for Burnt Crumbs
Toasting bread naturally creates crumbs. These fall through the toasting slots and collect in the appliance's bottom. Over time, crumbs can become packed, especially in toasters without an easily accessible crumb tray.
Left unattended, they carbonize with each use, eventually causing the issues mentioned above. Manufacturer guidelines, such as those found on NIST.gov, highlight appliance maintenance for safety.
Your Step-by-Step Guide to Toaster Cleaning
Tackling burnt crumbs in your toaster is essential for both safety and good-tasting toast. It’s a process that requires a little patience but is surprisingly simple. We’ve broken it down to make it easy.
First Things First: Safety Check
Always unplug your toaster before doing anything else. Electricity and cleaning don't mix well; avoid any risk of shock. Manufacturer guidelines universally stress unplugging appliances before maintenance.
Ensure the power cord is completely disconnected from the wall outlet.
Next, allow the toaster to cool down completely. Heating elements can remain hot for some time after use. Per industry standards for appliance safety, waiting at least 15-20 minutes after the last toast cycle is a good practice.
A cool toaster is safer to handle and prevents accidental burns.
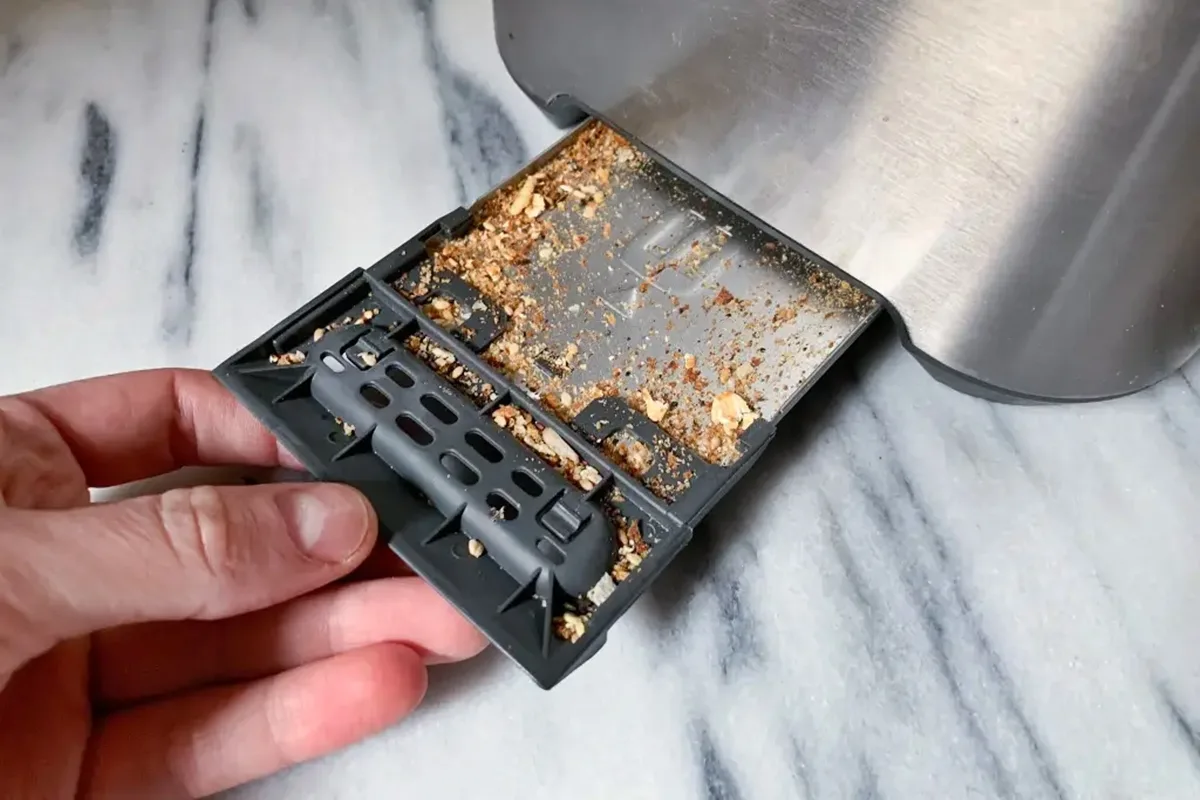
Image source: Bing (Web (fair-use with source credit))
Accessing the Crumb Tray
How you access burnt crumbs depends on whether your toaster has a removable crumb tray or a fixed one.
If Your Toaster Has a Removable Tray
Many modern toasters have a slide-out crumb tray at the base. This makes cleaning significantly easier.
- Locate the tray, usually a thin metal or plastic piece at the very bottom.
- Gently pull it out; it might have a handle or simply slide.
- Take the tray outside or over a trash bin.
- Empty all accumulated crumbs and debris.
- Wash the tray with warm, soapy water. Use a soft cloth or sponge to scrub away residue. Avoid abrasive scrubbers.
- Rinse thoroughly and let it air dry completely before reinserting.

Image source: Bing (Web (fair-use with source credit))
If Your Toaster Has a Fixed Tray (or No Tray)
Some toasters, especially older or basic models, have a fixed crumb tray or a collection area without an easy-access tray. In these cases, you'll need to be more resourceful.
- Turn the toaster upside down over a trash bin or outdoor surface.
- Gently shake it to dislodge loose crumbs. Tap it lightly on the side if needed.
- Use a soft brush (like a pastry brush or clean paintbrush) to sweep out any remaining loose debris from interior slots and the bottom.
This method isn't as thorough for burnt-on bits, so we'll cover how to handle those next. If your toaster has a removable tray but it's stuck, avoid forcing it, as this can damage the appliance.
Tackling Stubborn Burnt-On Residue
Sometimes, crumbs bake onto the toaster's interior surfaces, especially around heating elements or on the base. These require more attention.
Gentle Wiping and Scraping
For accessible burnt-on spots, start with the least aggressive method.
- Ensure the toaster is unplugged and completely cool.
- Use a soft, dry brush or lint-free cloth to try dislodging burnt material. Work gently to avoid damaging internal components.
- If dry brushing isn't enough, slightly dampen a cloth with water. Wring it out thoroughly so it's barely damp; you don't want excess moisture inside.
- Carefully wipe affected areas. Again, be gentle.
- For stubborn, flaked-on residue, a plastic scraper or an old credit card can be used very carefully. Avoid metal utensils, as they can scratch or damage heating elements and interior walls.
When to Try a Baking Soda Paste
If simple wiping or gentle scraping doesn't remove burnt residue, a paste of baking soda and water can be effective. Baking soda is a mild abrasive and deodorizer.
- Mix a small amount of baking soda with just enough water to form a thick paste.
- Apply the paste to burnt-on areas using a cotton swab or small brush.
- Let the paste sit for 10-15 minutes. This softens the burnt residue.
- Gently scrub with a soft brush or cloth.
- Wipe away the paste and residue with a clean, slightly damp cloth. Repeat if needed.
- Crucially, wipe away all baking soda paste. Leftover residue can affect toast taste or cause issues when the toaster heats up.
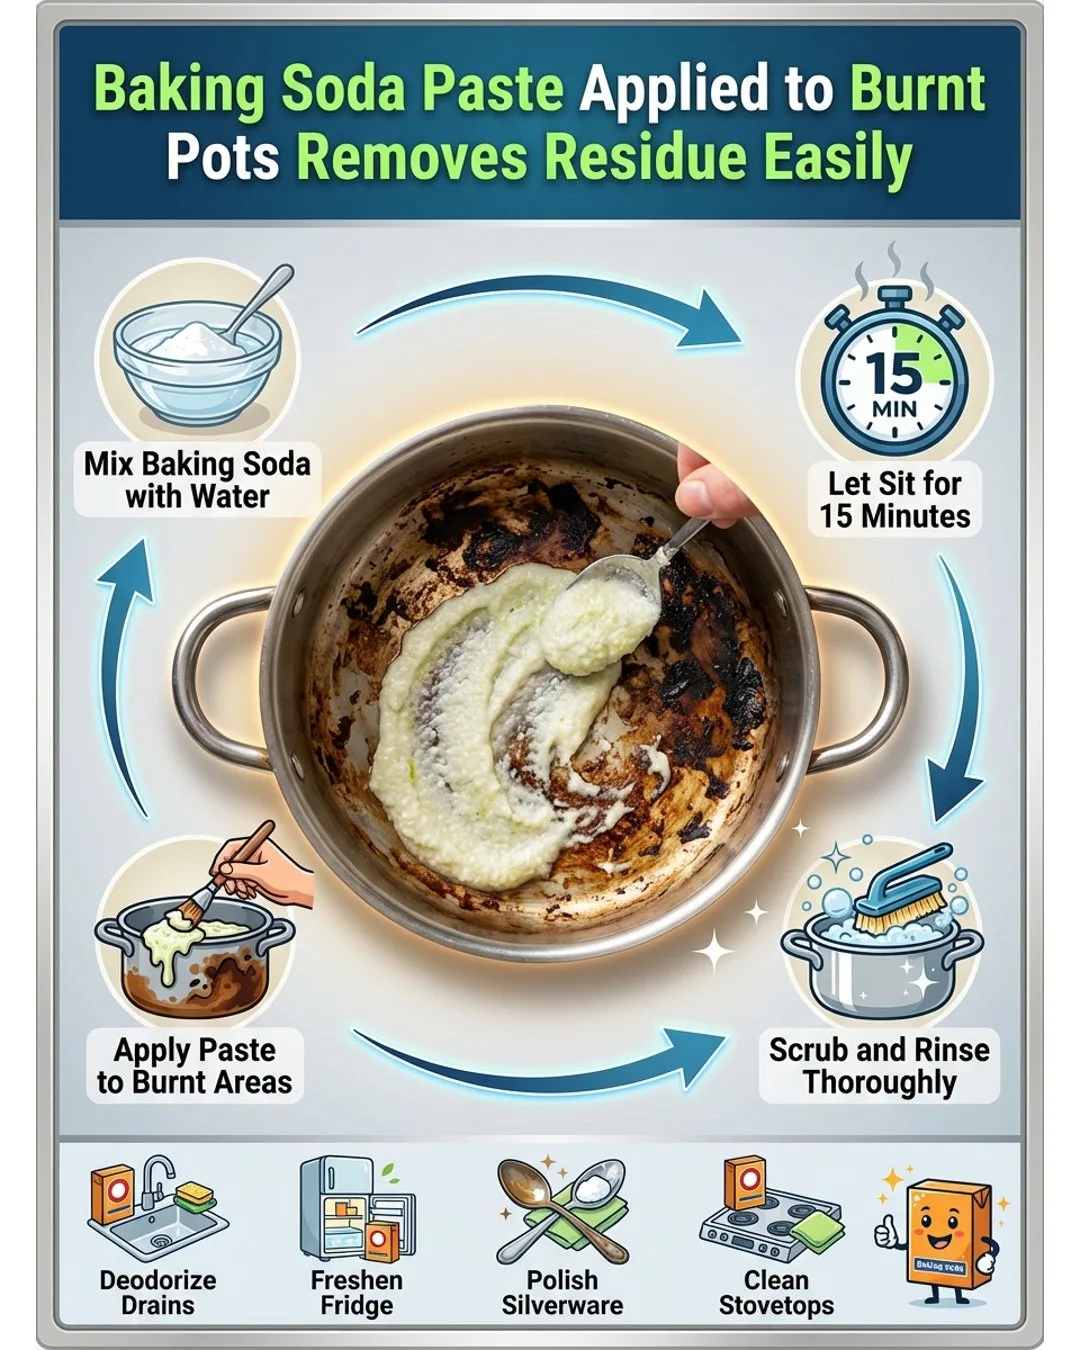
Image source: Bing (Web (fair-use with source credit))
Washing and Drying the Crumb Tray
If your crumb tray is removable, washing it thoroughly is key. After emptying, use warm, soapy water and a non-abrasive sponge or cloth. Scrub to remove any grease or stuck-on particles.
Rinse well under running water.
The most important part is ensuring the tray is completely dry before reinserting. Moisture can lead to rust or affect electrical components. Air dry it on a rack or gently pat it dry with a clean kitchen towel.
This step is a key recommendation in many small appliance maintenance guides.
Putting It All Back Together
Once the crumb tray is clean and bone dry, and you've addressed burnt residue inside, it's time to reassemble.
- If you turned the toaster upside down, carefully right it.
- Slide the clean, dry crumb tray back into its slot until it clicks or sits flush.
- If you cleaned the interior with a damp cloth, allow the toaster a few minutes to air out before plugging it in. This ensures residual moisture has evaporated.
Your toaster is now cleaner, safer, and ready to make delicious toast without smoky side effects. Regular cleaning, ideally monthly or when you notice the first signs, keeps it in top condition. Consistent cleaning ensures your toaster lasts longer, much like maintaining correct fluid levels helps engines last.
Common Mistakes That Make Things Worse
Even with good intentions, some common mistakes can cause more harm than good when cleaning toasters. Understanding these pitfalls can save you frustration and a potentially damaged appliance.
Overlooking the Power Cord
It sounds obvious, but people forget the power cord needs attention. It can collect dust, grime, and food splatters. Never immerse the cord or plug in water.
Wipe it down with a dry or slightly damp cloth, ensuring it's completely dry before plugging anything in. A damaged cord is a serious electrical hazard.
Using Water Inside the Toaster
This is a major issue. Toasters have intricate electrical components and heating elements sensitive to moisture. Manufacturer guidelines consistently warn against immersing the toaster in water or letting liquid seep into slots.
Water can cause short circuits, damage wiring, and create safety risks. Always use a damp, not wet, cloth for interior wiping and ensure everything is dry before powering up.
Forgetting About Fixed Trays
If your toaster lacks a removable crumb tray, you might skip thorough cleaning. However, these models often accumulate the most debris because they're harder to access. Turning them upside down and shaking is only part of the job.
You still need brushes or cloths to manually sweep crumbs from the base collection area. Ignoring this leads to the same fire hazards and burnt smells.
When to Call It Quits (or Get a New One)
Sometimes, even with cleaning, a toaster might be beyond repair or not worth the hassle. Our research indicates tell-tale signs to watch for. If your toaster shows multiple symptoms, consider replacement.
Signs Your Toaster Needs Professional Help or Replacement
- Persistent Smoke: If cleaning doesn't resolve smoking and it continues with every use, there might be deeper internal damage to heating elements or wiring.
- Electrical Issues: If the toaster sparks, trips your circuit breaker, or the plug feels unusually hot, these are serious safety concerns. Unplug it immediately. According to standards from organizations like Underwriters Laboratories (UL), appliances must operate safely.
- Damaged Exterior or Interior: Visible cracks in the casing, bent metal parts, or damaged heating elements mean the toaster is unsafe or ineffective.
- Malfunctioning Controls: If levers won't stay down, browning settings fail, or it consistently burns toast, internal mechanisms might be failing.
- Severe Corrosion or Rust: Especially on older models, internal rust degrades components and is hard to remove completely.
If cleaning issues persist, investing in a new appliance is usually more cost-effective and safer than risking injury.
Frequently Asked Questions About Toaster Cleaning
How often should I clean my toaster?
Aim to clean your toaster’s crumb tray at least monthly. If you notice burnt smells or see smoke, clean it immediately, regardless of schedule. Frequent use may require more frequent cleaning.
Can I use bleach to clean my toaster?
No, never use bleach or harsh chemical cleaners inside your toaster. They can damage internal components and leave harmful residues that could contaminate food. Stick to mild soap and water or a baking soda paste for tough spots.
What if my toaster doesn't have a crumb tray at all?
If your toaster lacks a removable crumb tray, turn it upside down over a trash bin and gently shake out loose crumbs. For burnt-on bits, carefully use a soft brush or damp cloth to clean the interior. Ensure it's completely dry before plugging in.
Is it safe to use compressed air to clean my toaster?
Compressed air can help blow out loose crumbs from toasters without removable trays. Use caution not to blow debris deeper into the appliance or damage delicate heating elements. Ensure the toaster is unplugged and cool before trying this.