How to Adjust Toaster Settings
Ever feel like you're playing toaster roulette? One minute your toast is barely warm, the next it's practically charcoal. We've all been there!
Getting that golden-brown perfection isn't magic, though. It's really just about understanding how your toaster works and making a few smart adjustments.
Think of your toaster settings not as rigid numbers, but as a spectrum. That dial or slider is your control panel for toasting intensity. According to manufacturer specifications for many common models, the settings often range from 1 to 7, where lower numbers indicate less heat and shorter durations for lighter toast.
Quick Answer
Adjust toaster settings by starting low (e.g., 2 or 3) and toasting one slice. Assess the browning. Increase the setting one notch at a time until you achieve your desired toast color and crispness.
Consider bread thickness, type, and freshness for best results.
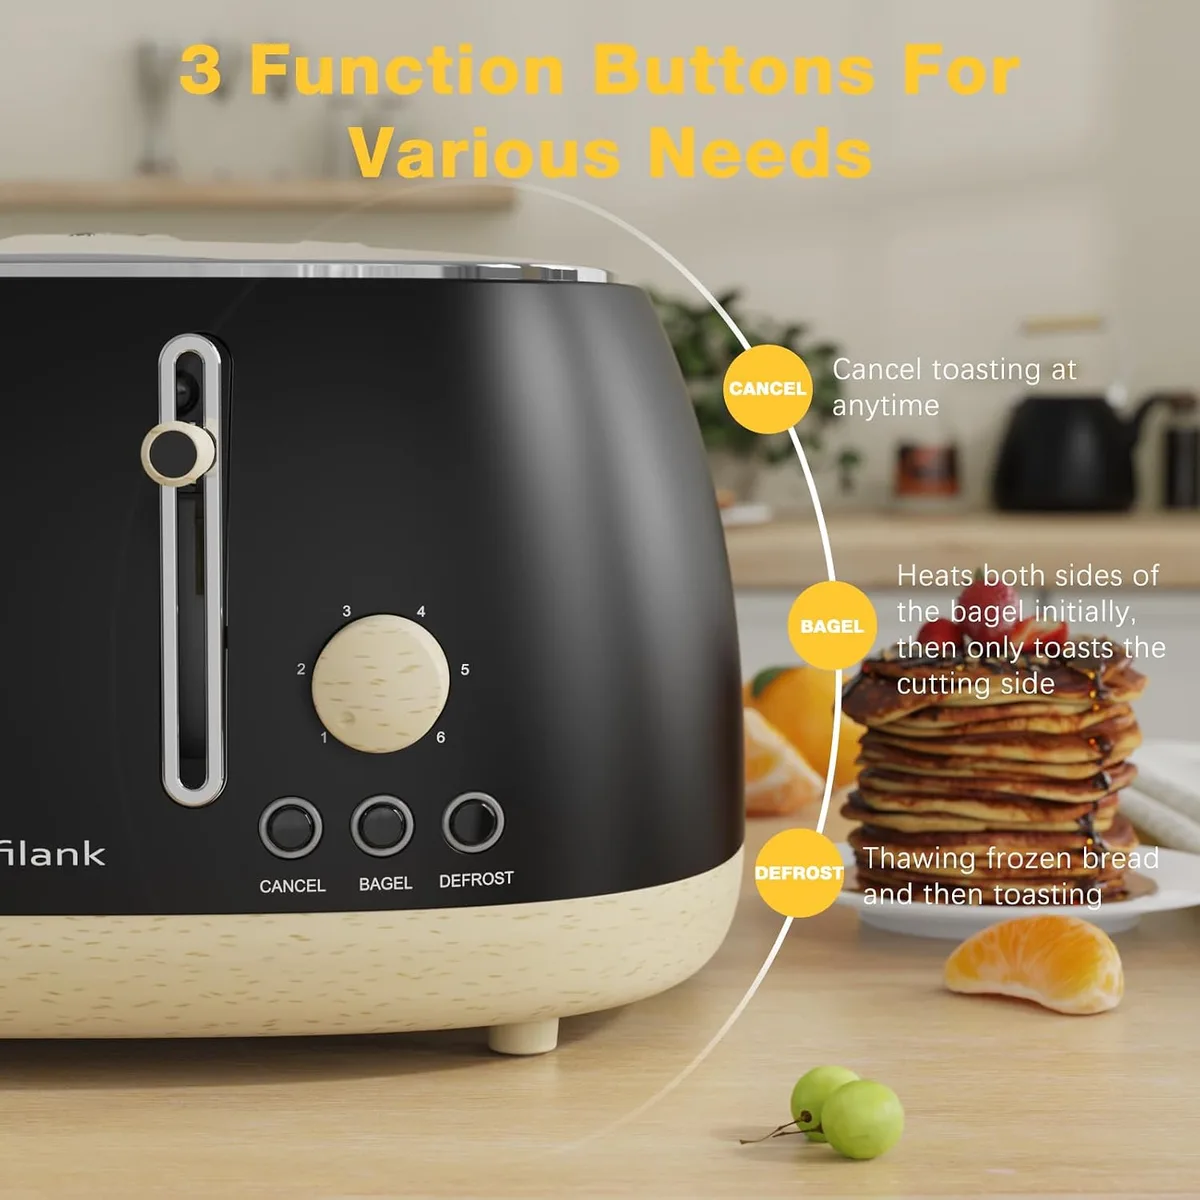
Image source: Bing (Web (fair-use with source credit))
Why Your Toaster Settings Are Tricky
The quest for perfect toast can feel surprisingly complicated. It's mostly because there’s no single "right" setting that works for everyone, every time. Your toaster's dial is more of a suggestion than a strict rule.
Achieving that ideal golden-brown hue depends on a handful of factors that change from one toasting session to the next.
The variables go beyond just the number on the dial. Things like the actual thickness of your bread, whether it’s fresh or a few days old, and the type of grain it’s made from all play a significant role. Even the ambient temperature of your kitchen can subtly influence how quickly the heating elements work.
Understanding the Numbers and What They Really Mean
Most toasters feature a numbered dial or a sliding control, typically ranging from 1 to 7 or 1 to 10. These numbers directly correspond to the amount of time the heating elements will stay active, or the intensity of the heat they produce. Lower numbers mean less heat and a shorter toasting cycle, resulting in lighter toast.
Conversely, higher numbers mean more heat and a longer cycle, leading to darker, crisper toast.
It's important to understand that these settings are relative. What’s a perfect "4" on one toaster might be closer to a "3" or a "5" on another model, even if they look identical. This variation is due to differences in internal components, wattage, and even the age of the appliance.
As of 2026, there's no universal standard dictating precise heat output for each numbered setting across all brands.
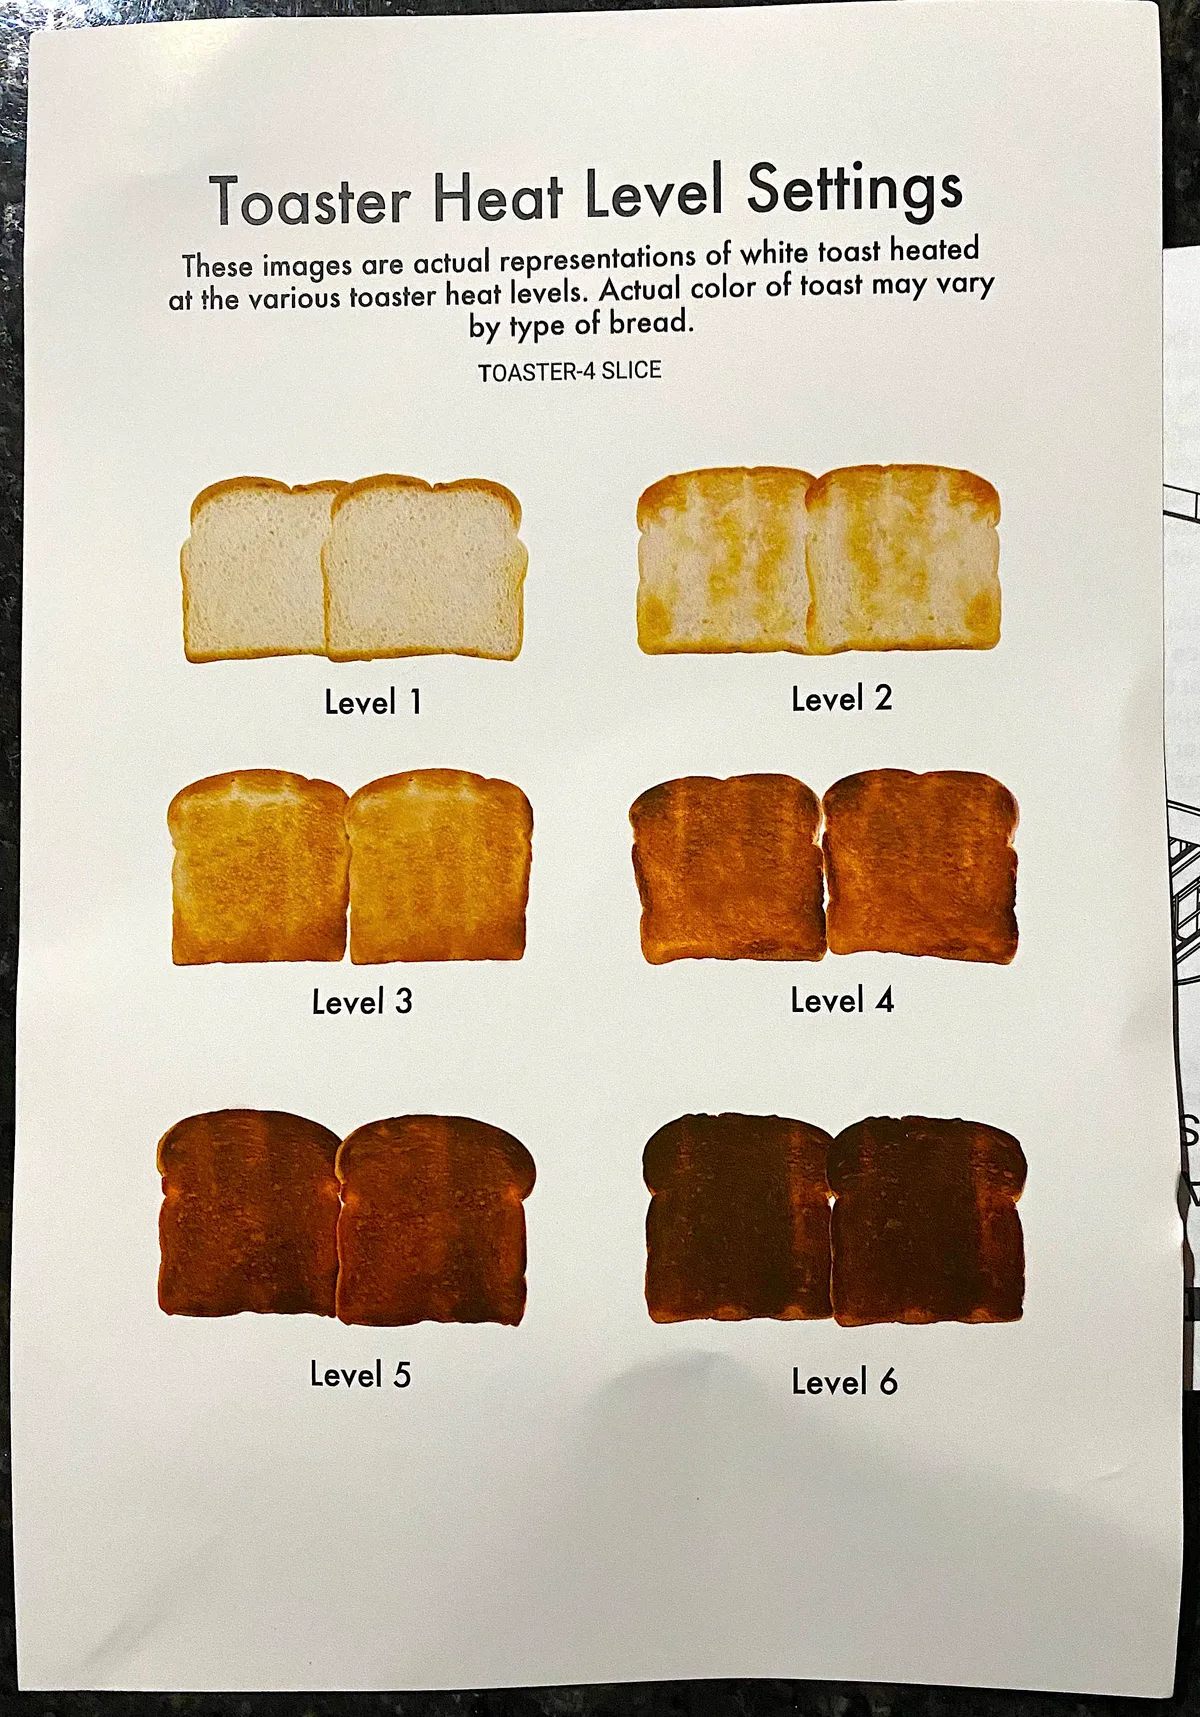
Image source: Bing (Web (fair-use with source credit))
Your Bread, Your Toaster: The Key Variables
When you’re trying to nail that perfect slice, remember that your bread is the star. Different types and thicknesses of bread will toast at different rates. Thicker slices need more time or a slightly higher setting to heat through evenly without burning the outside.
White bread tends to toast faster than denser whole-grain or sourdough varieties. Even the moisture content of your bread can make a difference.
Your toaster itself is another huge variable. Different brands and even different models within the same brand can have variations in their heating elements and timers. Older toasters may have less precise controls, while newer ones might have more advanced features that affect the toasting process.
Understanding these personal dynamics is crucial for consistent results. For instance, aggregate reviews show that models with wider slots often accommodate thicker breads more effectively.
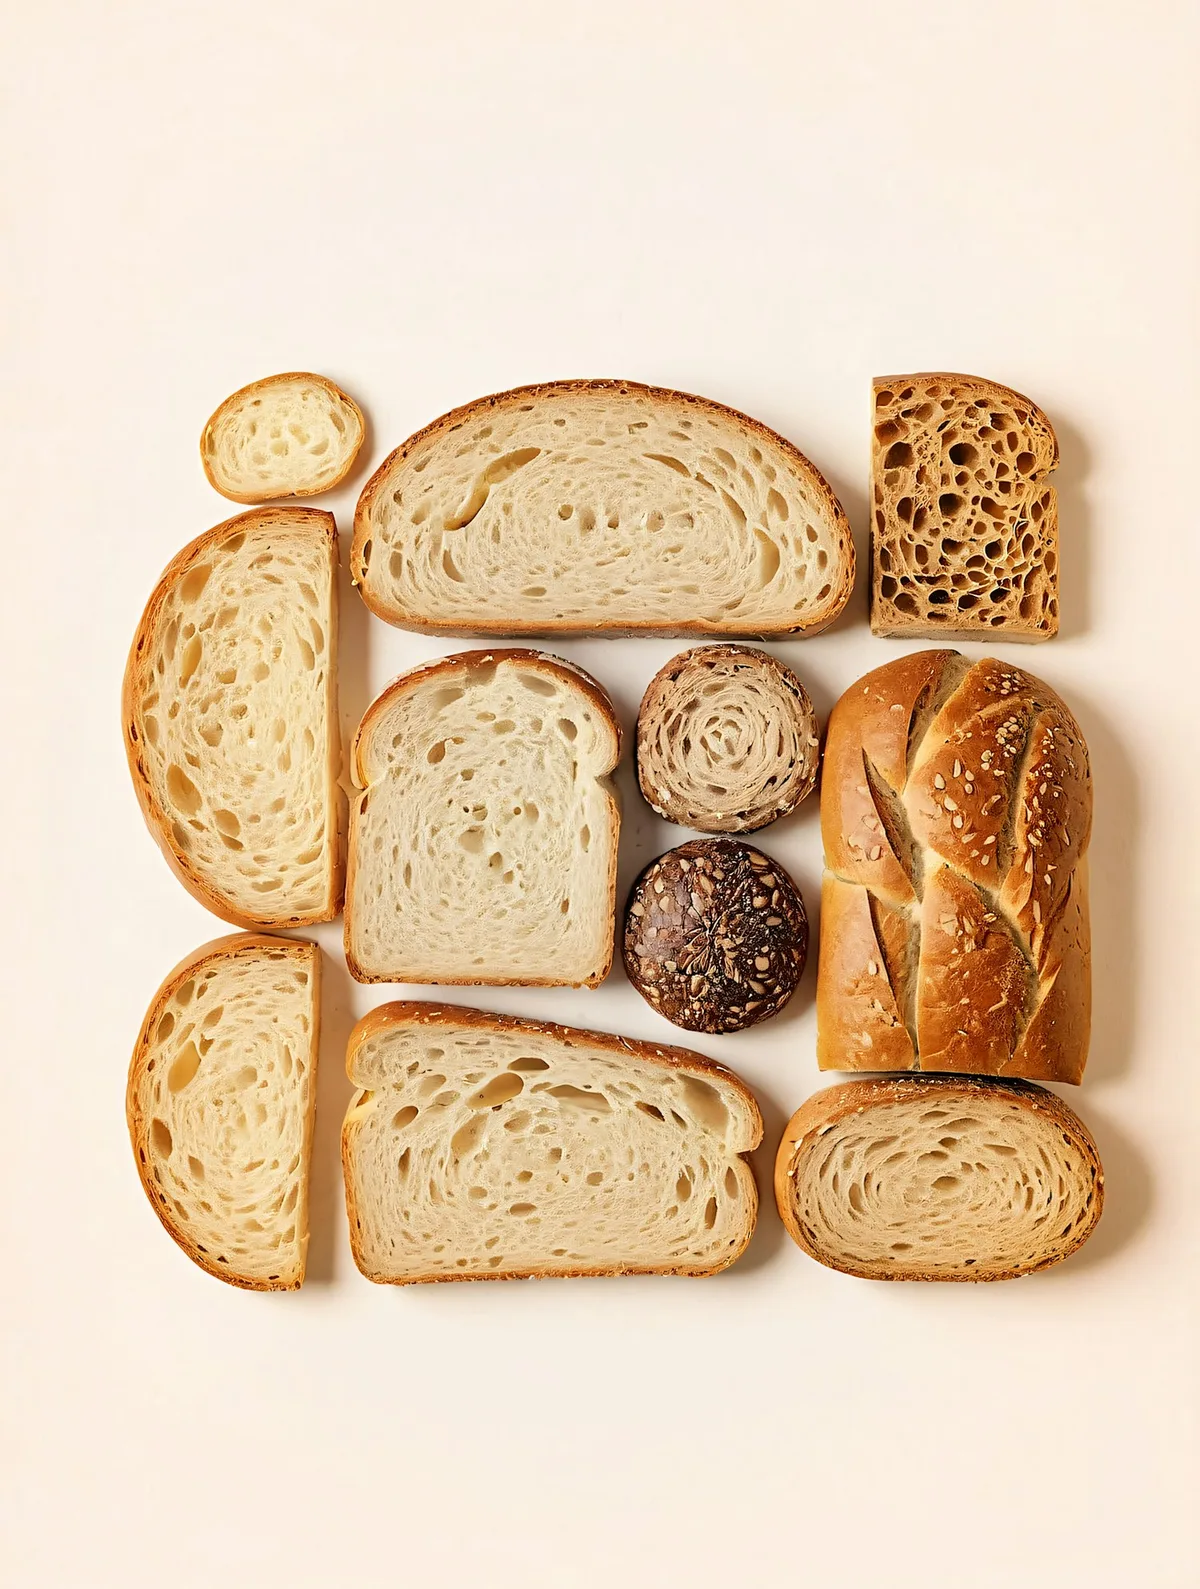
Image source: Bing (Web (fair-use with source credit))
How to Dial In Your Ideal Toast Setting
Finding your toaster's sweet spot isn't about guessing; it's a systematic approach. You’re essentially teaching yourself how your specific appliance behaves with your specific bread. This process is like calibrating any tool for optimal performance, ensuring you get exactly the results you’re looking for every single time.
The core principle is incremental adjustment. You'll make a small change, observe the outcome, and then make another small change based on what you saw. This method minimizes the risk of burning your toast while efficiently narrowing down the perfect setting.
Step 1: The Starting Point (Always Go Low)
Begin your toasting experiment with a standard slice of your most commonly used bread. Set your toaster to a relatively low setting. For most toasters, this means starting around a "2" or "3" on the dial.
This is your baseline.
The goal here is to see how the toaster handles the bread with minimal heat. You want to observe the initial browning and the texture. If the lowest setting that actually heats the bread still results in something too light, that's perfectly fine, it just means you'll be increasing the setting.
This initial step ensures you don't immediately overdo it, which is the most common way to end up with burnt toast.
Step 2: Test, Assess, and Adjust
Toast that first slice. Once it pops up, take a good look at it. Is it just a little warm?
Slightly golden? Deeply browned? The result will tell you where to go next.
- If it's too light: Increase the setting by just one notch. So, if you started at "2" and it's too light, set it to "3" for the next slice.
- If it's too dark: You’ve gone too far. For your next attempt, decrease the setting by one notch.
- If it’s perfect: Congratulations! You’ve found your baseline setting for this type of bread.
Repeat this process, toasting one slice at a time and adjusting the setting by a single increment with each subsequent slice, until you achieve your desired level of golden-brown crispness. This methodical approach is the most reliable way to find the perfect setting without wasting too much bread.
Step 3: Refining for Different Breads and Items
Once you’ve established a baseline for your everyday bread, you'll notice that other items might require different settings. Thicker slices of sourdough, for example, will likely need a higher setting or a longer duration to achieve an even brown without the crust becoming overly hard. A thin slice, conversely, could burn quickly on the same setting.
Think of your baseline as a starting point. If you’re toasting a thicker artisan loaf, you might need to bump the setting up by one or two notches from your standard. If you're toasting something very thin, you might need to go down a notch or two.
For items like bagels or frozen waffles, you might find specific settings on your toaster that are designed to accommodate their unique toasting needs, which we'll cover next.
Mastering Special Toaster Functions
Beyond the basic numbered dial, many modern toasters come equipped with specialized settings designed to tackle specific toasting challenges. These aren't just fancy buttons; they're engineered to provide a better outcome for certain types of food or situations. Understanding what each one does can significantly improve your toasting game and prevent common frustrations.
These functions are often tied to how the heating elements are activated. They might distribute heat differently, adjust the timing, or even alter the toasting cycle to suit items that don't fit neatly into the "standard slice" category. Knowing when and how to use them is key to unlocking your toaster's full potential beyond just browning bread.
Bagel, Defrost, and Reheat: When to Use Them
- Bagel Setting: This function is a game-changer for bagels. Typically, it toasts the cut side of the bagel more intensely than the outer crust, ensuring you get that perfectly crisp interior while keeping the outside soft and chewy. If your toaster has this, always use it when toasting sliced bagels cut-side-in.
- Defrost Setting: Straight from the freezer, bread can be tricky to toast evenly. The defrost setting adds extra time to the toasting cycle. It allows the bread to thaw gradually before the main toasting process begins, preventing the outside from burning while the inside remains cold. This function is also excellent for frozen waffles.
- Reheat Setting: Ever make toast a little too early? The reheat setting is designed for this. It provides a short burst of heat, just enough to warm up already-toasted bread without adding further browning. This is perfect for reviving toast that has gone cold but isn’t stale yet.
Common Toasting Pitfalls and How to Avoid Them
Even with the best intentions, it’s easy to fall into common toasting traps. The most frequent mistake is simply not paying attention to the variables involved. People often set their toaster and forget it, expecting the same result every time, regardless of the bread's thickness, freshness, or type.
This leads to frustration and, of course, the dreaded burnt toast or pale, lifeless slices.
Another significant pitfall is toaster inconsistency. As we’ve discussed, one toaster’s "4" is not another’s. Relying solely on a number without observing the actual outcome is a recipe for disappointment.
Aggregate user reviews indicate that a significant percentage of toasting complaints stem from expecting identical results from different toaster models.
Why Your Setting Isn't Working
- Inconsistent Bread: Using bread that varies greatly in thickness or moisture content without adjusting settings. Denser, whole-grain breads often require a higher setting than enriched white breads.
- Ignoring Toaster Quirks: Every toaster is different. What worked on your old machine won't necessarily work on a new one.
- Over-Reliance on Numbers: Treating the dial as an absolute measurement instead of a guideline.
- Forgetting Special Settings: Not using the bagel, defrost, or reheat functions when they could improve the outcome.
To avoid these issues, always start with a low setting and observe the result. Be prepared to adjust up or down one increment at a time until you find the perfect shade for your specific bread and toaster. This methodical approach is the most reliable way to achieve consistently great toast.
Frequently Asked Questions About Toaster Settings
How do I know if my toaster settings are correct?
Your toaster settings are correct when the toast reaches your desired level of golden-brown color and crispness without burning. This often involves a process of trial and error with your specific bread and toaster model, starting at a lower setting and gradually increasing it.
Can I use the same toaster setting for all types of bread?
No, you generally cannot use the same toaster setting for all types of bread. Thicker breads, denser whole grains, and enriched breads like brioche will toast differently. You'll typically need to adjust the setting higher for thicker or denser breads and lower for thinner or more delicate ones.
What does the "bagel" setting on my toaster do?
The "bagel" setting is designed to toast the cut side of a bagel more intensely than the outer sides. This results in a perfectly crisp interior that's ready for toppings, while the outside remains slightly softer and chewier.
Why does my toast burn on one side but not the other?
Uneven toasting often happens when the heating elements are not distributing heat evenly, or when the bread slice itself is not placed centrally in the slots. Some toasters have unevenly worn elements, or the bread might be leaning against one side.
How often should I adjust my toaster settings?
You should adjust your toaster settings whenever you change the type of bread, its thickness, or if you're toasting something other than standard bread, like a bagel or frozen waffle. Each new item or bread type may require a different setting for optimal results.