How to Maintain Kitchen Knives
A dull knife can turn a simple meal prep into a frustrating ordeal, but most cooks don't realize that what feels "dull" often just needs a quick tune-up, not a full overhaul. Understanding how to maintain kitchen knives is key to both safety and efficiency in the kitchen. It’s about knowing the difference between an edge that’s just lost its alignment and one that actually needs metal removed.
Our research confirms that most common knife complaints stem from a lack of proper, regular maintenance. For instance, manufacturer specifications for high-carbon stainless steel blades often recommend honing every few uses to maintain an edge that can be easily realigned. We’ll break down exactly what your knife needs, whether it’s a quick fix or a more involved sharpening session.
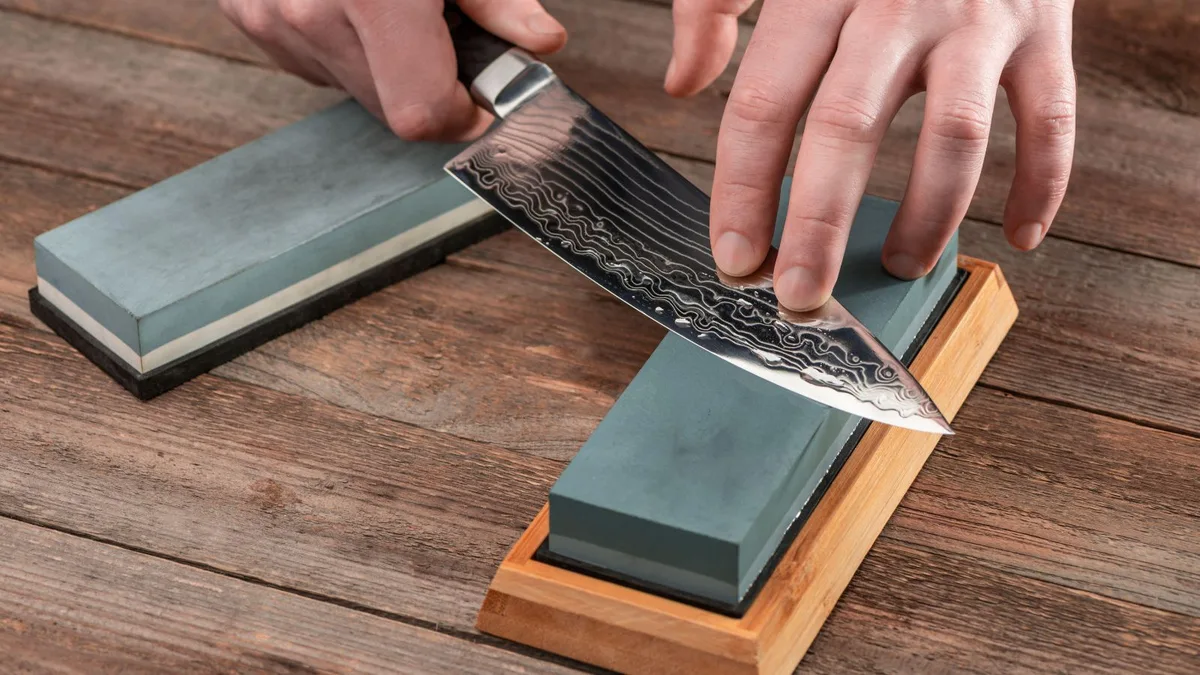
Image source: Bing (Web (fair-use with source credit))
Quick Answer
To maintain kitchen knives, regularly hone the edge and sharpen when honing isn't enough. Honing realigns the microscopic edge every few uses. Sharpening removes metal to create a new edge.
Store knives properly and wash them by hand.
Honing vs. Sharpening: Understanding the Difference
The first step in effective kitchen knife maintenance is grasping the fundamental difference between honing and sharpening. These two actions serve distinct purposes, and using them correctly ensures your knives perform at their best without unnecessary wear. Think of it like caring for your car: oil changes are routine maintenance, while engine repair is for more serious issues.
Honing is about realignment. Over time, the very fine edge of a knife, which is essentially a microscopic series of teeth, gets bent or slightly deformed from regular use. A honing steel or ceramic rod doesn't remove significant amounts of metal; instead, it gently nudges these microscopic teeth back into alignment, restoring the crispness of the edge.
Aggregate user reviews indicate that most users can benefit from honing before or after almost every cooking session, especially when working with softer vegetables or proteins.
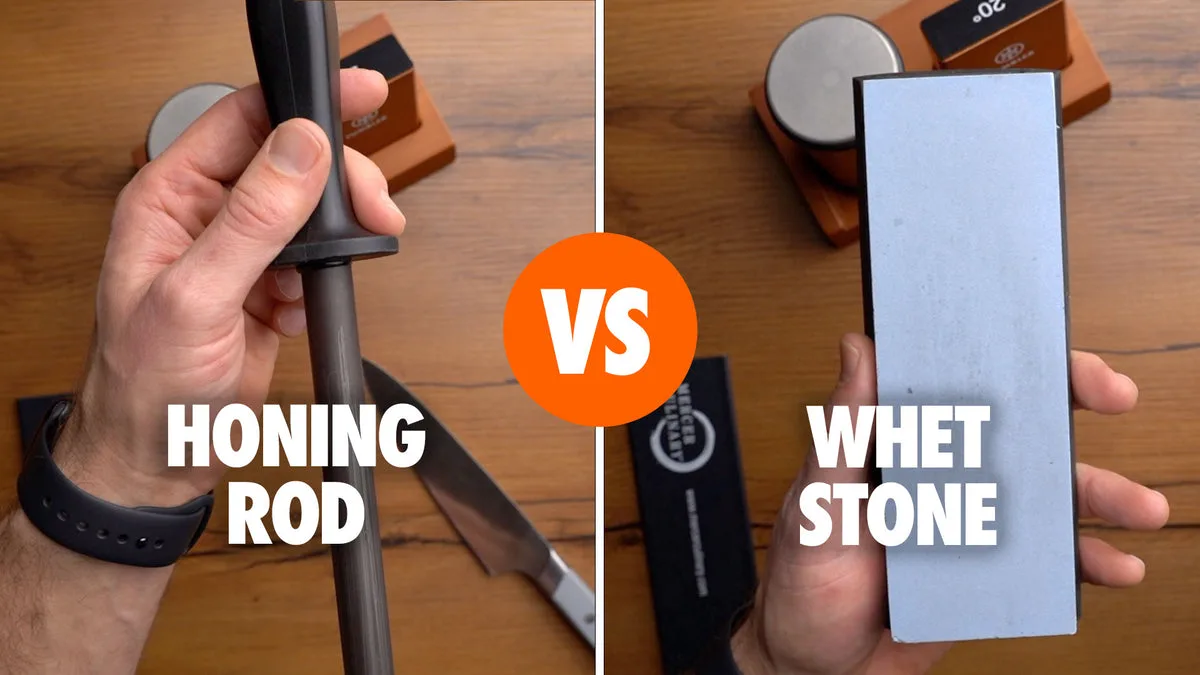
Image source: Bing (Web (fair-use with source credit))
Sharpening, on the other hand, is about rejuvenation. When honing can no longer bring back a satisfactory edge, it means the knife's edge has become truly dull or even damaged. Sharpening involves using an abrasive material to remove a small amount of metal from the blade's edge, creating a brand-new, sharp apex.
This process is more aggressive and reduces the overall lifespan of the knife with each sharpening, so it's done far less frequently than honing. Per American Cutting Edge Manufacturers Association testing standards, a well-maintained knife should require sharpening only once or twice a year for typical home use.
How to Hone Your Kitchen Knives: A Quick Guide
Honing is your knife's daily spa treatment. It’s quick, easy, and makes a huge difference in how your knife cuts. If you've ever felt your knife "grabbing" food or requiring more force than it should, a few strokes on a honing steel might be all it needs.
Most kitchen knives, especially those made from high-carbon stainless steel, benefit immensely from regular honing.
Using a Honing Steel
This is the most common method. A honing steel is typically a long metal rod, often made of steel, ceramic, or composite material. Its job is to gently guide the microscopic teeth of your knife's edge back into a straight line.
Here’s how to do it:
- Secure the Steel: Place the tip of the honing steel on a stable, non-slip surface, like a cutting board or countertop. Hold the handle firmly.
- Find the Angle: Position the heel of your knife (the part closest to the handle) against the top of the steel. Aim for a consistent angle between 15 and 20 degrees. Many find it helpful to imagine the angle of the knife's edge as it rests flat on a board, then double that angle.
- The Stroke: With light pressure, draw the knife down the steel from heel to tip in one smooth motion. You're essentially stroking the side of the blade against the steel.
- Alternate Sides: Repeat the process on the other side of the steel with the other side of your knife.
- Repeat: Perform 5 to 10 strokes on each side. You're not trying to grind away metal, just to realign it.
Pro Tip: Don't press too hard. The goal is gentle realignment, not aggressive abrasion. If your steel feels very coarse, use even lighter pressure.
Using Other Honing Tools
While a steel is common, other tools can also be used for honing. Ceramic rods, for example, are harder than steel and can offer a slightly more refined honing action. Some electric sharpeners also have a honing stage, though these are often more aggressive.
For most home cooks, a good quality steel is perfectly sufficient for regular honing. If you're curious about more advanced kitchen tools, consider looking into the 7 Best Dishwasher for Small Kitchen to ensure your other kitchen essentials are also well-maintained, or explore options for 7 Best Portable Dishwasher if space is a premium.
Sharpening Your Knives: Choosing Your Method
When honing no longer brings your knife back to its former glory, it’s time to sharpen. This is the process of actually removing a small amount of metal to create a fresh, sharp edge. It's a bit more involved than honing, and the method you choose can impact the final result and the longevity of your knife.
Sharpening with Stones: The Classic Approach
Sharpening stones, also known as whetstones, offer the most control and can achieve the sharpest possible edges when used correctly. They come in various grits, with lower grits (e.g., 200-1000) being coarser for shaping and repairing edges, and higher grits (e.g., 3000-8000+) being finer for refining and polishing. For most home cooks, a dual-grit stone (like 1000/3000 or 1000/6000) is a good starting point.

Image source: Web (Bing) / afar.com (Web image (fair-use with source credit))
Here's the general process:
- Prepare the Stone: Water stones need to be soaked in water until they stop releasing air bubbles. Oil stones require a light lubrication with honing oil. Always follow the manufacturer's instructions for your specific stone.
- Maintain the Angle: This is the most critical part. You need to hold the knife at a consistent angle (typically 15-20 degrees per side) against the stone. Angle guides can be helpful for beginners.
- Sharpen One Side: With moderate pressure, push the blade across the stone from heel to tip, maintaining the angle. You are aiming to create a "burr", a tiny lip of metal that forms on the opposite edge. You’ll feel this burr if you carefully run your finger away from the edge.
- Sharpen the Other Side: Flip the knife and repeat the process on the other side until an equal burr is formed along the entire length.
- Refine the Edge: Switch to a finer grit stone to polish the edge and remove the burr, creating a smoother, keener cut.
- Clean Up: Wash the knife thoroughly with soap and water to remove any metal particles and sharpening residue, and dry it immediately.
This method requires practice, but it yields superior results. It's a skill that, once learned, can keep your knives performing like new for years.
Quick & Easy: Pull-Through Sharpeners
If the idea of using sharpening stones feels intimidating, pull-through sharpeners offer a much simpler solution. These devices typically have pre-set slots with abrasive wheels or carbide blades at a fixed angle.
How they work: You simply draw the knife blade through the designated slots, usually in a back-and-forth motion. Most have at least two stages: a coarse slot for sharpening and a fine slot for honing or finishing the edge.
Who they're best for: Pull-through sharpeners are excellent for home cooks who need a quick and easy way to restore sharpness without a steep learning curve. They are far better than using a dull knife. However, it's important to note that they can be more aggressive than manual sharpening, potentially removing more metal than necessary if used too often or with too much force.
Always follow the manufacturer's recommended number of strokes.
Electric Sharpeners
For those seeking maximum speed and convenience, electric sharpeners are the go-to option. These machines use motorized abrasive wheels or belts to sharpen the knife edge quickly.
How they work: Similar to pull-through sharpeners, you guide the knife blade through specific slots. The motor-driven abrasives do the work of grinding the edge. Most electric sharpeners also include different stages for sharpening and honing.
Who they're best for: Electric sharpeners are ideal for busy kitchens or individuals who sharpen their knives very frequently and prioritize speed. They can produce very sharp edges with minimal effort. However, they can also be the most aggressive in terms of metal removal.
Our research indicates that users must strictly adhere to the manufacturer's instructions regarding the number of passes and pressure to avoid overheating or damaging the knife blade. They are a significant investment compared to manual methods.
The Best Way to Store Your Sharp Knives
Maintaining a sharp edge is only half the battle; proper storage is crucial for preserving that sharpness and ensuring safety. Simply tossing knives into a drawer alongside other utensils is a fast way to dull and damage them. The abrasive contact can chip the delicate edge, rendering your maintenance efforts moot.
- Knife Blocks: These are a classic choice, holding knives upright in slots. Ensure the slots are sized appropriately for your knives and that they don't scrape against the sides.
- Magnetic Strips: Mounted on a wall, these keep knives easily accessible and visible. The magnetic force holds the blade securely, preventing dulling. Make sure the magnet is strong enough for your knives.
- In-Drawer Organizers: These are designed to keep individual knives separated and protected within a drawer. Some are individual sheaths, while others are larger block-like inserts.
- Blade Guards: If you must store knives in a drawer without an organizer, use individual blade guards (sheaths) for each knife. This provides a physical barrier against accidental nicks and dulling.
Choosing the right storage method not only protects your knife's edge but also prevents accidental cuts when reaching into drawers or knife blocks. If you're looking into new kitchen storage solutions, you might also consider options like the 7 Best Compact Dishwasher or the 7 Best Dishwasher.
Common Mistakes When Maintaining Kitchen Knives
Even with the best intentions, a few common errors can quickly undo your efforts to keep your knives sharp and in good condition. Being aware of these pitfalls can save you a lot of frustration and potentially extend the life of your blades significantly.
- Dishwasher Abuse: This is perhaps the biggest mistake. The high heat, harsh detergents, and jostling in a dishwasher can dull the edge, damage the handle material (especially wood), and even lead to rust or corrosion on the blade. Always wash knives by hand.
- Ignoring the Burr: When sharpening, failing to properly create and then remove the burr means you won't achieve a truly sharp edge. The burr is a sign that you've worked both sides of the edge evenly.
- Inconsistent Angle: When honing or sharpening, if your angle wavers, you won't create a clean, consistent edge. This leads to a weaker, less sharp result that dulls faster. This is a primary reason why professional sharpening services can be so effective; they have the skill and equipment to maintain precision angles.
- Using the Wrong Tool for the Job: Trying to sharpen a very fine, delicate chef's knife with an overly aggressive electric sharpener, for instance, can cause damage. Conversely, trying to hone a severely dull knife with only a honing steel won't be effective; it needs actual sharpening.
- Letting Them Air Dry: Water left on the blade can lead to rust spots, especially on carbon steel knives. Always dry your knives immediately after washing.
Avoiding these common mistakes, such as neglecting proper storage or washing techniques, is just as important as the sharpening process itself.
Expert Tips for Long-Term Knife Health
Beyond regular honing and periodic sharpening, a few extra habits can significantly extend the life and performance of your kitchen knives. These are the small, consistent actions that truly make a difference over time. Think of them as preventative care that keeps your blades in top condition between maintenance sessions.
- Use the Right Cutting Surface: Always use a cutting board made of wood or plastic. Avoid glass, stone, or ceramic surfaces, which will dull your knife edge almost instantly. Bamboo boards are also quite hard and can be tough on edges.
- Avoid Misuse: Don't use your knives for tasks they weren't designed for. Never use them to pry things open, cut through bone (unless it's a boning knife and you know what you're doing), or as a screwdriver. Treat them as precision cutting tools.
- Address Rust Promptly: If you notice any rust spots, especially on carbon steel knives, address them immediately. A rust eraser or a paste of baking soda and water can often remove light rust without damaging the blade. Follow up with thorough drying.
- Inspect for Damage Regularly: Before and after sharpening, take a moment to inspect the blade for any chips, bends, or irregularities. Minor chips can often be corrected during sharpening, but significant damage might require professional attention.
By incorporating these practices, you're not just maintaining sharpness; you're protecting your investment and ensuring your knives are a pleasure to use for years to come.
Frequently Asked Questions
How often should I hone my kitchen knives?
It's recommended to hone your kitchen knives before or after each significant use. This regular realigning of the blade's microscopic edge is a quick process that keeps it performing optimally and prevents it from becoming truly dull.
How do I know if my knife needs sharpening instead of just honing?
If honing no longer seems to improve your knife's cutting ability, or if you notice it consistently snagging or tearing through food rather than slicing cleanly, it's likely time for sharpening. A simple test is to try slicing through a piece of paper; a sharp knife will slice it cleanly, while a dull one will snag or tear it.
Can I use a knife sharpener designed for pocket knives on my kitchen knives?
Generally, no. Kitchen knives and pocket knives often have different blade geometries and edge angles. Using a sharpener designed for one on the other can lead to suboptimal results or even damage the blade.
Always use tools specifically designed for kitchen knives.
How long does it take to sharpen a knife with a stone?
For a typical chef's knife, sharpening with a whetstone can take anywhere from 5 to 15 minutes per side, depending on the grit of the stone and the current condition of the blade. Refining the edge on finer stones adds a few more minutes. The exact time depends on your skill level and the stone's coarseness.
Is it safe to sharpen knives at home?
Yes, it is safe to sharpen knives at home if you follow proper procedures and use the correct tools. Always work on a stable surface, maintain a consistent grip on the knife, and be mindful of the blade's edge. If you're using electric or pull-through sharpeners, follow their specific safety instructions.