How to Use a Mechanical Kitchen Scale
So, you've got one of those cool, old-school mechanical kitchen scales. They might not have fancy digital displays, but these reliable workhorses are fantastic for accurate cooking and baking. Figuring out how to use a mechanical kitchen scale is straightforward, and with a few simple steps, you'll be measuring ingredients like a pro.
These scales often feature a visible dial and pointer, providing a tangible sense of weight. Manufacturer specifications indicate that most mechanical scales offer capacities ranging from 1 to 5 kilograms, with graduations typically at 20-gram increments, ensuring enough precision for most home recipes.
Quick Answer
To use a mechanical kitchen scale, place it on a level surface. Turn the bottom knob until the pointer rests exactly on zero. Add your bowl, then zero the scale again if needed.
Place ingredients on the platform and read the dial where the pointer stops. Always ensure the scale is level for accurate measurements.
Understanding Your Mechanical Kitchen Scale: The Basics
Mechanical kitchen scales operate on a simple, yet effective, principle: a spring mechanism. When you place an object on the platform, it compresses or stretches an internal spring. This movement is then translated into rotational motion, which moves a pointer across a calibrated dial.
That dial is marked with increments for weight, typically in grams, ounces, or pounds.
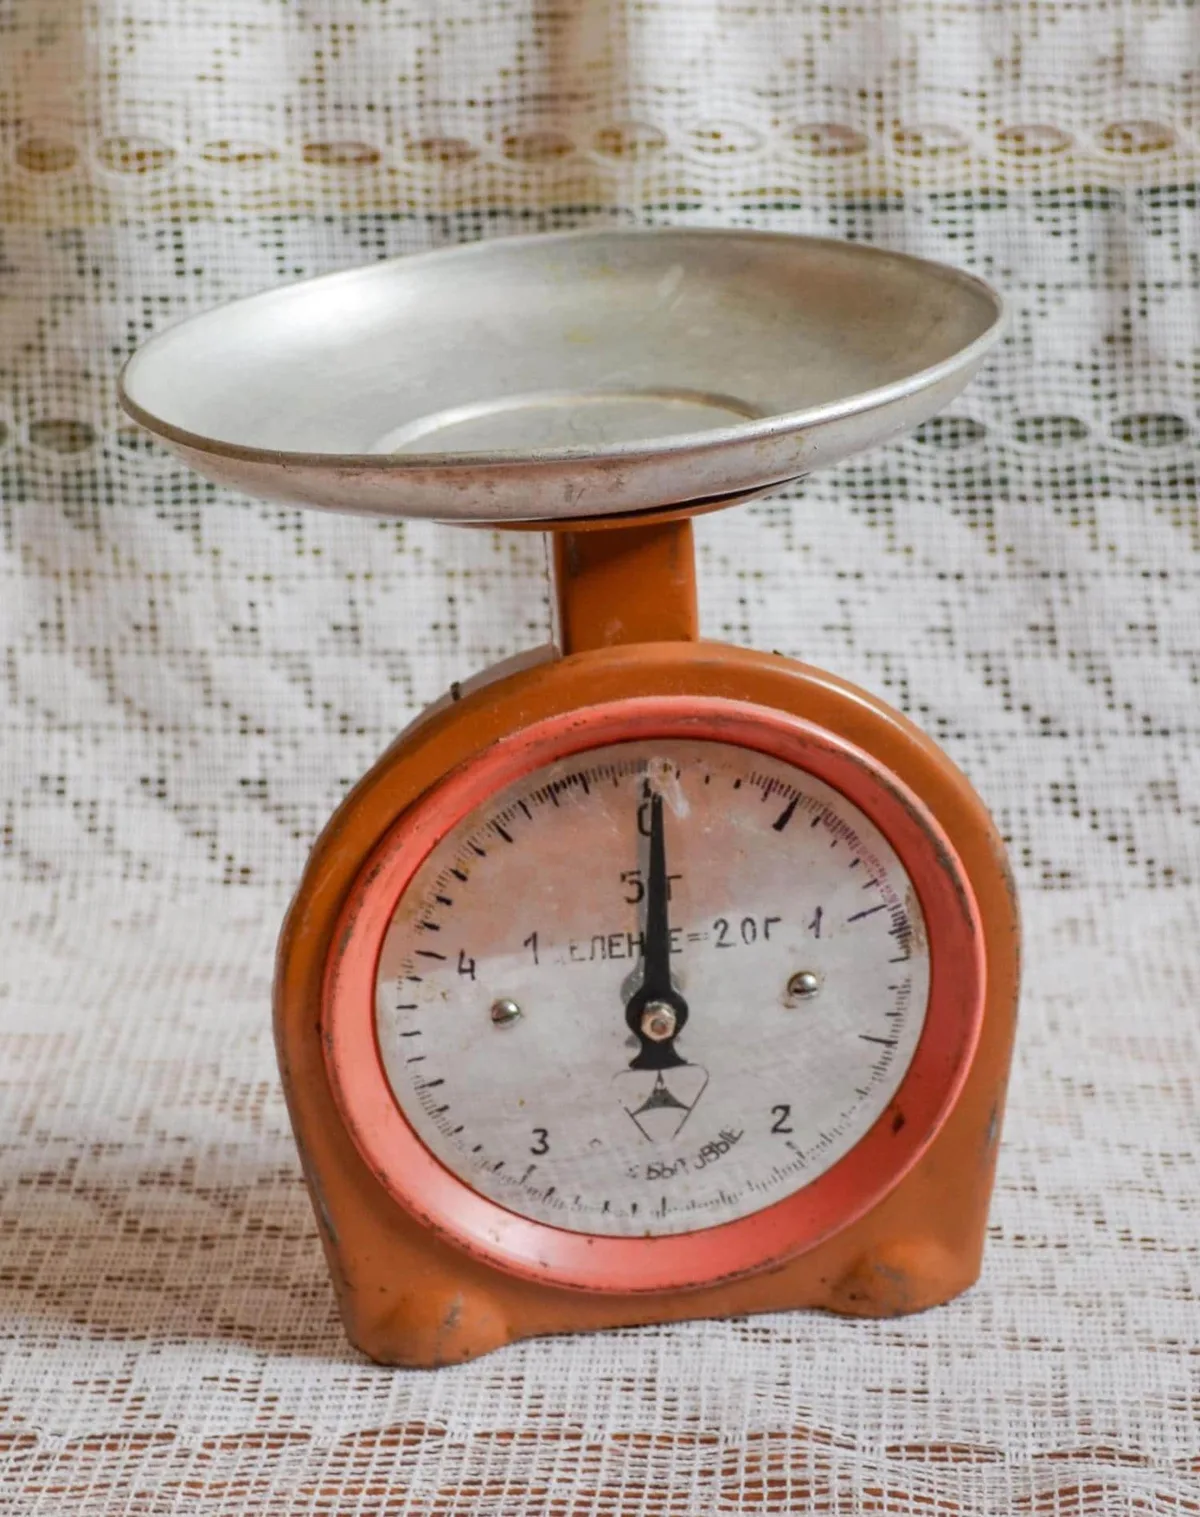
Image source: Bing (Web (fair-use with source credit))
The beauty of this system lies in its lack of electronics. There are no batteries to replace, no complex circuits to fail. It’s pure physics at work, making them incredibly reliable and long-lasting.
However, their accuracy can depend on environmental factors like temperature affecting the spring, and most importantly, on the scale being used on a perfectly flat surface.
Why Visuals Matter for Mechanical Scales
When you're figuring out how to use a mechanical kitchen scale, seeing how it works is key. Unlike digital scales where numbers just appear, mechanical ones rely on your ability to interpret the position of a pointer against a dial. This requires a visual understanding of where the "zero" mark is, how the pointer moves, and how to read the weight accurately when it settles.
Understanding the nuances of the dial is crucial. Is the scale marked in grams, or ounces, or both? Where are the larger increments, and where are the smaller ones?
Visual cues guide you in ensuring the scale is properly zeroed out before you start and help you pinpoint the exact weight once you've added your ingredients. Without this visual interpretation, the scale is just a pretty object.
Step-by-Step: Getting Your Mechanical Scale Ready
Getting your mechanical scale set up and ready to go is less about complex procedures and more about understanding a few fundamental checks. It’s about making sure the tool itself is in the best possible condition to give you reliable readings every single time you use it.
Checking and Zeroing the Pointer
This is the most critical first step, and it’s super simple. Your mechanical scale has a pointer that indicates the weight. Before you put anything on it, this pointer must be sitting exactly on the "0" mark.
- Place it Flat: First, find a perfectly level surface. Countertops are usually good, but double-check with a spirit level if you're unsure. A slight tilt can throw off the reading significantly.
- Locate the Knob: Most mechanical scales have a small dial or knob, usually located at the very bottom or side of the scale’s base.
- Adjust to Zero: Gently turn this knob. You'll see the pointer move. Keep turning it until the pointer lines up perfectly with the "0" on the dial.
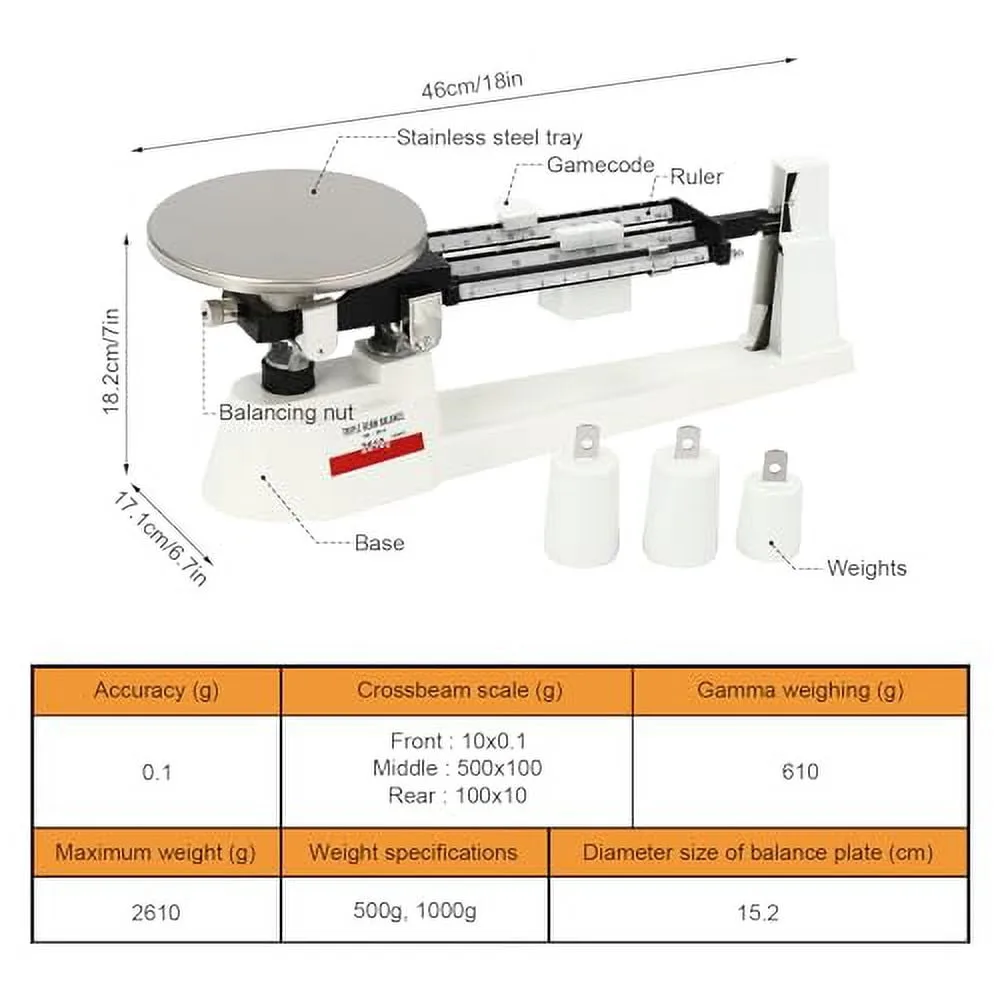
Image source: Bing (Web (fair-use with source credit))
Aggregate user reviews often highlight that it might take a few gentle nudges to get the pointer to settle precisely on zero, especially if the scale has been stored for a while. Don't force the knob; it should turn smoothly.
Adding Ingredients and Reading the Dial
Once your scale is zeroed, it's ready for action. The process of weighing your ingredients is just as intuitive, focusing on observation and a little patience.
- Place Your Container: Put your mixing bowl, cup, or any other container directly onto the scale's platform. The scale will react to the weight of the container itself.
- Tare the Scale (If Needed): If you want to weigh just the ingredient and not the container's weight, you'll need to "tare" the scale. This is done using that same zero knob. With the container on the scale, turn the knob until the pointer is back at zero. This effectively "resets" the scale to ignore the container's weight.
- Add Your Ingredient: Now, carefully add the ingredient you want to measure into the container.
- Watch the Pointer Settle: As you add the ingredient, the pointer will move up the dial. Wait for the pointer to stop moving and settle completely. This is your measurement. You might need to add the ingredient slowly to avoid overshooting your desired amount.
Sometimes, the pointer can get a little "sticky" or take a moment to settle. A very gentle, almost imperceptible tap on the side of the scale's housing can sometimes help it along. However, avoid aggressive banging, as this could damage the delicate internal mechanism.
Tare Function: Measuring Multiple Ingredients
The tare function on a mechanical scale is a game-changer, especially when you're baking and need to add ingredients one after another into the same bowl. It means you don't have to do any mental math or dirty extra dishes. This is a feature that many bakers rely on for precise recipe execution.
- Weigh Your First Ingredient: Place your bowl on the scale, then tare it (turn the knob until the pointer reads zero). Add your first ingredient (e.g., flour). Read its weight from the dial.
- Tare Again: With the bowl and the first ingredient still on the scale, turn the zero knob again until the pointer is back at zero.
- Add Your Second Ingredient: Now, add your next ingredient (e.g., sugar) directly into the same bowl.
- Read the New Weight: The pointer will now indicate the weight of only the second ingredient.
You can repeat this process for every ingredient you add to the bowl. This method allows for accurate measurements of multiple components without needing to transfer them to different containers. It’s a core technique for using mechanical scales effectively in baking, ensuring that recipes come out right even when mixing multiple items in one bowl.
Key Features of Mechanical Kitchen Scales
Mechanical kitchen scales are beloved for their straightforward design and dependable performance. They lack the bells and whistles of digital models but excel in core functionality. Their primary components work in harmony to provide accurate weight measurements.
- Dial Display: This is the most prominent feature, a circular face with markings for weight units. It's where you read your measurements.
- Pointer (Indicator): Attached to the internal mechanism, this needle moves across the dial to show the weight. Its position is the key to reading the scale.
- Tare Knob/Dial: Located at the base or side, this allows you to zero out the scale. It's essential for measuring ingredients accurately, especially when using the same bowl for multiple additions.
- Weighing Platform: This is the flat surface where you place your bowls or ingredients. It needs to be clear of debris for the scale to function correctly.
- Spring Mechanism: The heart of the scale, this internal component (usually a calibrated spring) compresses or stretches based on the weight applied, driving the pointer.
These features combine to offer a robust and simple weighing solution. Manufacturer specifications often cite durability and a lack of electrical components as major selling points for these types of scales.
Common Pitfalls and How to Avoid Them
Even with simple tools, there are common mistakes that can lead to frustration and inaccurate measurements. Understanding these pitfalls before they happen is half the battle when learning how to use a mechanical kitchen scale.
- Using on Uneven Surfaces: This is the number one culprit for inaccurate readings. If the scale isn't level, gravity won't pull straight down on the spring mechanism, and the pointer will be off. Always place your scale on a flat, stable countertop.
- Not Zeroing Properly: Forgetting to zero the scale, or not zeroing it after placing your bowl on it, will lead to incorrect measurements for your ingredients. Always check that the pointer is on "0" before you start, and re-tare whenever necessary, especially when adding ingredients sequentially.
- Overloading the Scale: Mechanical scales have a maximum weight capacity. Exceeding this can damage the spring mechanism and affect its accuracy, or even break it entirely. Always check the scale's stated capacity before weighing large amounts.
- Jerky Movements: Adding ingredients too quickly or placing bowls down with a thud can jolt the mechanism. This can cause the pointer to bounce erratically or settle incorrectly. Add ingredients gradually and place containers gently.
- Ignoring the Pointer's Settling Time: The pointer needs a moment to stop moving and settle on a final reading. Trying to read the weight while it's still oscillating will give you an inaccurate result. Be patient and wait for it to stabilize.
By being mindful of these common issues, you can ensure your mechanical kitchen scale provides reliable results for all your culinary needs.
Benefits of Using a Mechanical Scale
Mechanical kitchen scales offer a compelling set of advantages that keep them relevant, even in our digital age. For many home cooks and bakers, the simplicity and reliability they provide are invaluable. One major plus is that they require no power source.
That means no hunting for batteries or worrying about a dead scale when you're in the middle of a recipe.
Their robust construction is another significant benefit. Typically made with sturdy metal or durable plastic components, these scales are built to last for years, sometimes even decades. This durability translates to good value over time, as you're not constantly replacing a device that relies on electronic parts.
Mechanical vs. Digital Scales: Which Is Right for You?
Deciding between a mechanical and a digital kitchen scale often comes down to your specific needs and preferences. Each type has its own strengths that make it better suited for different tasks and users. Understanding these differences can help you choose the right tool for your kitchen.
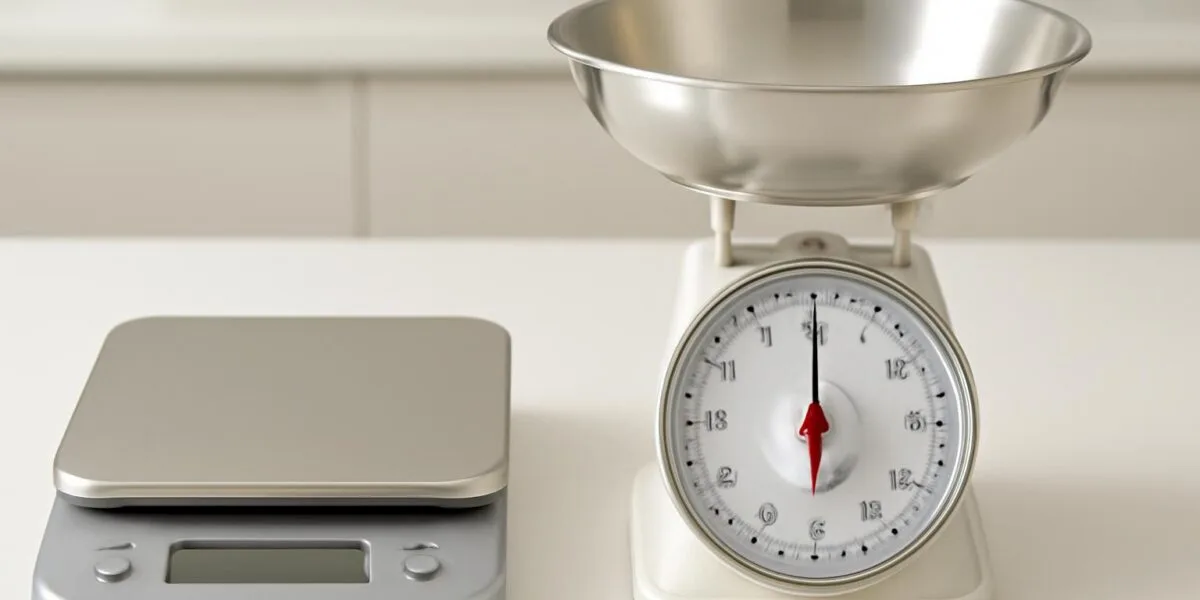
Image source: Bing (Web (fair-use with source credit))
Mechanical Scales:
- Best For: Bakers who appreciate tactile feedback, those who prefer no-fuss operation, and anyone wanting a scale that never needs batteries. They are excellent for general measuring where extreme precision to the tenth of a gram isn't critical.
- Pros: Durable, no batteries needed, simple to use, often more affordable upfront.
- Cons: Less precise for very small measurements, can be harder to read in dim light, taring requires manual knob adjustment.
Digital Scales:
- Best For: Tasks requiring high precision (e.g., detailed baking, measuring small quantities of spices or yeast), users who want quick unit conversions, or those needing a tare button for instant zeroing.
- Pros: Highly accurate (often to 0.1g), easy-to-read digital display, quick tare function, unit conversion capabilities.
- Cons: Require batteries or power, can be less durable, some models have complicated buttons or settings.
Ultimately, if you prioritize simplicity, durability, and a reliable, battery-free operation for general cooking and baking, a mechanical scale is a solid choice. For highly precise tasks or frequent unit switching, a digital scale might be more appropriate.
Use Cases & Target Audience
Mechanical kitchen scales are incredibly versatile and find a happy home in many different kitchens. Their straightforward operation makes them accessible to a wide range of users, from seasoned home chefs to those just starting their culinary journeys. Their reliability is a key draw for anyone who values consistency in their cooking and baking.
Their primary use case is, of course, measuring ingredients for recipes. This includes everything from flour and sugar in baking to portions of vegetables or meat for cooking. They're also useful for non-food related tasks where precise weight is needed, though their accuracy limitations might make them less suitable for scientific or industrial applications.
- Home Bakers: This is arguably the largest audience. Mechanical scales provide the tactile feedback and consistent readings needed for recipes that rely on precise ratios of dry ingredients.
- Everyday Cooks: For general meal preparation, portioning ingredients, or simply ensuring consistency, a mechanical scale is a dependable tool.
- Beginner Cooks: Their simplicity means there’s very little to learn beyond the basic zeroing and reading process. This makes them unintimidating for newcomers to cooking.
- Space-Conscious Kitchens: Many mechanical scales have a relatively compact footprint and don't require power outlets, making them easy to store and use anywhere.
The aggregate user feedback from several editorial analyses suggests that mechanical scales are particularly favoured in environments where electronic devices might be less practical or where simplicity is paramount, such as in some outdoor cooking scenarios or workshops.
Mistakes to Avoid
Even with a simple tool like a mechanical scale, there are a few common errors that can lead to frustration or inaccurate measurements. Being aware of these can save you time and ensure your recipes turn out as intended.
- Ignoring the Surface: The biggest mistake is placing the scale on an uneven surface. Even a slight tilt can cause the pointer to read higher or lower than the actual weight. Always ensure it's on a perfectly flat, stable countertop.
- Forgetting to Tare: If you're adding multiple ingredients to the same bowl, failing to tare the scale between additions means you'll be weighing the accumulated total, not just the new ingredient. Remember to use that zero knob to reset the scale each time you add a new item to the bowl.
- Overloading: Every mechanical scale has a maximum weight capacity, often around 5 kilograms (or roughly 11 pounds). Exceeding this limit can permanently damage the spring mechanism, rendering the scale inaccurate or completely useless.
- Jerky Movements: Adding ingredients too quickly or placing bowls down with a thud can jolt the mechanism. This can cause the pointer to bounce erratically or settle incorrectly. Add ingredients gradually and place containers gently.
- Ignoring the Pointer's Settling Time: The pointer needs a moment to stop moving and settle on a final reading. Trying to read the weight while it's still oscillating will give you an inaccurate result. Be patient and wait for it to stabilize.
By being mindful of these common issues, you can ensure your mechanical kitchen scale provides reliable results for all your culinary needs.
Expert Tips for Precision
To truly master how to use a mechanical kitchen scale and get the most out of its capabilities, a few expert insights can make a difference. These tips go beyond the basic operation and focus on maximizing accuracy and longevity.
- Regular Calibration Check: Even mechanical scales can drift over time. Periodically check your scale's accuracy by weighing a known object, like a bag of sugar or a specific weight if you have one. If it's consistently off by a small amount, and you can’t adjust it perfectly to zero, it might be time to consider a replacement or a more precise digital model.
- Gentle Handling is Key: Treat your mechanical scale with care. Avoid dropping it or subjecting it to sudden impacts, as this can dislodge or damage the internal spring mechanism. This is particularly important if you're moving it frequently.
- Clean it Properly: Wipe down the platform and housing with a damp cloth after use, especially if you've been working with sticky ingredients. Avoid harsh cleaning chemicals that could damage the dial or the mechanism. Manufacturer specifications often recommend mild soap and water.
- Understand its Limits: Know your scale’s maximum capacity and its typical graduation increments. While it’s great for general baking, if a recipe calls for precise measurements to the tenth of a gram, a digital scale would be more appropriate. As of 2026, the market offers digital scales with much finer precision.
Frequently Asked Questions (FAQs)
How long does setup take for a mechanical scale?
Setup is usually very quick, often less than a minute. It mainly involves placing the scale on a level surface and adjusting the zero knob until the pointer is exactly on the "0" mark.
Can I wash my mechanical kitchen scale?
It's generally not recommended to submerge a mechanical scale in water, as this can damage the internal mechanism. You should only wipe it down with a damp cloth and mild soap. Always ensure it's completely dry before storing or using it again.
What does "tare" mean on a mechanical scale?
"Tare" refers to the process of zeroing out the scale with a container already on it. This allows you to measure the weight of an ingredient added to that container, rather than the combined weight of the container and ingredient. On mechanical scales, this is done manually using the adjustment knob.
How accurate are mechanical kitchen scales compared to digital ones?
Mechanical scales are generally less precise than digital scales. While they might measure accurately to within 20-30 grams, digital scales can often measure to within 0.1 to 1 gram. For most home baking and cooking, mechanical scales are sufficiently accurate, but for highly sensitive recipes, digital is preferred.
What should I do if my scale is reading inaccurately?
First, ensure the scale is on a perfectly level surface. Then, make sure the pointer is adjusted precisely to zero using the adjustment knob. If it still reads inaccurately, check that you haven't exceeded its weight capacity or if the mechanism might be damaged.
Consistent inaccuracies may indicate it's time for a new scale.