How to Disassemble a Juicer
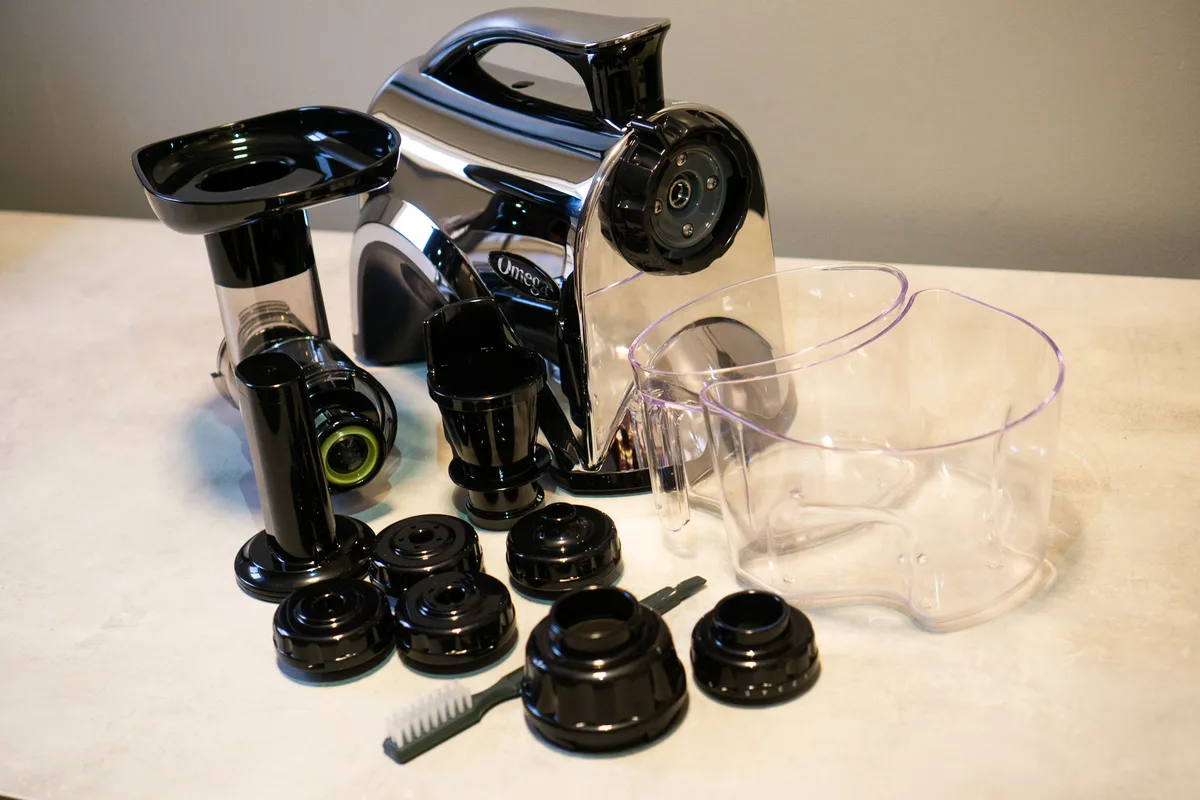
Image source: Bing (Web (fair-use with source credit))
You've probably seen those gleaming juicers on countertops, promising vibrant, healthy drinks. But after a few weeks of use, the real challenge isn't making juice, it's getting your juicer truly clean. Knowing how to disassemble a juicer is key to both its longevity and your health.
Without a proper deep clean, lingering pulp and juice can breed bacteria.
This guide walks you through the process, focusing on what you need to see and understand to take your juicer apart safely and effectively. We'll cover everything from identifying its parts to tackling stubborn areas, ensuring your machine runs smoothly. Manufacturer specifications for many common centrifugal models, for instance, recommend full disassembly at least once a month for optimal hygiene.
Quick Answer
To disassemble a juicer, always unplug it first. Then, remove the juice jug and pulp container. Separate the lid, often by twisting or unlocking a safety lever.
Next, carefully detach the filter basket or auger. Finally, wipe down all removable parts with warm, soapy water.
Why You Need to See It: Taking Your Juicer Apart
Disassembling a juicer isn't just about cleaning; it's about understanding the mechanics of your machine. While many parts are obvious, some connections are less so, and a visual approach helps you avoid damage. Manufacturer specifications often emphasize that components like seals and the filter basket require hands-on cleaning.
This visual guide aims to bridge the gap between the manual's text and what you actually need to observe and do. We're focusing on what you'll see as you take it apart, making the process intuitive.
Before You Start: What You'll Need to See and Do
Before diving in, a little preparation goes a long way. For this visual disassembly, you'll primarily need your eyes and a clear workspace. Think of it like preparing for a simple DIY project, knowing what you're dealing with and having the right setup makes all the difference.
Safety First: Unplugging Your Juicer
This is non-negotiable. Electrical components mean a serious shock risk if the juicer is plugged in. Always ensure the power cord is disconnected from the wall outlet before you touch any part of the juicer.
A quick check of the manual confirms this critical first step.
Essential Tools for Visual Disassembly
For most juicers, you won't need a toolbox full of gadgets. Your hands are your primary tools. However, having a soft brush, like a dedicated juicer cleaning brush or a soft-bristled toothbrush, can help you see and dislodge tiny pulp remnants in nooks and crannies.
A dry, lint-free cloth is also essential for drying parts thoroughly.

Image source: Bing (Web (fair-use with source credit))
The Anatomy of Your Juicer: Parts You'll Identify
Understanding the names and functions of your juicer's components is the first step. Different types of juicers have slightly different parts, but the general principles of disassembly are similar. We’ll cover the most common ones you’ll encounter.
Centrifugal Juicer Components (Visual Guide)
These are the juicers that spin at high speeds to extract juice. You'll typically see a motor base, a large feeding chute, a lid with a pusher, a removable pulp container that often attaches to the back or side, and a juice jug that sits under the spout. The core of the juicer is the filter basket, which contains a fine mesh and often a blade at the bottom.
Observing how these pieces fit together is key to disassembly.
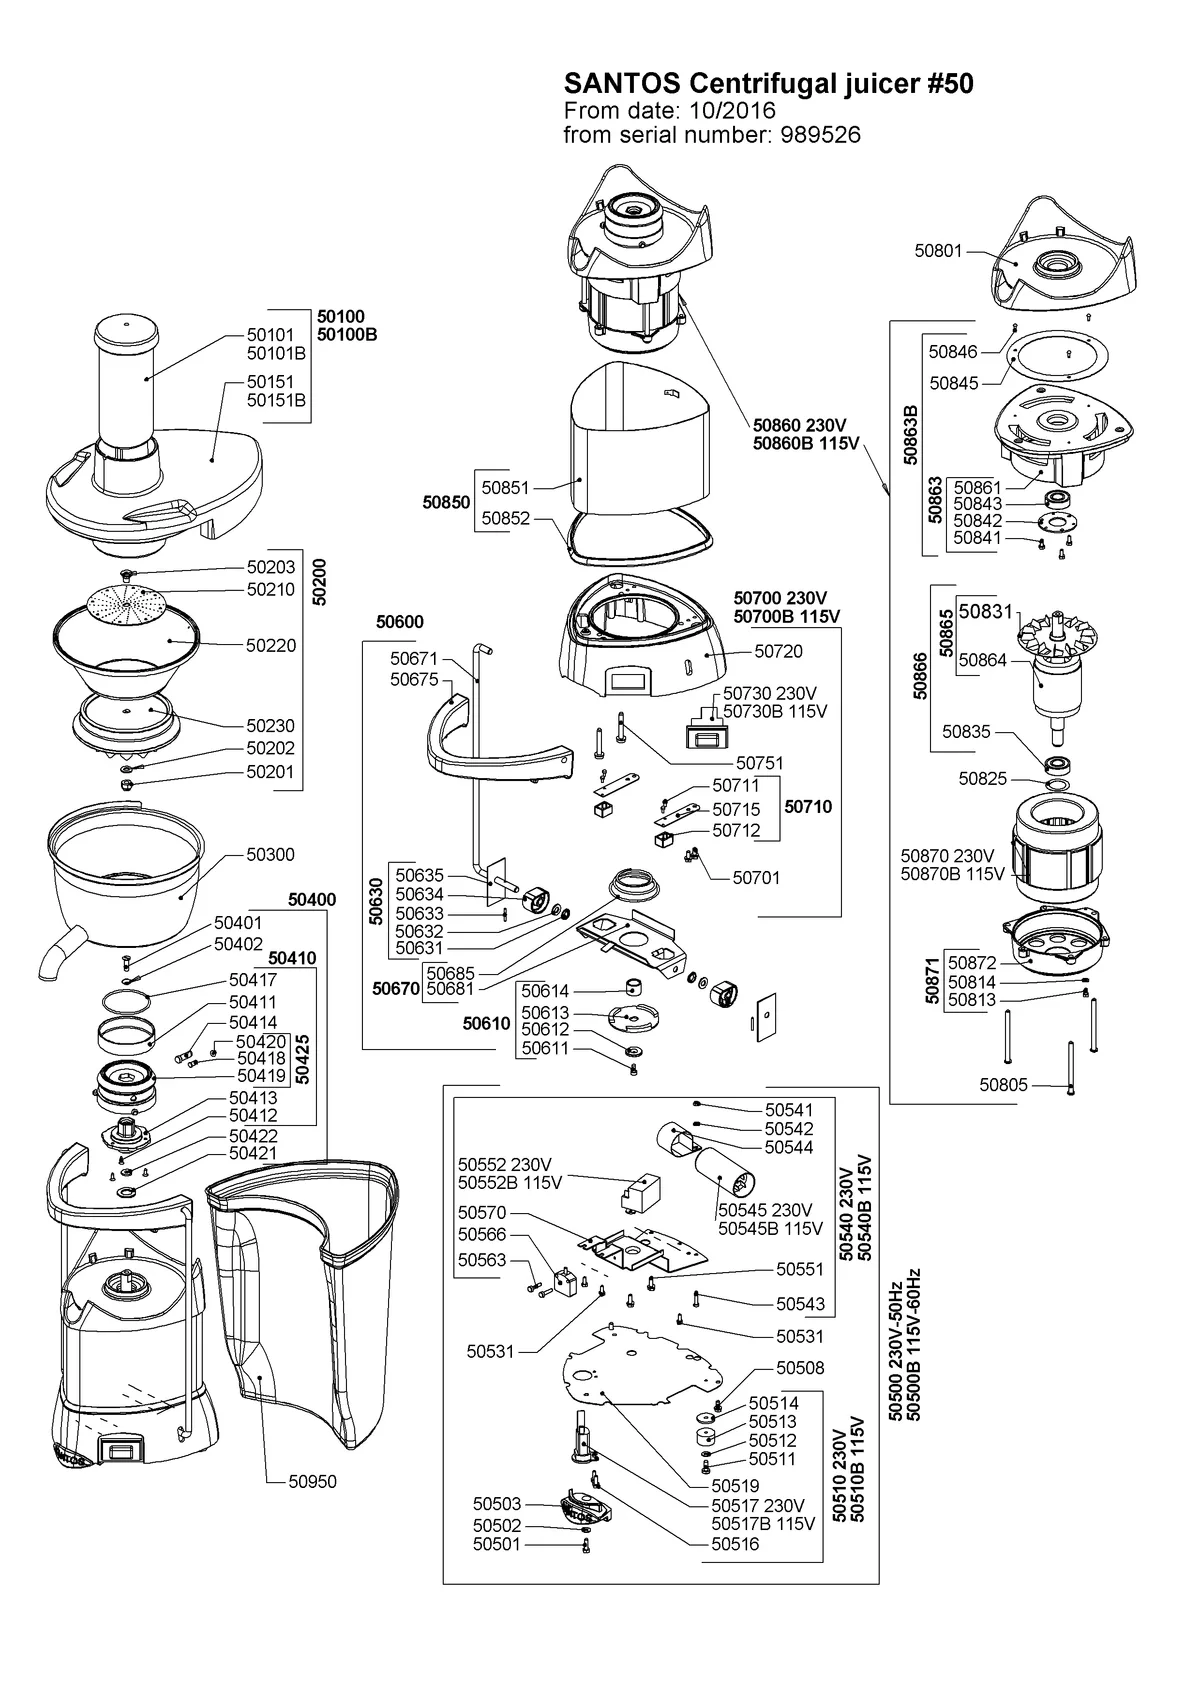
Image source: Bing (Web (fair-use with source credit))
Masticating Juicer Components (Visual Guide)
Masticating or slow juicers use a different method, employing a rotating auger (a screw-like mechanism) to crush and press the produce. Their parts often include a motor base, a drum or chamber where the augering happens, an auger itself, a strainer or screen that separates pulp from juice, a lid with a feeding chute, and separate containers for juice and pulp. These can sometimes feel more complex to take apart initially, but the visual cues for unlocking and separating are usually quite clear.
Step-by-Step Visual Disassembly: A Guided Tour
Taking your juicer apart isn't a puzzle; it's a process of logical separation. Focus on how each piece connects and how it might release. Always look for twists, locks, or levers before applying force.
Removing the Juice Jug and Pulp Container
Start with the easiest parts. The juice jug usually just lifts off the spout. The pulp container, often a larger, less shapely bin, typically detaches by simply pulling it away from the main body.
Some models might have a locking arm that needs to be unclipped.
Separating the Lid and Feeding Chute
The lid usually locks into place with a twist or by aligning specific markings. Look for safety interlock mechanisms, these prevent the juicer from operating unless the lid is securely fastened. Once unlocked, the lid can typically be lifted or twisted off.
The feeding chute is usually integrated with the lid, so they come off together.
Detaching the Filter Basket or Auger
This is often the most crucial part to clean thoroughly. For centrifugal juicers, the filter basket is usually a drum-like piece that sits inside the main juicing chamber. It might lift straight out or require a slight twist.
For masticating juicers, the auger is a large, screw-shaped component that you can usually pull straight out once the lid and chamber are clear. Pay attention to any seals around these parts.
Accessing Tricky Spots (Visual Cues)
After the main components are removed, you'll see the internal workings, especially around the motor base. This is where you might spot dried pulp or juice residue. Look for seams or small openings where cleaning brushes can reach.
Manufacturer specifications suggest that as of 2026, most models are designed for easy access to these areas for hygiene.
Common Juicer Disassembly Mistakes (and How to Spot Them)
Even with a visual guide, it's easy to make a misstep. Recognizing common errors before they happen saves your juicer and your sanity. Most issues arise from not observing carefully enough or assuming parts will release like others.
Forcing Parts Apart
This is the number one mistake. If a part isn't budging, it's usually not broken; you're just missing a step or a lock. Look for subtle arrows, small tabs, or areas where a twist might be needed.
Remember, juicers are designed to be taken apart and put back together without excessive force.
Ignoring Locking Mechanisms
Many juicers have safety locks that prevent operation unless all parts are correctly assembled. When disassembling, these same locks might need to be disengaged or bypassed. For instance, a lever that locks the lid down must be in the 'unlocked' position for the lid to come off.
Always visually confirm a lock is disengaged.
Misidentifying Components
Sometimes, parts look similar, leading to confusion. For example, the pulp container might be mistaken for the juice jug if you're not paying attention to their shape and placement. Always refer to the visual cues of your specific juicer model.
If you're unsure, it's better to consult your juicer's manual.
Reassembly: Putting It All Back Together Visually
Now that you've seen all the parts and how they came apart, putting your juicer back together is usually straightforward. The key is to reverse the disassembly process, paying attention to how each piece originally seated. Visual memory from the disassembly is your best guide here.
Look for any seals or gaskets that may have been removed and ensure they are properly positioned before rejoining components. Many juicers have a specific order for reassembly to ensure everything locks correctly. Manufacturer specifications often detail this reassembly order.
As of 2026, most modern juicers are designed with clear alignment markers to simplify this step, preventing incorrect assembly that could damage the unit.
Quick Cleaning Wins: What Disassembly Buys You
Fully disassembling your juicer unlocks a level of clean you just can't achieve with a quick rinse. This thorough approach removes dried-on pulp and juice that can harbor bacteria and mold. These microscopic issues can affect the taste of your juice and, more importantly, your health.
Think of it like cleaning an appliance with many small parts. Unless you take those parts out, the hidden grime remains. Regular deep cleaning, facilitated by disassembly, also helps you spot any worn-out components, like dull blades or cracked seals, giving you a heads-up for potential replacements.
This preventative maintenance can extend the life of your juicer significantly.
Juicer Disassembly FAQs
Why can't I just rinse my juicer?
Rinsing a juicer after use might seem sufficient for immediate cleanup, but it often leaves behind fine pulp particles and juice residue in hard-to-reach areas. These remnants can dry and become difficult to remove, creating a breeding ground for bacteria and mold. Manufacturer guidelines generally recommend a more thorough cleaning periodically.
How often should I fully disassemble my juicer?
Our research indicates that full disassembly and deep cleaning should ideally be done at least once a month, especially with frequent use. For lighter use, every two to three months might suffice. However, if you notice any persistent odors or visible residue, it’s time for a deep clean regardless of the schedule.
What if I lose a part during disassembly?
Losing a part can be frustrating, but it's rarely the end of the world. First, retrace your steps carefully in the area where you were cleaning. If the part is still missing, check your juicer's owner's manual to identify the component.
Then, contact the juicer manufacturer directly; they typically sell replacement parts for all their models.