How to Disassemble a Blender
When you need to clean those hard-to-reach spots or troubleshoot a sluggish motor, knowing how to disassemble a blender is a surprisingly useful skill. It's not just about getting things sparkling clean; it's about understanding the mechanics of a common kitchen appliance and potentially fixing minor issues yourself. This guide breaks down the process visually, so you can tackle it with confidence.
Manufacturer specifications for most countertop blenders indicate a motor power ranging from 700 to 1500 watts, and understanding how these parts fit together is key to safe and effective disassembly. We'll walk through each step, highlighting what to look for and common pitfalls to avoid, so you can get your blender back in top shape.
Why You Need to See It: Disassembling Your Blender Visually
Disassembling a blender isn't something you typically do daily, but when the need arises, text alone can be a little… abstract. That's where visuals come in. Think about trying to describe a complex knot or a delicate piece of machinery without showing it; it's tough!

This process relies heavily on seeing how different parts connect, where the screws are hidden, and the order in which components need to be separated. Manufacturer diagrams and clear photos or videos are invaluable here. We’ll point out the key visual cues you’ll be looking for as you take your blender apart.
What You'll Be Taking Apart: Blender Components
Before you start, it’s helpful to know what’s inside the average blender. You'll usually encounter a few main parts, each with a specific job. Understanding these components makes the disassembly process much clearer.
- Motor Base: This is the heavy part that sits on your counter and houses the motor. It's the "brain" and power source of the blender.
- Blender Jar: This is the pitcher where you put your ingredients. It can be made of glass or BPA-free plastic and typically has measurement markings.
- Blade Assembly: This is the set of sharp blades at the bottom of the jar, responsible for chopping and pureeing. It’s usually a removable unit.
- Lid and Cap: These seal the top of the jar to prevent spills during blending.
Other components might include rubber gaskets or O-rings for sealing, and sometimes a rubber boot around the blade assembly. As of 2026, most blenders adhere to these core designs, though specific brands may have unique features.
The Step-by-Step Visual Guide to Disassembly
This section walks you through the actual process of taking your blender apart, focusing on what you’ll see and feel at each stage. Remember, the exact steps might vary slightly depending on your blender's model, but the general principles remain the same.
Getting Ready: Safety First!
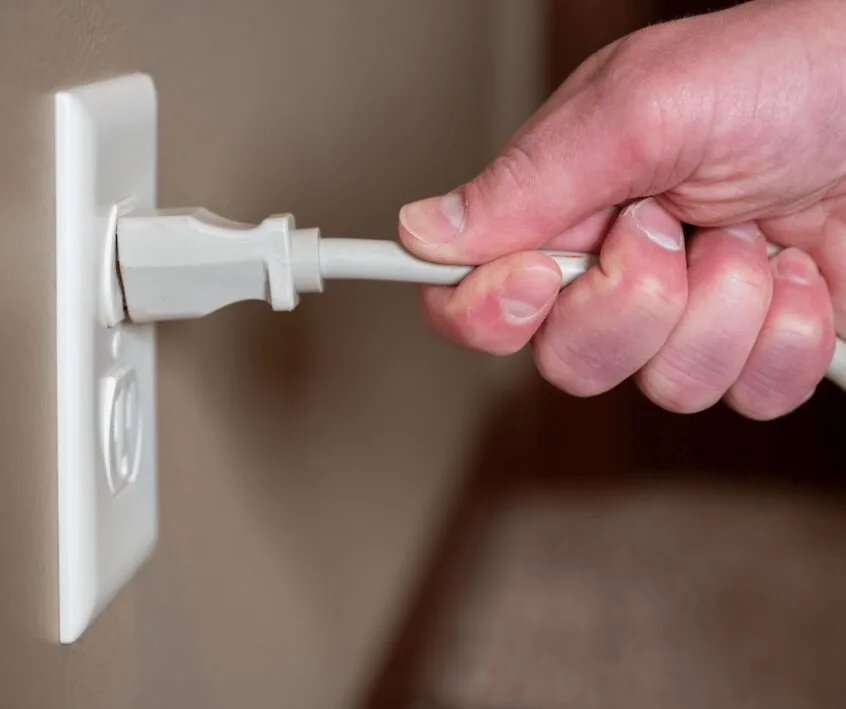
This is the most crucial step, and it’s non-negotiable. Before you touch anything, you absolutely must ensure the blender is unplugged from the wall. Power running to the motor base while you're working with sharp blades or internal components is a recipe for a serious accident.
You'll also want to have a clean, flat workspace. A well-lit area helps you see small parts and screws clearly. Gather any tools you might need, like a screwdriver set, pliers, or even a rubber jar opener if a part is stuck tight.
Having a container or tray to keep screws and small parts organized is also a good idea.
Removing the Blender Jar
This is usually the simplest part of the process. The blender jar, or pitcher, is the part that sits on top of the motor base. Most blenders have a jar that simply twists and lifts off, or it might have a locking mechanism that requires a slight turn.
Check the base of the jar and the top of the motor base for any markings, arrows, or tabs that indicate how it’s secured. Gently twist the jar counter-clockwise. If it’s still firmly in place, try rocking it slightly while twisting.
Avoid excessive force, as you could damage the connection point. Once it’s free, set the jar aside.
Tackling the Blade Assembly
The blade assembly is often what needs the most attention for cleaning or replacement. It’s typically located at the bottom of the blender jar. Depending on your model, the blade assembly might be a separate piece that screws into the jar, or it might be integrated into a wider base unit for the jar.
To remove a screw-in blade assembly, you'll usually turn it counter-clockwise. Sometimes, it can be quite tight due to food residue or dried-on liquid. If you're struggling, you might need to use a rubber jar opener or a dish towel for better grip.
Be extremely cautious of the sharp blades; always handle this part by the plastic or metal housing, never by the blade edges.
Peeking Inside the Motor Base
This is where things can get a bit more involved, and visuals are paramount. The motor base contains the motor, electronics, and gears. To get inside, you’ll typically need to unscrew the base of the motor unit.
Many blenders have rubber feet that can be pried off, revealing screws underneath.
You might need a Phillips head screwdriver or a Torx bit, depending on the manufacturer. Keep track of screw lengths and positions, as they can vary. Once the base is off, you'll see the motor and its connections.
Be mindful of any wires or delicate components. It’s usually best to only go this deep if you’re specifically troubleshooting an internal issue or performing a deep clean on specific motor-related parts.
Common Blender Disassembly Headaches and How to Spot Them
Even with a visual guide, things can sometimes go wrong. Our research indicates that common issues arise from a few key areas. Being aware of these potential headaches can save you frustration and prevent damage to your appliance.
- Stuck Blade Assembly: Food residue can harden, acting like glue. If it won't budge, try soaking the jar upside down in warm, soapy water for an hour, or use a rubber jar opener for extra grip. Avoid using metal tools that could damage the threads or housing.
- Stripped Screws: Over-tightening or using the wrong screwdriver can strip the head of a screw, making it impossible to remove. If this happens, you might need specialized screw extraction tools.
- Damaged Seals/Gaskets: These are often made of rubber or silicone and are crucial for preventing leaks. When disassembling, be gentle with them, and note their exact position for reassembly. If they look cracked or brittle, it’s time to replace them.
Cleaning Deep or Fixing Up: Why Disassemble?
So, why go through the trouble of taking your blender apart? There are two main reasons: thorough cleaning and necessary repairs or maintenance. Blenders, especially the blade assembly and jar seals, can trap food particles and develop mold or odors over time if not cleaned meticulously.
Disassembly allows you to get into every nook and cranny, ensuring a truly hygienic appliance. Beyond cleaning, it’s essential if a part is malfunctioning. For instance, if your blender is leaking from the bottom of the jar, you'll need to disassemble the blade assembly to check or replace the seal.
This kind of access is impossible with just surface cleaning.
When to Call It Quits: Reassembly and Beyond
Once you’ve finished cleaning or repairing, reassembling your blender is the next logical step. This process should be pretty straightforward, essentially reversing the disassembly steps. However, a few key points can make sure you do it correctly and avoid any issues.
Make sure all parts are completely dry before reassembly. Moisture can lead to mold or damage internal components. Pay special attention to the blade assembly and the jar's seal.
When reattaching the blade assembly, ensure it’s screwed in securely but don't overtighten, as this can strip the threads or crack the jar.
When placing the jar back onto the motor base, align it properly. You should feel or hear it click into place. Gently twist it to ensure it’s locked.
After reassembly, it’s a good idea to test the blender with just a small amount of water first. Run it on a low setting, then a higher one, checking for any leaks or unusual noises. This final check confirms everything is back together correctly and safely.
Frequently Asked Questions
How long does it typically take to disassemble a blender?
Disassembly time can range from 10 to 30 minutes, depending on the blender model and how stuck parts are. If you're just removing the blade assembly for cleaning, it's much faster than opening the motor base.
What tools do I usually need to take a blender apart?
You'll often need a set of screwdrivers, including Phillips head and sometimes Torx bits. Pliers can be helpful for stubborn parts, and a rubber jar opener can provide extra grip. A small container for screws is also recommended.
Can I wash blender parts in the dishwasher after disassembly?
Many blender jars, lids, and caps are dishwasher-safe, but always check your owner's manual. However, the motor base itself should NEVER be submerged in water or put in a dishwasher. Its internal electronics and motor require careful cleaning with a damp cloth.
What should I do if I can't remove the blade assembly?
If the blade assembly is stuck, try soaking the jar upside down in warm, soapy water for at least an hour. Use a rubber jar opener for better grip or a bit of gentle leverage with a wooden spoon handle against the housing (not the blades). If it still won't budge, consult your blender's manual or manufacturer support.
Is it safe to disassemble an immersion blender?
Yes, immersion blenders can often be partially disassembled for cleaning. You'll typically unscrew the blending shaft from the motor unit. Always ensure the appliance is unplugged before starting.
Be very careful with the exposed blades on the shaft.
Where can I find specific instructions for my blender model?
The best place for specific instructions is your blender's owner's manual. If you no longer have it, most manufacturers provide digital copies on their official websites. Searching for "[Your Blender Brand and Model Number] manual" should help you find it.