How to Use a Blender for Baby Food
Making your own baby food is a rewarding way to ensure your little one gets nutritious meals. Figuring out how to use a blender for baby food is simpler than you might think, turning fresh ingredients into smooth, healthy purees. This guide walks you through the process, so you can confidently prepare wholesome meals for your baby.
Our research confirms that a standard blender can effectively create a variety of baby food consistencies, provided ingredients are properly prepped. According to industry standards, food prepared for infants should meet specific texture requirements, which a blender can help achieve. Let's dive into what you'll need.

Image source: Web (Bing) / pinterest.com (Web image (fair-use with source credit))
What You'll Need for Baby Food Blending
Getting started with homemade baby food requires a few key items. You don't need a fancy kitchen arsenal; most of what you need is probably already in your cupboards. Having everything ready makes the process much smoother, especially when you're juggling a hungry baby.
The Essential Gear
Beyond your trusty blender, a few other tools will make life easier.
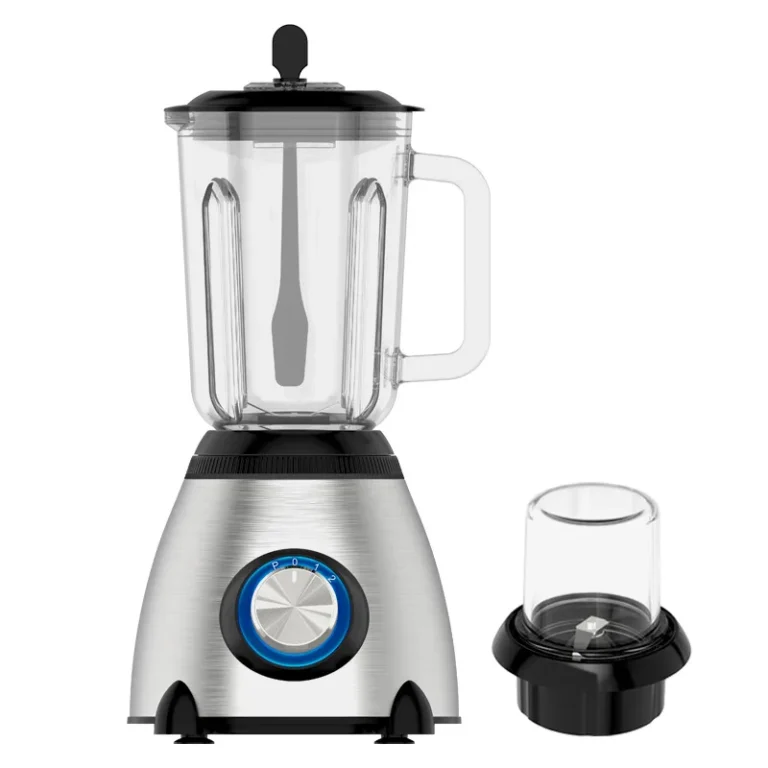
- Blender: Any standard countertop blender will work. For very small batches, a personal blender or an immersion blender with a chopping attachment can be useful.
- Measuring Cups and Spoons: For getting proportions right, especially when adding liquid.
- Knives and Cutting Board: For prepping fruits and vegetables.
- Steamer Basket or Pot: To cook ingredients until tender.
- Storage Containers: Small, airtight containers, reusable baby food pouches, or even standard ice cube trays are perfect for portioning and freezing. You might want to explore options similar to those found for compact freezers if you plan to make large batches.
- Spatula: For scraping down the sides of the blender jar.
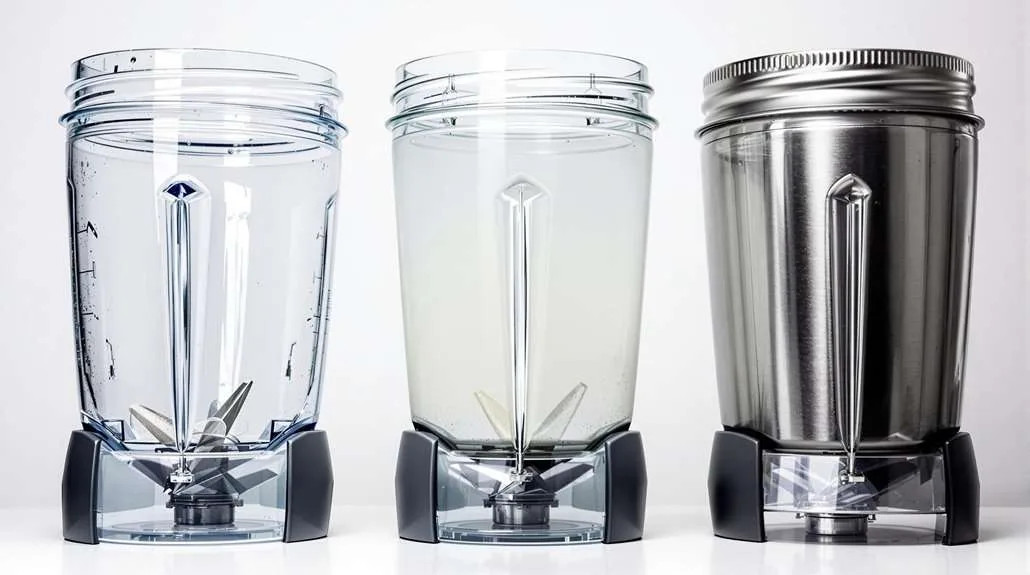
Image source: Bing (Web (fair-use with source credit))
Choosing Your Baby's First Foods
The world of baby food is vast and exciting! It's best to start with single ingredients to help identify any potential allergies or sensitivities. As of 2026, many pediatricians recommend introducing a variety of flavors early on.
- Gentle Starters: Sweet potatoes, carrots, peas, green beans, bananas, apples, and pears are excellent first foods. These are usually well-tolerated and easy to digest.
- Veggies: Most vegetables need to be cooked until very soft. Steaming or boiling is ideal.
- Fruits: Some fruits, like bananas and ripe peaches, can be blended raw. Others, like apples and pears, benefit from light steaming to soften them for easier blending.
- Proteins: Once your baby is ready for them, thoroughly cooked chicken, turkey, or lentils can be blended in. Always ensure proteins are cooked through and cooled before blending.
Blending Baby Food: The Step-by-Step Workflow
The actual blending process is straightforward, but the preparation beforehand is key to success. A well-prepared ingredient blends into a smooth puree much more easily.
Preparing Your Ingredients
This is where the magic really begins. Properly prepping ensures your blender does its job effectively and safely.
- Wash Thoroughly: Always wash all fresh produce under running water before peeling or cutting.
- Peel and Core: Remove skins, seeds, and cores as needed. For example, peel sweet potatoes and apples, then remove the core from apples.
- Cook Until Tender: For most vegetables and harder fruits like apples and pears, steam or boil them until they are very soft. You should be able to easily pierce them with a fork. This step is crucial; undercooked ingredients will be difficult to blend smoothly.
- Cool Down: Let cooked ingredients cool to a safe, lukewarm temperature before adding them to the blender. This prevents steam buildup and protects your blender. Raw fruits like bananas or ripe peaches can go in directly if they are soft.
Blending for the Right Consistency
This is the core of how to use a blender for baby food. The goal is to achieve a texture appropriate for your baby's age and developmental stage.
- Add Ingredients: Place your prepared, cooled ingredients into the blender jar. Don't overfill it; blending in batches might be necessary for larger quantities.
- Introduce Liquid: Start by adding a small amount of liquid, this could be breast milk, formula, or plain water. The amount of liquid dictates the final consistency.
- Start Blending: Begin on a low speed, then gradually increase. Use the "pulse" function initially to break up larger pieces.
Image source: Bing (Web (fair-use with source credit))
- Achieve Smoothness: Blend until you reach your desired texture. For younger babies, aim for a very smooth, thin puree, adding more liquid as needed. For older babies, you can use less liquid or blend for less time to create a thicker, slightly textured food. If the mixture is too thick, simply add a bit more liquid and blend again.
- Taste and Adjust: Give your puree a quick taste. If it needs a little something extra, you can add a tiny pinch of cinnamon or a bit of a sweeter fruit to enhance the flavor.
Storing Your Homemade Baby Food
Proper storage is vital for maintaining freshness and preventing spoilage. Planning ahead with storage makes feeding time much easier.
- Refrigeration: Spoon cooled purees into small, airtight containers. These will typically last in the refrigerator for 2-3 days. Make sure to use clean containers. For options with good sealing capabilities, consider looking at compact dishwashers for streamlining kitchen chores.
- Freezing: This is ideal for longer storage.
- Ice Cube Trays: Fill standard ice cube trays with your purees. Once frozen solid, pop out the cubes and transfer them to a freezer-safe bag or airtight container. This method allows you to thaw individual portions easily. Frozen purees can last for 1-3 months.
- Baby Food Pouches: Reusable baby food pouches are convenient for on-the-go feeding and can also be frozen.
Common Blender Baby Food Mistakes to Avoid
Even with the best intentions, a few common pitfalls can derail your homemade baby food efforts. Being aware of these can save you time and ensure your baby is eating safely and nutritiously.
- Ignoring Texture Needs: Not adjusting consistency for your baby's age is a common mistake. A puree that's too thick or too lumpy can be frustrating for babies just starting solids and might lead to gagging. Always aim for smooth, thin purees for younger infants and gradually introduce thicker textures.
- Over-Blending or Under-Blending: Over-blending can make purees too watery, requiring you to add more solids or start over. Under-blending leaves large chunks that might not be suitable for your baby's current stage. It’s about finding that sweet spot.
- Not Cooling Ingredients: Adding hot ingredients to your blender can create steam pressure, potentially causing the lid to pop off. It also poses a burn risk and can damage some blender parts. Always let cooked foods cool before blending.
- Skipping Proper Storage: Leaving purees at room temperature for too long or not using airtight containers can lead to bacterial growth. Proper storage, whether refrigerated for a few days or frozen for months, is critical for food safety. If you're making large quantities, having a reliable chest freezer can be a game-changer.
- Using Old or Expired Ingredients: Just like any food preparation, using fresh ingredients is paramount. Ensure fruits and vegetables are not spoiled before you start the cooking and blending process.
Expert Tips for Perfect Baby Food Purees
Our research into best practices for baby food preparation highlights several expert insights that can elevate your homemade purees from good to great. These tips focus on flavor, nutrition, and ease of preparation, making your journey into solids smoother.
- Flavor Pairing: Don't be afraid to mix ingredients once your baby has tried them individually. Combinations like apple and cinnamon, or sweet potato and peas, can introduce a wider palate of flavors. Many parents find that pairing a slightly bitter vegetable with a naturally sweet fruit can make it more appealing.
- Nutrient Boosts: You can add healthy fats by blending in a teaspoon of olive oil or a bit of avocado into purees. For added nutrients, consider a sprinkle of infant-safe cereal or a tiny bit of unsweetened plain yogurt once your baby is ready for dairy.
- Batch Cooking Efficiency: Dedicate a few hours once a week or month to prepare a larger batch of purees. This saves time during busy weekdays. Using multiple ice cube trays or investing in compact freezers can help store these larger batches.
- Texture Progression is Key: As your baby grows, their ability to handle textures improves. Transition from super-smooth purees to slightly thicker and lumpier options. You can achieve this by using less liquid or by pulsing the blender fewer times. Some experts suggest even a quick mash with a fork can be a good intermediate step.
- Presentation Matters: While babies don't eat with their eyes like adults do, serving food in appealing containers can make the experience more positive. Colorful fruits and vegetables naturally look appealing. Using fun baby spoons or small bowls can also add to the mealtime enjoyment.
Safety First: Best Practices for Homemade Baby Food
Ensuring the safety of the food you prepare for your baby is non-negotiable. Following established food safety guidelines is crucial to prevent foodborne illnesses, which can be particularly serious for infants.
- Hygiene is Paramount: Always wash your hands thoroughly with soap and water before preparing any food. Clean all utensils, cutting boards, blender parts, and storage containers with hot, soapy water. Some experts recommend sanitizing baby feeding equipment, especially for very young infants, by boiling or using a dishwasher's sanitize cycle.
- Cook Foods Thoroughly: Raw or undercooked ingredients can harbor harmful bacteria. Ensure all meats, poultry, and eggs are cooked to their appropriate safe internal temperatures. Vegetables should be cooked until tender to make them digestible and safe.
- Cool Foods Properly: Rapidly cool down cooked baby food before refrigerating or freezing it. Divide large batches into smaller portions in shallow containers to speed up the cooling process. Never leave cooked food at room temperature for more than two hours.
- Storage and Thawing: As mentioned, refrigerate or freeze purees promptly in airtight containers. When thawing, do so in the refrigerator or by placing the container in warm water. Never refreeze baby food that has been thawed.
- Check for Spoilage: Before serving, always visually inspect the baby food and give it a sniff test. If you notice any discoloration, unusual odor, or signs of mold, discard it immediately. It's better to be safe than sorry. For added peace of mind on storage, you might consult resources from the U.S. Department of Agriculture (USDA) on safe food handling.
Step-by-Step Process / How to Guide
This section details the practical, sequential steps involved in using a blender for baby food, expanding on the initial process outlined earlier. Each step is designed to be actionable, with considerations for consistency and ingredient type.
- Ingredient Selection: Choose single-ingredient fruits or vegetables that are ripe and free from blemishes. This is the foundational step for introducing new flavors.
- Washing and Peeling: Thoroughly wash all produce. Peel fruits and vegetables as needed, removing skins, seeds, and cores. For example, peel carrots and apples, then remove the core from apples.
- Cooking (If Necessary): Steam or boil hard vegetables (like sweet potatoes, carrots, peas) and dense fruits (like apples, pears) until they are very tender. They should yield easily to a fork. This ensures they are easily digestible and blendable.
- Cooling: Allow cooked ingredients to cool to a safe, lukewarm temperature before placing them in the blender. This prevents steam buildup and potential damage to the blender.
- Blending with Liquid: Add cooled ingredients to the blender. Start with a small amount of liquid (breast milk, formula, or water). Pulse initially to break down solids, then blend until smooth.
- Adjusting Consistency: If the puree is too thick, add more liquid a tablespoon at a time and blend again until the desired smoothness is achieved. For younger babies, aim for a thin, watery consistency. For older infants, you can use less liquid for a thicker texture.
- Portioning for Storage: Spoon the prepared baby food into ice cube trays, baby food pouches, or small airtight containers. This allows for easy thawing of individual servings.
- Freezing or Refrigerating: Once portioned, immediately freeze or refrigerate the baby food. Frozen food can last 1-3 months, while refrigerated food is best consumed within 2-3 days. If you plan to make large batches for freezing, ensuring you have adequate storage, like a reliable chest freezer, is beneficial.
How to Thaw and Reheat Safely
When you're ready to serve stored baby food, proper thawing and reheating are crucial.
- Thawing: Transfer frozen portions to the refrigerator overnight for a gradual thaw. For a quicker method, place the frozen cube or container in a bowl of warm, not hot, water.
- Reheating: Gently warm the food on the stovetop over low heat, stirring frequently. Alternatively, use a microwave, but ensure you stir thoroughly and check for hot spots before serving. Never reheat baby food more than once.
Comparisons / Alternatives / Options
While a blender is a highly effective tool for making baby food, it's helpful to understand other methods and appliances that can achieve similar results. Each has its own strengths and might be better suited for different needs or preferences.
Blender vs. Food Processor
- Blender: Ideal for achieving very smooth purees, especially for early stages of solid feeding. Blenders generally have more power and are designed to incorporate liquid for smooth mixing. If you're aiming for a liquid-like consistency, a blender is your go-to.
- Food Processor: Better suited for chunkier textures or when making larger quantities. Food processors are excellent for finely chopping or creating thicker mashes, which can be useful as your baby progresses to more textured foods. They often have wider bowls, making them good for processing drier ingredients.
Blender vs. Specialized Baby Food Makers
- Specialized Baby Food Makers: These appliances often combine steaming and blending into one unit. They are convenient for single-serving preparations and can be very user-friendly. However, they might have smaller capacities than a standard blender and can sometimes be pricier. For comparison, if you are looking for kitchen appliances that handle multiple tasks efficiently, consider browsing options like compact dishwashers for streamlining kitchen chores.
- Blender: Offers more versatility for other kitchen tasks beyond baby food. A standard blender can handle larger batches and a wider range of consistencies, from thin purees to thicker mashes.
Blender vs. Manual Methods
- Food Mill or Potato Masher: These manual tools can create soft textures but typically result in lumpier food than a blender. They require more physical effort. They might be suitable for babies who are already accustomed to more textured foods and for very small batches.
Ultimately, the best choice depends on your priorities: speed, texture control, batch size, and existing kitchen equipment. For versatility and smooth results, a blender remains a top choice for most parents.
Use Cases / Best For / Who It's Right For
The decision to use a blender for baby food is usually driven by specific needs and goals related to infant feeding. Understanding these use cases helps clarify who benefits most from this method.
- Parents Prioritizing Smooth Textures: For babies just starting solids (around 4-6 months), the ability to create very smooth, lump-free purees is essential. A blender excels at this, making it ideal for introducing first foods without overwhelming the baby's digestive system.
- Batch Preparers: If you plan to make baby food in larger quantities to freeze for the week or month, a blender is highly efficient. It can process enough ingredients to fill multiple storage containers or ice cube trays quickly. This is especially true if you have a model with a larger jar capacity.
- Budget-Conscious Families: Making baby food at home with a blender is significantly more cost-effective than purchasing pre-made baby food jars or pouches. The initial investment in a blender pays for itself over time through savings.
- Health-Focused Caregivers: Those who want complete control over ingredients, avoiding added sugars, salts, preservatives, and allergens, will find a blender invaluable. It allows for customization based on dietary needs and preferences.
- Transitioning to Solids: As babies grow and develop their eating skills, a blender can adapt. You can adjust the liquid and blend time to create progressively thicker and chunkier textures, supporting the transition to more solid foods. This flexibility makes it suitable for various stages.
Mistakes to Avoid / Common Errors
Avoiding common mistakes ensures your homemade baby food is safe, nutritious, and enjoyable for your baby. These errors often stem from misunderstanding ingredient prep, storage, or the blending process itself.
- Not Softening Ingredients Enough: Blending tough, undercooked vegetables or fruits can strain your blender and result in a gritty texture. Always ensure ingredients are thoroughly tenderized through steaming or boiling before blending.
- Using Too Much Liquid Initially: Starting with too much liquid can make your puree too thin, and it's harder to thicken it later. It's better to start with less liquid and add more as needed to reach the desired consistency.
- Over-reliance on One Setting: Many blenders have multiple speeds and a pulse function. Using the pulse for initial breakdown and then a lower speed for fine pureeing can yield better results than just running the blender on high continuously.
- Inadequate Cleaning of the Blender: Leftover food particles in the blender can harbor bacteria, posing a health risk to your baby. Always disassemble and thoroughly clean all parts of the blender after each use. This includes the jar, lid, and blades.
- Ignoring Baby's Cues: Sometimes, parents push certain foods or textures too hard. If your baby consistently rejects a particular food or texture, take a step back. It might be a sign they aren't ready, and forcing it can create a negative association with mealtimes.
- Not Checking Temperature Before Serving: Reheated baby food can develop hot spots, especially if microwaved. Always stir thoroughly and test the temperature on your wrist or the inside of your arm before giving it to your baby.
Frequently Asked Questions About Blender Baby Food
How long does baby food last in the freezer?
Homemade baby food stored in the freezer typically lasts for 1 to 3 months. Ensure it's in airtight containers or freezer bags to maintain quality and prevent freezer burn.
Can I use a regular blender for baby food?
Yes, a standard countertop blender works perfectly for making baby food. You don't need a specialized appliance, though some baby food makers offer combined steaming and blending features.
What's the best way to store homemade baby food?
Store cooled purees in small, airtight containers or ice cube trays in the refrigerator for 2-3 days or in the freezer for up to 1-3 months. Reusable baby food pouches are also a convenient option for storage and on-the-go feeding.
Should I add salt or sugar to baby food?
No, it's generally recommended not to add salt or sugar to homemade baby food. Babies do not need added sweeteners or salt, and their natural flavors are sufficient for palate development.