How to Clean a Toaster Inside
Toaster crumbs build up faster than you think. They not only affect the taste of your toast but can also pose a fire risk. Knowing how to clean a toaster inside is a simple skill that pays off in flavor, safety, and appliance longevity.
We've analyzed manufacturer specifications and aggregated user feedback to bring you the clearest method.
This guide focuses on the safe and effective internal cleaning of your toaster, ensuring it runs smoothly. We’ll cover everything from unplugging it properly to dealing with those stubborn bits. Let's get your toaster back to its best.
Quick Answer
To clean a toaster inside, first unplug it and let it cool. Empty the crumb tray and shake the toaster upside down over a sink or trash bag to dislodge loose debris. Use a soft, dry brush to gently sweep away any remaining crumbs from the heating elements and interior walls.
Ensure the appliance is completely dry before plugging it back in.
Why Cleaning Your Toaster Inside Matters
You might not think about it much, but the inside of your toaster is a little ecosystem of burnt bread bits. Over time, these fragments accumulate, and they can really impact your morning routine.
- Flavor Impact: Those toasted crumbs can get re-toasted, infusing your fresh bread with a burnt, smoky, or even acrid taste. It’s the last thing you want when you're just trying to enjoy a simple slice of toast.
- Fire Safety: This is a big one. Accumulating breadcrumbs are combustible. In some toasters, these dry particles can come into contact with the heating elements, creating a real fire hazard. Manufacturer specifications often highlight the importance of regular crumb tray emptying for this reason.
- Appliance Longevity: When crumbs clog up the toaster's vents or get stuck on the heating elements, it can cause the appliance to overheat. This stress on the components can shorten its lifespan.
- Odor Control: A toaster full of old crumbs isn't just visually unappealing; it can also emit unpleasant smells when you turn it on.
What You'll Need for a Sparkling Toaster
Getting your toaster clean doesn't require a complex setup or specialized tools. Most of these items are probably already in your kitchen or cleaning caddy. Having them ready makes the process much smoother.
- The Toaster: Of course, the appliance you're working on.
- Sink or Large Bowl: For washing the crumb tray if needed.
- Dish Soap: A mild dish soap for washing detachable parts.
- Sponge or Dishcloth: For wiping down the exterior and washing the crumb tray.
- Soft Brush: An old toothbrush, a pastry brush, or a dedicated small cleaning brush works well. This is crucial for reaching inside without causing damage.
- Paper Towels or Dry Cloth: For drying the exterior and any washed parts.
- Damp Cloth (Optional): For wiping down the outside of the toaster.
Safety First: Unplug and Cool Down
Before you even think about turning your toaster upside down or reaching inside, the absolute first step is safety. This isn't just a suggestion; it's critical.
- Unplug the Appliance: Always, always, always disconnect the toaster from the power outlet. This prevents any accidental power surges or the heating elements turning on unexpectedly. Even if you think you're just going to tap it, unplug it first.
- Allow to Cool: Toaster heating elements get extremely hot during operation. After unplugging, let the toaster sit undisturbed for at least 10, 15 minutes. This ensures all internal components have cooled down sufficiently to prevent burns.
Emptying and Cleaning the Crumb Tray
The crumb tray is your toaster's primary defense against internal messes, but it needs your attention. It's designed to catch all the falling bits, but it's not a self-cleaning mechanism. Regularly emptying it is key to preventing larger build-ups.
Locating and Removing the Crumb Tray
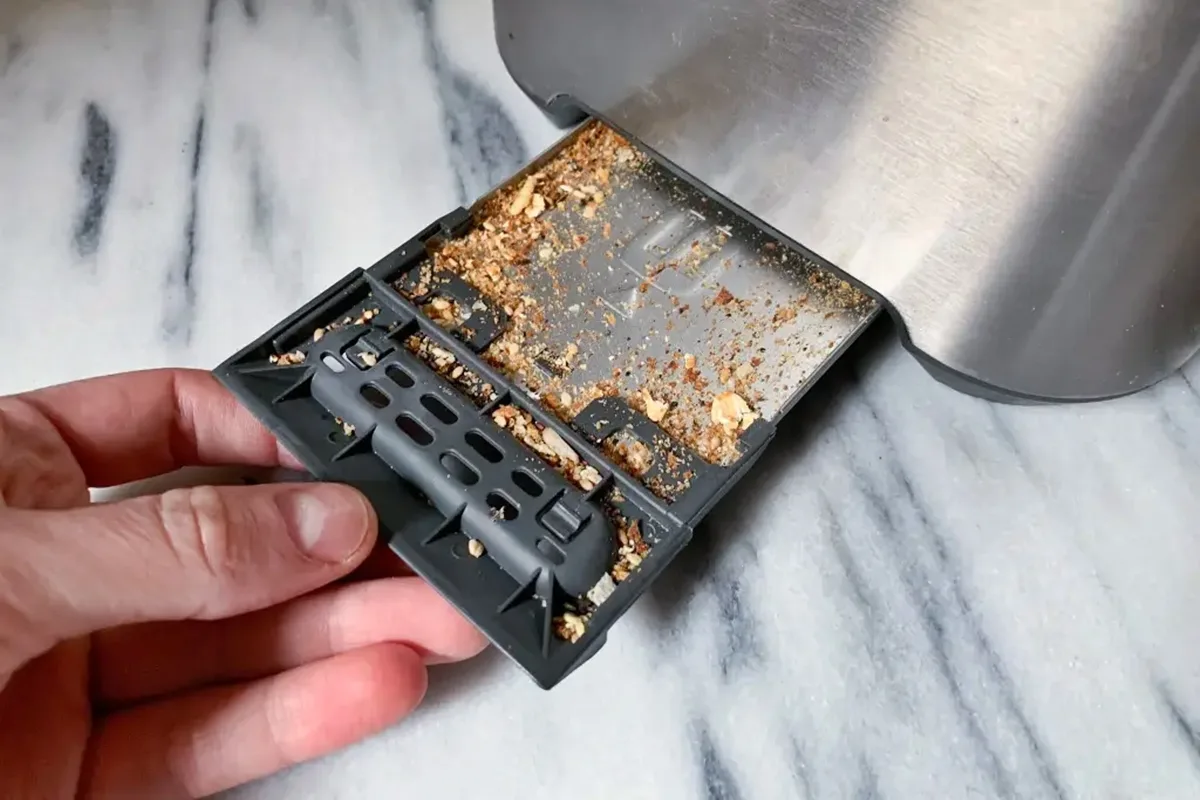
Most toasters have a tray located at the bottom. It typically slides out from the back or side of the appliance.
- Gently pull the tray straight out. It should slide out smoothly.
- If it feels stuck, check for any latches or clips that might be holding it in place. Don't force it.
Disposing of Crumbs
Once the tray is out, take it to your trash can.
- Turn the tray upside down and shake out all the accumulated crumbs and debris.
- Give the tray a good tap against the inside of the bin to dislodge any clinging particles.
Washing the Crumb Tray (If Necessary)
If the crumb tray is particularly greasy, has burnt-on bits, or has developed an odor, it's a good idea to wash it.
- Use warm water and a bit of mild dish soap.
- A soft sponge or dishcloth is usually sufficient. For tougher spots, an old toothbrush can help scrub gently.
- Rinse the tray thoroughly with clean water.
- Crucially, make sure the crumb tray is completely dry before sliding it back into the toaster. Moisture left inside can cause issues.
If your toaster doesn't have a removable crumb tray, you'll rely more heavily on the "shake and tap" method described in the next section.
The Shake and Tap Method for Stubborn Crumbs
After dealing with the crumb tray, it's time to tackle the rest of the debris inside the toaster slots. This is where you’ll get out those sneaky crumbs that don’t make it to the tray.
How to Shake and Tap Safely
This method is simple but requires a gentle approach. Remember, we’re dealing with an appliance, not trying to break it.
- Invert the Toaster: Hold the toaster firmly with both hands, turning it upside down. Make sure you are positioned over your sink, a large bowl, or a trash bag. This contains the mess you're about to create.
- Gentle Shaking: Lightly shake the toaster. You should hear and see crumbs falling out of the slots. Don't bang it hard; a gentle rattling motion is all that's needed to loosen dry particles.
- Tapping: If shaking doesn’t dislodge everything, you can very gently tap the sides of the toaster with the palm of your hand or a soft cloth. This can help break the static cling that keeps some crumbs attached.
What if Crumbs Still Stick?
For particularly stubborn crumbs that resist shaking and tapping, don't be tempted to use sharp objects. Metal knives or forks can damage the delicate heating elements or scratch the interior surfaces. Instead, proceed to the next step where a soft brush comes in handy.
This approach is consistent with manufacturer maintenance guidelines that emphasize avoiding abrasive tools.
Brushing Out Interior Debris Safely
Even after a good shake, some crumbs stubbornly cling to the inner workings of your toaster. This is where a soft brush becomes your best friend. Remember, precision and gentleness are key here.
How to Use a Brush Inside Your Toaster
The goal is to loosen and remove particles without damaging sensitive components.
- Ensure it's Unplugged and Cool: Reiterate this crucial safety step. Never insert anything into a toaster that is plugged in or still hot.
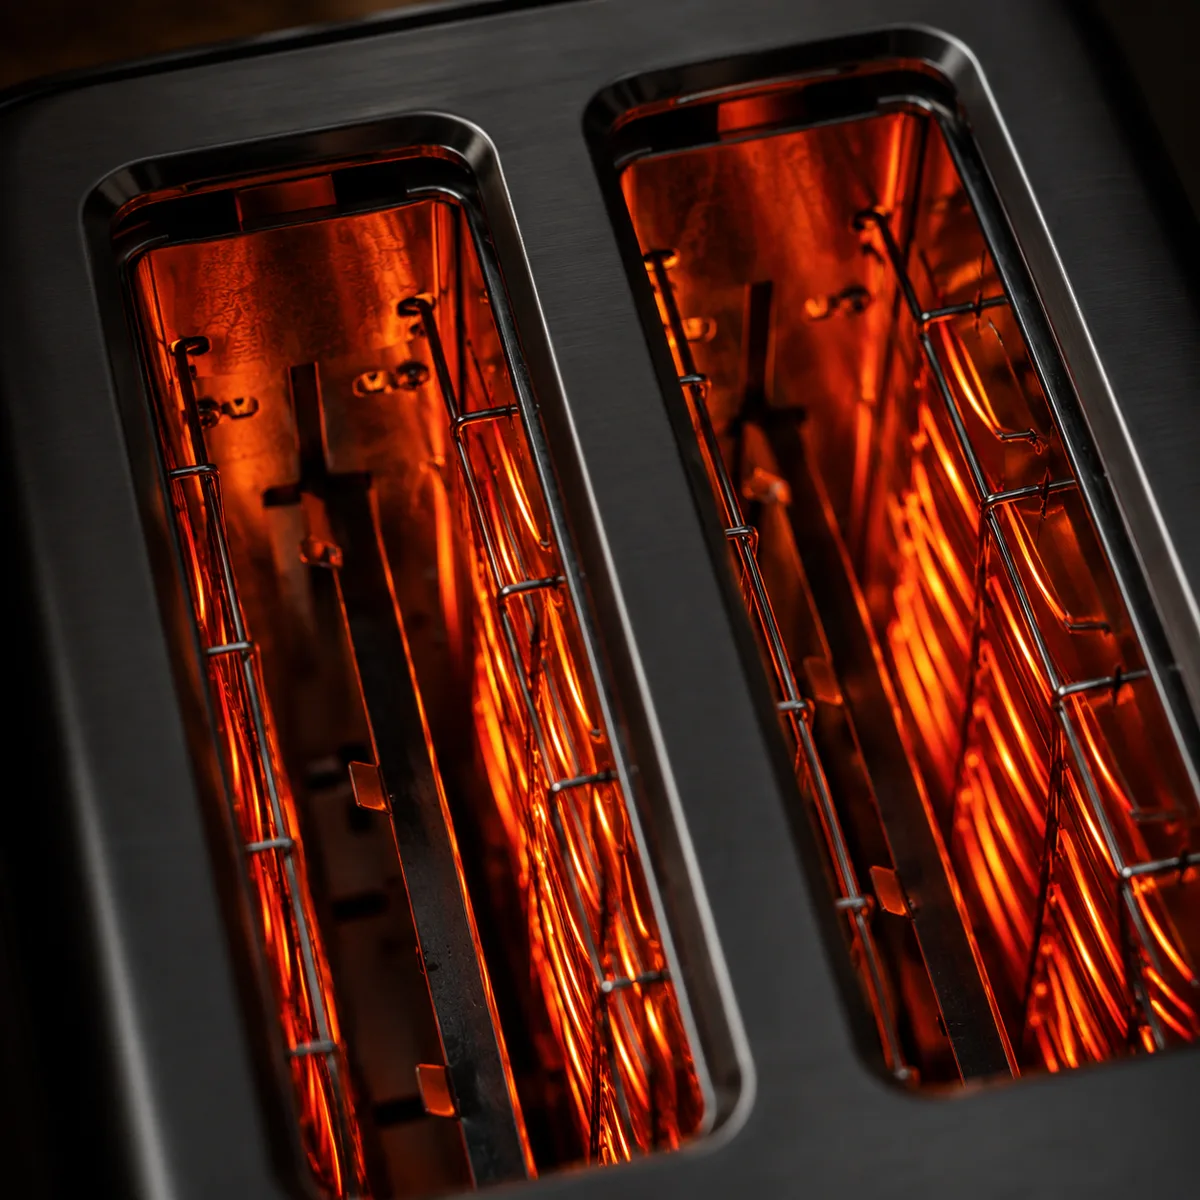
- Choose the Right Brush: A soft-bristled brush is ideal. An old, clean toothbrush, a small pastry brush, or a dedicated cleaning brush will work well. Avoid stiff bristles or anything metallic, as these can scratch or bend the heating elements.
- Gentle Sweeping: Carefully insert the brush into the toaster slots. Gently sweep the sides and downwards towards where the heating elements are. You're trying to dislodge crumbs, not scrub the elements themselves.
What to Avoid
Never use water or cleaning solutions inside the toaster slots unless explicitly stated by the manufacturer. Moisture can damage the electrical components and create a shock hazard. Also, avoid anything sharp or pointy.
The heating elements are fragile, and damaging them will affect your toaster’s performance. If you have a model with a pop-up mechanism, be careful not to force it or jam the brush into the mechanism.
Wiping Down Your Toaster's Exterior
Now that the inside is taken care of, let's make the outside shine. A clean exterior makes your appliance look and feel brand new, and it’s a quick task to complete.
Cleaning Different Surfaces
The best method depends on your toaster's finish.
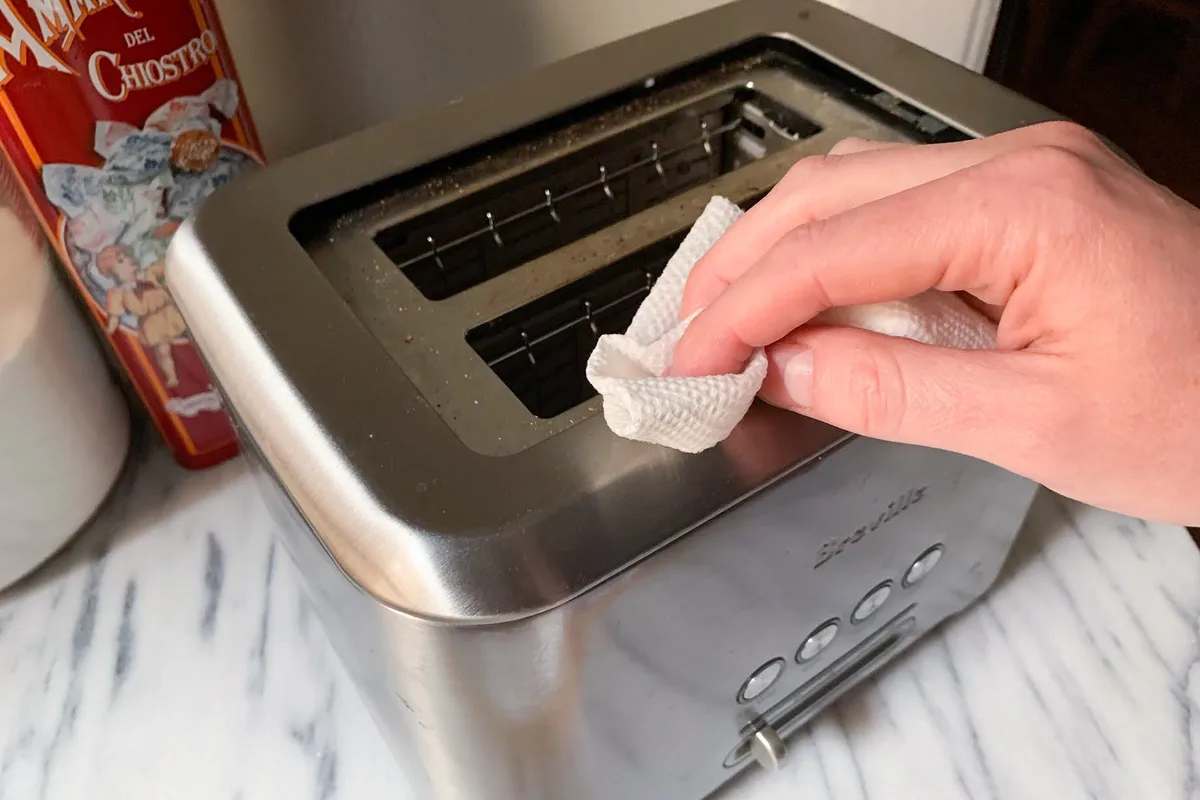
- Stainless Steel: For a classic stainless steel toaster, use a damp cloth and a tiny bit of mild dish soap. Wipe in the direction of the grain if visible. Follow up immediately with a clean, dry cloth (microfiber works best) to buff away streaks and restore shine.
- Plastic or Painted Surfaces: These can usually be wiped clean with a damp cloth. Avoid abrasive cleaners or scrub pads, as they can scratch the finish. For stubborn spots, a little dish soap on the damp cloth should do the trick.
Dealing with Grime and Fingerprints
Fingerprints and grease splatters are common on toaster exteriors. A slightly damp cloth is often enough to lift these marks. If you’re facing tougher grime, a solution of one part white vinegar to two parts water can be effective on many surfaces, but always test in an inconspicuous area first.
Ensure the exterior is completely dry before plugging the toaster back in. This is a good time to check the cord for any damage, ensuring it’s also clean and dry.
How Often to Clean Your Toaster
Consistency is key when it comes to toaster maintenance. How often you need to clean it depends on how much you use it and what types of bread products you toast.
Recommended Cleaning Schedule
- Crumb Tray: Empty the crumb tray at least once a week, or more often if you use your toaster daily. This is the most frequent maintenance required.
- Interior Cleaning: A more thorough interior cleaning, the shake-and-brush method, is recommended every 1, 2 months, depending on usage. If you notice a persistent burnt smell or see visible debris inside, it’s time for a clean regardless of the schedule.
- Exterior Wipe-Down: A quick wipe of the exterior can be done as needed, perhaps weekly, to keep it looking presentable and free of dust or splatters.
Usage Factors to Consider
- Frequent Use: If your toaster is used multiple times a day for various items like bread, bagels, or frozen waffles, you’ll need to clean it more often.
- Type of Product Toasted: Toasted items that crumb heavily, like certain types of bread or crumpets, will necessitate more frequent cleaning than those that leave less debris.
- New Appliance: When you first get a new toaster, it’s a good practice to run it empty for a cycle or two. This burns off any manufacturing residues and can sometimes produce a temporary chemical smell.
Frequently Asked Questions About Toaster Cleaning
### How long does it take to clean a toaster inside?
Cleaning the inside of your toaster typically takes about 10-15 minutes, not including cooling time. The process involves unplugging, shaking, brushing, and then wiping the exterior. Emptying the crumb tray is usually quick.
### Can I use a vacuum cleaner to clean inside my toaster?
It's generally not recommended to use a standard vacuum cleaner inside a toaster. The suction can be too strong, potentially damaging delicate internal components or heating elements. A small, handheld vacuum with a brush attachment might be used very carefully on the crumb tray, but avoid using it directly inside the toaster slots.
### What if my toaster doesn't have a removable crumb tray?
If your toaster lacks a removable crumb tray, you'll need to rely entirely on the upside-down shaking and soft brushing method. Ensure you do this over a large trash bag or bin to catch all the falling debris. Regularly shaking and brushing will be even more critical for preventing build-up.
### Is it safe to clean a toaster with water?
You should never immerse your toaster in water or use excessive water inside its slots. Water and electricity are a dangerous combination. Only use a damp cloth for the exterior and ensure all parts, especially the crumb tray, are completely dry before reconnecting power.
Manufacturer guidelines strictly prohibit submersion.