How to Fix a Slow Cooker
Image source: Bing (Web (fair-use with source credit))
Your slow cooker won't turn on, and you're staring down a recipe that needs it. Before you rush out for a replacement, hold on. You might be able to fix it yourself with a few basic tools and about thirty minutes.
Most slow cooker failures aren't catastrophic. They come down to a handful of common, fixable parts.
We're talking about a simple appliance with a heating element and a thermostat. A typical model runs between 150 and 300 watts, per manufacturer specifications for most Crock-Pot and Hamilton Beach units. That low power draw means internal components are basic and often accessible.
Let's walk through exactly how to diagnose and repair your cooker.
Quick Answer
To fix a slow cooker, first identify the symptom. Unplug the unit and test the outlet with another device. If the outlet works, check the power cord for damage.
Next, access the base and use a multimeter to test the thermal fuse for continuity. A blown fuse is the most common failure and costs under $10 to replace.
Fix It or Toss It? Start With 2 Questions
Before you pick up a screwdriver, answer two quick questions. They'll tell you if a repair makes sense or if you're throwing good money after bad.
Is the problem with the ceramic crock or the electrical base? A cracked stoneware insert needs a replacement part, not a repair. A damaged crock can shatter from thermal shock during cooking. That's a genuine safety hazard.
How old is your slow cooker and what does a comparable replacement cost? A basic new slow cooker runs $30 to $60 as of 2026. If your repair involves a thermal fuse ($5, $10) or a new knob, fix it. If the heating element is burnt out and the unit is past five years, replacement is usually the smarter move.
Diagnose by Symptom: Pick Your Branch
The secret to fixing anything is starting with a clear diagnosis. Find the symptom that matches yours, then follow that specific branch.
Branch 1: Won't turn on at all. This points to a power delivery issue. Start at the wall and work inward.
Branch 2: Turns on but never gets hot. The indicator light glows but food stays cold. Either the heating element isn't activating or the thermostat is stuck.
Branch 3: Cooks on High but scorches on Low. Classic thermostat or control knob failure. The temperature regulation is broken.
Branch 4: Heats unevenly or cycles on and off. Often a failing heating element with dead spots, or a loose wire connection inside the base.
Branch 5: Clicks, smells, or trips the breaker. Stop immediately. This signals an electrical short or critical component failure. In most cases, the cooker is done.
| Symptom | Likely Cause | Fix Difficulty |
|---|---|---|
| Won't turn on | Power cord, outlet, or thermal fuse | Easy |
| On but not heating | Heating element or thermostat | Moderate |
| Wrong heat settings | Control knob or selector switch | Easy |
| Intermittent heat | Loose wiring or element degradation | Moderate |
| Burning smell or tripping | Electrical short | Replace unit |
Read This Before You Open the Base
Safety isn't optional. Electricity and heat demand respect.
Always unplug first. Not just turn it off. Unplug it from the wall. Then inspect the cord for cracks, fraying, or exposed wires.
A damaged cord means the cooker needs professional attention or replacement, period.
Never immerse the base in water. You can wipe the exterior with a damp cloth. But the heating coil and wiring inside are not waterproof. Water intrusion destroys the electronics and creates a shock risk.
Watch for safety red flags. Per the U.S. Consumer Product Safety Commission guidelines for small appliances, if you see scorch marks, melted plastic, or smell burning, stop. Do not attempt a repair.
These signs mean the unit is no longer safe to operate.
For everyday appliance care, our guide on how to clean a food scale covers principles that apply to keeping any kitchen equipment in working order.
Open It Up: The Tools You Actually Need
You don't need a full workshop. A few basics handle almost any slow cooker repair.
A multimeter is your most important tool. A basic digital model that measures continuity (the beep function) is all you need. It's how you'll test the thermal fuse and heating element.
Most slow cooker bases use Phillips-head screws. Some use Torx. Check the screws on your base plate before you start.
| Tool | Purpose |
|---|---|
| Digital multimeter | Testing fuses and elements |
| Phillips screwdriver set | Removing base plates |
| Needle-nose pliers | Handling small wire connectors |
| Safety glasses | Protecting your eyes |
Gather these, clear a workspace, and lay down a towel to catch any screws that try to escape.
The Repair Tree: Common Failures and the Exact Fixes
With the unit unplugged and the base plate removed (usually 4, 6 screws on the bottom), you can see the heating element and thermal fuse.
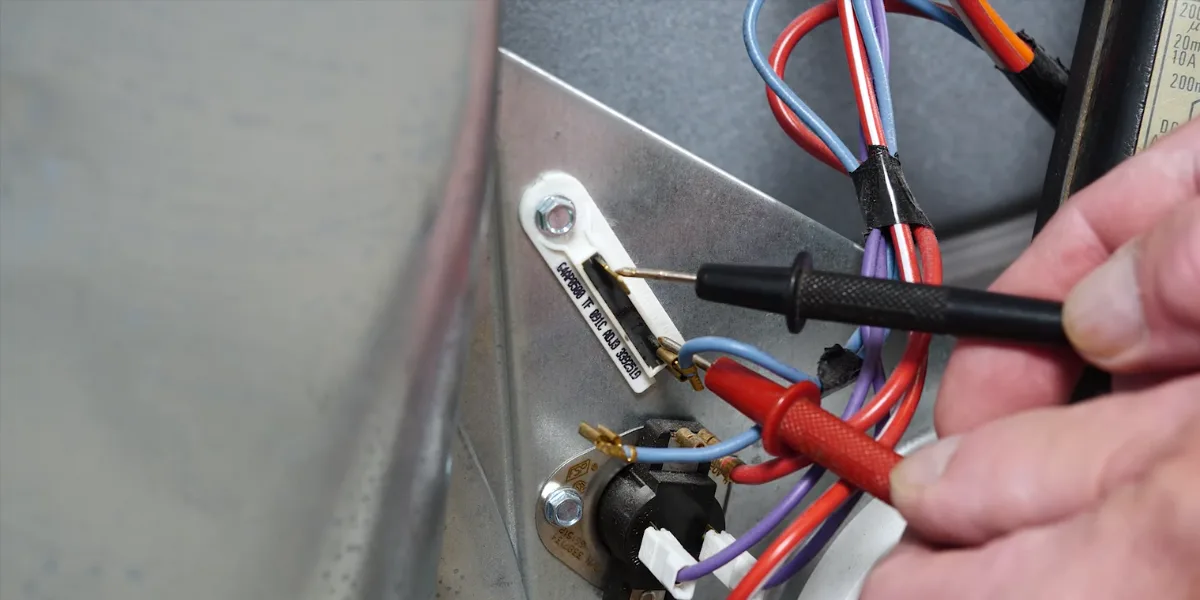
Image source: Bing (Web (fair-use with source credit))
Dead Thermal Fuse (Most Common Fix)
This small cylindrical component is a one-time safety device. If the cooker ever overheated, the fuse blew to prevent a fire. That's why your cooker died suddenly.
Test it with your multimeter on continuity mode. Touch the probes to each end. No beep?
It's blown. Snip it out, note the temperature rating stamped on the side, and solder in a new one. This part fixes roughly 40% of dead slow cookers.
Burnt-Out Heating Element
Test the element with your multimeter set to resistance. A healthy element typically reads between 20 and 40 ohms. No reading means it's open.
You can buy a replacement element, but this is often the point where buying new makes more financial sense.
Broken Control Knob or Selector Switch
If the knob spins freely without engaging, it's stripped. If it's stuck, the switch behind it may be faulty. Replacing the entire switch assembly is a common, affordable repair.
Order the part using your model number.
Loose Wiring Connections
Years of heating and cooling cycles loosen spade connectors on the switch or element. Check every connection point. Reseat any connector that wiggles.
This five-second check solves many intermittent heating problems.
Always test your repair with a pot of water on Low for thirty minutes before you commit to an actual meal.
When the Crock Is the Problem: Cracks, Chips, and Seals
A cracked ceramic insert isn't just inconvenient. It's dangerous. Stress from heating can cause a crack to expand rapidly.
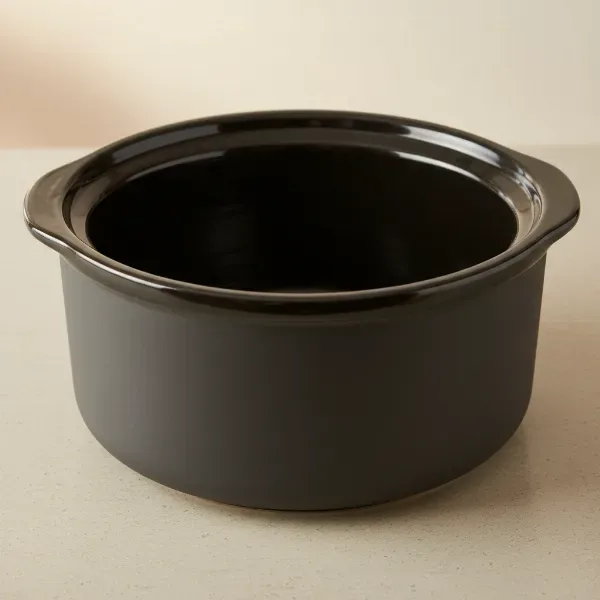
Image source: Bing (Web (fair-use with source credit))
Never cook with a visibly cracked crock. Even a hairline fracture can worsen under heat. The fix is straightforward: find a replacement insert. Check the manufacturer's website first with your model number.
Generic retailers also carry them. A new crock typically costs $15 to $40.
Lid fit matters too. A warped lid lets heat and moisture escape, which ruins cook times. Sometimes cleaning the rim solves it. If the lid is chipped or cracked, a replacement lid is usually available from the manufacturer.
For tips on keeping kitchen tools accurate and well-maintained, our guide on how to test a kitchen scale walks through calibration principles that apply broadly to precision kitchen equipment.
Know When to Quit: Repair vs. Replace
Here's the honest math. Add up the cost of the part plus your time. Compare that to a new unit.
A thermal fuse repair costs $5 to $10 in parts. A new control knob runs $10 to $15. Both are worth doing on any cooker under eight years old.
A heating element replacement costs $15 to $25, plus more effort. If your cooker is old or was budget-priced, replacement wins.
Check your warranty first. Many manufacturers offer 1 to 3 year coverage. If your slow cooker is still within warranty, contact the manufacturer directly.
Don't open the base yourself and void it.
If you're deciding what to replace it with, our guide on how to choose a kitchen scale shows how we evaluate kitchen equipment purchases using the same cost-versus-value approach.
Keep It Running: Simple Habits That Prevent Future Breakdowns
Most slow cooker failures come from neglect or misuse. A few habits extend the life of your unit significantly.
Clean the heating surface after every use. Food residue on the base plate insulates it and causes uneven heating. Wipe it down with a damp cloth once it's completely cool.
Store the crock and lid separately. Nesting the lid on the crock traps moisture and causes odor buildup. Store them apart, or leave the lid slightly ajar.
Avoid thermal shock. Don't place a hot ceramic crock on a cold granite counter or run it under cold water. Let it cool gradually. This is the number one cause of cracked inserts.
Use the right size for the job. A 2-quart cooker running with minimal contents works harder than it should. Match your cooker size to your typical batch. If you regularly cook for two, a smaller unit is more efficient and lasts longer.
Plug directly into the wall. Power strips and extension cords can cause voltage drops that stress the heating element over time. A direct wall connection keeps power delivery consistent.
Frequently Asked Questions
Can I fix a slow cooker that won't heat on Low but works on High?
Yes, this is usually a control knob or thermostat issue. The Low setting uses a different contact path through the selector switch. If that contact is worn or corroded, only High will work.
Replacing the switch assembly typically resolves it.
Why does my slow cooker smell like burnt plastic?
A burning plastic smell usually means a wire insulation is melting against the heating element, or the base plate is overheating. Unplug it immediately. Inspect the wiring inside for melted insulation.
If you find any, the unit should be replaced rather than repaired.
Is it safe to use a slow cooker with a cracked crock?
No. A cracked ceramic insert can break apart during cooking, causing hot food and liquid to spill. Replace the crock before using the cooker again.
Replacement inserts are available from most manufacturers.
How long should a slow cooker last?
With normal use and basic maintenance, most slow cookers last 5 to 10 years. The thermal fuse is the most common part to fail. Regular cleaning and proper storage can push a quality unit toward the upper end of that range.
Where do I buy replacement parts?
Start with the manufacturer's website using your model number. Authorized parts retailers and general marketplaces also carry thermal fuses, knobs, crocks, and lids for most major brands.





One Comment