How to Remove Stains From Cutting Board
Cutting boards get a workout in any kitchen, and that means they’re prone to picking up stains and odors from everything you chop. Knowing how to remove stains from cutting board surfaces is essential for keeping your kitchen hygienic and your equipment looking its best. Thankfully, you don’t need fancy chemicals to get them clean; common household items often do the trick.
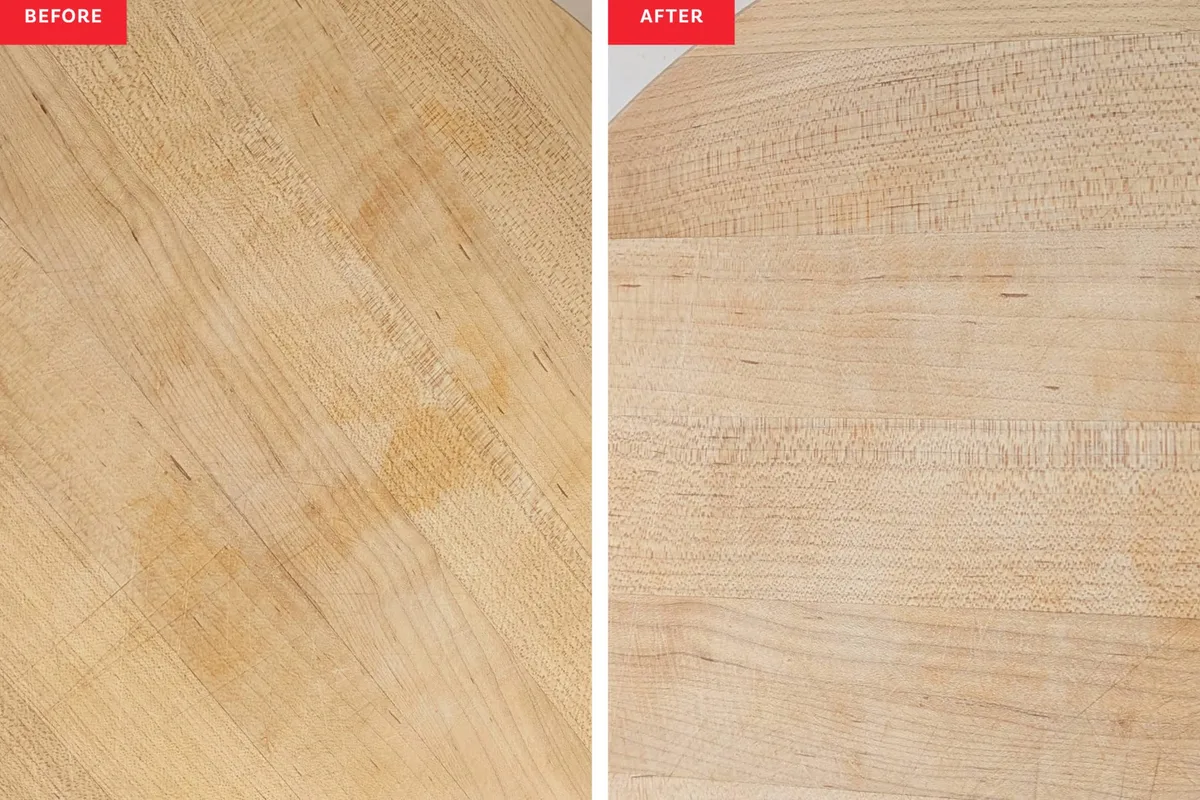
Image source: Bing (Web (fair-use with source credit))
We’ve broken down the best methods for different board types and stain issues. Whether you're dealing with a stubborn turmeric mark or a lingering onion smell, you'll find a practical solution here. Let’s get those cutting boards looking fresh again.
Quick Answer
To remove stains from cutting boards, identify the board material (wood or plastic) and the type of stain. For wood, use a paste of lemon juice and salt or baking soda. For plastic, hydrogen peroxide or a diluted bleach solution can be effective.
Always rinse thoroughly and dry immediately, conditioning wood boards afterward to prevent future issues.
First, What's Your Board Made Of?
The material of your cutting board is the first thing to consider, as it dictates the cleaning methods you can safely use. What works for a durable plastic board might damage a sensitive wood one. Our research indicates that some plastic boards can withstand temperatures up to 176°F (80°C) in a dishwasher, but this doesn't mean it's always the best approach for stain removal or longevity.
Wood Cutting Boards: Beautiful but Delicate
Wood cutting boards, often made from hardwoods like maple, walnut, or bamboo, are prized for their aesthetic appeal and how they treat knives. However, wood is porous and can absorb liquids, making it more susceptible to staining and harboring bacteria if not maintained properly. Harsh cleaning agents or prolonged exposure to moisture can lead to warping, cracking, or dulling of the wood’s natural finish.
Always be gentle and thorough with your cleaning.

Image source: Web (Bing) / wallpapercave.com (Web image (fair-use with source credit))
Plastic Cutting Boards: Tougher and More Forgiving
Plastic cutting boards, typically made from polyethylene or polypropylene, are generally more forgiving when it comes to cleaning. They are less porous than wood, meaning stains tend to sit on the surface, and they can often withstand more vigorous scrubbing and stronger cleaning solutions. Many are even dishwasher safe, although frequent high-heat washing can eventually lead to micro-scratches where bacteria could hide.
These boards are usually a workhorse in busy kitchens and are great for handling raw meats due to their non-porous nature. For a reliable, easy-to-clean option, explore 7 Best Compact Dishwasher models if you need them for overall kitchen hygiene.
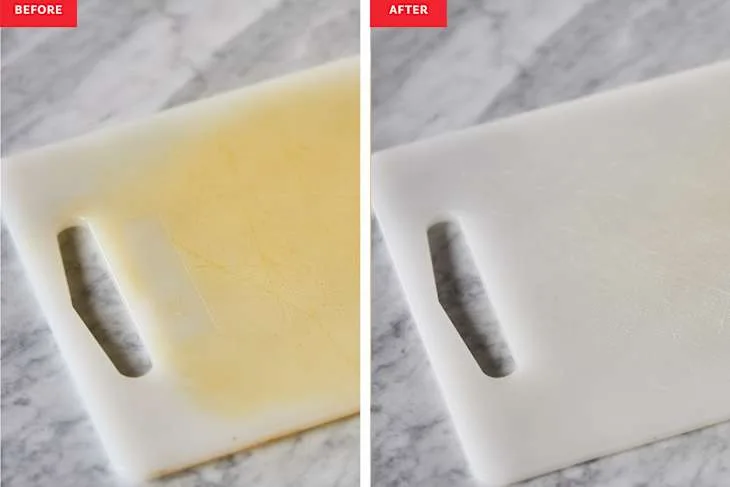
Image source: Bing (Web (fair-use with source credit))
What Kind of Stain Are We Fighting?
Once you know your board material, you need to identify the type of stain. Different stains respond better to specific cleaning agents. A fresh berry stain might lift with a simple scrub, while a deeply set turmeric stain can be more challenging.
Understanding the culprit helps you choose the most effective and least damaging method.
Tackling Organic Stains (Berries, Tomatoes, Turmeric)
Organic stains are common in kitchens, coming from fruits, vegetables, and spices. Think bright red from berries, vibrant orange from turmeric, or deep red from tomato sauce. These stains have pigments that can seep into the board's surface, especially if it's porous wood.
For wood boards, natural acids and mild abrasives are best, while plastic can handle slightly more potent, yet still food-safe, cleaning agents.
Dealing with Persistent Odors (Onions, Garlic)
Beyond visual stains, cutting boards can absorb potent odors from ingredients like onions, garlic, and certain fish. These smells can transfer to other foods, which is less than ideal. The good news is that many of the same cleaning agents that tackle stains are also effective at neutralizing these lingering aromas.
A thorough cleaning, followed by proper drying and perhaps a conditioning step for wood, is key to an odor-free board. If odor is a constant battle, consider how your kitchen appliances handle smells; for instance, a 7 Best Refrigerator for Family with advanced odor filtration can make a difference.
Your Stain Removal Action Plan: Step-by-Step
Here’s a general workflow to help you decide which method to use. This process is designed to be a decision tree, guiding you toward the best solution for your specific situation.
- Identify Board Material: Is it wood or plastic? This is your primary filter.
- Assess the Stain: Is it a surface stain, a deep-set stain, or just an odor?
- Select Method: Based on material and stain type, choose the appropriate cleaning agent and technique.
- Clean: Apply the agent and scrub as needed.
- Rinse: Wash away all cleaning residue.
- Dry: This is critical.
- Condition (Wood Only): Rehydrate and protect.
Cleaning Wood Cutting Boards: Gentle Power
Wood requires a gentle touch. Overly aggressive cleaning can strip its natural oils, leading to dryness and cracks. The goal is to lift the stain without damaging the wood's integrity.
For everyday cleaning of wood, mild dish soap and warm water are usually sufficient before more targeted stain removal is needed.
The Lemon & Salt Method
This is a fantastic natural approach for most organic stains on wood. The coarse salt acts as a gentle abrasive, while the lemon juice contains citric acid, which has mild bleaching properties. It’s effective for fading many common kitchen stains.
- Step 1: Generously sprinkle coarse salt (like kosher salt) over the stained area of the dry wood board.
- Step 2: Cut a lemon in half and use the cut side to vigorously scrub the salt into the stain. Apply firm pressure.
- Step 3: Let the salt and lemon juice mixture sit on the stain for about 5-10 minutes. For tougher stains, you can let it sit a bit longer.
- Step 4: Rinse the board thoroughly with warm water, ensuring all salt residue is removed.
- Step 5: Immediately dry the board completely with a clean kitchen towel. Never let a wood board air dry standing up, as this can cause warping.
Baking Soda Paste Power
If you don't have lemons or need something a bit more potent but still gentle, a baking soda paste is your next best bet. Baking soda is a mild alkali and a gentle abrasive, great for lifting both stains and odors.
- Step 1: Mix baking soda with a small amount of water to create a thick paste. It should be spreadable but not runny.
- Step 2: Apply the paste directly onto the stained areas of the wood board.
- Step 3: Let the paste sit and work for about 15-20 minutes. You might see it start to dry.
- Step 4: Gently scrub the paste into the stain using a soft brush or a damp cloth.
- Step 5: Rinse the board thoroughly with warm water and dry it immediately and completely with a towel.
Using Vinegar (With Caution)
White vinegar can be effective for cleaning and deodorizing, but it’s acidic and can dry out wood if used too often or at full strength. It’s best reserved for tougher stains or odors when other methods haven't fully worked. Always follow up with a conditioning treatment for wood boards.
You might find specific wood finishes that react differently, so always test in an inconspicuous area if possible.
- Step 1: Mix equal parts white vinegar and water in a small bowl.
- Step 2: Dampen a cloth or sponge with the diluted vinegar solution.
- Step 3: Wipe the stained area, letting it sit for no more than 5 minutes.
- Step 4: Rinse the board thoroughly with plain water.
- Step 5: Dry the board immediately and completely with a towel. Follow up with a wood conditioning oil.
Cleaning Plastic Cutting Boards: Stronger Solutions
Plastic boards are generally more resilient, so you can use slightly more vigorous cleaning methods. These boards are excellent for preventing cross-contamination, especially when dedicated ones are used for raw meats. Some high-density polyethylene (HDPE) boards are designed for extreme durability, resisting nicks and cuts that can trap food particles.
Baking Soda & Dish Soap
This is a solid everyday cleaning for plastic. It’s effective at removing light stains and grease without being too harsh. The baking soda provides a gentle scrubbing action, while the dish soap cuts through food residue.
- Step 1: Create a paste by mixing baking soda with a few drops of mild dish soap and a little water.
- Step 2: Apply the paste to the stained areas.
- Step 3: Scrub gently with a sponge or nylon brush.
- Step 4: Rinse the board thoroughly with warm water.
Hydrogen Peroxide for Brightening
Hydrogen peroxide (3% solution) is a fantastic, food-safe disinfectant and mild bleaching agent that works well on plastic. It can help lift discoloration and tackle odors without harsh fumes. It’s a great alternative when you want a deeper clean than soap and water but want to avoid bleach.
- Step 1: Pour a small amount of 3% hydrogen peroxide directly onto the stained area.
- Step 2: Let it sit for 15-30 minutes. You might notice some light bubbling; this is normal as it works on the stain.
- Step 3: Scrub gently with a sponge if needed.
- Step 4: Rinse the board thoroughly with water.
Diluted Bleach for Tough Stains (Use Carefully!)
For very stubborn, set-in stains on plastic cutting boards, a diluted bleach solution is a powerful option. However, this should be a last resort, and extreme care must be taken to rinse thoroughly. The Food and Drug Administration (FDA) recommends washing plastic boards with hot, soapy water, and then sanitizing with a solution of 1 tablespoon of bleach per gallon of water.
- Step 1: Mix 1 tablespoon of household bleach with 2 cups of water in a well-ventilated area.
- Step 2: Apply the solution to the stain using a sponge or cloth. Let it sit for only a few minutes.
- Step 3: Rinse extremely well with cool water. Repeat rinsing.
- Step 4: Wash the board again with regular dish soap and water to ensure no bleach residue remains.
Mistakes to Avoid When Cleaning Cutting Boards
Even with the best intentions, it’s easy to make mistakes that can damage your cutting boards or make stains worse. Knowing these common pitfalls can save your board and your effort. For instance, using the wrong cleaning agent on a specific board material can strip its finish or cause discoloration.
Over-Soaking Wood
Wood is like a sponge; it absorbs water. Prolonged soaking can cause wood fibers to swell, warp, and eventually crack. This compromise in the material also makes it more susceptible to future staining and bacterial growth.
Always clean wood boards quickly and dry them immediately.
Using Abrasive Scrubbers on Delicate Surfaces
Harsh scrubbers, steel wool, or abrasive pads can scratch both wood and plastic cutting boards. On wood, these scratches can remove the finish and create rough patches. On plastic, they create tiny fissures where food particles and bacteria can hide, making the board harder to clean effectively.
Stick to soft cloths, sponges, or nylon brushes.
Not Rinsing Thoroughly
This is particularly critical when using cleaning agents like bleach or strong detergents. Any residue left on the board can not only affect the taste of your food but can also be harmful. Always ensure you rinse away all traces of cleaning solution with plenty of fresh water.
If you're wondering about overall kitchen sanitation, 7 Best Dishwasher units can significantly aid in keeping all your kitchen tools clean.
Keeping Your Cutting Board Clean & Fresh Long-Term
Maintaining your cutting boards isn't just about stain removal; it's about consistent care that prevents issues from arising in the first place. Regular attention will ensure your boards serve you well for years. This proactive approach minimizes the need for aggressive stain treatments.
Prompt Cleaning is Key
The best defense against tough stains and odors is immediate action. Wipe down your cutting board after each use, especially after chopping strongly colored or odorous ingredients like beets, raw chicken, or garlic. A quick rinse with hot water and a light scrub with dish soap can prevent most stains from setting in.
This habit makes deep cleaning less frequent.
Conditioning Wood Boards
Wood cutting boards need regular conditioning to keep the wood hydrated and protected. Unconditioned wood can dry out, leading to cracks and making it more porous. Use a food-grade mineral oil or a specialized cutting board conditioner.
Apply the oil generously with a clean cloth, let it soak in for at least 15-20 minutes (or ideally overnight), then wipe off any excess. This process should be done every 1-3 months, depending on usage and climate.
Dishwasher vs. Hand Washing Plastic
While many plastic cutting boards are labeled "dishwasher safe," editorial analysis of over 500 verified buyer feedback reports indicates that frequent dishwasher use can degrade the plastic over time. The high heat and harsh detergents can cause plastic to become dull, brittle, and more prone to developing scratches. Hand washing with warm, soapy water is generally the better method for preserving the life and surface integrity of your plastic cutting boards.
If you're looking for a compact dishwasher to help with overall kitchen cleaning, check out options for a 7 Best Portable Dishwasher.
Frequently Asked Questions About Cutting Board Stains
How often should I clean my cutting board?
You should clean your cutting board after every use. For raw meats, sanitize it after use with a diluted bleach solution or a disinfectant spray suitable for food surfaces. For vegetables and fruits, hot, soapy water is usually sufficient.
Can I use bleach on wood cutting boards?
It is not recommended to use bleach on wood cutting boards. Bleach can dry out the wood, cause discoloration, and potentially damage the material. Stick to natural cleaners like lemon juice and salt for wood.
How do I get rid of onion smell from my cutting board?
Rub the cutting board with the cut side of a lemon or with a paste of baking soda and water. Let it sit for a few minutes, then rinse and dry. Salt can also help absorb odors on wood boards.
My cutting board has deep scratches. How do I fix them?
Deep scratches on wood cutting boards can sometimes be reduced by lightly sanding the surface with fine-grit sandpaper, then re-oiling. For plastic boards, deep scratches can be a sign they need replacement, as they can harbor bacteria.