How to Sanitize an Ice Maker
Making ice at home is a convenience most of us take for granted, but that crystal-clear ice can quickly turn into a breeding ground for unpleasant things if not cared for properly. Knowing how to sanitize an ice maker is key to ensuring you're not serving up more than just refreshment. Unwanted guests like mold and bacteria can affect taste, odor, and even your health.
Aggregate reviews show that many users overlook the importance of regular deep cleaning, relying only on the appliance's self-cleaning cycle. However, according to National Sanitation Foundation (NSF) International standards for food equipment, maintaining cleanliness is paramount to prevent cross-contamination. This guide walks you through everything you need to know to keep your ice maker sparkling.
Quick Answer
Sanitize your ice maker by unplugging it, emptying all ice and water, and then cleaning all accessible parts with a food-grade sanitizer. Run a cleaning cycle if your unit has one, followed by thorough rinsing and draining. This process should be repeated regularly to prevent mold and bacteria growth.
Why Your Ice Maker Needs a Deep Clean (Beyond the Self-Clean Button)
That self-cleaning button on your ice maker? It's a helpful feature, but it's usually more of a light rinse than a deep sanitization. Our research indicates that these cycles are designed to flush out loose debris and mineral deposits, but they often don't reach every nook and cranny where mold and bacteria love to hide.
Think of it like rinsing a dish versus scrubbing it with soap, one is a quick fix, the other a thorough clean.
When you don't go beyond the basic cycle, you're leaving behind a perfect environment for microscopic invaders. Moisture, along with residual ice particles and mineral deposits, creates a welcoming habitat. These can lead to that musty smell or off-taste in your ice that you might have noticed, and worse, they can pose health risks if left unchecked.
For instance, studies by the US Department of Agriculture (USDA) on food safety highlight how biofilm can form in such environments, harboring harmful pathogens.
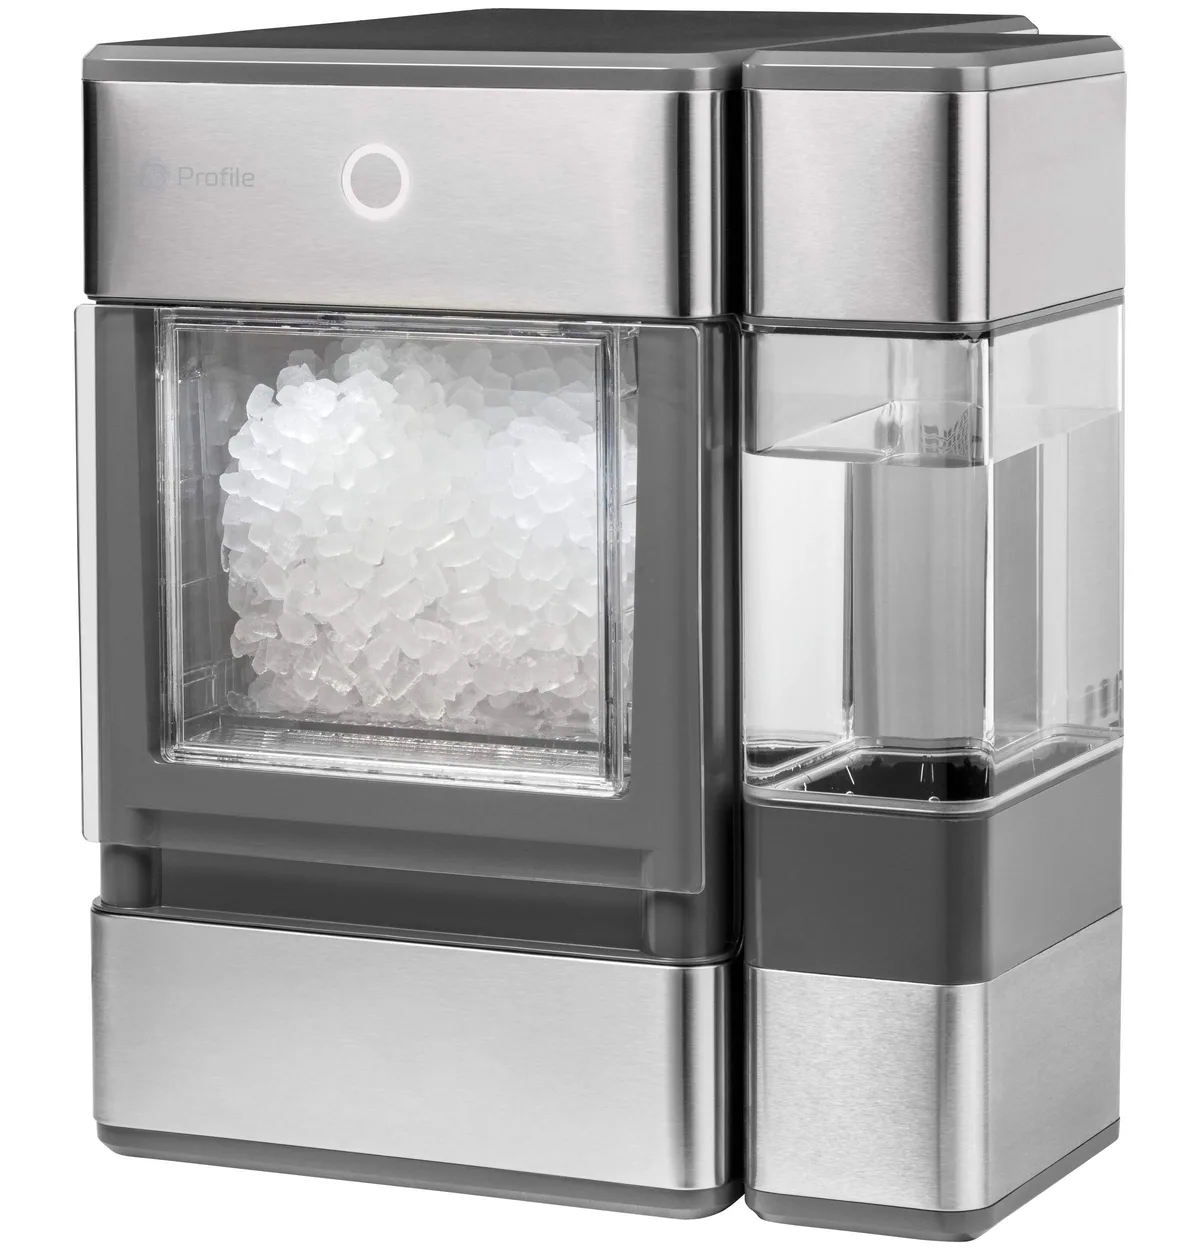
Image source: Bing (Web (fair-use with source credit))
What's Hiding in Your Ice Maker? Common Problems and How to Spot Them
It’s easy to forget about the ice maker sitting in the corner of your kitchen or bar, but like any appliance that handles consumables, it needs attention. Neglecting it can lead to a few common but unpleasant issues that directly impact your ice quality and, potentially, your health.
Mold and Mildew in the Ice Bin
That fuzzy, discolored growth you sometimes see inside the ice bin or around the water reservoir? That's mold and mildew. It thrives in damp, dark environments, and your ice maker provides exactly that.
It often looks like black, green, or gray splotches.
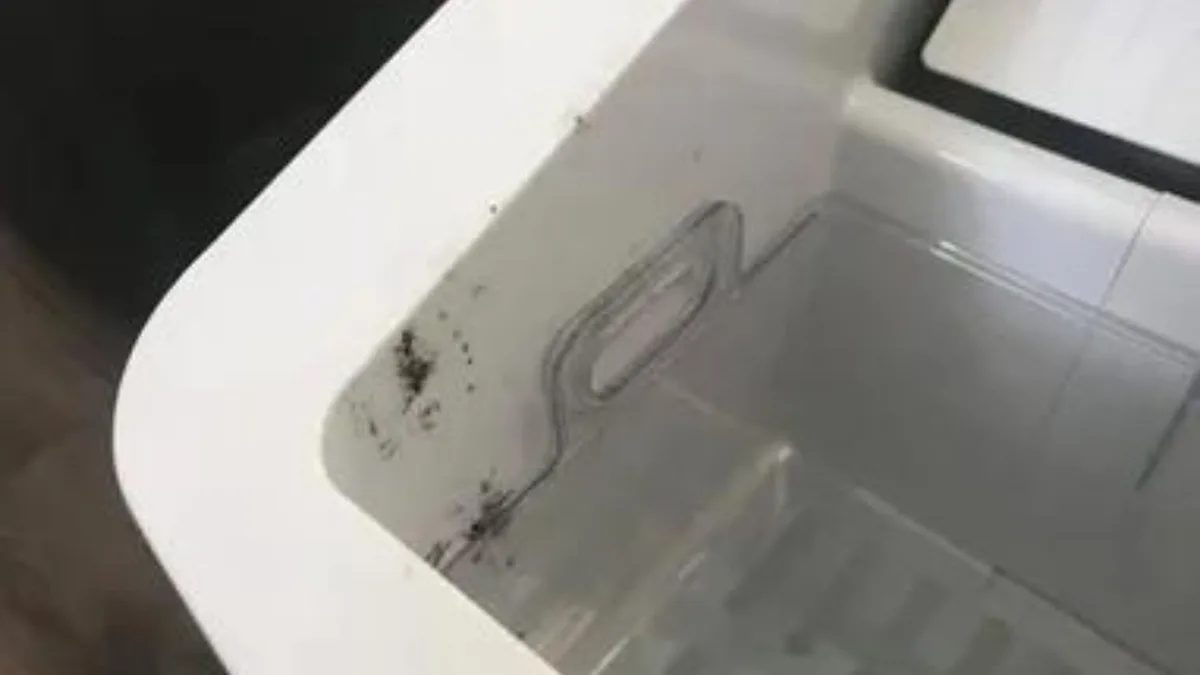
Image source: Bing (Web (fair-use with source credit))
If you spot it, it's a clear sign that your ice maker needs an immediate, thorough sanitization. Beyond being unsightly, mold spores can affect the taste of your ice and could potentially cause respiratory issues for some individuals, especially if ventilation is poor.
Mineral Scale Buildup
Over time, minerals from your tap water, like calcium and magnesium, can deposit onto the internal components of your ice maker. This is called limescale. It appears as a white, chalky residue, particularly on the mold plate, water lines, and inside the reservoir.
While not always a direct health hazard, significant scale buildup can impede the ice maker's performance. It can slow down ice production, lead to oddly shaped or hollow ice cubes, and eventually cause component failure. Think of it like plaque buildup in plumbing, it restricts flow and efficiency.
Off-Tastes and Odors
The most common complaint from users who haven't sanitized their ice maker is that the ice simply doesn't taste right. It might have a faint metallic tang, a plasticky flavor, or even a musty, stale odor. This is almost always a direct result of whatever is growing or has settled inside the appliance.
Bacteria, mold, or mineral deposits can all impart undesirable flavors. Even leftover residue from cleaning products can affect taste if not rinsed out properly. If your ice tastes or smells funny, assume it’s time for a deep clean.
This issue is particularly common in portable ice makers that might be stored for periods between uses, where residual moisture can lead to a stale environment.
The Decision Tree: When and How to Sanitize Your Ice Maker
Deciding when and how to sanitize your ice maker isn't always straightforward. Different units have different features, and the type of cleaning needed can depend on your water quality and usage habits. This decision tree will help you figure out the best approach.
- Do you notice any mold, mildew, or discoloration inside the ice bin or on components?
- YES: Proceed immediately to a deep sanitization workflow. Don't delay.
- NO: Continue to the next question.
- Does your ice have an off-taste or an unpleasant odor?
- YES: A deep sanitization is recommended, even if you don't see visible growth.
- NO: Continue to the next question.
- When was the last time you performed a thorough cleaning (beyond just emptying and wiping)?
- More than 3 months ago: Schedule a deep sanitization.
- Less than 3 months ago: A basic wipe-down might suffice, but consider a light sanitization if you have hard water.
- Do you have particularly hard water in your area?
- YES: You should aim for more frequent cleaning, possibly every 1, 2 months, to combat scale buildup effectively.
- NO: Cleaning every 3, 6 months is generally recommended.
Your Ice Maker's Cleaning Cycle: Helpful or Harmful?
Many modern ice makers come equipped with a "self-cleaning" function. This is a great starting point, but it's crucial to understand its limitations. These cycles typically involve circulating a cleaning solution (often just water, or a specialized cleaner you add) through the system to rinse out loose debris and mineral deposits.
Per manufacturer specifications, they are designed for routine maintenance.
However, they rarely achieve a true sanitizing effect on their own. They typically don't scrub surfaces or eliminate all forms of bacteria and mold, especially in hard-to-reach areas. If you've ever seen visible mold inside after running the self-clean cycle, you know what we mean.
Therefore, it's best to view the self-cleaning cycle as a preparatory step or a light maintenance task, not a full sanitization solution. For true sanitization, you'll need to take additional steps.
Step-by-Step: A Comprehensive Ice Maker Sanitizing Workflow
Ready to get your ice maker truly clean? This workflow guides you through the process, ensuring you hit all the important parts. Remember, consistency is key, so aim to do this every 3, 6 months, or more often if you notice any issues.
Preparation:
- Unplug the Unit: Safety first! Always disconnect the power to prevent any electrical hazards during cleaning.
- Empty Everything: Remove all existing ice from the bin and drain any standing water from the reservoir. If your unit has a drain plug, use it.
- Disassemble Removable Parts: Carefully take out any parts that can be detached, this typically includes the ice bin, scoop, water reservoir, and any internal strainers or filters. Refer to your owner's manual if you're unsure.
- Wash Removable Parts: Wash these components thoroughly in warm, soapy water. For stubborn buildup, you might need a soft brush. Rinse them completely and set them aside to air dry.
Cleaning & Sanitizing:
- Apply Cleaning Solution: Prepare your chosen cleaning solution (see the next section for guidance). Pour it into the water reservoir. If your ice maker has a dedicated cleaning port or funnel, use that.
- Run a Cleaning Cycle (if available): If your unit has a self-cleaning function, activate it according to the manufacturer's instructions. This circulates the cleaner through the internal system. If no such cycle exists, you might need to manually run water through the system or let the solution sit for a recommended period (check your manual).
- Rinse Thoroughly: Once the cleaning cycle is complete, discard the cleaning solution. Then, rinse the entire system multiple times with clean, fresh water. Fill the reservoir with clean water and run a short ice-making cycle (or manually flush if needed) to ensure all cleaning residue is removed. Repeat this rinsing step at least two or three times.
Drying & Reassembly:
- Dry Internal Components: Wipe down all interior surfaces, including the ice bin area and the mold plate, with a clean, lint-free cloth. Ensure everything is as dry as possible.
- Reassemble: Once all parts are completely dry, carefully reassemble your ice maker.
- Initial Ice Production: Make a batch of ice. Discard this first batch, as it might still contain residual cleaning agents or minerals from the rinse. Your ice maker is now sanitized and ready to produce clean ice!
Choosing the Right Sanitizing Solution
Selecting the appropriate cleaning agent is critical. Using the wrong product can damage your ice maker or leave harmful residues. Always prioritize solutions that are food-grade and safe for use in appliances that handle consumables.
- Commercial Ice Maker Cleaners: These are specifically formulated for ice machines and are often the safest and most effective choice. They are designed to tackle both mineral scale (descaling) and microbial buildup (sanitizing). Follow the product’s instructions for dilution and application carefully. Brands like Affresh or Whirlpool have specific ice maker cleaning kits.
- Vinegar (as a Descaler, NOT a Sanitizer): Diluted white vinegar (e.g., 1 part vinegar to 1 part water) can be effective at breaking down mineral scale (limescale). However, vinegar is acidic and not a broad-spectrum sanitizer; it won't effectively kill all bacteria or mold. If you use vinegar for descaling, you must follow up with a proper sanitizing step using a food-grade sanitizer. Always rinse thoroughly after using vinegar, as the smell can linger and affect your ice.
- Bleach: Generally, bleach is NOT recommended for most ice makers. While it's a powerful disinfectant, it's difficult to rinse completely from the intricate parts of an ice maker. Any residual bleach can impart a strong, unpleasant flavor and odor to your ice, and in some cases, it can even damage certain plastic or rubber components. Stick to products specifically approved for food equipment.
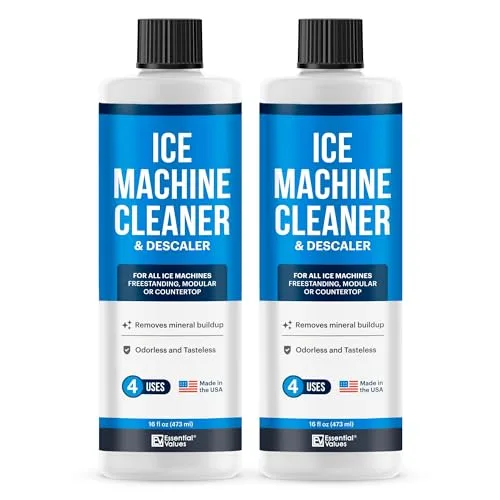
Image source: Bing (Web (fair-use with source credit))
When in doubt, always consult your ice maker's owner's manual for their recommended cleaning and sanitizing agents. Manufacturer specifications are your best guide.
Can You Use Vinegar? (And Other DIY Myths)
Vinegar is a common household cleaner, and many people wonder if it's a good option for ice makers. Yes, diluted white vinegar can be effective for tackling mineral scale, or limescale, that builds up over time. It’s acidic, which helps to dissolve those chalky deposits that can clog water lines and affect ice production.
However, and this is a big "however," vinegar is not a true sanitizer. While it can kill some bacteria, it won't eliminate all the mold, mildew, and other microbes that can thrive in a damp ice maker. If you choose to use vinegar for descaling, you must follow it up with a proper sanitization step using a food-grade sanitizer.
Otherwise, you're only addressing half the problem. Plus, the strong smell of vinegar can linger, potentially making your ice taste like a salad dressing. Always rinse extensively after using vinegar to minimize flavor transfer.
What to Do If It's Really Bad (Or You're Stuck)
Sometimes, you might find that your ice maker has gotten beyond a simple DIY cleaning. Perhaps you’ve neglected it for too long, or maybe you’re dealing with a particularly stubborn buildup of mold or scale that your usual cleaning routine isn’t touching. In these situations, you have a couple of options.
First, consider a more aggressive commercial ice machine cleaner. These products are often stronger and formulated to break down tougher deposits. Always follow their instructions precisely, including any required dwell times and thorough rinsing.
If even these specialized cleaners aren't doing the trick, or if you're uncomfortable attempting a deep clean yourself, it might be time to call a professional appliance repair technician. They have the tools and expertise to tackle severe cases.
If your unit is very old or has severe internal damage, replacement might be a more cost-effective option than professional repair. Before you invest in expensive cleaners or repairs, check the cost of a new, comparable ice maker. For many portable units, a new one might cost less than professional servicing.
Essential Ice Maker Cleaning Mistakes to Sidestep
Even with the best intentions, it's easy to make mistakes when cleaning your ice maker. These errors can range from ineffective cleaning that leaves behind contaminants to damaging the appliance itself. Being aware of these common pitfalls can save you time, money, and ensure your ice is truly clean and safe.
- Not Unplugging the Unit: This is a critical safety oversight. Always disconnect the power before you start cleaning. Water and electricity are a dangerous combination, and you don't want to risk an electric shock.
- Using Harsh Chemicals: Bleach, ammonia, or abrasive cleaners should be avoided. They can leave behind harmful residues that are impossible to rinse out completely, affecting the taste of your ice and potentially posing health risks. Stick to food-grade cleaners specifically designed for ice makers or approved by the manufacturer.
- Skipping the Rinse: This is a big one. Even if you use a safe cleaner, not rinsing thoroughly enough means residual chemicals or cleaning agents can end up in your ice. Always run multiple flush cycles with clean water after cleaning.
- Not Drying Components Properly: Leaving parts wet invites mold and mildew to start growing again immediately. After washing and rinsing, ensure all removable parts and interior surfaces are thoroughly dried with a clean, lint-free cloth before reassembly. Air drying in a well-ventilated area can also help.
- Ignoring the Water Reservoir and Ice Bin: These are the most visible areas for buildup, but people sometimes only focus on the ice-making mechanism. The reservoir and bin are constantly in contact with water and ice, making them prime spots for mold and bacteria. They need just as much attention as any other part.
- Over-reliance on the Self-Clean Cycle: As mentioned, the self-clean function is a maintenance tool, not a deep sanitizing solution. If you only use this, you're likely leaving behind microscopic contaminants.
Keeping Your Ice Maker Sparkling: Regular Maintenance Tips
Consistent, light maintenance is your best defense against major cleaning headaches down the road. By incorporating a few simple habits into your routine, you can keep your ice maker running efficiently and producing clean, fresh-tasting ice without needing a deep clean too often. Think of it as preventative care for your appliance.
- Empty and Wipe Down Regularly: If you don't use your ice maker constantly, try to empty it and wipe down the ice bin and interior with a damp cloth at least once a week. This removes loose moisture and any stray ice chips that can start to grow mold.
- Check and Replace Water Filters: Most ice makers, especially those connected to a water line, use filters to purify the water. These filters trap impurities, sediment, and sometimes odors. Follow the manufacturer's recommended schedule for replacing them, usually every 3, 6 months. A clogged or expired filter can lead to poor ice quality and affect the taste. Properly filtered water also reduces scale buildup.
- Use Filtered Water: If your ice maker doesn't have a built-in filter or if you want an extra layer of purity, use filtered water from a pitcher or tap filter. This is especially helpful in areas with hard water, as it significantly reduces the mineral content and thus, scale formation. This practice aligns with recommendations from appliance manufacturers for optimal performance.
- Allow for Air Circulation: When not in use, leave the ice maker door or lid slightly ajar if possible. This allows any residual moisture to evaporate, preventing that stagnant, damp environment where mold loves to grow. This is particularly important for portable units that might be stored for extended periods.
- Run a Flush Cycle Periodically: Even if you're not doing a full sanitization, running a quick flush cycle (if your unit has one) or a cycle with just clean water every month can help keep the internal components clear of debris. It’s a quick way to maintain a cleaner system.
- Listen to Your Ice Maker: Strange noises can sometimes indicate an issue, like a blockage or a component struggling due to scale buildup. If you notice unusual sounds, it might be a sign to check the water lines or perform a descaling.
Frequently Asked Questions About Ice Maker Sanitization
How often should I sanitize my ice maker?
For most home use, sanitizing your ice maker every 3 to 6 months is sufficient. However, if you have hard water, notice any off-tastes or odors, or see visible mold, you'll need to clean it more frequently, possibly every 1 to 2 months.
Can I use dish soap to clean my ice maker?
Mild dish soap can be used to wash removable parts like the ice bin and scoop. However, for the internal components of the ice maker, it's best to use a food-grade cleaner specifically designed for ice machines or a diluted white vinegar solution for descaling, followed by a sanitizer. You must ensure all soap residue is thoroughly rinsed away.
My ice tastes like plastic. What's wrong?
A plastic taste usually comes from new components outgassing or from residue left on the internal parts. Ensure you've run the recommended number of initial ice-making cycles to flush out any manufacturing residues. If the taste persists after thorough cleaning and rinsing, it might indicate a component within the ice maker itself is leaching plastic, and professional inspection or replacement may be needed.
How do I clean a portable ice maker?
Portable ice makers are generally easier to clean. Unplug the unit, empty all ice and water, and remove any detachable parts (like the ice basket and scoop). Wash these in warm, soapy water.
Then, use a food-grade cleaner or diluted vinegar in the water reservoir, run a cleaning cycle if available, and rinse thoroughly multiple times with fresh water. Ensure all parts are dried completely before reassembling.