How to Fix a Microwave That Isn’t Heating
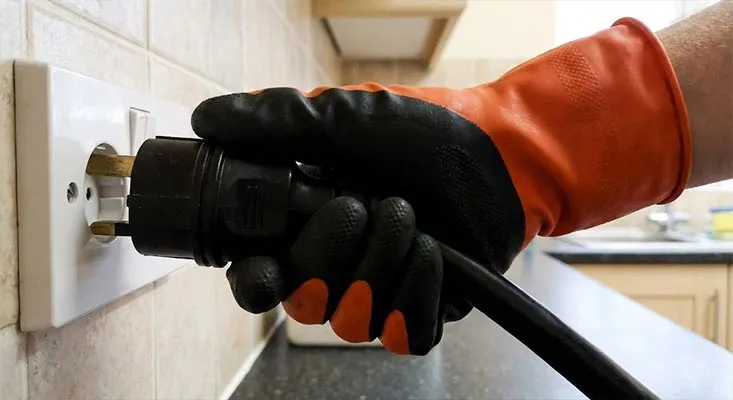
Image source: Bing (Web (fair-use with source credit))
When your microwave suddenly stops heating, it’s a major kitchen inconvenience. You're left wondering how to fix a microwave that isn't heating, and you need answers fast. This guide cuts through the noise to help you diagnose the problem, understand the risks, and figure out your next steps.
Many common microwave heating issues stem from simple fixes, but some involve internal components that require caution. According to manufacturer specifications, internal fuses are designed to protect the appliance from power surges, and their failure can be a direct cause of no-heat symptoms. We'll break down the diagnostic process so you can tackle it safely.
Quick Answer
If your microwave isn't heating, first check the power source and door latch. If those are fine, unplug the unit and inspect the internal fuse and door interlock switches. Failure of the magnetron or high-voltage components also prevents heating and typically requires professional repair.
Why Your Microwave Isn't Heating: The First Things to Check
It’s a classic kitchen conundrum: you pop something in the microwave, hit start, and… nothing. No heat. That sinking feeling is understandable, but before you start shopping for a replacement, there are a few basic things to look at.
These aren't the dramatic, complex fixes; these are the simple checks that often get overlooked. They could save you time, money, and the hassle of a new appliance purchase.
Sometimes, the problem isn't with the microwave itself at all. It could be an issue with the power supply or how the door is sealing. Getting these basics right is step one in figuring out what’s going on.
Is It Plugged In and Powered Up? The Obvious First Step
Seriously, this is the most common culprit. You’d be surprised how often a microwave stops heating simply because it’s not properly connected to power.
- Check the Plug: Make sure the microwave’s power cord is pushed all the way into the wall outlet. A loose connection can stop everything.
- Test the Outlet: Grab another small appliance, like a lamp or phone charger, and plug it into the same outlet. If that appliance also fails to power up, the outlet itself is likely the problem. You might need to check your home’s circuit breaker.
- Circuit Breaker: Head to your home’s electrical panel. Look for a tripped breaker (usually in the middle position or fully off). Flip it completely off, then back on. If it trips again immediately, you might have a larger electrical issue and should consult an electrician.
- Door Latch Integrity: Ensure the microwave door closes firmly and all latches engage properly. A slightly ajar door or a broken latch can prevent the unit from heating due to safety interlocks.
If these initial checks don't resolve the issue, it’s time to listen and observe more closely.
Safety First: What You Absolutely MUST Know Before Opening It Up
This is the most critical part of troubleshooting your microwave. Microwaves contain high-voltage components that can store a dangerous electrical charge, even when the appliance is unplugged. Attempting internal repairs without understanding these risks can lead to serious injury or worse.
Your safety is paramount.
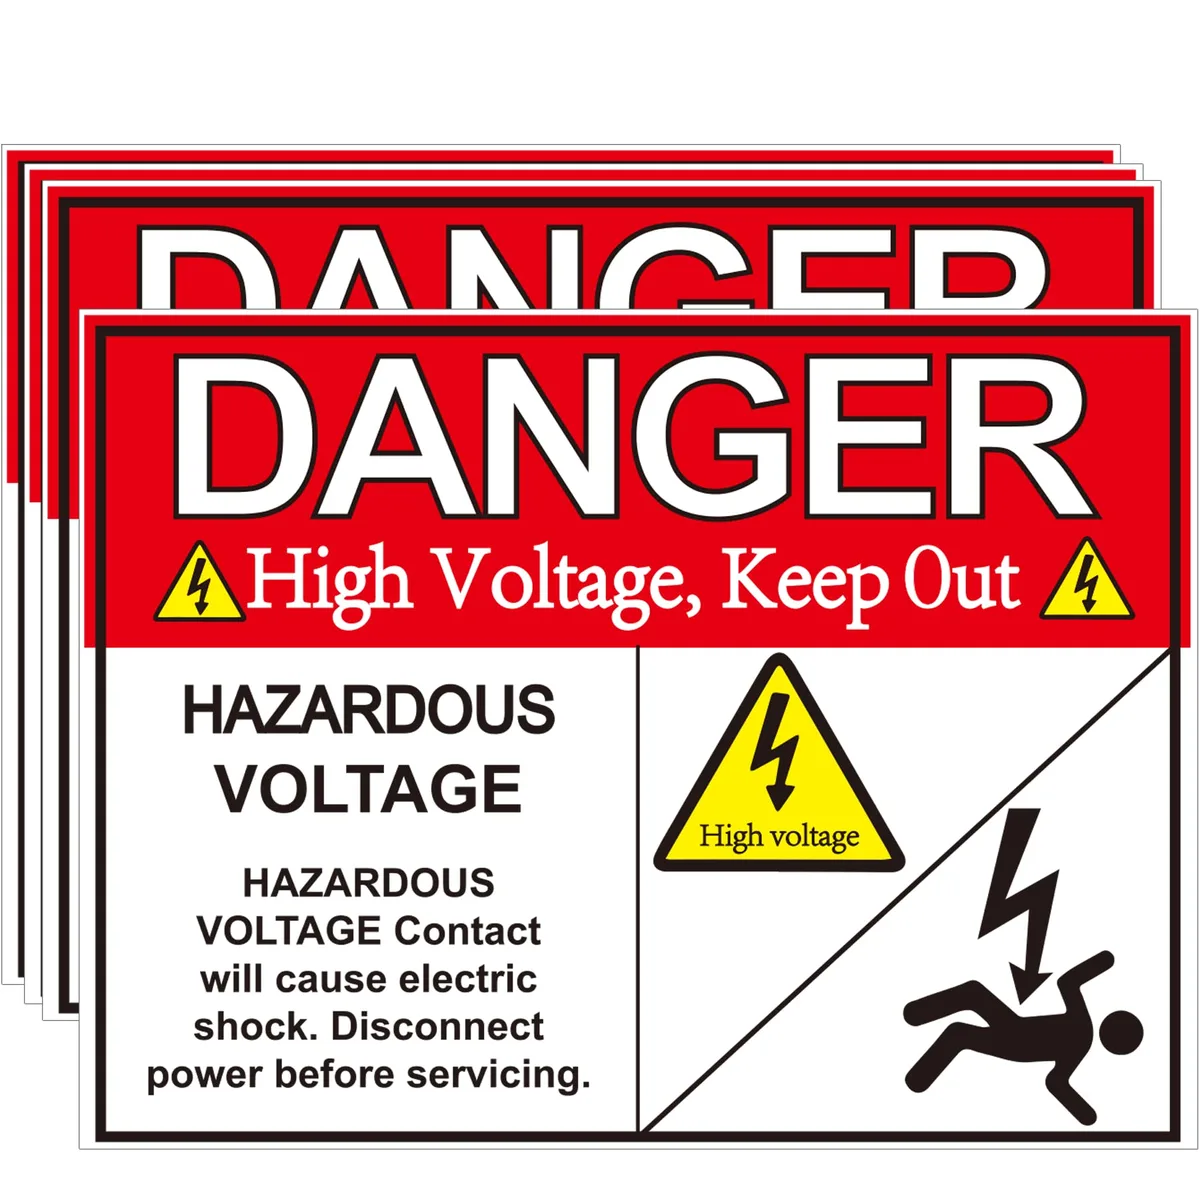
Image source: Bing (Web (fair-use with source credit))
For context, the high-voltage capacitor can retain a charge equivalent to that of a small stun gun. Manufacturer specifications universally emphasize the need for caution. This means that before you even think about unscrewing the casing, you must take specific steps to ensure the appliance is safe to handle.
The Real Danger: High Voltage and Residual Charge
Even after unplugging the microwave, internal capacitors can hold a lethal electrical charge for an extended period. This residual charge is the primary safety concern when working on microwaves. Most appliance repair guides, including those from major manufacturers, will warn that only trained professionals should service these units due to this specific risk.
- Always Unplug: This is non-negotiable. Unplug the microwave from the wall outlet and wait for at least 5-10 minutes before proceeding. This allows some of the charge to dissipate naturally, though it's not a guarantee it's gone.
- Never Touch Internal Components Directly: Avoid touching the high-voltage transformer, capacitor, or magnetron unless you are absolutely certain the unit has been safely discharged by a professional or you have specific knowledge and tools for doing so.
- Professional Help is an Option: If any part of this seems daunting or you’re not comfortable, it’s best to stop here and seek professional help or consider replacing the unit.
Inside Your Microwave: The Key Players in Heating Food
To understand why your microwave might not be heating, it helps to know the main components responsible for generating and directing the microwaves that cook your food. These parts work in a specific sequence to turn electrical energy into the waves that heat your meals.
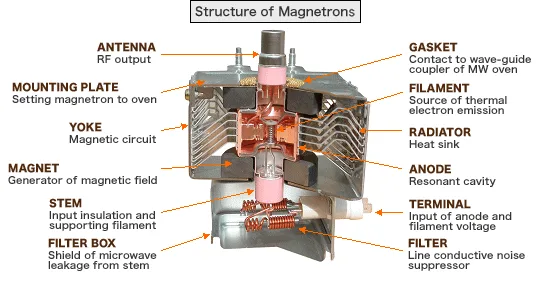
Image source: Bing (Web (fair-use with source credit))
When one of these core components fails, the microwave might still turn on, the lights might illuminate, and the turntable might spin, but it won't produce the necessary heat.
How Microwaves Actually Work (Simplified!)
A microwave oven essentially converts household electrical power into high-frequency radio waves (microwaves). These waves are then directed into the cooking cavity, where they cause water molecules in food to vibrate rapidly. This vibration creates friction, which generates heat and cooks the food from the inside out.
The entire process relies on a precise interplay of several key parts.
The Usual Suspects: Common Parts That Fail
When a microwave stops heating, the problem almost always lies with one of these critical components. Identifying the faulty part is key to determining if a repair is feasible.
- The Fuse: This is a safety device designed to blow and cut power if there’s a significant electrical overload. If the fuse is blown, the microwave won't power on at all, or in some cases, may still light up but not heat.
- Door Interlock Switches: These are safety switches built into the door mechanism. They ensure the microwave won't operate if the door isn't securely closed and latched. If these fail, the microwave might appear to work but won't generate heat.
- The Magnetron: This is the vacuum tube that actually generates the microwaves. It’s the heart of the heating system. If the magnetron fails, you’ll have no heat.
- High-Voltage Transformer, Capacitor, and Diode: These components work together to supply the correct high voltage to the magnetron. A failure in any of these will prevent the magnetron from functioning, resulting in a lack of heat.
Troubleshooting Your Microwave: A Step-by-Step Diagnostic Flow
Now that we’ve covered the basics and the safety concerns, let’s get into the actual troubleshooting process. This is a workflow designed to help you systematically identify the problem. Remember, safety is your top priority throughout these steps.
If at any point you feel uncomfortable, stop and seek professional help.
We're going to start with the simplest checks and move towards the more involved ones. This decision tree approach helps you avoid unnecessary complexity and potential risks.
Step 1: The Easy Stuff – Simple Checks You Can Do Now
Before we even think about opening the microwave, let's re-confirm the very basics. These are the things that are easy to overlook but can save you a lot of effort.
- Secure Power Connection: Double-check that the microwave’s plug is firmly seated in the wall outlet. Sometimes, vibrations can loosen it.
- Outlet Functionality: Confirm the outlet itself is working by plugging in a different, known-working appliance. If that appliance also fails to power up, the issue is with the outlet or the circuit breaker.
- Circuit Breaker Check: Go to your home’s electrical panel and check if the breaker for the microwave circuit has tripped. If it's in the middle or off position, reset it by flipping it completely off, then back on. If it trips again immediately, there's likely a short circuit, and you should call an electrician.
- Door Latch Integrity: Ensure the microwave door closes firmly and all latches engage properly. A slightly ajar door or a broken latch can prevent the unit from heating due to safety interlocks.
If these initial checks don't resolve the issue, it’s time to listen and observe more closely.
Step 2: Listening and Looking – What to Observe
When you attempt to use the microwave, pay close attention to what it does and what sounds it makes. This observation can provide significant clues about the nature of the malfunction.
- Operational Indicators: Does the microwave display light up? Does the turntable spin? Does the fan run when you press start? If it’s completely dead with no lights or sounds, it points towards a primary power issue, possibly a blown fuse or a failed power cord. However, if these functions work but there's no heat, the problem is likely within the heating circuit itself.
- Unusual Sounds: Listen for any odd noises such as humming, buzzing, crackling, or popping sounds when the microwave is supposed to be heating. A persistent humming noise without heating can sometimes indicate a problem with the high-voltage transformer or magnetron. Strange electrical noises often suggest a component is struggling or failing.
Step 3: Getting Inside (Unplugged!) – Checking Components
This is where things get more technical, and safety is paramount. Remember to unplug the microwave and wait at least 5-10 minutes before proceeding. You’ll typically need a screwdriver to remove the screws on the back panel, allowing you to slide off the outer casing.
Inside, you’ll find a network of wires and components.
- The Fuse: Locate the main fuse, often a small glass or ceramic cylinder found near where the power cord enters the unit. Look for a visible break in the wire inside the fuse. If it’s blown, this is a strong indicator of a problem.
- Door Interlock Switches: These are usually located around the door frame mechanism. They are small switches that get activated when the door latches. Visually inspect them for any signs of burning or physical damage. You can test these with a multimeter if you have one, checking for continuity when the switch is pressed.
- High-Voltage Components: The magnetron, high-voltage transformer, capacitor, and diode are clustered together, often near the fan. These are the most critical and dangerous components. Look for any obvious signs of damage like bulging on the capacitor, discolored wiring, or physical damage to the magnetron.
Step 4: Identifying the Culprit – What Do the Symptoms Mean?
As you examine the components, certain findings will point more strongly towards specific issues. This is where the diagnostic logic comes into play, helping you narrow down the possibilities.
- If the Fuse is Blown: A blown fuse usually indicates a short circuit somewhere in the high-voltage system. The most common cause is a failure in the magnetron, capacitor, or diode. If you replace the fuse and it blows again immediately, it confirms another component has failed.
- If Door Switches Seem Off: If the door interlock switches aren't making proper contact or show signs of wear, they can prevent the heating cycle from starting, even if the microwave powers on. These are often replaceable.
- If High-Voltage Components Show Damage: Visible damage to the capacitor (bulging, leaks) or discoloration on the transformer suggests a failure in that part. A failed magnetron is harder to spot visually, but it's a very common cause of no-heat issues.
Step 5: Potential Fixes and Next Steps
Once you’ve identified a likely faulty component, you have a few options. For simpler issues like a blown fuse or a problematic door switch, a DIY repair might be feasible if you have the right parts and a bit of technical know-how. Always ensure you are using exact replacement parts, especially for fuses.
However, if the problem points to the magnetron, high-voltage transformer, capacitor, or diode, the repair becomes significantly more complex and potentially dangerous due to the high voltages involved. Replacing these parts often requires specialized tools and a thorough understanding of appliance electrical systems. For these more advanced issues, seeking professional service is generally recommended.
When to Call a Professional or Buy a New One
After going through the basic checks and perhaps even opening up the microwave to inspect visible components, you'll often reach a point where you have to decide whether to proceed with a repair or to replace the appliance. This decision is rarely straightforward and depends on several factors, including the cost of parts, the complexity of the repair, and the age of the microwave itself.
As of 2026, the average cost of a new mid-range microwave is between $150 and $300, while professional repair costs can vary widely but often range from $75 to $200 for parts and labor, not including the service call fee. For older appliances, spending a significant portion of a new unit’s price on repairing an aging one often doesn't make financial sense.
Weighing Repair vs. Replacement Costs
Deciding whether to repair or replace your microwave involves a financial calculation and a practical assessment of your appliance's lifespan. When the primary heating components like the magnetron or high-voltage transformer fail, the cost of these parts and the labor to install them can quickly approach or exceed the price of a new unit.
- Cost of Parts: A replacement magnetron alone can cost upwards of $50-$100, and this doesn't include the transformer, capacitor, diode, or the service call fee.
- Age of the Microwave: If your microwave is more than 7-10 years old, other components may be nearing the end of their life, making it a less wise investment to repair it.
- Complexity: Repairs involving the high-voltage system require specialized knowledge and tools. If you're not comfortable performing these types of repairs, hiring a professional is the safest bet, but it increases the overall cost.
- Warranty Status: If your microwave is still under warranty, repair is almost always the best option, as it will likely be covered. However, most microwave warranties are for one year, so older units are typically out of warranty.
If the cost of parts and labor for a specific repair seems high relative to the price of a new, comparable model, replacement is often the more practical choice.
Frequently Asked Questions About No-Heat Microwaves
Can I Just Replace the Fuse?
Yes, if you've identified a blown fuse as the problem, you can replace it. However, a blown fuse often indicates a secondary issue, such as a short in another component. If you replace the fuse and it blows again immediately, do not keep trying to replace it; this means another part has failed and needs professional diagnosis or the unit needs replacement.
Always use an exact replacement fuse of the same rating.
What If It Makes a Buzzing Noise?
A buzzing or humming noise when the microwave should be heating, but isn't, often points to a problem with the high-voltage transformer or the magnetron. These components work together to generate the microwaves. If one of them is failing, it might hum or buzz while trying to operate without producing heat.
This type of issue typically requires professional assessment and repair.