How to Troubleshoot a Coffee Maker
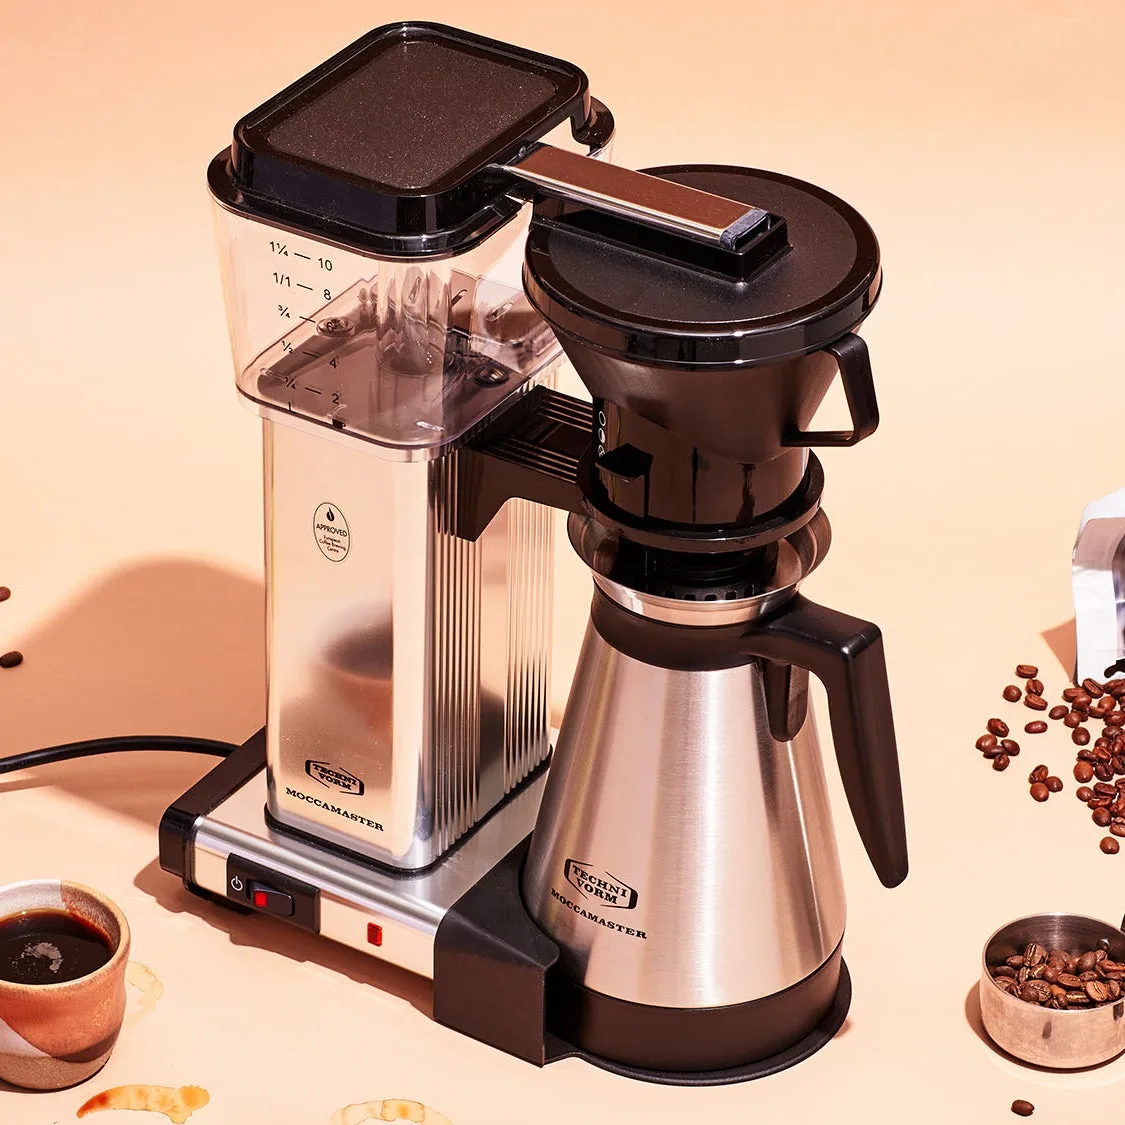
Image source: Bing (Web (fair-use with source credit))
Coffee Maker Troubleshooting: Your Step-by-Step Guide
That first cup of coffee in the morning is practically sacred for many of us, and when your coffee maker decides to take a day off, it throws a real wrench into the works. Figuring out how to troubleshoot a coffee maker doesn't require a professional degree, but it does mean being methodical. We've gathered the most common issues and straightforward solutions to get you back to brewing.
Most coffee makers operate on a simple principle: heat water and pass it through coffee grounds. When something goes wrong, it’s usually a blockage, a power issue, or a component failure. According to manufacturer specifications, a standard drip coffee maker with a 12-cup capacity should brew a full pot in approximately 6 to 10 minutes.
If yours is taking significantly longer or not brewing at all, it's time to start troubleshooting.
Quick Answer
To troubleshoot a coffee maker, check power first. Then, look for water flow obstructions. Clean mineral buildup by descaling.
Ensure all parts are properly seated. Regular cleaning prevents most issues.
When Your Coffee Maker Won't Turn On: First Steps
If your coffee maker is completely unresponsive, no lights, no sounds, nothing, it’s usually a simple power problem. This is the first place to check because it’s the easiest to fix and can save you a lot of unnecessary fuss.
Is the Plug Checked and Outlet Good?
The most basic check is to ensure the power cord is securely plugged into both the coffee maker and the wall outlet. Sometimes, it can feel plugged in but be just loose enough to prevent power flow.
- Check the Connection: Push the plug firmly into the outlet.
- Test the Outlet: Plug a different small appliance (like a lamp or phone charger) into the same outlet to confirm it’s working. If the other appliance also doesn't work, the outlet itself might be the issue.
Circuit Breaker Check
If multiple appliances in your kitchen are suddenly out, you might have tripped a circuit breaker. This is a safety mechanism in your home’s electrical system designed to cut power if there’s too much demand or a fault.
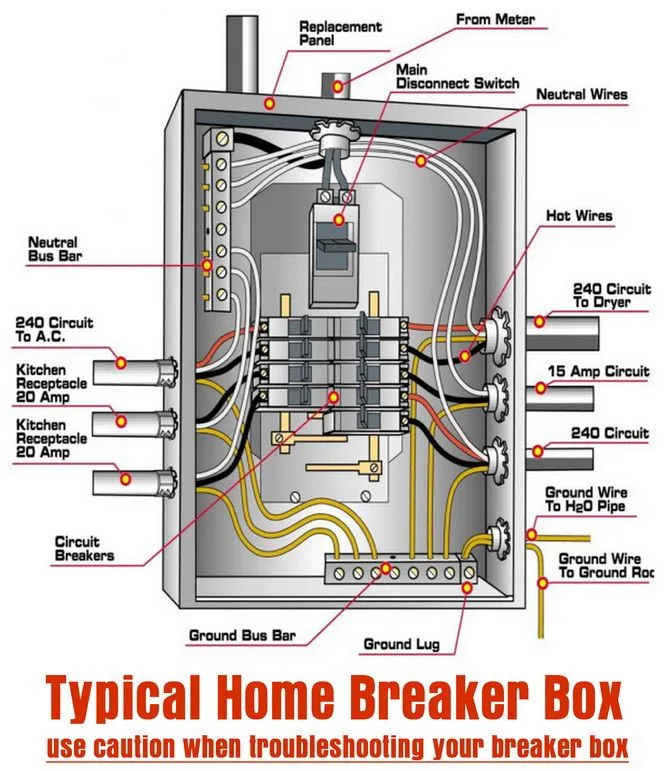
Image source: Bing (Web (fair-use with source credit))
- Locate Your Panel: Find your home's main electrical panel, usually in a basement, garage, or utility closet.
- Identify Tripped Breakers: Look for switches that are in the "off" position or halfway between "on" and "off."
- Reset the Breaker: Firmly push the affected breaker to the "off" position, then back to the "on" position. If it trips again immediately, there might be a more serious electrical issue in your home, and you should consult a qualified electrician. If it stays on, try plugging your coffee maker back in.
If none of these power checks get your machine to respond, it suggests an internal electrical fault within the coffee maker itself. For many standard models, especially those in the mid-range price point (typically under $100 as of 2026), the cost of professional repair often outweighs purchasing a new unit.
Coffee Maker Not Brewing? Let's Get That Coffee Flowing
You turn on the coffee maker, you might hear a hum or a click, but no liquid emerges into the carafe. This is a common frustration that usually stems from an obstruction or a misaligned component.
Water Level and Lid Position Checks
Sometimes, the simplest things are overlooked.
- Sufficient Water: Ensure you’ve added enough water to the reservoir. Most coffee makers have a minimum water line, and many will not initiate the brewing cycle if this level isn't met to prevent dry heating.
- Lid and Basket Seating: Make sure the coffee maker lid is fully closed and latched if it has one. Similarly, the brew basket must be properly seated in its designated holder. A slightly ajar lid or a crooked basket can prevent the water from being released or flowing correctly into the grounds.
Brew Basket and Filter Obstructions
The path from the water reservoir to the carafe is through the brew basket, and this is a frequent choke point.
- Filter Placement: If you use paper filters, check that one is correctly inserted without any folds or overlaps that could block the flow of water. Ensure no stray grounds are preventing the basket from sitting flush.
- Reusable Filters: For reusable mesh or permanent filters, make sure they are clean. Old coffee grounds or oils can create a sludge that impedes water passage.
If these checks don't resolve the issue, the problem might be with the internal tubing or the pump mechanism, which can become clogged with mineral deposits over time.
Slow Brewing or Cold Coffee? It's Probably Scale
Over time, minerals naturally present in tap water can accumulate inside your coffee maker's heating element and internal tubing. This buildup, known as scale, is a leading cause of decreased performance and can even affect the taste of your coffee.
Understanding Mineral Buildup (Scale)
Hard water, characterized by a high mineral content, is the primary culprit. As water is heated and passed through the machine, these minerals are left behind, clinging to surfaces and creating a stubborn layer of residue. This scale acts as an insulator, slowing down the heating process and restricting water flow.
How to Descale Your Coffee Maker
Descaling is the process of removing this mineral buildup. You can use commercial descaling solutions specifically made for coffee makers, or a common household alternative.
- Vinegar Solution: A mixture of equal parts white vinegar and water is often effective. Fill the water reservoir with this solution.
- Brew Cycle Interruption: Start a brew cycle, but stop it about halfway through. Allow the vinegar/water solution to sit in the machine for at least 30 to 60 minutes. This soaking time lets the acidity break down the mineral deposits.
- Complete the Cycle: Finish the brew cycle to flush out the loosened scale.
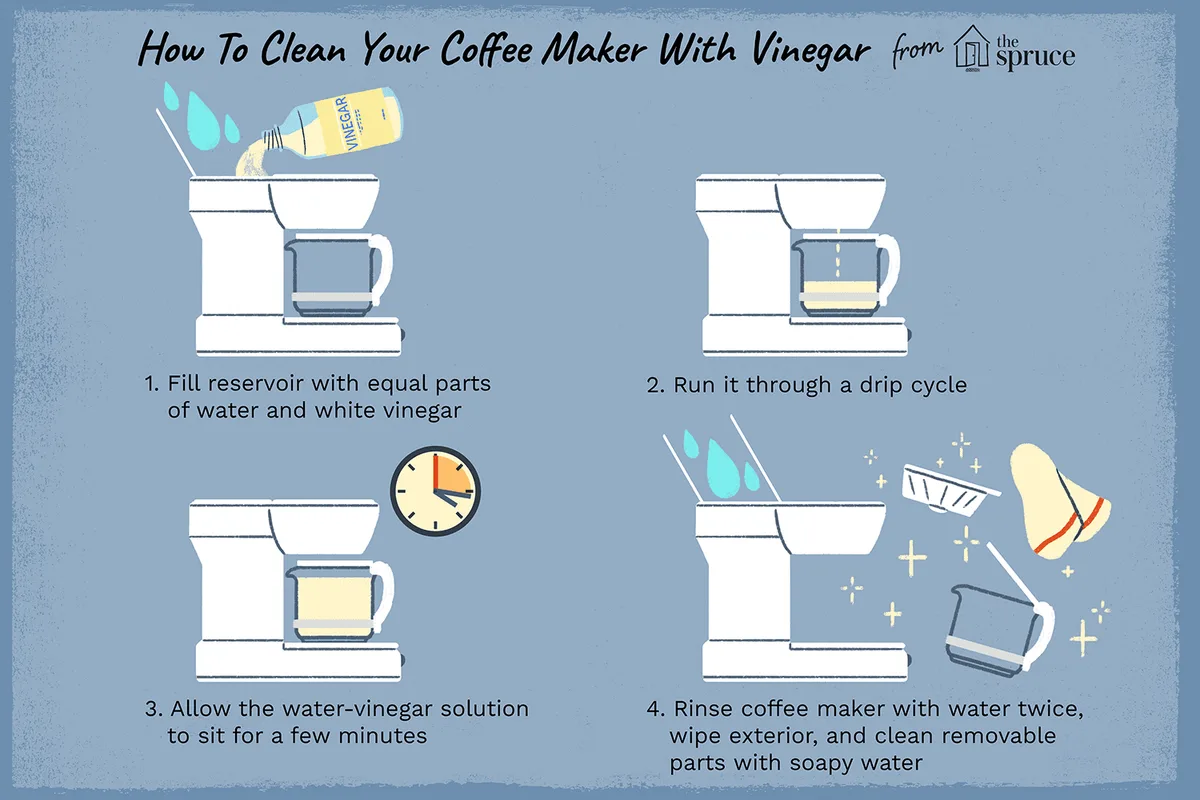
Image source: Bing (Web (fair-use with source credit))
Rinsing for Fresh Taste
After descaling, it's crucial to rinse the machine thoroughly to remove any lingering vinegar taste or smell.
- Plain Water Cycles: Run at least two to three full brew cycles using only fresh, clean water. Discard the water after each cycle. This ensures no residual descaling agent remains to affect the flavor of your next pot.
Coffee Leaking? Pinpointing the Source
Discovering a puddle under your coffee maker is never fun, and leaks can range from minor drips to significant spills. Identifying the exact point of origin is key to fixing the problem.
Checking the Water Reservoir and Carafe
The most common leak points are often the simplest to address.
- Reservoir Seal: Ensure the water reservoir is properly seated in its base and that there are no cracks or damage to the plastic. If the reservoir has a valve or seal at its base, check that it’s clean and functioning correctly. A loose or damaged seal will cause water to escape when the reservoir is filled.
- Carafe Placement: Make sure the carafe is pushed fully into place under the brew basket. Many coffee makers have a drip-stop mechanism that relies on the carafe's presence to allow coffee to flow; if the carafe is not correctly positioned, coffee might back up and overflow the basket.
Brew Basket and Base Leaks
If the leaks aren't from the reservoir or carafe area, you'll need to look elsewhere.
- Brew Basket Overflow: Overfilling the brew basket with too much coffee grounds can cause water to bypass the filter and spill over the sides. Ensure you’re using the correct amount of grounds for the water volume.
- Internal Leaks: Leaks originating from the base of the machine often indicate a problem with internal tubing or the heating element's connections. While descaling can sometimes dislodge debris causing minor leaks, persistent leaks from the base might point to a more significant internal issue that could require disassembly to diagnose and repair.
Why Does My Coffee Taste Off?
Even if your coffee maker is brewing and dispensing liquid, a stale or unpleasant taste can ruin your morning. This often comes down to cleanliness and the quality of your ingredients.
Regular Cleaning Habits
Coffee oils are aromatic but can turn rancid over time, leaving a bitter or chemical taste in your coffee.
- Daily Rinse: Rinse the brew basket and carafe with warm, soapy water after each use.
- Weekly Scrub: For a more thorough clean, use a soft brush or sponge to scrub the removable parts. Don't forget to wipe down the exterior and warming plate.
- Deep Clean: Beyond regular cleaning, performing a descaling process every 1-3 months, depending on your water hardness, is vital for maintaining taste and machine performance. This removes internal buildup that can affect flavor. Properly maintaining your wooden cutting board can also prevent flavor transfer if you're using it to prep other items. how to maintain a wooden cutting board
Water Quality and Coffee Freshness
The ingredients you use play a massive role in the final taste.
- Water Source: If your tap water has a strong taste or odor, it will carry over into your coffee. Using filtered water can make a significant difference. Many users find that switching to filtered water also helps reduce the frequency of descaling needed.
- Coffee Bean Freshness: Coffee grounds lose their volatile aromas and flavors quickly after grinding. Always store coffee beans in an airtight container away from light and heat. For the best results, grind your beans just before brewing. If your beans are old, they might taste stale regardless of how well your machine is functioning.
When to Consider a New Coffee Maker
Sometimes, despite your best troubleshooting efforts, a coffee maker is simply beyond saving. This can be a tough realization, especially if you’ve had a trusty machine for a while. However, knowing when to replace it can save you time and continued frustration.
- Persistent Internal Leaks: If you’ve tried descaling and checked all the external connections but still have leaks from the base of the machine, it might indicate a compromised internal seal or cracked tubing. Repairing these can be complex and costly, often exceeding the price of a new unit.
- Complete Electrical Failure: If your machine shows no signs of life after confirming power to the outlet and checking the breaker, the internal wiring or heating element might have failed. Many manufacturers design coffee makers with integrated components, making individual part replacement difficult or impossible for the average user.
- Age and Deterioration: Coffee makers, especially lower-cost models, have a lifespan. If your machine is several years old, parts may have degraded, leading to a cascade of minor issues. As of 2026, the average lifespan for a standard drip coffee maker is often cited as 3-5 years with regular use.
If your machine falls into one of these categories, investing in a new coffee maker might be the most practical and cost-effective solution.
Coffee Maker Troubleshooting FAQs
Why is my coffee maker making a strange noise?
Strange noises often indicate a blockage. If you hear grinding, gurgling, or popping, it's usually caused by mineral buildup (scale) restricting water flow, or sometimes an issue with the pump mechanism. Running a descaling cycle can often resolve these sounds.
How often should I descale my coffee maker?
You should descale your coffee maker every 1 to 3 months. If you have hard water, you might need to descale as often as monthly. Signs like slower brewing or decreased coffee temperature indicate it's time.
Can I use something other than vinegar to descale?
Yes, you can use commercial descaling solutions specifically formulated for coffee makers. These are often readily available and can be very effective. Avoid using harsh chemicals like bleach, as they can damage the machine and leave harmful residues.
My coffee tastes burnt, what's wrong?
A burnt taste can stem from several issues. If you’ve been using the machine for a long time without proper cleaning, burnt coffee oils might have accumulated. Overheating due to a malfunctioning thermostat or heating element is another possibility.
Ensure your brew basket and carafe are clean and that you aren't over-extracting by using too fine a coffee grind.
Is it safe to use a coffee maker that leaks?
It’s generally not advisable to use a coffee maker that leaks, especially if the leak is significant or coming from the base where electrical components are located. Water and electricity are a dangerous combination, and a leak could pose a safety hazard. It's best to unplug the machine and address the leak before attempting to use it again.




4 Comments