How to Clean a Toaster
Is your toaster launching smoke signals every morning, or just not quite browning your bread like it used to? Knowing how to clean a toaster is key to keeping it working well and your kitchen safe. You'd be surprised how much burnt-on gunk can build up inside these everyday appliances.
Regular cleaning not only prevents those unpleasant smells and smoke but also extends the life of your toaster. Manufacturer specifications for many standard electric toasters, like those adhering to UL 499 standards for heating appliances, recommend periodic cleaning to maintain optimal performance and safety. Let's dive into how you can get your toaster sparkling clean.
Quick Answer
To clean a toaster, unplug it and let it cool completely. Empty the crumb tray and brush out loose debris from the interior. For stuck-on bits, use a soft brush and avoid liquids inside the heating elements.
Wipe down the exterior with a damp cloth.
Seeing the Dirt: Why Visuals Matter for Toaster Cleaning
When you're trying to figure out how to clean a toaster, sometimes words just don't cut it. You might be thinking, "Okay, I need to clean it," but where do you actually look? What does "clean" even mean for a toaster's insides?
That's where seeing is believing. Visual cues are super helpful for understanding where those stubborn burnt crumbs hide and how much has accumulated. It’s about spotting the areas that need attention before they become a bigger problem.
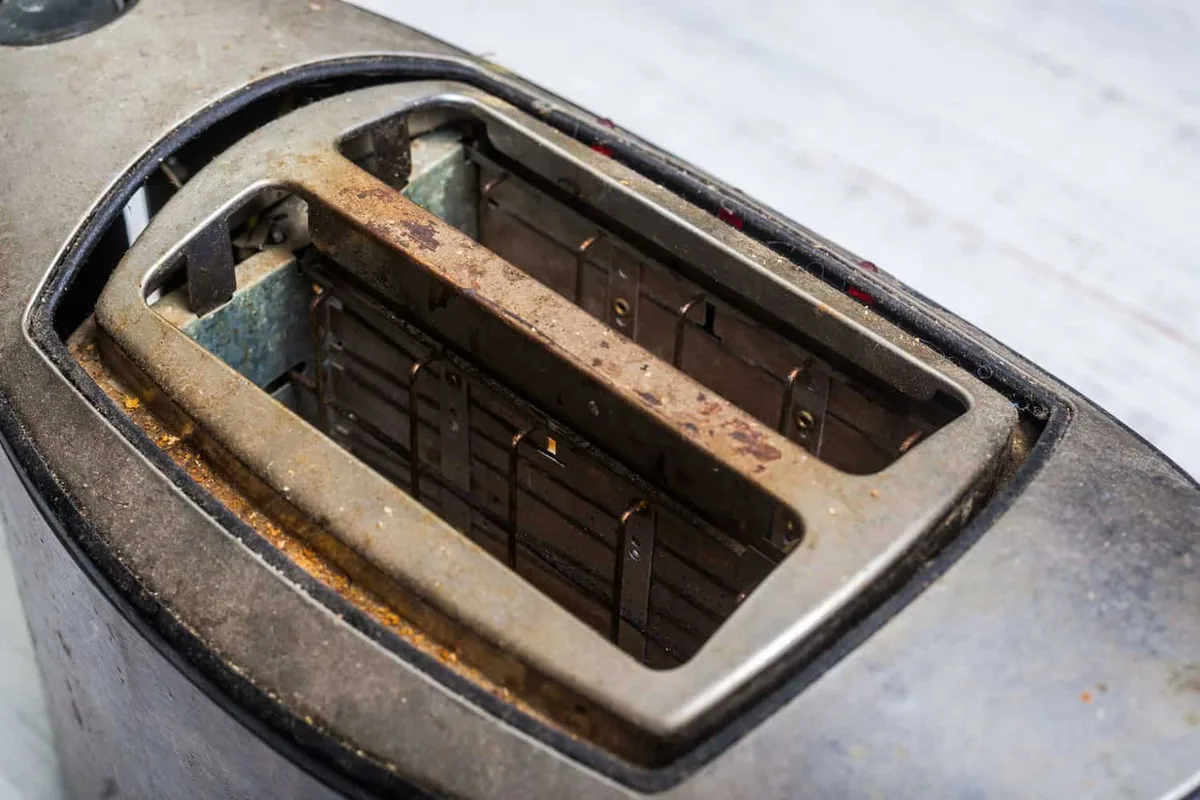
Common Crumbs & Grime: What to Look For
Think about what goes into a toaster: bread, bagels, English muffins, maybe even a croissant. All of these can leave behind bits, especially if a piece burns. These tiny remnants, often charred and stuck to the heating elements, are the main culprits behind smoke and bad smells.
You'll want to look for:
- Visible crumb accumulation, especially at the bottom of the toaster slots and on the crumb tray.
- Blackened residue, indicating burnt food stuck to the heating elements.
- Greasy spots, if you've toasted buttery pastries.
- Dust and debris settling inside when the toaster isn't in use.
Spotting these isn't just about tidiness; it's about proactively addressing potential fire hazards and ensuring your toast tastes like toast, not burnt despair.
Your Step-by-Step Toaster Cleaning Visual Guide
Getting your toaster clean involves a few straightforward steps. We'll walk through them, focusing on what you'd see at each stage to make sure you're doing it right. Proper cleaning ensures your appliance runs safely and efficiently.
Step 1: Unplug and Cool Down
This is the absolute first and most critical step for safety. You don't want any electrical accidents while you're cleaning. Once you've unplugged the toaster from the wall outlet, give it about 15, 20 minutes to cool down completely.
Hot internal components can cause burns if touched. They can also be more difficult to clean effectively.
Step 2: Tackle the Crumb Tray
Most toasters have a removable crumb tray located at the bottom. This is where all the fallen crumbs gather. Carefully slide out the tray.
If it's very full, do this over a trash can or sink to avoid making a mess. Empty the tray completely. Then, use a damp cloth or paper towel to wipe away any stuck-on crumbs or grease.
Some trays are dishwasher safe, but always check your toaster's manual first.
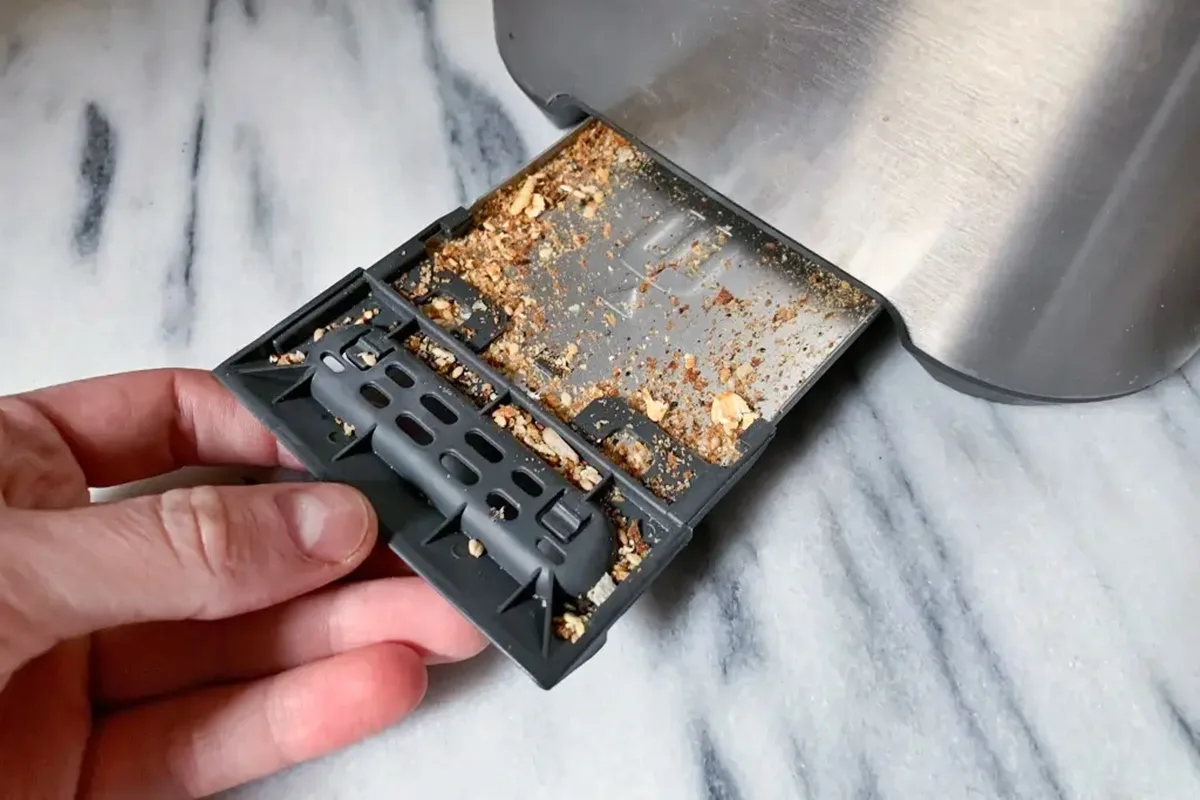
Step 3: Reach the Nooks and Crannies
This is where you'll address the interior. After emptying the crumb tray, turn the toaster upside down over a sink or trash can. Gently shake it to dislodge any loose crumbs still inside the slots.
For more stubborn bits clinging to the sides or heating elements, a soft-bristled brush or a clean, dry paintbrush works wonders. Be gentle around the heating elements; you don't want to damage them.
Step 4: Wipe Down the Exterior
Now, focus on the outside of your toaster. Use a soft, damp (not soaking wet) cloth to wipe down the housing. For stubborn spots or smudges on stainless steel models, a little mild dish soap on the cloth can help.
Always wipe in the direction of the metal grain if you have a stainless steel finish. Ensure the cloth is only damp; never allow water to drip into the toaster’s vents or slots.
Step 5: Reassemble and Test
Once all parts are clean and completely dry, reinsert the crumb tray. Plug the toaster back in. You can do a quick test by toasting a slice of bread on a low setting.
This helps ensure everything is working correctly and clears out any lingering dust you might have missed. Do this in a well-ventilated area just in case.
Mistakes That Make Cleaning Worse
Even with the best intentions, it's easy to make mistakes when cleaning your toaster. These missteps can make the job harder. They can also damage the appliance or create a safety risk.
Being aware of these common pitfalls can save you a lot of trouble.
Forgetting to Unplug
This is the most dangerous mistake. Cleaning any electrical appliance while it's plugged in is a recipe for disaster. You risk electric shock, which can cause serious injury or worse.
Always double-check that the cord is out of the wall socket before you start cleaning. Waiting for the toaster to cool down is also part of this crucial safety protocol.
Using the Wrong Tools
Some people might be tempted to use harsh cleaners, abrasive pads, or even strong vacuum attachments. This can scratch the exterior finish or, more importantly, damage the delicate heating elements inside. Trying to scrub the heating elements with a metal brush would likely cause irreparable harm.
Stick to soft brushes, damp cloths, and mild soap when necessary.
Neglecting Regular Cleaning
Think of your toaster like any other kitchen tool. If you don't clean your wooden cutting board regularly, it can harbor bacteria and become warped. Similarly, letting crumbs build up in your toaster over weeks or months turns a simple cleaning task into a much tougher job.
It also significantly increases the risk of smoke and fire. A quick crumb tray empty after each use and a brush-out weekly can prevent major issues.
Keeping It Fresh: Toaster Maintenance Habits
Beyond the occasional deep clean, adopting simple maintenance habits can keep your toaster in top shape year-round. These aren't complicated tasks; they just require a little mindfulness. Good upkeep means your toaster will last longer and perform better, delivering perfect toast every time.
- Empty the crumb tray regularly: Aim to do this after every few uses, or at least weekly. A full crumb tray is a fire hazard.
- Wipe down the exterior frequently: A quick wipe with a damp cloth after breakfast can prevent build-up of grease and splatters. This is similar to how you’d maintain a wooden cutting board to keep it looking good and preventing damage.
- Be mindful of what you toast: Very greasy or sticky items can create more mess. If you're toasting something that might drip, consider using toaster bags or placing foil underneath (but never inside the heating element area).
- Listen for unusual sounds: If your toaster starts making strange grinding or buzzing noises, it might be time for a more thorough inspection, or it could be a sign of internal damage.
These small actions contribute to a longer lifespan and better performance for your appliance. Proper care extends to all kitchen gadgets, much like learning how to clean blender blades ensures your blender works efficiently.
Frequently Asked Questions About Toaster Cleaning
How often should I clean my toaster?
For most households, emptying the crumb tray weekly and giving the interior a quick brush-out monthly is sufficient. If you use your toaster daily, especially for items that tend to burn or leave residue, you might need to clean it more frequently, perhaps even bi-weekly for the interior. A deep clean, where you meticulously wipe down all accessible parts, should happen every 3, 6 months depending on usage.
Can I use water inside my toaster?
No, you should never pour water or cleaning liquids directly inside the toaster slots or onto the heating elements. Water and electricity are a dangerous combination. Moisture inside the toaster can lead to electrical shorts, damage internal components, and create a severe shock hazard.
Always ensure the appliance is unplugged and dry before cleaning.
What if my toaster still smells after cleaning?
If a burnt smell or odor persists after a thorough cleaning, it might be due to deeply ingrained residue on the heating elements that a simple brushing couldn't dislodge. It could also indicate a component is failing. Try toasting a slice of bread on a low setting in a well-ventilated area, which can sometimes help burn off residual bits.
If the smell remains strong or is accompanied by smoke, it's best to consult your toaster's manual or consider replacing the appliance, as it could pose a fire risk.