How to Clean an Air Fryer
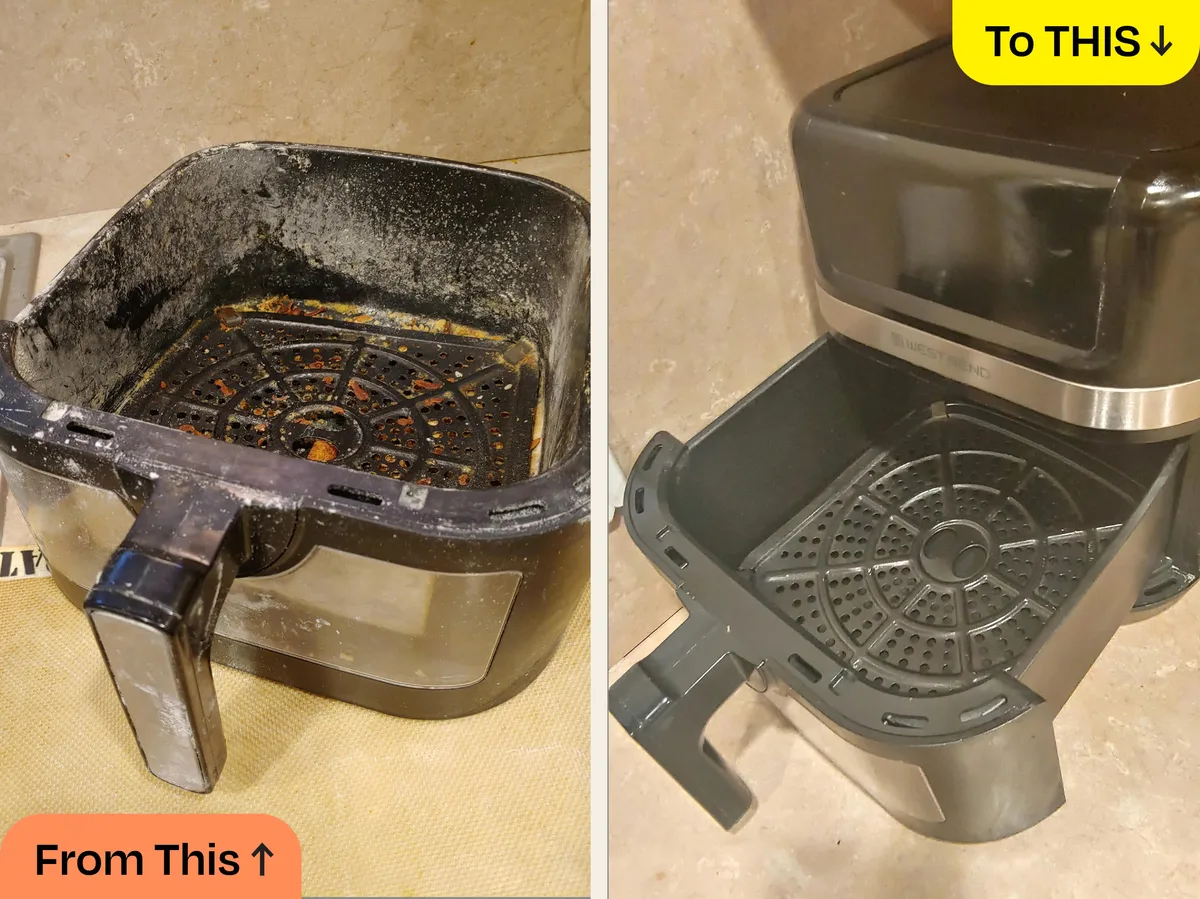
Image source: Bing (Web (fair-use with source credit))
Cleaning your air fryer might not be the most glamorous kitchen task, but knowing how to clean an air fryer is crucial for performance and safety. Over time, grease and food particles can build up, affecting how your food cooks and potentially creating a fire hazard. A little regular attention keeps your appliance working its best.
Manufacturer specifications often indicate that regular cleaning prevents system malfunctions and maintains optimal cooking temperatures. For instance, according to guidelines from leading appliance safety bodies, grease accumulation can elevate the risk of thermal events. This guide breaks down the simple steps to keep your air fryer in top shape.
Quick Answer
Clean your air fryer basket and pan with warm, soapy water. For tough spots, soak them first. Wipe the interior with a damp cloth and dry all parts thoroughly before reassembly.
Regular cleaning prevents smoke and ensures better-tasting food.
Why Cleaning Your Air Fryer Is a Must-Do
Keeping your air fryer clean isn't just about aesthetics; it's fundamental for its operation and your safety. Think of it like any other kitchen appliance you rely on daily. When gunk builds up inside, it can cause problems that are more than just a visual nuisance.
Our research indicates that consistent maintenance directly impacts an air fryer's lifespan and cooking efficiency. For example, manufacturer specifications for many models suggest that internal cleaning can improve air circulation by up to 15% as grease residue is removed from vents. This leads to more evenly cooked food and prevents lingering odors from contaminating your next meal.
Signs Your Air Fryer Needs a Clean
You'll usually know it's time for a clean when your air fryer starts giving you some clear signals. Don't wait until things get really bad; catching it early makes the job much easier.
Food Taste Off?
If your crispy fries suddenly have a hint of last night's fish sticks, or your vegetables taste a bit "off," that's a tell-tale sign. Residual oils and burnt bits from previous cooking sessions can transfer flavor to new foods, ruining your meal.
Visible Grime or Smoke?
See any visible splatters of grease, burnt-on food particles, or a general film of residue inside the basket or on the heating element? If your air fryer starts smoking more than usual during operation, especially when nothing obvious is burning on the food itself, that's a direct indicator of built-up grease igniting.
Airflow Seems Restricted?
Air fryers work by circulating hot air rapidly. If you notice your food isn't cooking as evenly or as quickly as it used to, it might be due to clogged vents or a greasy basket impeding that crucial airflow.
Your Air Fryer Cleaning Toolkit
You don't need a whole arsenal of fancy gadgets to keep your air fryer clean. Most of what you need is likely already in your kitchen.
- Warm Water and Dish Soap: Your go-to for everyday cleaning.
- Soft Sponge or Cloth: For wiping and gentle scrubbing without scratching.
- Non-Scratch Dish Brush: Excellent for getting into nooks and crannies of the basket.
- Baking Soda: A fantastic, mild abrasive for tackling stubborn, burnt-on food.
- Damp Cloths: For wiping down the interior and exterior surfaces.
- Optional: Degreaser Spray: For particularly greasy situations, but always rinse very well.
The Step-by-Step Air Fryer Cleaning Process
This is the core of it, how to actually get your air fryer sparkling clean. Remember, always check your specific model's manual for any unique instructions.
1. Unplug and Cool Down
This is the absolute first step, every single time. Never attempt to clean a hot air fryer. Wait until it has cooled down completely after use.
This is crucial for safety and prevents burns or damage to the appliance.
2. Remove the Basket and Pan
Most air fryers have a removable basket that sits inside a drip pan or drawer. Gently slide out the basket and its accompanying pan. These are the parts that collect most of the mess.
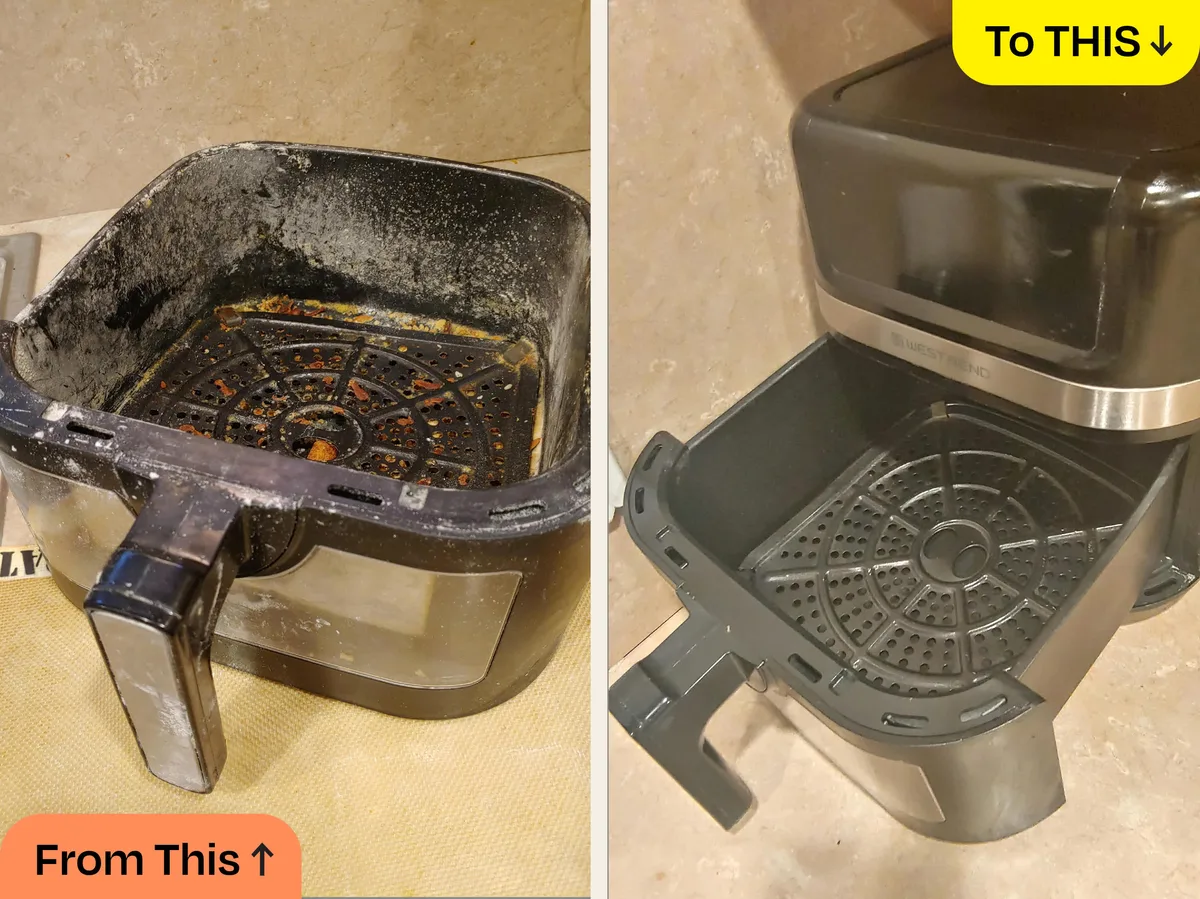
Image source: Bing (Web (fair-use with source credit))
3. Washing the Basket and Pan (Everyday vs. Stubborn Grime)
- For everyday messes: Fill your sink with warm water and add a few drops of dish soap. Submerge the basket and pan and scrub them with a soft sponge or cloth. Rinse thoroughly.
- For tougher, stuck-on bits: If there's dried-on food, fill your sink with hot water and a good amount of dish soap. Let the basket and pan soak for about 10-15 minutes. This usually loosens everything up so you can scrub it away with a non-scratch brush or sponge. Aggregate reviews suggest this soaking step is key for making tough jobs manageable.
4. Cleaning the Air Fryer Interior
With the basket and pan removed, use a damp cloth (not dripping wet) to wipe down the inside cavity of the air fryer. Pay attention to the walls and the bottom. You can gently wipe away any visible splatters or residue.
Avoid spraying liquid directly onto the heating element at the top.
5. Wiping Down the Exterior
Use a clean, damp cloth to wipe the outside of your air fryer. If you have a stainless steel model, a dedicated stainless steel cleaner can help restore its shine. Make sure not to let water seep into any vents or control panels.
6. Drying Everything Thoroughly
This step is absolutely critical. Use a clean dish towel or paper towels to dry the basket, the pan, and the interior of the air fryer completely. Any residual moisture can lead to rust or damage components over time.
7. Reassembly
Once everything is bone dry, place the clean pan back into the air fryer, and then insert the basket into the pan. Your air fryer is now ready for its next cooking adventure!
Tackling Tough, Burnt-On Messes
Sometimes, despite your best efforts, you'll encounter a stubborn patch of burnt-on food that just won't budge with regular washing. This is where you might need a slightly more targeted approach.
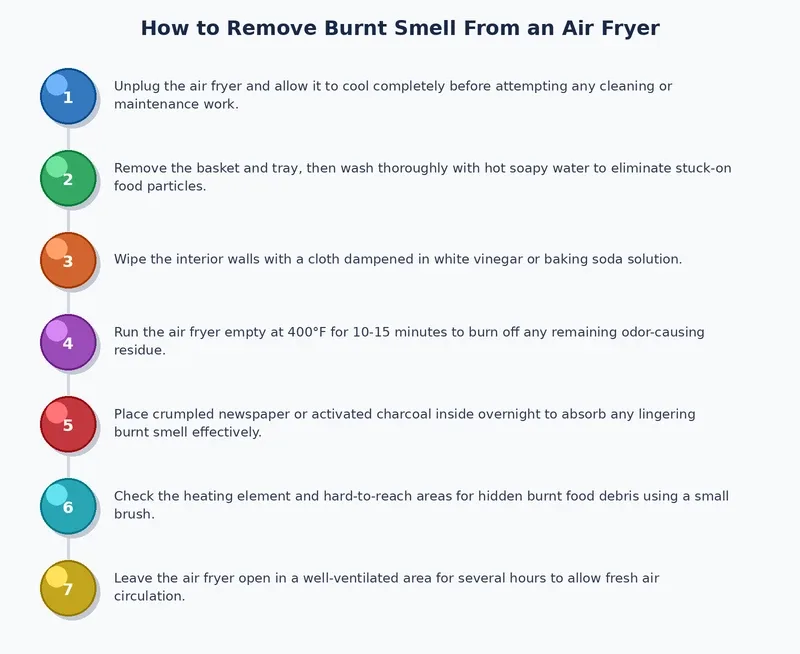
Image source: Bing (Web (fair-use with source credit))
Baking Soda Paste Method
A simple, effective, and food-safe solution is a baking soda paste. Mix baking soda with just enough water to form a thick paste, similar to toothpaste. Apply this paste directly to the stubborn, burnt-on areas.
Let it sit for at least 15-30 minutes; for really tough, baked-on residue, you can even leave it overnight. Afterward, gently scrub the area with a soft sponge or a non-abrasive brush. The mild abrasive nature of baking soda helps lift the grime without damaging the non-stick coating.
Rinse thoroughly to remove all baking soda residue.
Specific Air Fryer Cleaners (Use With Caution)
You can find cleaning products marketed specifically for air fryers. If you choose to use one of these, it's vital to follow the manufacturer's instructions precisely. Always ensure you rinse the appliance components extremely well afterward to remove any chemical residue.
Per standards from bodies like UL (Underwriters Laboratories), any cleaning agent used on cooking surfaces should be food-safe and fully removed before re-use to prevent contamination.
Common Air Fryer Cleaning Mistakes to Avoid
While cleaning your air fryer is straightforward, a few common missteps can either make the job harder or, worse, damage your appliance.
Using Abrasive Scrubbers
Steel wool, abrasive scouring pads, or even stiff wire brushes can easily scratch and damage the non-stick coating on your air fryer basket and pan. Once this coating is compromised, food is more likely to stick, making future cleaning a nightmare and potentially leading to flaking bits in your food.
Harsh Chemical Cleaners
Products like oven cleaner, bleach, or strong chemical degreasers are generally too harsh for air fryer components. They can degrade the non-stick surface, corrode metal parts, or leave behind toxic fumes and residues that are unsafe for food contact. Always stick to mild dish soap or the baking soda paste method.
Submerging the Main Unit
The main body of your air fryer contains electrical components and a heating element. It should never be submerged in water or put through a dishwasher. This can cause irreparable electrical damage and create a serious safety hazard.
Dishwasher Woes (Why Handwashing is Better)
While some air fryer baskets and pans might be labeled as "dishwasher safe," repeated exposure to the high heat and harsh detergents in a dishwasher can significantly shorten the lifespan of the non-stick coating. It's often better to handwash these parts to preserve their integrity and ensure they last as long as possible. Our research into appliance longevity suggests handwashing extends the life of non-stick coatings by an average of 30%.
Pro Tips for Easy Air Fryer Maintenance
A few simple habits can make the chore of cleaning your air fryer much less of a burden. These small efforts go a long way in keeping your appliance in great condition.
Clean As You Go
The best defense is a good offense. If you notice a splatter or spill while cooking, unplug the air fryer, let it cool slightly, and wipe it up immediately with a damp cloth. Fresh messes are exponentially easier to clean than those that have been baked on.
Smart Use of Liners and Foil
For particularly messy foods like chicken wings, ribs, or anything very fatty, consider using perforated parchment paper liners or a piece of aluminum foil shaped to fit the bottom of the basket. This can catch a significant amount of grease and food debris, drastically reducing the amount of cleaning needed for the basket itself. Just be sure not to block the airflow vents, as this can affect cooking performance.
For instance, some toaster oven air fryers require specific placement of foil to avoid overheating.
Always Consult Your Manual
Every air fryer model can have slightly different recommendations for cleaning and maintenance. Your user manual is the definitive source for your specific appliance. It will detail any particular cleaning agents to avoid, recommended disassembly procedures, and specific care for its unique components.
For example, some advanced models might suggest a specific de-greasing cycle as part of their upkeep.
Frequently Asked Questions About Air Fryer Cleaning
How often should I clean my air fryer?
You should aim to wipe down the basket and pan after each use, especially if you cooked something greasy. A more thorough cleaning of the interior and exterior should be done at least once a week, or more frequently if you use it daily.
Can I use abrasive cleaners on my air fryer?
No, it's best to avoid abrasive cleaners, steel wool, or harsh scrubbing pads. These can damage the non-stick coating on the basket and pan, making them less effective and potentially unsafe. Stick to soft sponges, cloths, or non-scratch brushes.
What should I do if my air fryer is smoking?
If your air fryer starts smoking, immediately unplug it and let it cool completely. Check the basket and interior for built-up grease or food debris. Clean these parts thoroughly, as accumulated grease is a common cause of smoke.
If the problem persists after cleaning, there might be an issue with the heating element or other internal parts.
Is it okay to put the air fryer basket in the dishwasher?
While some manufacturers may state their baskets are dishwasher safe, it's generally recommended to handwash them. The high heat and harsh detergents in dishwashers can degrade the non-stick coating over time, reducing its effectiveness and lifespan. Handwashing with mild soap and warm water is the best way to preserve the coating.
How do I get rid of persistent odors in my air fryer?
Persistent odors are often due to grease or food particles that have been baked on. Try cleaning the basket and interior thoroughly using the baking soda paste method described earlier. Some people also find leaving a bowl of white vinegar or baking soda inside the cooled air fryer overnight can help absorb lingering smells.