How to Fix a Toaster That Won’t Stay Down
Is your toaster's lever refusing to stay down, leaving you with untoasted bread and a morning made more complicated? You're not alone; this is a super common hiccup that can happen to almost any toaster. Knowing how to fix a toaster that won't stay down can save you time and the hassle of hunting for a new appliance when a simple tweak is all that's needed.
We'll guide you through the most likely causes and their straightforward solutions. Most toasters operate on a basic mechanical latch system. As of 2026, the fundamental design hasn't changed drastically, meaning these fixes are broadly applicable.
Quick Answer: How to Fix a Toaster That Won't Stay Down
The lever won't stay down because a latch mechanism isn't engaging. First, unplug the toaster. Check for jammed crumbs around the lever and inside the slots.
Gently wiggle the lever and carriage. If debris is the issue, shake it out vigorously. If the problem persists, internal issues may require professional assessment or replacement.
Safety First: Unplugging and Cooling Down
Before you even think about touching your toaster to diagnose the problem, the absolute first step is to ensure it's safe to handle. This means two things: unplugging it from the wall socket and making sure it's completely cool. Electrical appliances, even when not actively heating, can retain a charge or pose a shock risk if internal components are faulty.
- Unplug the cord. Make sure it's pulled completely out of the wall outlet.
- Allow sufficient cooling time. Depending on recent use, this could range from 15 minutes to an hour. A toaster that's just finished a cycle can be very hot internally.
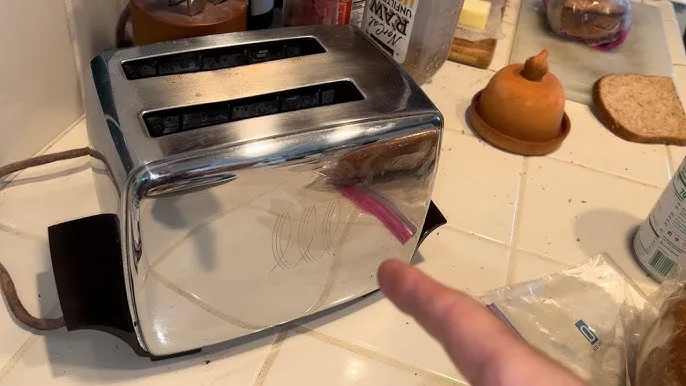
Image source: Bing (Web (fair-use with source credit))
Only when both these conditions are met should you proceed with any inspection or troubleshooting. This basic safety measure prevents accidental shocks and potential damage to the appliance.
Troubleshooting Steps: Finding the Culprit
When your toaster lever doesn't click into place, it’s usually due to a few common mechanical issues. We can usually pinpoint the problem by looking at the lever itself and the internal workings.
Is the Lever Mechanism Just Sticking?
Sometimes, the simplest explanation is the right one. The lever you push down to start toasting is connected to an internal latch. If this lever or the surrounding mechanism is stiff, it might not be able to move far enough for the latch to engage properly.
- Check the lever's movement. Try pushing the lever down repeatedly. Does it feel smooth and effortless, or does it catch, require a lot of force, or feel loose and wobbly?
- Look for obvious obstructions. Can you see any stray crumbs or foreign objects right around where the lever pivots or enters the toaster body?
- Gentle manipulation. With the toaster unplugged, try gently wiggling the lever up and down. Sometimes, this can dislodge minor blockages. You might also try lightly tapping around the lever area with the handle of a wooden spoon or similar non-metallic object.
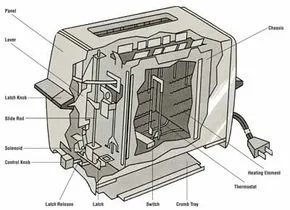
Image source: Bing (Web (fair-use with source credit))
If the lever feels very stiff or resistant, a small amount of dry lubricant, like a PTFE-based spray, can sometimes help. However, it's crucial to use this very sparingly and only on the pivot points. Too much lubricant can attract dust and make the problem worse or even damage the internal electronics if it gets into the wrong places.
Are Crumbs the Real Problem? Shaking It Out
This is by far the most frequent reason a toaster stops working correctly. Those delicious little bits of bread often fall down into the toaster's interior and can accumulate, jamming the delicate mechanisms that control the lever and the toasting carriage.
- Turn it upside down. With the toaster unplugged and completely cool, hold it firmly over a sink, trash can, or a large piece of newspaper.
- Give it a good shake. Gently but firmly shake the toaster upside down. You’ll likely see a cascade of crumbs fall out.
- Repeat if necessary. Shake it in different orientations to dislodge any stubborn bits. You might even try gently tapping the sides of the toaster while it's upside down.
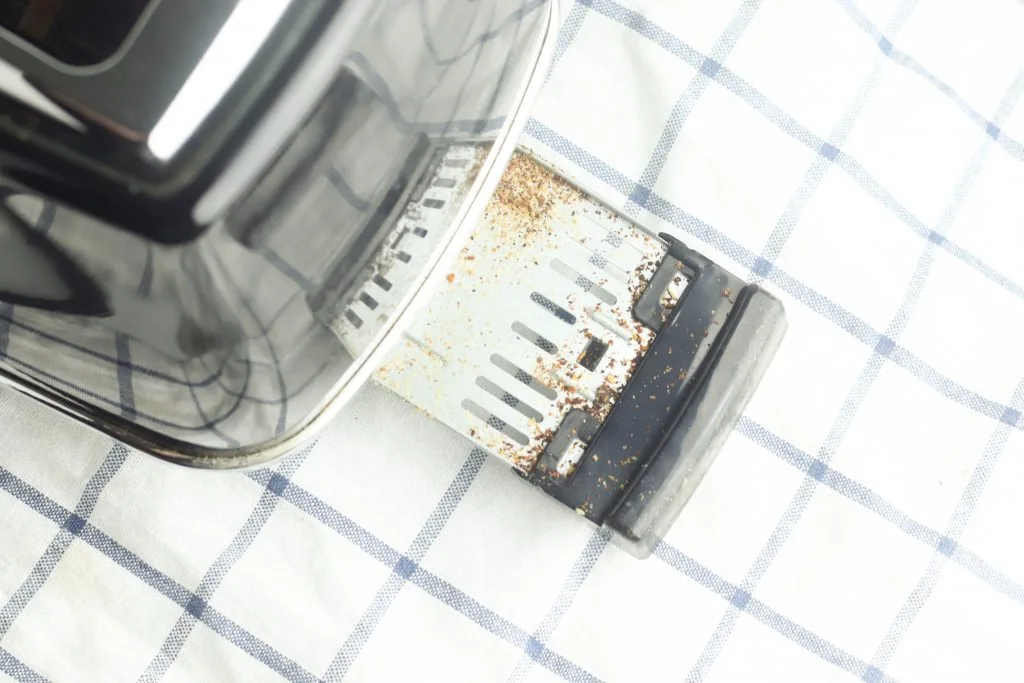
Image source: Bing (Web (fair-use with source credit))
After shaking, check the crumb tray if your toaster has one. Ensure it's completely empty and properly reinserted. A full or improperly seated crumb tray can sometimes interfere with the lever's ability to lock down.
This simple cleaning step resolves the issue for many toasters.
Identifying Latch Engagement Issues
The core of the problem often lies in the latch mechanism. When you press the lever down, a part of that mechanism is supposed to catch and hold it in the 'down' position. If this catch doesn't engage, the spring will immediately push the lever back up.
- Observe the internal carriage. With the toaster unplugged, press the lever down. Look inside the toaster slots with a flashlight. Can you see if the carriage (the platform that holds the bread) is moving down smoothly, or is it catching on something?
- Where should the latch catch? In a functioning toaster, the lever engages a small hook or a magnetic catch that keeps it down. You're looking for anything that prevents this connection.
- Check for obstructions near the latch point. Sometimes, a piece of debris or even a slightly bent piece of metal can be in the path of the latch.
If you can visually identify an obstruction, and it looks like a simple crumb or a piece of carbonized bread, try to carefully remove it with a non-metallic tool like a plastic toothpick or a small, dry brush. Be very gentle to avoid damaging any delicate parts.
When Internal Parts Might Be Jammed or Bent
If shaking out crumbs and cleaning around the lever doesn't solve the problem, it’s possible something internal has become jammed, bent, or broken. This is less common than simple debris but can happen if the toaster has been dropped or had something forcefully inserted into the slots.
- Listen for unusual sounds. When you try to push the lever down (with it unplugged), do you hear any grinding, snapping, or heavy resistance that feels mechanical rather than just stiff?
- Visual inspection for damage. Look closely at the lever and the carriage mechanism from the top slots. Do you see any obviously bent metal pieces or parts that seem out of alignment compared to how they should look?
- Carriage movement. Try gently lifting the carriage by hand from inside the slot. Does it move freely, or is it completely stuck? A stuck carriage can prevent the lever from latching.
If you suspect internal damage, attempting to force anything is generally not recommended. These mechanisms are often made of thin metal and can be easily further damaged. For many toasters, especially older or less expensive models, the cost and complexity of repairing internal mechanical failures often exceed the price of a new appliance.
Common Toaster Repair Mistakes to Sidestep
When trying to fix a toaster that won't stay down, it's easy to make a few common mistakes that can either fail to solve the problem or, worse, cause more damage. Being aware of these can save you frustration and potentially a trip to the repair shop (though, as we'll see, replacement is often the better route).
- Forcing the lever: Never try to force the lever down if it feels stuck or isn't latching. This can bend or break the internal latching mechanism, making the repair much more difficult or impossible. The spring-loaded mechanism is designed to engage easily when everything is clear.
- Using liquids for cleaning: Beyond a damp cloth on the exterior, never use water or cleaning solutions inside the toaster. If you've tried shaking out crumbs and suspect a sticky residue, avoid spraying liquids into the slots. This can lead to electrical shorts and damage to heating elements. Manufacturer specifications for most toasters strictly forbid internal liquid cleaning.
- Using metal tools aggressively: While a toothpick or a soft brush can help dislodge debris, avoid using metal knives, forks, or screwdrivers to pry or poke at internal parts. These can scratch or bend delicate components, or worse, create a short circuit if the toaster is accidentally plugged in.
- Ignoring electrical safety: Always, always unplug the toaster before performing any inspection or cleaning. This basic safety measure prevents accidental shocks. This is especially critical when dealing with internal mechanisms where exposed wires or contacts might exist.
Avoiding these pitfalls ensures that if a fix is possible, you're approaching it safely and effectively. If these simple troubleshooting steps and cautions don't resolve the issue, it's often best to consider professional repair or replacement.
When It's Time for a New Toaster
After going through the troubleshooting steps and carefully avoiding common mistakes, you might find that your toaster's lever still won't stay down. When simple fixes like shaking out crumbs or gently manipulating the lever don't work, it's a strong indicator that the issue is more internal and potentially beyond a DIY repair. For many household appliances, especially those that are relatively inexpensive like most toasters, the decision to repair versus replace often leans towards replacement.
- Cost of Repair: Professional repair for small appliances can often approach or exceed the cost of a brand-new unit. If the internal latching mechanism is broken, it may require specialized parts that are difficult to source for older or basic models.
- Safety Concerns: If internal components are bent or damaged, there's always a lingering concern about electrical safety, even after a repair. Modern toasters are designed with safety features, and a compromised mechanism could potentially put you at risk.
- Technological Advancements: Newer toaster models often come with improved features, such as more precise browning controls, wider slots for different bread types, and enhanced safety shut-offs. Upgrading might offer better performance and reliability.
- Availability of Parts: Unlike larger appliances, finding exact replacement parts for common toaster models can be challenging, especially for units that are several years old. Manufacturer support for small kitchen appliances often has a limited lifespan.
Ultimately, if your toaster fails after basic troubleshooting, consider that its lifespan may have simply come to an end. It might be more practical to invest in a new one that’s reliable and safe for daily use, rather than attempting complex repairs on a unit that’s already showing signs of significant wear.
Frequently Asked Questions About Toaster Fixes
Why did my toaster suddenly stop staying down?
This usually happens due to an accumulation of crumbs jamming the internal latch mechanism, or a component within that mechanism becoming stuck or damaged. It's a common sign that the toaster needs cleaning or may have an internal fault.
Can I use a lubricant on the toaster lever?
In some cases, a tiny amount of dry lubricant (like PTFE spray) applied sparingly to the lever's pivot points might help if it's just stiff. However, avoid over-application, as excess lubricant can attract dust and cause further issues. Never spray liquids inside the toaster.
How can I tell if the toaster is beyond repair?
If shaking out crumbs, cleaning the lever area, and gently checking for obvious obstructions don't solve the problem, and the lever still won't latch, it's likely an internal mechanical failure. If you suspect bent parts or hear grinding noises when trying to engage the lever, it's usually not worth attempting a DIY repair.
Is it safe to try and poke something inside the toaster slot?
Only do this when the toaster is unplugged and completely cool. Use non-metallic tools like a toothpick or a soft brush to gently remove visible debris. Never force anything, and avoid using metal objects that could cause damage or electrical shorts.
How often should I clean my toaster?
It’s a good practice to empty the crumb tray at least once a week, or more often if you use your toaster daily. A thorough shake-out of any loose crumbs should be done monthly, or whenever you notice the lever becoming stiff or difficult to engage.