How to Clean a Hand Mixer
Keeping your kitchen tools in good working order doesn't have to be complicated. For many of us, the electric hand mixer is a go-to for everything from whipping cream to mixing cake batter. When it comes to how to clean a hand mixer effectively, a little consistent effort goes a long way toward ensuring its longevity and performance.
In our research, manufacturer specifications often highlight the importance of regular cleaning, with some recommending specific cleaning agents and drying times to prevent damage. Properly caring for your hand mixer ensures it remains a reliable kitchen companion, ready for your next culinary adventure. Let's dive into the best practices for keeping your mixer sparkling.
Quick Answer
To clean a hand mixer, unplug it, detach the beaters, and wash them separately. Wipe down the main body with a damp cloth. Avoid submerging the motor housing in water.
Ensure all parts are dry before reassembly or storage.
Why Visuals Matter for a Sparkling Mixer
When we talk about cleaning a hand mixer, imagine you're looking at it. That’s because the process is best understood by seeing the actual parts and where to focus your attention. Think about how batter can splatter and leave sticky residue on the mixer body or wedge itself into the beater attachments.
Demonstrating where to wipe, how to detach the beaters, and what tools might be helpful is much clearer when you can see it.
For instance, visual guides often show how to gently twist and pull the beaters to release them, or how to hold the mixer at an angle while wiping down the motor housing to prevent moisture from seeping in. These visual cues are critical for avoiding common mistakes, like pushing water into the motor. Without these visual references, text alone can leave you guessing.

Image source: Bing (Web (fair-use with source credit))
The Quick Clean: After Every Baking Session
This is your everyday maintenance routine, designed to keep most of the grime from setting in. Doing this after each use is the easiest way to prevent bigger cleaning jobs down the line. It’s about preventing that dried-on gunk that’s a pain to remove later.
Unplug, Detach, and Wash the Beaters
This is the first and most crucial step. Make sure your electric hand mixer is unplugged from the power outlet. Then, locate the eject button, usually found near the top of the mixer body, and press it firmly.
This will release the beaters or dough hooks.
Most beater attachments are dishwasher safe, often on the top rack. Aggregate user reviews suggest checking your appliance's manual to confirm, as some may require hand washing. If hand washing, use warm, soapy water and a soft sponge, then rinse thoroughly.
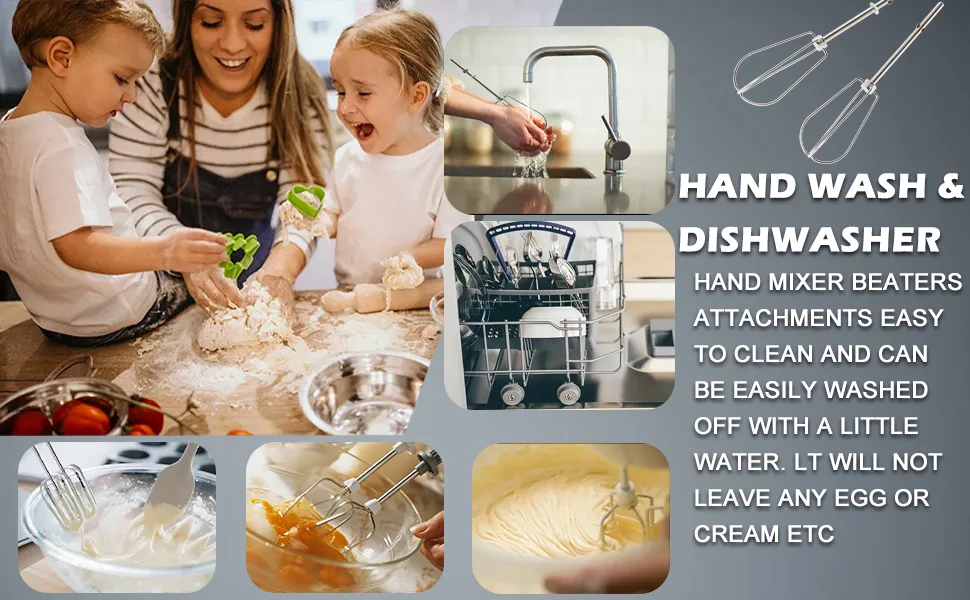
Image source: Bing (Web (fair-use with source credit))
Wipe Down the Mixer Body
With the beaters removed, it’s time to clean the main unit. Use a damp, soft cloth, not soaking wet, to wipe down the exterior of the hand mixer. Pay close attention to areas where batter might have splattered.
For most standard plastic casings, a mild dish soap solution can be used on the cloth if needed, but always wring it out well.
Ensure you don't let any liquid drip into the vents or openings where the motor housing is located. This prevents internal damage and potential electrical hazards. A dry, soft cloth should follow to remove any lingering moisture.
The Deeper Clean: Tackling Tough Grime
While the quick clean handles daily spatter, sometimes you’ll encounter more stubborn residue. This might happen after a particularly messy baking project or if your mixer has been stored for a while. A deeper clean tackles those dried-on bits and ensures all parts are hygienic.
Spotting and Removing Stubborn Residue
For dried-on food particles on the mixer’s body, a slightly damp cloth with a drop of mild dish soap can help. Gently rub the affected area. If the residue is particularly tough, you can try an old toothbrush to carefully scrub away the bits without scratching the plastic.
Manufacturer documentation sometimes suggests using a baking soda paste for tough spots, applied with a soft cloth and then wiped clean with a damp cloth. Always test any cleaning solution on an inconspicuous area first to ensure it doesn't damage the finish. The goal is to lift the grime without harming the appliance.
Cleaning the Power Cord
Don't forget the power cord! It can accumulate dust and kitchen grime just like any other part of the appliance. Use a damp cloth to wipe it down.
Make sure the cloth is only slightly moist and wring it out thoroughly.
Avoid using excessive water or harsh chemicals on the cord, as this can degrade the insulation over time. If the cord shows any signs of fraying or damage, it's a good idea to have it inspected by a qualified technician before further use. Safety first is always the priority with electrical appliances.
Ensuring It's Completely Dry
This step is absolutely vital, especially after a deeper clean. Before you reattach the beaters or store the mixer, make sure every part is completely dry. Moisture left inside the motor housing or on the beaters can lead to rust, mold, or electrical issues.
Use a clean, dry, lint-free cloth to thoroughly dry all components. Allow the mixer to air dry for a bit longer in a well-ventilated area if you suspect any residual dampness, particularly around vents or crevices. Manufacturer guidelines, such as those found in many user manuals for appliances like KitchenAid or Cuisinart mixers, often emphasize this drying step to maintain optimal performance and safety.
Crucial Cleaning Mistakes to Avoid
When cleaning your hand mixer, a few common missteps can lead to damage or even safety hazards. Understanding what not to do is just as important as knowing the right cleaning methods. These are the errors that most often require appliance repair or lead to a shortened lifespan for your mixer.
The Danger of Water Immersion
This is the biggest and most critical mistake: never submerge the main body of your hand mixer in water. The motor and electrical components are housed within this part, and direct water exposure can cause immediate damage. Water can seep into the motor, leading to short circuits, corrosion, and complete failure of the appliance.
If your mixer has come into contact with liquid, unplug it immediately and dry it thoroughly. For most mixers, only the beater attachments are designed to be washed with water. Manufacturer specifications consistently warn against this practice; for instance, many brands explicitly state in their manuals, "Do not immerse motor unit in water."

Image source: Web (Bing) / wallpaperaccess.com (Web image (fair-use with source credit))
Why Harsh Cleaners Aren't Your Friend
Using abrasive cleaners, scouring pads, or harsh chemical solvents on your hand mixer can damage its finish and plastic components. These substances can scratch the surface, dull the sheen, and even weaken the plastic over time. Think of it like using steel wool on a non-stick pan, it might get it clean, but it ruins the surface.
Mild dish soap and water are almost always sufficient for cleaning the exterior. If you encounter tough, dried-on food, gently work at it with a soft cloth or a soft-bristled brush rather than resorting to harsh chemicals. Always check your appliance's user manual for recommended cleaning agents, as some manufacturers might suggest specific mild solutions for their models.
Keeping Your Mixer in Top Shape: Long-Term Care
Beyond the immediate cleaning, a few ongoing practices can significantly extend your hand mixer's lifespan. Proper storage is key. After ensuring the mixer and its attachments are completely dry, store them in a clean, dry place, away from extreme temperatures or humidity.
Many mixers come with a storage case or a dedicated spot in a kitchen drawer or cupboard.
Manufacturer specifications often suggest avoiding overloading the motor. When mixing very stiff doughs or thick batters, pay attention to the motor's sound and feel. If it sounds strained or starts to overheat, take a break.
This prevents unnecessary wear and tear on the motor.
Another aspect of long-term care involves periodic checks of the power cord and plug. Look for any signs of damage, such as nicks, cuts, or fraying. If you notice any issues, it's best to contact the manufacturer or a qualified repair service, as a damaged cord can be a serious safety hazard.
This diligence in maintenance ensures your mixer remains a dependable tool for years to come.
Frequently Asked Questions About Hand Mixer Cleaning
How often should I clean my hand mixer?
You should perform a quick clean after each use, focusing on washing the beaters and wiping down the exterior. A more thorough cleaning, addressing any stubborn spots, can be done monthly or whenever you notice buildup. Consistent quick cleans prevent the need for frequent deep cleans.
Can I use bleach to clean my hand mixer?
No, you should never use bleach or other harsh chemicals to clean your hand mixer. Bleach can damage the plastic casing and electrical components. Stick to mild dish soap and water for general cleaning.
For tougher spots, baking soda paste is a safer alternative.
What should I do if my hand mixer smells like burning?
A burning smell usually indicates an electrical issue, often with the motor. If you detect this odor, unplug the mixer immediately and stop using it. Do not attempt to clean it further; instead, consult your appliance's manual for troubleshooting or contact the manufacturer for service or repair advice.
Are all hand mixer attachments dishwasher safe?
While many beater and dough hook attachments are designed to be dishwasher safe, it’s crucial to check your specific appliance’s user manual. Some manufacturers recommend hand washing certain materials or finishes to preserve their integrity. Always ensure attachments are completely dry before reattaching them to the mixer.