How to Assemble a Juicer
Unpacking a new juicer feels exciting, but the pile of plastic parts can sometimes look a bit daunting. Learning how to assemble a juicer efficiently means you'll be juicing in no time, without unnecessary frustration. This guide focuses on the visual cues and steps essential for a successful setup, no matter your model.
We've compiled straightforward guidance to help you put your juicer together quickly and correctly. Understanding each component and its place is key to smooth operation and longevity. This focus on visual understanding makes the process accessible for any user.
Quick Answer
To assemble a juicer, first identify all parts using the manual. Connect the motor base securely, then attach the filter basket and blade. Place the lid, followed by the pulp collector and juice pitcher.
Ensure all parts lock into place before operation.
Why Pictures Matter When Putting Your Juicer Together
When you're standing over a collection of juicer parts, a simple list of instructions might not cut it. That's where visuals come in. Diagrams and clear photos show you exactly how components should align and connect, preventing guesswork.
For instance, knowing which way a filter basket spins or how a lid should click into place is much easier to grasp with a visual aid. Manufacturer specifications often highlight the importance of correct assembly for both performance and safety.
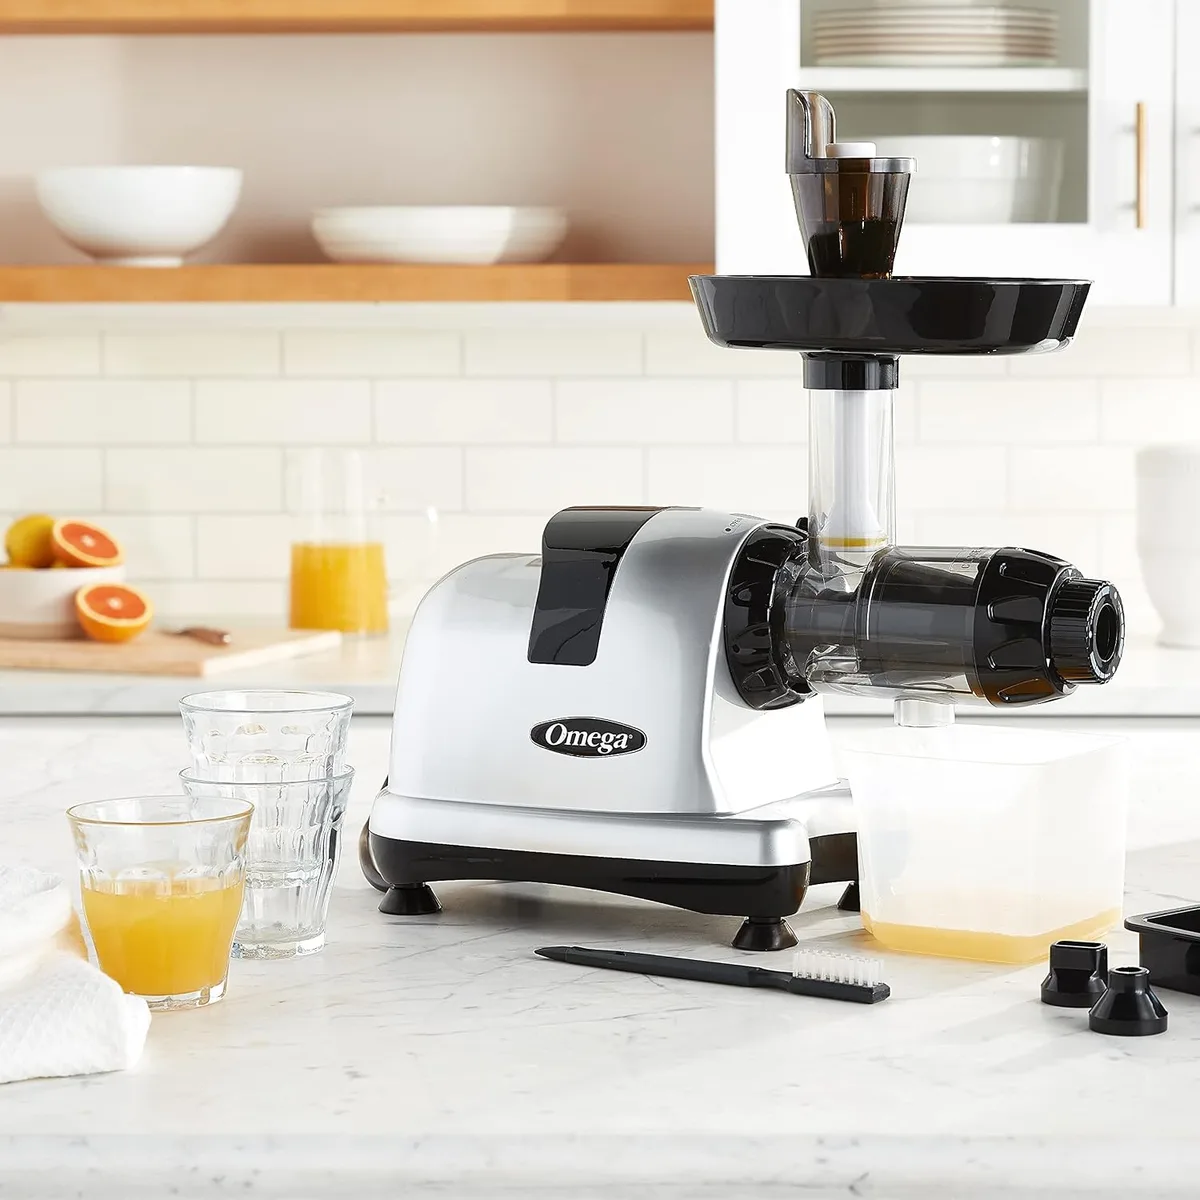
Image source: Bing (Web (fair-use with source credit))
Decoding Your Juicer's Parts: What's What
Before you even think about putting anything together, it's wise to get acquainted with all the pieces. Most juicers, whether centrifugal or masticating, share core components but can look different. Common parts include the motor base, which houses the engine; the filter basket, where the magic of juice extraction happens; the blade or auger, responsible for breaking down produce; a lid with a feed chute for adding fruits and vegetables; a pulp collector for discarding fibrous waste; and a juice pitcher to catch your liquid gold.
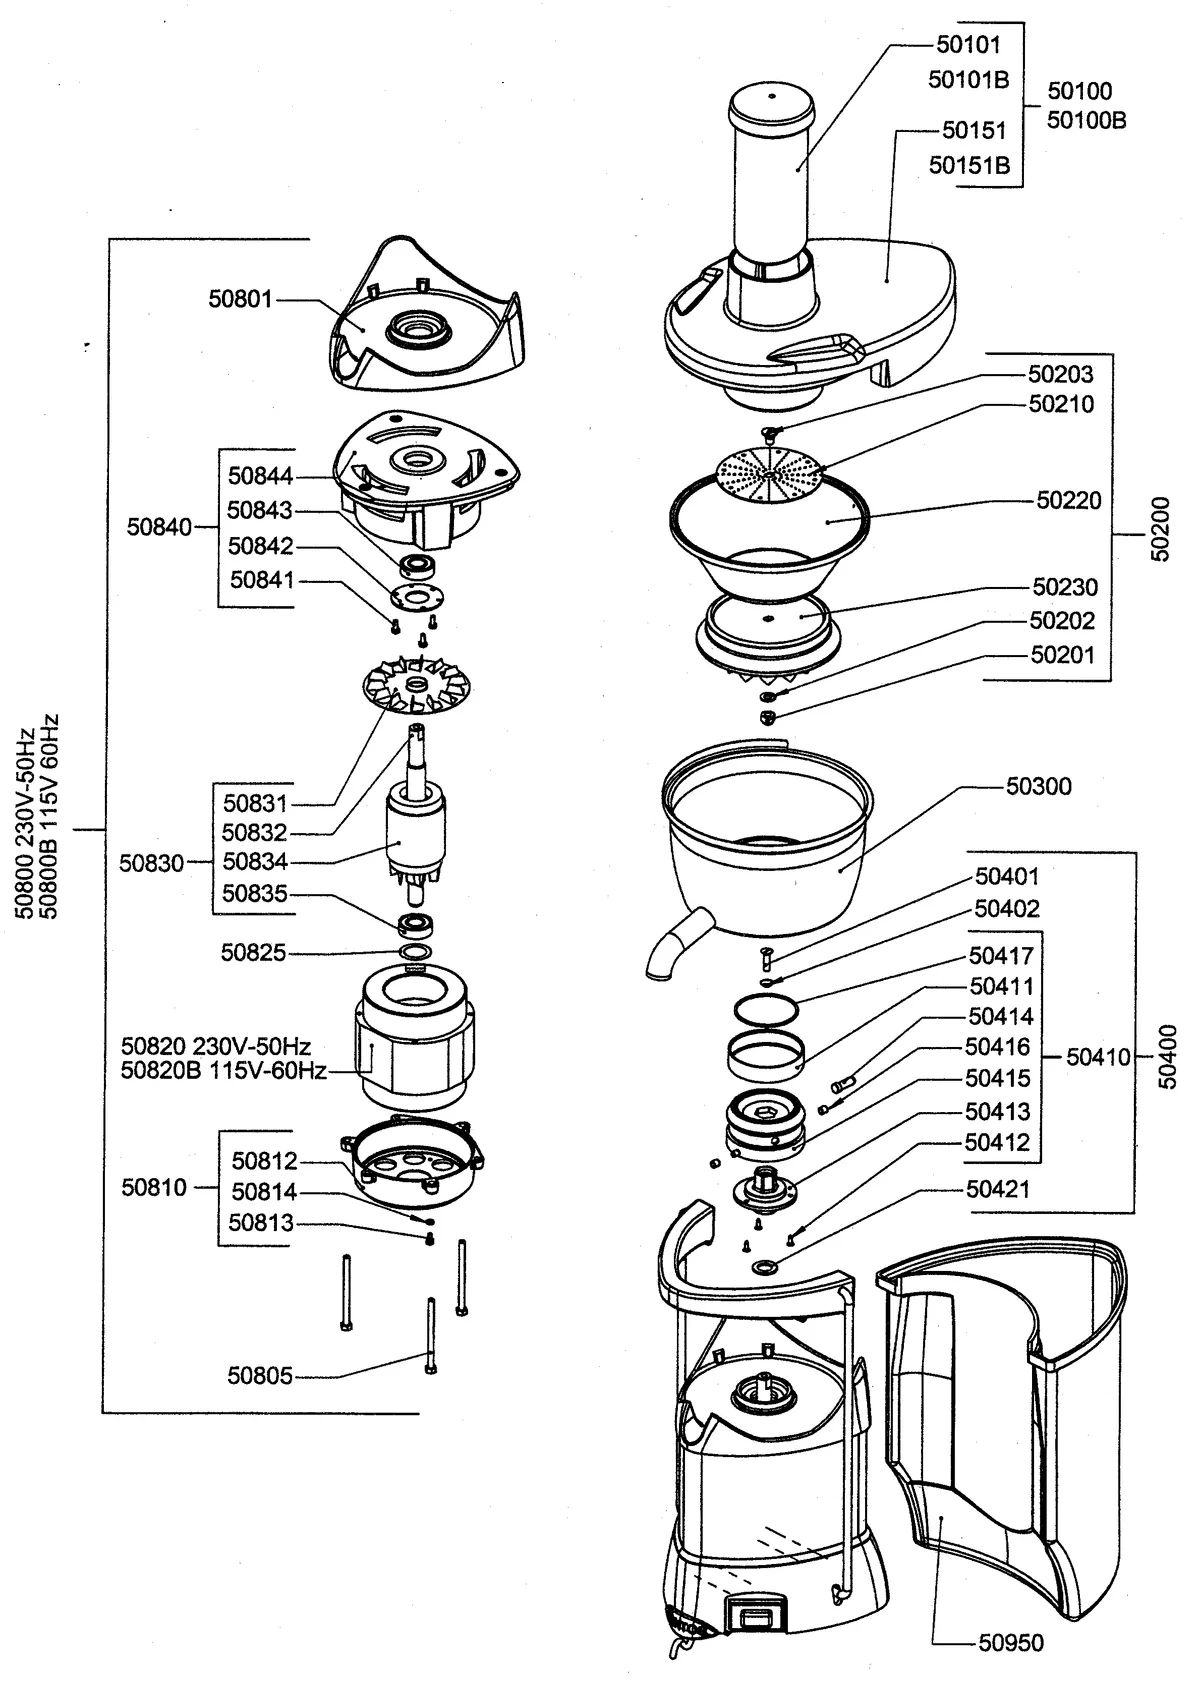
Image source: Bing (Web (fair-use with source credit))
- Motor Base: The sturdy bottom part containing the motor and controls.
- Filter Basket: A cylindrical piece, often with a mesh screen, that separates juice from pulp.
- Blade/Auger: The sharp cutting element (centrifugal) or screw-like mechanism (masticating) that processes produce.
- Lid: Covers the juicing mechanism and typically has a feed chute.
- Feed Chute: The opening at the top where you insert fruits and vegetables.
- Pulp Collector: A container that attaches to the unit to catch the extracted pulp.
- Juice Pitcher: Collects the fresh juice.
Familiarizing yourself with these parts now will make the assembly process much smoother. It’s a bit like recognizing the different components of a cooking appliance before you start a recipe.
Step 1: Getting Started – Unpacking and Identifying Components
The first actual step in how to assemble a juicer is simple: carefully unpack everything. Lay out all the pieces on a clean, stable surface, like a countertop. Many juicers come with a user manual that includes a diagram of all the parts.
Refer to this diagram to make sure you have everything that was supposed to be in the box.
- Check for Damage: While you're unpacking, give each part a quick visual inspection. Look for any cracks, chips, or loose connections.
- Consult the Manual: Every juicer model is slightly different. The manual is your best friend here; it will show you the specific order and orientation for assembly.
If you’re missing a part or notice any damage, it’s best to contact the manufacturer before proceeding. Trying to assemble a juicer with incomplete or damaged parts can lead to operational issues or even safety hazards. As of 2026, most manufacturers offer clear online guides and customer support for these situations.
Step 2: Building the Base – Motor and Main Housing
This is where the juicer starts to take shape. The motor base is the foundation, containing the engine that powers the juicing mechanism. It’s usually the heaviest part.
You’ll typically place the filter basket and the cutting mechanism (blade or auger) directly onto the motor base or a supporting part connected to it.
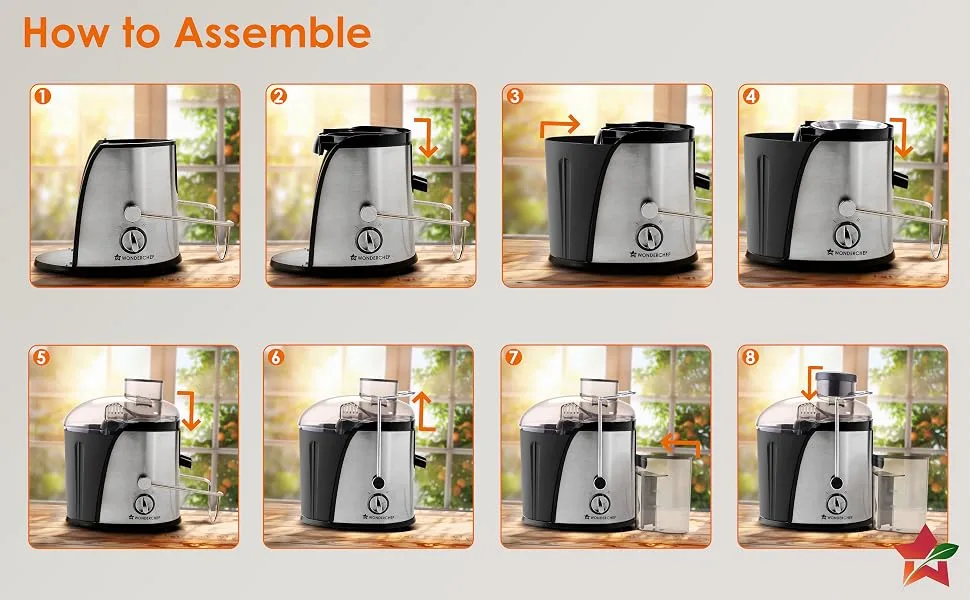
Image source: Bing (Web (fair-use with source credit))
For centrifugal juicers, this involves seating the filter basket firmly. It might have a specific groove or locking mechanism. Then, the blade is usually positioned inside or on top of this basket.
For masticating juicers, you'll likely insert an auger into the juicing chamber before attaching that assembly to the base. Ensure these parts are properly aligned; you might hear or feel a click when they're correctly seated.
- Centrifugal: Blade goes into filter basket, then filter basket locks onto motor base.
- Masticating: Auger goes into juicing screen, then this assembly locks onto motor base.
It's crucial these parts are secure. A wobbly base or filter basket can lead to vibration, noise, and inefficient juicing.
Step 3: Attaching the Filter Basket and Blade (Centrifugal Juicers)
This step is specific to centrifugal juicers, which are very common. The filter basket is typically a cylindrical component with a fine mesh. You'll place this directly onto the motor base.
It often has tabs or a specific shape that only allows it to fit in one orientation. Press it down firmly until it’s seated correctly.
Next comes the blade. This is usually a sharp, metal piece that sits at the bottom of the filter basket. It might be integrated with the basket or attach separately.
Ensure the blade is secure; some models have a small screw or locking mechanism to hold it in place. The rotation of this blade, at high speeds, is what breaks down your produce.
- Secure Seating: Make sure the filter basket doesn't move around loosely.
- Blade Alignment: Confirm the blade is firmly attached and spins freely when the motor is engaged (don't power it on yet, just check for stability).
If you're unsure about the orientation, look for arrows or notches on the parts that should line up. This attention to detail prevents the juicer from vibrating excessively during operation.