How to Change Batteries in a Kitchen Scale
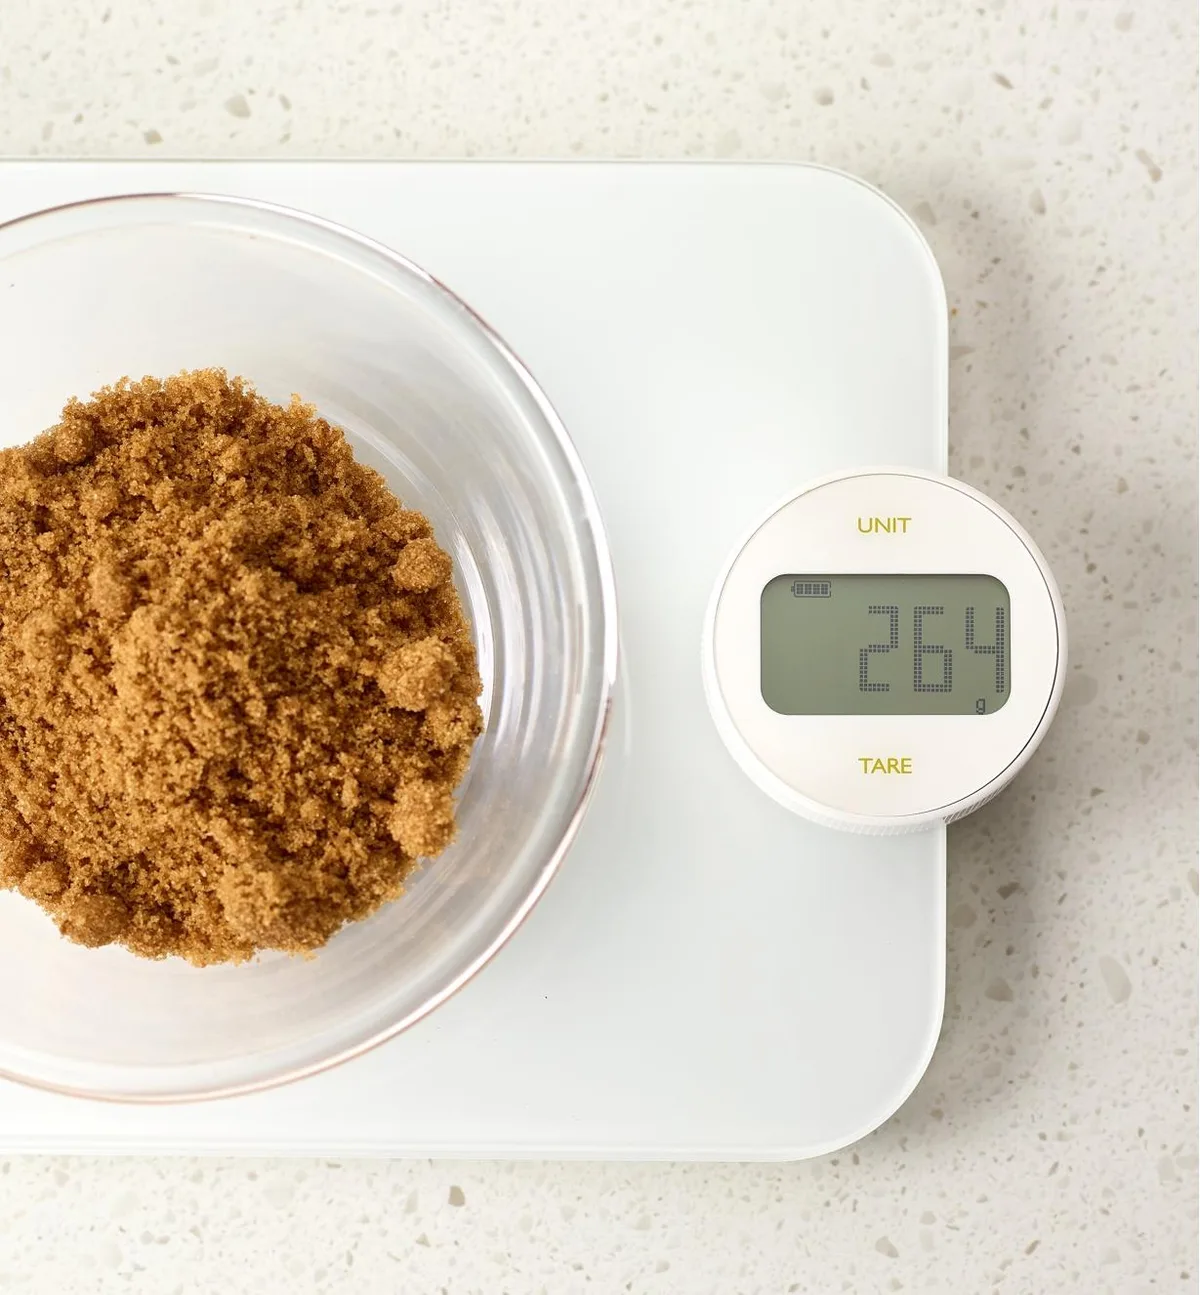
Image source: Bing (Web (fair-use with source credit))
So, your kitchen scale has stopped working or is acting weird. That's frustrating when you're trying to measure ingredients for a recipe. Luckily, how to change batteries in a kitchen scale is usually a straightforward fix that can get you back to baking and cooking in no time.
Most issues are resolved with a simple battery swap, often taking less than five minutes.
Manufacturer specifications for typical kitchen scales often require two AA or AAA batteries, a standard that has remained consistent for many units as of 2026. These power requirements are crucial for maintaining the accuracy and responsiveness of the scale's sensors. Let's dive into the process to get your scale back online.
Quick Answer
To change batteries in a kitchen scale, identify the battery type (usually AA or AAA). Turn the scale over and locate the battery compartment cover. Unscrew or unlatch it, remove the old batteries, insert new ones observing polarity, and secure the cover.
Identifying Your Kitchen Scale's Battery Type
Before you can swap out the old power cells, you need to know what kind of batteries your kitchen scale uses. This might seem obvious, but different models have different needs, and using the wrong type could cause problems.
Common Battery Types
Most kitchen scales run on common household batteries, making replacements easy to find.
- AA Batteries: These are the most frequent power source, offering a good balance of size and longevity for many digital scales.
- AAA Batteries: Smaller than AAs, these are often found in more compact or slim-line scale designs.
- Coin-cell Batteries: Some very small or specialty scales might use flat, coin-shaped lithium batteries, similar to those in watches or small electronics.
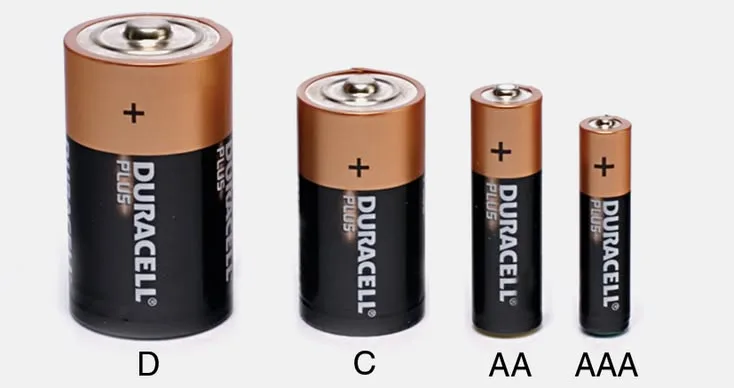
Image source: Bing (Web (fair-use with source credit))
How to Check Your Scale
If you're unsure about your scale's battery requirements, there are a few reliable ways to find out.
- Consult the Manual: If you still have the original instruction booklet, it will clearly state the battery type required. This is always your first and best resource.
- Check the Scale Itself: Many manufacturers include a label on the bottom or near the battery compartment that indicates the battery size. Look for text or symbols like "AA," "AAA," or a battery icon.
- Online Model Search: If you can find your scale's model number (usually printed on the bottom), a quick online search for "[Your Scale Model] battery type" will almost certainly yield the correct information.
Accessing the Battery Compartment: Common Designs
Once you know what batteries you need, the next step is getting to them. The battery compartment on kitchen scales can vary quite a bit depending on the design and age of the unit. Identifying the type of compartment you have will make the process much smoother.
Scales with Screwed-On Covers
This is a common setup, particularly on older or more robust scale models. These compartments are secured with small screws for a firm fit.
- Flip the Scale: Turn your kitchen scale upside down to expose the bottom surface.
- Locate Screws: You'll typically see two to four small screws holding a removable panel in place.
- Use the Right Tool: A small Phillips head screwdriver is usually needed. Ensure the screwdriver tip fits snugly into the screw head to avoid stripping it.
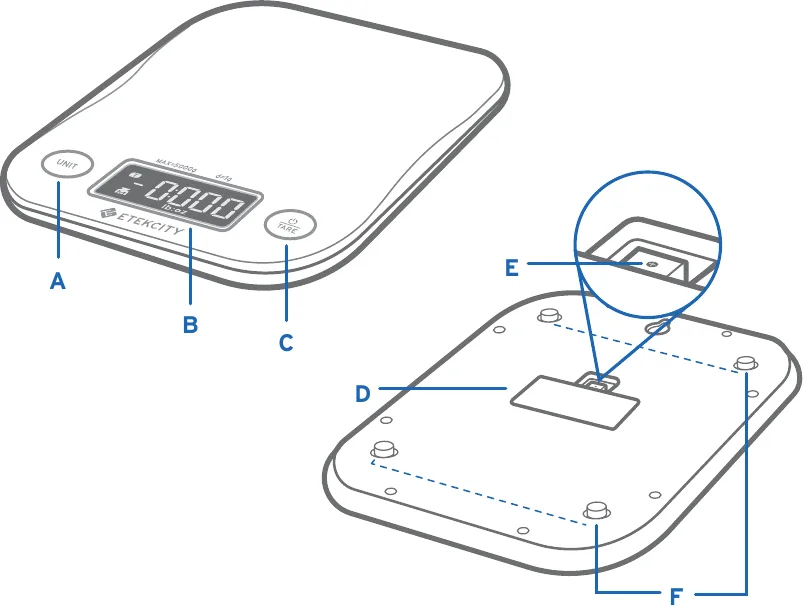
Image source: Bing (Web (fair-use with source credit))
Scales with Latch or Clip Covers
Many newer or more streamlined scales opt for a latch or clip mechanism instead of screws. This design aims for quicker access and fewer small parts to lose.
- Find the Seam: Look for a distinct line on the bottom panel where it meets the main body of the scale.
- Identify the Latch: This might be a small indentation you can pry at, a sliding tab, or a small button to press.
- Gently Release: Use a fingernail or a thin, non-metallic tool (like a plastic card) to gently push, slide, or pry the cover open. Avoid metal tools that could scratch the scale's casing.
Scales with Integrated Compartments
Some scales feature a battery compartment that's an integrated part of the main housing, often with a hinged or sliding flap. These are designed for simplicity and to keep the battery compartment flush with the scale's body.
- Locate the Opening: There's usually a small slot or notch to insert a finger or a tool for leverage.
- Slide or Hinge Open: Depending on the design, you'll either slide the cover in a specified direction or gently lift it on a hinge.
The Battery Swap: New Batteries In, Old Ones Out
With the battery compartment open, it's time to swap out those depleted cells. This step is critical for ensuring your scale functions correctly.
Checking Battery Polarity
This is the most crucial part of inserting new batteries. Most battery compartments have clear markings indicating the correct orientation for each battery.
- Look for Symbols: Inside the compartment, you'll see a "+" symbol for the positive end and a "-" symbol for the negative end.
- Match the Ends: Ensure the positive end of your new battery aligns with the "+" marking in the compartment, and the negative end aligns with the "-" marking. Most batteries will only fit correctly in one direction due to their shape and internal contacts.
Inserting New Batteries
Once you've confirmed the correct orientation, gently place the new batteries into the compartment.
- Seat Firmly: Push each battery in until it feels securely seated against the contacts.
- Double-Check: Quickly look to confirm all batteries are in the correct position. If your scale uses multiple batteries, ensure they are all facing the right way before closing.
Putting Your Kitchen Scale Back Together
After the battery swap, you'll need to secure the battery compartment cover. This process is the reverse of how you opened it, so just retrace your steps.
- For Screwed Covers: Place the cover back into position, aligning any tabs or grooves. Reinsert the screws and tighten them gently until the cover is snug. Avoid overtightening, as this can strip the screw threads or damage the plastic.
- For Latch or Clip Covers: Align the cover with the opening and press down firmly on the edges or the latch area until it snaps or clicks into place. Make sure it feels secure and flush with the rest of the scale.
- For Integrated Compartments: Simply slide or hinge the cover back until it locks into its closed position.
After reassembling, turn your scale on. It should power up normally, displaying a clear reading on its screen and ready for use. If it’s still not working, double-check that the batteries are correctly oriented and fully seated, and that the cover is making proper contact.
You might also want to refer to resources on how to troubleshoot a coffee maker if you're experiencing general electronic issues, though scale problems are usually simpler.
Common Mistakes When Changing Scale Batteries
Even though changing batteries seems simple, a few common missteps can lead to frustration or an unresponsive scale. Being aware of these can save you time and hassle.
- Incorrect Battery Orientation: This is the most frequent mistake. If batteries aren't inserted with the correct polarity (+ and -), the scale simply won't power on, or it might behave erratically. Always check for those markings.
- Using the Wrong Battery Type: While most scales use standard AA or AAA batteries, attempting to use a different size or type can prevent the compartment from closing, make poor contact, or even potentially damage the scale's electronics if it's a vastly incompatible type.
- Losing Small Screws: For scales with screwed-on covers, those tiny screws are notoriously easy to misplace. Keep them in a small dish, your palm, or a magnetic tray while you work to avoid them rolling away.
- Forcing the Cover: Prying open a latch or clip cover too aggressively, especially with metal tools, can scratch the plastic casing or break the delicate clips. Gentle persuasion is usually all that's needed.
- Not Closing the Cover Fully: If the battery compartment cover isn't secured properly, the batteries might not make consistent contact with the terminals. This can lead to intermittent power, flickering displays, or the scale refusing to turn on at all. Ensure it's clicked or screwed shut securely.
- Ignoring Old Batteries: While not directly related to the process of changing batteries, failing to replace old batteries when the scale starts showing signs of weakness can lead to inaccurate readings. Scales rely on a consistent power supply for precise measurements. If you notice fluctuating numbers, it might be time for a swap. For related appliance issues, consider resources on how to fix a coffee maker leaking water if you encounter appliance quirks.
When to Consider Other Solutions
Most of the time, changing the batteries will completely resolve any issues with your kitchen scale. However, if you've swapped out the batteries, confirmed they're the correct type and orientation, and the scale still isn't working, it might be time to consider that the problem lies elsewhere.
- Scale Age and Condition: If your scale is very old, heavily used, or has suffered a significant impact, the internal electronics might have failed. In such cases, repairs might not be cost-effective. A new, reliable digital scale can often be purchased for a reasonable price, typically ranging from $15 to $50, depending on features and brand.
- Water Damage: Kitchen appliances are prone to spills. If liquid has gotten inside the scale, it can corrode the internal components or short-circuit the electronics, often leading to permanent failure. If you suspect water damage, drying it out might help, but it's not guaranteed. You can look into how to clean a pour over coffee maker for general ideas on dealing with appliance water issues, but internal scale damage is trickier.
- Sensor Issues: The accuracy of a kitchen scale depends on its load sensors. If these are damaged or malfunctioning, the scale might give incorrect readings or refuse to zero out properly, even with fresh batteries. This is usually not a DIY fix.
- Cost of Repair vs. Replacement: For most consumer-grade kitchen scales, the cost of professional repair would likely exceed the price of a new unit. It’s generally more practical to replace the scale if a simple battery change doesn't solve the problem.
FAQs About Kitchen Scale Batteries
How long do kitchen scale batteries typically last?
Battery life can vary significantly based on usage frequency, battery quality, and the scale's power consumption. However, for a scale used a few times a week for general cooking, you might expect batteries to last anywhere from 6 months to over a year. Heavy use or leaving the scale on for extended periods will shorten this lifespan.
Can I use rechargeable batteries in my kitchen scale?
Yes, in most cases, you can use rechargeable AA or AAA batteries if your scale uses those types. Just ensure they are fully charged and inserted with the correct polarity. Rechargeable batteries can offer long-term cost savings and are a more environmentally friendly option, aligning with best practices for appliance maintenance.
What should I do with old batteries?
It's important to dispose of old batteries responsibly. Many local recycling centers, electronics stores, and even some supermarkets have designated drop-off points for battery recycling. Avoid throwing them in with regular household trash, as they can contain chemicals that are harmful to the environment.