How to Use a Stand Mixer Dough Hook

Image source: Bing (Web (fair-use with source credit))
How to Use Your Stand Mixer Dough Hook for Perfect Bread
You've got a stand mixer, and you're ready to tackle that homemade bread recipe. But what about that funny-looking attachment that came with it? Knowing how to use a stand mixer dough hook is the secret to achieving that perfect, airy crumb and chewy crust without all the arm workout.
It’s designed to do the heavy lifting for you, turning tough dough into something smooth and workable.
Manufacturer specifications for most stand mixer attachments indicate they are designed to mimic traditional kneading motions, significantly reducing preparation time for yeast-raised doughs. For instance, a typical 5-quart stand mixer bowl can handle about 4-5 cups of flour, which is crucial for not overloading the motor. This guide will walk you through everything you need to know to get the best results.
Quick Answer: Dough Hook Essentials
To use a stand mixer dough hook, attach it securely to the mixer shaft. Add your dough ingredients to the bowl, start the mixer on its lowest speed, and gradually increase to medium-low. Knead until the dough is smooth, elastic, and pulls away from the bowl sides, typically 5-10 minutes.
Always check manufacturer guidelines for specific speed and time recommendations.
What Your Dough Hook Does for Dough
That C- or J-shaped piece of metal is your stand mixer’s primary tool for developing gluten. When you mix flour and water, you create gluten-forming proteins. The dough hook’s job is to repeatedly grab, pull, and fold the dough, stretching those proteins and creating a strong, elastic network.
This network traps the gases produced by yeast, allowing your dough to rise and giving your finished bread its characteristic structure and chewy texture. Without proper gluten development, bread can be dense and crumbly.
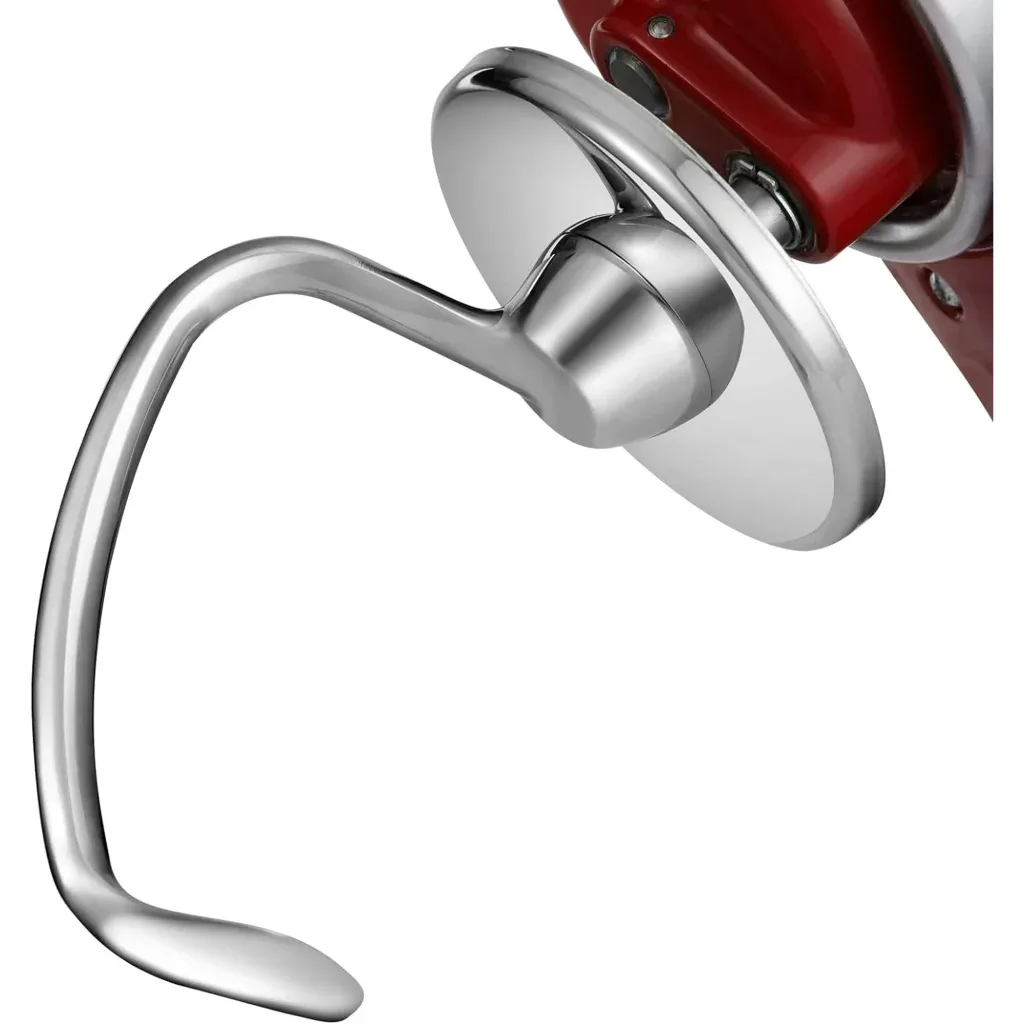
Image source: Bing (Web (fair-use with source credit))
Essentially, the hook mimics the rhythmic motion of hand kneading, but with consistent power and speed. This consistent action is key to achieving optimal gluten structure, something that can be trickier to replicate by hand, especially for beginners. It transforms a sticky, shaggy mass into a smooth, cohesive ball ready for proofing.
Getting Your Dough Hook Attached and Ready
Before you even think about ingredients, ensure your dough hook is the correct attachment for the job. It looks distinct from the paddle or whisk attachments, designed specifically for its kneading purpose. Most stand mixers use a central shaft at the front where attachments click or twist into place.
- Identify the Hook: Look for the sturdy, often coated metal attachment shaped like a C or a J.
- Align and Insert: Line up the dough hook's mounting pin or slot with the corresponding opening on your mixer's attachment hub.
- Secure it: Push the hook firmly upward into the hub. You’ll usually need to twist it (often counter-clockwise) until it locks securely. You should feel or hear a distinct click, indicating it’s properly seated. A loose attachment can cause damage or be ineffective.
Manufacturer specifications for most stand mixer attachment hubs require a secure lock before operation. This ensures safety and optimal performance. If it feels wobbly or doesn't lock, consult your mixer's manual to confirm correct attachment and procedure.
The Step-by-Step Process for Kneading Dough
Kneading dough with your stand mixer is a straightforward process, but timing and speed are important. Here’s how to do it right:
- Add Ingredients: Place all your dough ingredients into the stand mixer bowl. Don't overfill it; consult your mixer's manual for its maximum flour capacity to avoid straining the motor.
- Attach the Dough Hook: Ensure the dough hook is firmly locked into the mixer's attachment hub.
- Start Slow: Begin by turning the mixer on its lowest speed setting. This initial stage helps to combine the ingredients without creating a floury mess. Let it mix for about 30-60 seconds until a shaggy dough starts to form.
- Increase Speed: Gradually increase the speed to a medium-low setting, typically speed 2 to 4 on most mixers. This is where the actual kneading happens.
- Monitor and Knead: Let the mixer run. The dough should start to pull away from the sides of the bowl and gather around the dough hook, forming a smooth ball. This process usually takes between 5 to 10 minutes.
- Check for Doneness: Periodically, and especially towards the end of the recommended kneading time, stop the mixer and check the dough's consistency. You're looking for a smooth, elastic texture.
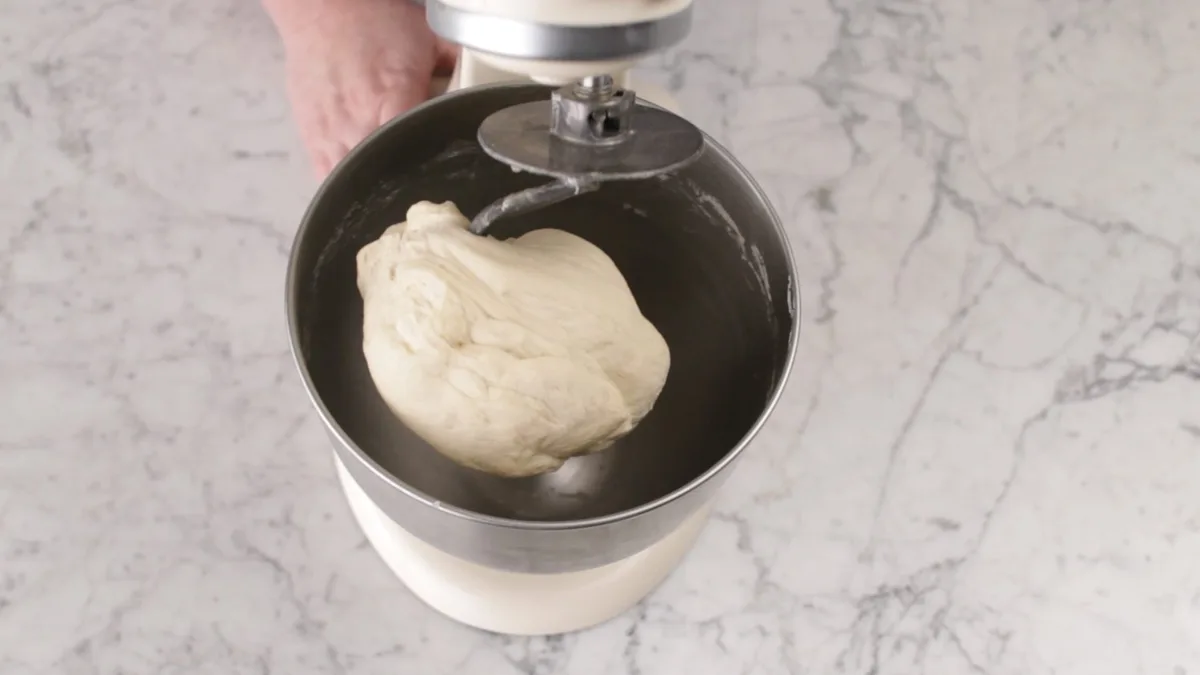
Image source: Bing (Web (fair-use with source credit))
This step-by-step method ensures your dough gets adequately kneaded without overworking it. If you're new to this, following a guide like this can make a big difference in your baking success. For advanced users looking for troubleshooting, articles on how to troubleshoot a coffee maker might offer general principles on diagnosing mechanical issues, though specific to different appliances.
Recognizing Dough Done Right: Visual Cues
Knowing when your dough is perfectly kneaded is more about what you see and feel than just a timer. The dough hook is doing its job when the dough transforms from a sticky, shapeless mass into something smooth, elastic, and well-behaved.
Look for these visual indicators:
- Smoothness: The dough should appear smooth and have a consistent texture, with no dry pockets or overly sticky patches clinging to the sides of the bowl.
- Elasticity: As the dough is worked by the hook, it should stretch without immediately snapping back. It will start to look "alive" and responsive.
- Cleans the Bowl: A key sign is that the dough begins to pull away from the sides of the mixer bowl. It forms a cohesive ball that essentially "rides" the dough hook as it turns. If there's still a lot of dough stuck to the bowl’s interior, it likely needs more kneading time.
- Windowpane Test: For a definitive check, stop the mixer and pinch off a small piece of dough. Gently stretch it between your fingers. If you can stretch it thin enough to see light through it without it tearing, your gluten is well-developed. This is the ultimate sign of perfectly kneaded dough.
If your dough is too sticky even after 10 minutes of kneading, you might need to add a tablespoon of flour at a time until it starts to pull away. Conversely, if it seems too dry and crumbly, add a teaspoon of water. It's a bit of an art, but these visual cues will guide you.