How to Use a Stand Mixer for Bread
Stand mixers are fantastic for so many kitchen tasks, but when it comes to baking bread, they can feel like a secret weapon. If you've ever wondered how to use a stand mixer for bread, you're in the right place. It’s about more than just pushing a button; it’s about understanding the dough and letting the machine do its best work.
This guide will walk you through the process, focusing on what to look for visually and how to troubleshoot if things don't go quite as planned. We'll cover how to get the most out of your mixer for consistently great bread, as of 2026.
Quick Answer
To use a stand mixer for bread, attach the dough hook, combine ingredients in the bowl, and mix on low speed. Gradually increase to medium-low speed for 6-10 minutes. Watch for smooth, elastic dough that pulls from the sides.
Add tiny amounts of flour or water to adjust consistency as needed.
Why Visuals Make Bread Baking with Your Mixer Easier
When you're making bread, especially for the first time with a stand mixer, there's a lot you learn by seeing rather than just reading. Recipes give you numbers, but dough has a personality. Understanding what "shaggy," "tacky," or "smooth and elastic" actually looks and feels like is crucial.
Your stand mixer has a power that can quickly overwork or underwork dough if you're not paying attention to these visual cues.
Manufacturer specifications for most stand mixers, like KitchenAid models, indicate a range of speeds suitable for kneading, typically between speed 2 and 4 on their dial. However, the visual feedback of the dough itself is a more reliable indicator of progress than a timer alone. Observing the dough's texture, how it clings to the hook, and its elasticity helps you know when it's just right.
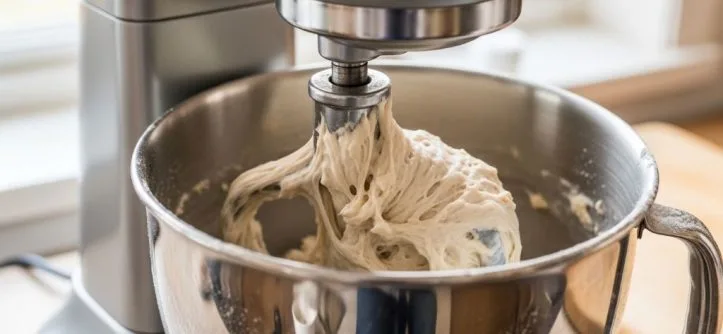
Image source: Bing (Web (fair-use with source credit))
Your Stand Mixer's Dough Hook: The Star of the Show
The workhorse for bread in your stand mixer is the dough hook attachment. This specially shaped piece of metal is designed to mimic the motion of kneading by hand, but it does so tirelessly and efficiently. Its design allows it to grab the dough, pull it, twist it, and fold it, effectively developing the gluten structure that gives bread its characteristic chew and rise.
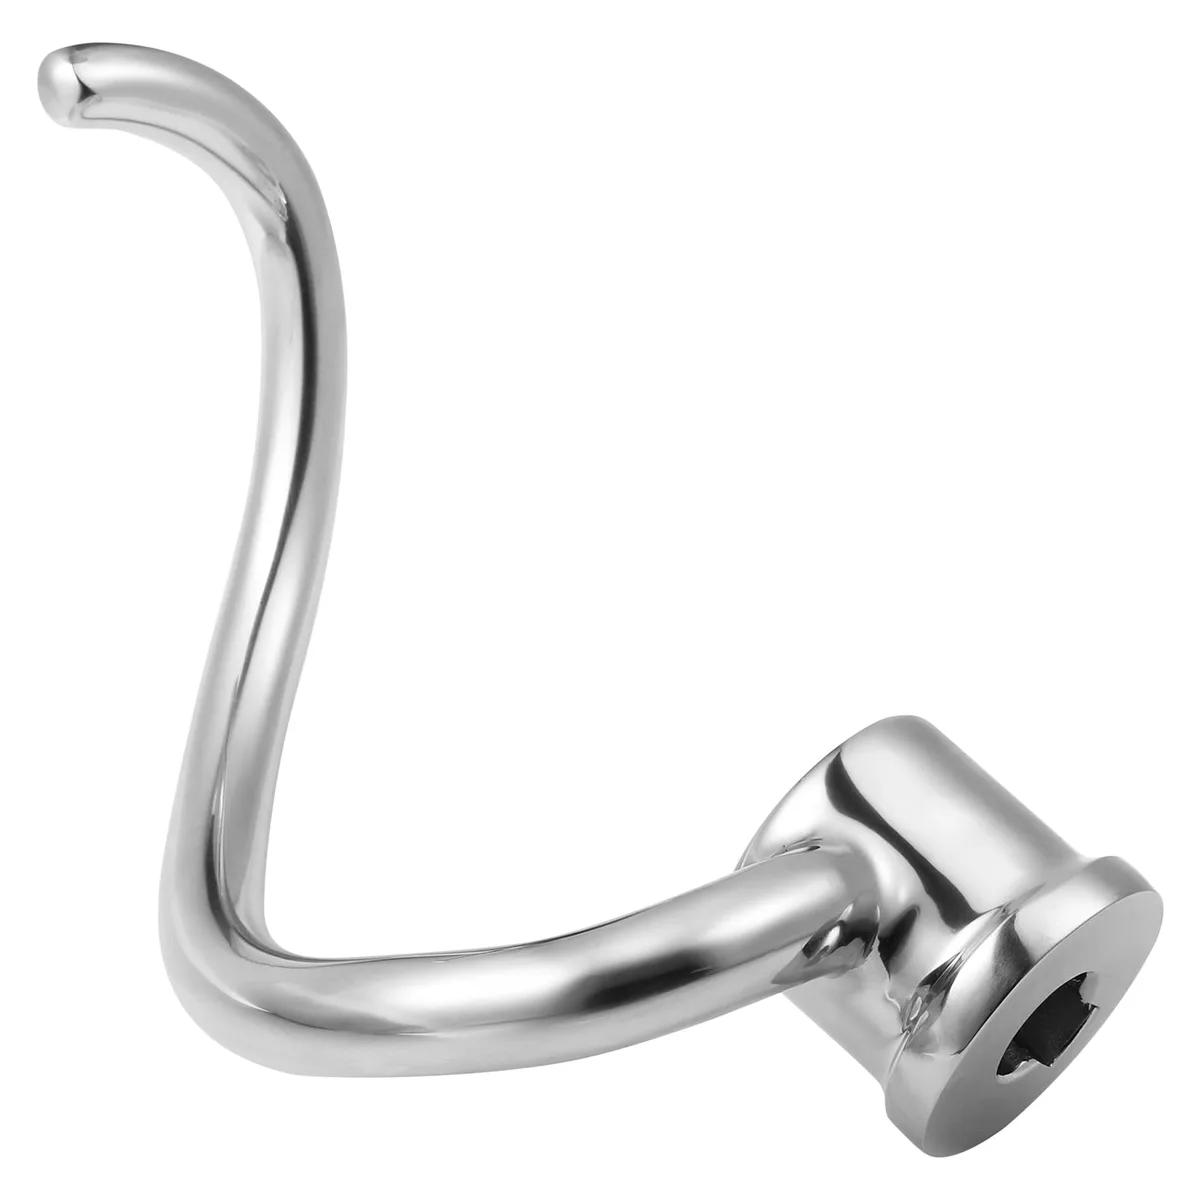
Image source: Bing (Web (fair-use with source credit))
Different mixers come with slightly different hook designs, but they all serve the same purpose. It's important to ensure the hook is properly locked into place before you start. This prevents it from flying off at high speed and ensures it's engaging the dough correctly.
A properly fitted dough hook is key to avoiding unnecessary wear on your mixer and getting the best kneading action.
Step-by-Step: Mixing and Kneading Your Bread Dough
Getting started with bread in your stand mixer is straightforward, but paying attention to each step makes a huge difference. Think of this as your guided tour from separate ingredients to a dough ready for its first rise.
Combining Ingredients
First, gather all your ingredients. Most recipes will call for you to add the dry ingredients, flour, salt, sugar, and yeast, into the mixing bowl. Then, you’ll pour in your wet ingredients, like water or milk.
It’s helpful to have your wet ingredients measured out and ready to go.
The Initial Mix: From Shaggy to Clumpy
Once everything is in the bowl, attach the dough hook. Start the mixer on its lowest speed, usually designated as "Stir" or speed 1 or 2. You want to let the mixer run for about 1 to 2 minutes.
During this stage, the ingredients will start to come together. It will look messy and shaggy, with dry flour pockets still visible. That’s exactly what you’re aiming for at this point; don’t worry if it doesn't look like smooth dough yet.
The Kneading Phase: Watching Dough Transform
After the initial mix, gradually increase the speed to a medium-low setting. This is typically speed 2 to 4 on most home stand mixers. Now, the dough hook goes to work developing the gluten.
You’ll notice the dough starting to gather around the hook and pull away from the sides of the bowl. This process usually takes anywhere from 6 to 10 minutes, depending on your specific mixer and recipe.
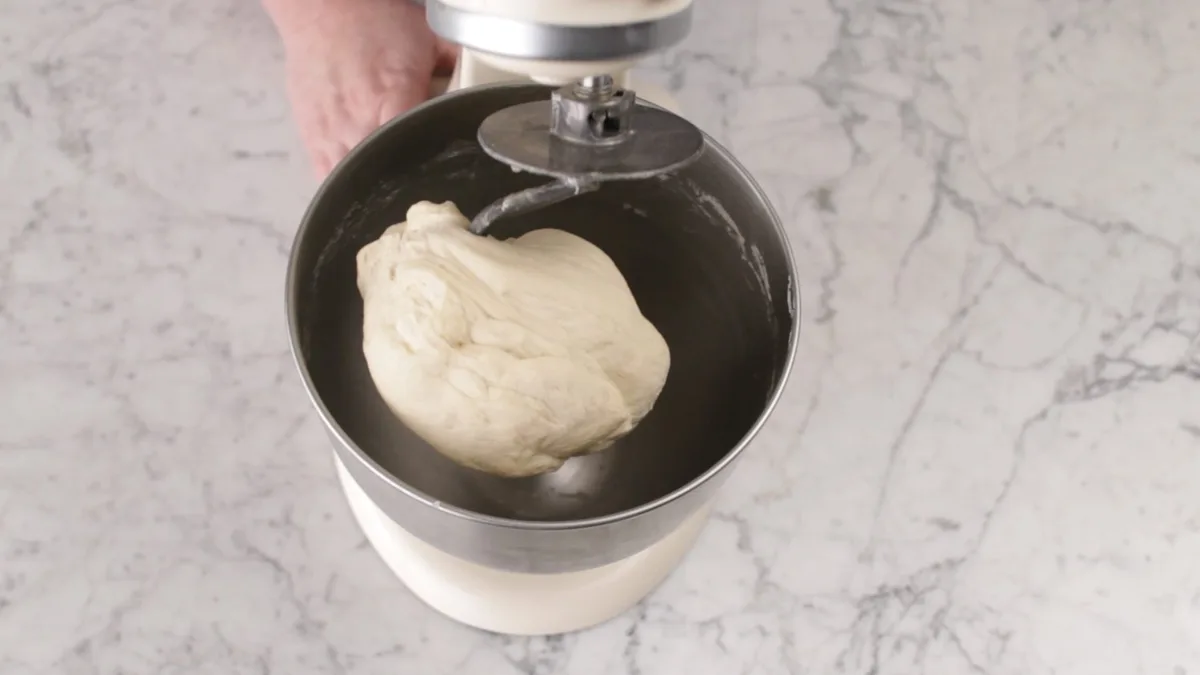
Image source: Web (Bing) / jocooks.com (Web image (fair-use with source credit))
During kneading, the dough transitions from a rough, sticky mass into a smooth, elastic ball. Keep an eye on it, the dough should ideally be slightly tacky but not sticking to your fingers when you lightly touch it. If it’s sticking excessively, you might need to add a tablespoon of flour at a time.
Conversely, if it seems too stiff and dry, add a teaspoon of water.
Testing for Perfect Gluten Development
After the kneading time has passed, it’s time to check if the gluten is properly developed. This is often referred to as the "windowpane test." Gently pinch off a small piece of dough and carefully stretch it between your fingers. If you can stretch it thin enough so that light shines through it without the dough tearing, your gluten is well-developed.
If it tears easily, it needs a few more minutes of kneading.
What Your Dough Should Look Like: Visual Cues for Success
Understanding dough consistency is probably the most critical part of baking with a stand mixer. While the mixer does the physical work, you are the eyes and ears of the process, judging the dough's readiness. Relying solely on the timer can lead to under- or over-kneaded dough, which impacts the final texture of your bread.
For instance, a well-kneaded dough should feel smooth and pliable. Manufacturer specifications for mixers often don't detail dough consistency, but user feedback universally highlights its importance. As of 2026, visual guides are still the best way to learn.
Spotting Dough That's Too Sticky
If your dough is too sticky, it will cling stubbornly to the sides of the mixing bowl and the dough hook, and it will feel very wet and unmanageable. When you try the windowpane test, it will likely tear almost immediately, and you'll see large wet patches. This usually means there's too much liquid or not enough flour.
Recognizing Dough That's Too Dry
On the flip side, dough that's too dry will appear stiff, crumbly, and won't come together into a cohesive ball. It might leave a lot of dry flour streaks in the bowl even after extended kneading. If you try to stretch it, it will break apart quickly.
This indicates not enough liquid or too much flour was used.
The Ideal Dough Texture and Appearance
The goal is a dough that is smooth, soft, and slightly tacky to the touch. It should cleanly pull away from the sides of the bowl as it kneads, wrapping around the dough hook. When you touch it, only a minimal amount of dough should stick to your fingers, and it shouldn't feel overly wet or gummy.
This is the visual cue that the gluten has developed nicely, promising a good rise and tender crumb in your finished loaf.
Common Mistakes When Kneading Bread Dough
Even with a stand mixer, it's possible to make mistakes that can affect your bread. These errors often come down to rushing the process or not trusting your senses over the clock. Learning to spot and avoid them will save you from a lot of disappointing loaves.
Over-Flouring Pitfalls
One of the most common mistakes is adding too much flour when the dough seems sticky. It’s tempting to dump in extra flour to make it easier to handle, but this can lead to a dry, dense loaf. Remember, dough is supposed to be a bit tacky.
If it’s sticking to your fingers a little, that’s usually okay. If you absolutely must add flour, do it a tablespoon at a time and let the mixer incorporate it before deciding if more is needed.
The Danger of Under-Kneading
On the flip side, stopping the kneading process too early means the gluten hasn't developed enough. This results in bread that is dense, has a poor structure, and might not rise properly. The windowpane test is your best friend here.
If you can't stretch the dough thinly without tearing, it needs more kneading time. Trust the visual and tactile cues, not just the recipe's suggested minutes.
When to Stop the Mixer
It’s easy to think "more kneading is always better," but you can actually overwork your dough. Over-kneading can break down the gluten strands you worked so hard to develop, leading to a tough, crumbly loaf. The dough might start to feel greasy or overly elastic and then suddenly tear easily during the windowpane test.
Also, if your dough starts to overheat from constant friction, it can negatively impact yeast activity. Knowing when to stop is as important as knowing when to start.
Expert Tips for Smoother Bread Baking
Here are a few tried-and-true tips to make your bread-making experience even better. These often come from experience and understanding the nuances of dough.
- Room Temperature is Key: For the most consistent results, ensure your ingredients, especially your liquids and eggs (if using), are at room temperature. This helps everything combine smoothly and aids yeast activity.
- Scrape Down Effectively: Don't be afraid to stop the mixer and scrape down the sides of the bowl with a rubber spatula. This ensures all the flour and ingredients get incorporated into the dough evenly. Do this periodically, especially early in the mixing process.
- Know Your Mixer's Power: Different stand mixers have different motor strengths and gearing. A more powerful mixer might knead dough faster or require slightly less time than a less powerful one. Pay attention to the dough, not just the clock.
- Don't Ignore the Bowl: Sometimes the dough might appear to be kneading correctly, but if it’s still sticking to the very bottom of the bowl, it might need a bit more mixing or a slight adjustment. Aggregate reviews indicate this is a common troubleshooting point.
- Clean Promptly: After you remove the dough, it's easiest to clean the mixing bowl and dough hook right away. Dried-on dough can be much harder to remove. A quick rinse and wipe usually does the trick.
Frequently Asked Questions About Stand Mixer Bread
How long does it typically take to knead bread dough in a stand mixer?
Kneading usually takes about 6 to 10 minutes on a medium-low speed, but this can vary depending on your mixer and recipe. The key is to knead until the dough is smooth, elastic, and passes the windowpane test.
Can I use my stand mixer for other types of dough, like pizza dough?
Yes, absolutely! Most stand mixers with a dough hook are excellent for pizza dough, focaccia, and other yeast-based doughs. The principle of developing gluten remains the same.
What should I do if my dough is too sticky or too dry?
If the dough is too sticky, add flour a tablespoon at a time. If it’s too dry, add water a teaspoon at a time, mixing thoroughly between additions until the desired consistency is reached.
How do I know if my stand mixer attachment is the right one for bread?
For bread, you almost always want to use the dough hook attachment. It's specifically designed for the thick, elastic nature of bread dough. Attachments like whisk or flat beaters are not suitable for kneading.
Troubleshooting Common Dough Issues
Sometimes, despite your best efforts, dough can be tricky. Here are a few common issues and how to address them:
- Dough is Too Wet and Sticky: If the dough is consistently sticking to the sides and hook, making it hard to form a ball, add a tablespoon of flour at a time. Mix for a minute after each addition until it starts to pull away cleanly.
- Dough is Too Stiff and Dry: If the dough appears crumbly, doesn't clump together, or seems tough, add a teaspoon of water at a time. Let the mixer incorporate it fully to see if it softens.
- Dough Doesn't Form a Ball: This often means the gluten isn't developing properly. Ensure you're using the dough hook and a medium-low speed. Continue kneading for the recommended time, checking for elasticity.
- Dough Overheats: If your mixer is running for a very long time on a higher speed, the dough can get warm. This can harm the yeast. If you notice it feeling warm, stop the mixer and let it cool down for a few minutes before continuing.