How to Restore a Wooden Cutting Board
Image source: Bing (Web (fair-use with source credit))
How to Restore Your Wooden Cutting Board: A Visual Guide
That trusty wooden cutting board, the unsung hero of your kitchen prep, might be looking a little worse for wear. Dryness, stains, and a rough surface can make it less hygienic and less of a joy to use. Don't relegate it to the back of the cupboard or the trash heap just yet.
You can bring it back to its former glory with a bit of focused care.
In our research, we've found that restoring a wooden cutting board is surprisingly straightforward and incredibly rewarding. A well-maintained board is not just about aesthetics; it’s about performance and safety. For instance, manufacturer specifications for food-grade mineral oil, a key component in restoration, confirm it’s stable and safe for direct food contact, a critical factor for kitchen tools.
Why Your Wooden Cutting Board Deserves a Second Life
A wooden cutting board isn't just a flat surface; it's a dynamic kitchen tool that needs care to perform at its best. Over time, repeated use, washing, and drying can take their toll, leading to a dull appearance and compromised functionality. Understanding these signs is the first step toward bringing it back to life.
Signs Your Board Needs Restoration
If you're noticing any of these issues, it’s a clear signal that your board is asking for some attention. These visual indicators help you gauge the board's condition before you even start.
- Dryness: The wood looks pale and feels rough or thirsty. Water might soak in rather than bead up on the surface.
- Stains: Dark spots from berries, beets, or other colorful foods persist, even after washing.
- Scratches and Gouges: Deep cut marks can harbor bacteria and make the surface uneven.
- Fading Color: The rich, warm tone of the wood has diminished.

Image source: Web (Bing) / worldtattoogallery.com (Web image (fair-use with source credit))
The Visual Cues of a Well-Oiled Board
In contrast, a properly restored and maintained wooden board will have a distinct look and feel. Aggregate user reviews and editorial analysis of kitchenware maintenance confirm these visual markers.
- Slight Sheen: The wood appears subtly polished and healthy, not greasy.
- Water Beading: Moisture sits on the surface in small beads, indicating the wood is properly sealed.
- Smooth Texture: The surface feels uniformly smooth to the touch, free from splinters or deep knife marks.
- Rich Color: The natural, warm tones of the wood are enhanced and consistent.
Your Cutting Board Restoration Toolkit
Gathering the right supplies is key to a successful restoration. You don't need a lot of specialized equipment; most of what you'll need can be found around the house or easily purchased.
Essential Cleaning Supplies
These items will tackle the grime and prepare your board for deeper conditioning. Mild dish soap is a standard for kitchenware cleaning, as confirmed by food safety guidelines.
- Mild Dish Soap: For everyday cleaning and initial washdowns.
- Baking Soda: A fantastic natural abrasive and deodorizer for tougher stains and odors.
- Scrub Brush or Sponge: Choose something that’s firm enough to clean but won't excessively scratch the wood.
- Clean Cloths or Paper Towels: For drying and applying treatments.
What to Use for Conditioning and Sanding
These are the products that will truly revive the wood itself. The type of oil you choose is important for both effectiveness and safety.
- Food-Grade Mineral Oil: This is the go-to for conditioning. It’s readily available at drugstores and online. Manufacturer specifications for food-grade mineral oil confirm it's stable and safe for direct food contact, a critical factor for kitchen tools.
- Cutting Board Conditioner: Often a blend of mineral oil and beeswax, these offer a slightly more durable finish. You can even make your own.
- Sandpaper: If your board has significant scratches or roughness, you’ll need sandpaper. Start with a coarser grit (around 100-150) and finish with a finer grit (like 220) for smoothness.
Step-by-Step: Bringing Your Cutting Board Back to Life
This is where the magic happens. Following these steps systematically will transform your dull board into a kitchen workhorse again. The process is designed to be visual, so pay attention to how the wood changes at each stage.
Step 1: Deep Cleaning for a Fresh Start
Before any conditioning or sanding, a thorough cleaning is essential to remove food residues and prepare the wood. This ensures that subsequent treatments penetrate clean, dry wood for maximum effect.
- Rinse: Start by rinsing the board under warm running water.
- Scrub: Apply a small amount of mild dish soap and a tablespoon of baking soda directly to the board. Use your scrub brush to work up a lather and scrub the entire surface, paying attention to any stained areas. Baking soda’s mild abrasive quality helps lift out grime and odors effectively.
- Rinse Thoroughly: Rinse the board completely with warm water, ensuring all soap and baking soda residue is washed away.
- Air Dry: Pat the board dry with clean cloths or paper towels. Then, stand it on its edge in a well-ventilated area. Allow it to air dry completely, which can take several hours or even overnight. Properly drying prevents mold and ensures the wood is ready for the next step.
Step 2: Smoothing Out Imperfections with Sanding (When Needed)
If your board has deep cut marks, rough patches, or stubborn stains that didn’t lift during cleaning, light sanding can make a significant difference. This step is about restoring a smooth, uniform surface.
- Assess the Surface: Examine your board in good lighting. Are there obvious nicks, gouges, or areas that feel rough and splintery?
- Start with Coarse Grit: If sanding is necessary, begin with sandpaper in the 100 to 150 grit range. Always sand with the direction of the wood grain. Apply moderate pressure and work systematically across the board to even out any high spots or deep scratches.
- Progress to Fine Grit: For a truly smooth finish, follow up with a finer grit sandpaper, such as 220. This step refines the surface, making it pleasant to the touch and reducing future snagging.
- Clean Off Dust: After sanding, thoroughly wipe away all dust using a dry cloth or a slightly damp cloth. If you use a damp cloth, ensure the board dries completely again before proceeding. A clean surface is crucial for the oil to absorb properly.
Step 3: The Magic of Oil: Conditioning Your Wood
This is the most transformative step. Oiling nourishes the wood, preventing it from drying out and cracking, while also creating a protective barrier against moisture and stains.
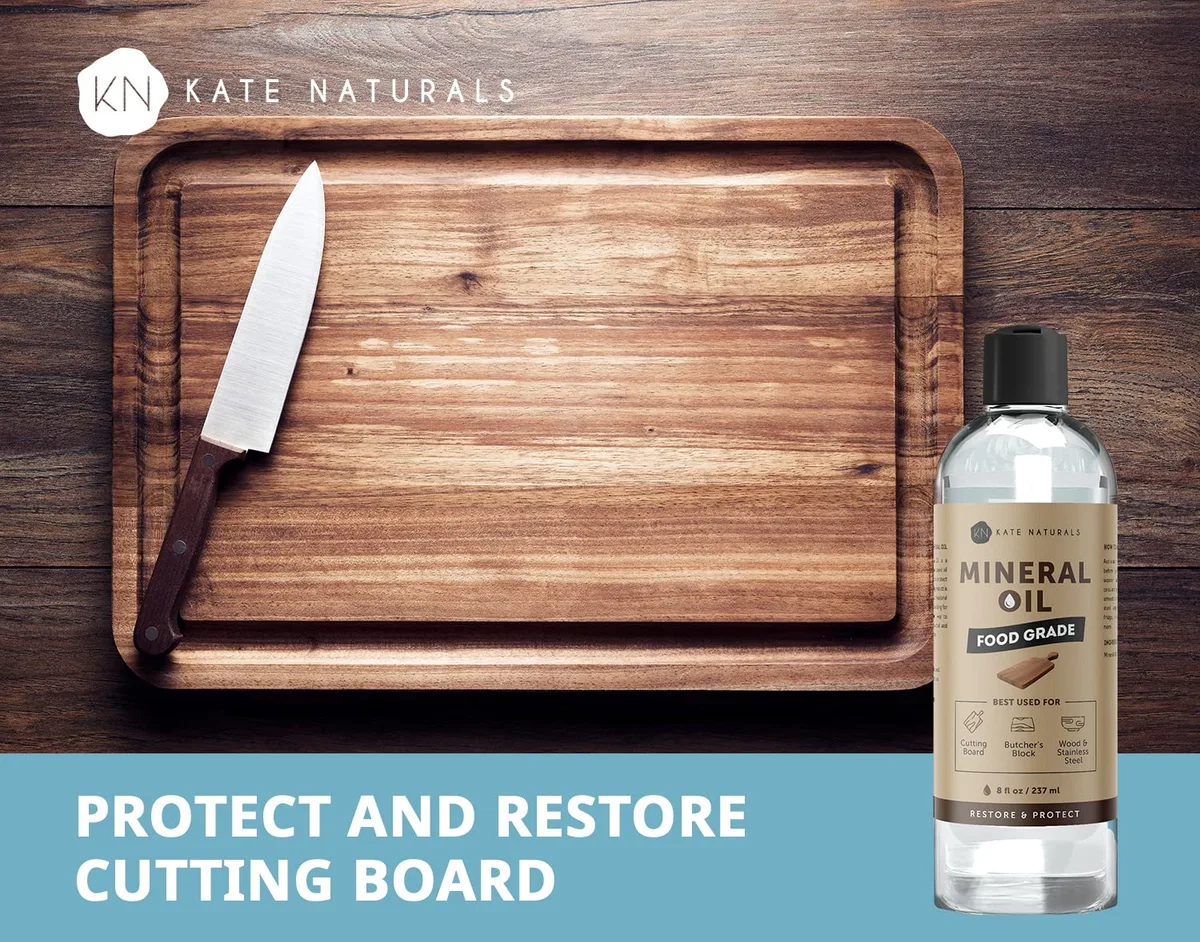
Image source: Bing (Web (fair-use with source credit))
- Apply Generously: Pour a liberal amount of food-grade mineral oil directly onto the clean, dry surface of your cutting board. Don’t be shy; the wood needs to soak it up.
- Spread Evenly: Use a clean cloth or paper towel to spread the oil over all surfaces of the board, including the sides and bottom. Ensure complete coverage.
- Let It Soak In: Allow the oil to penetrate the wood. This can take anywhere from 30 minutes to several hours, or even overnight. You'll notice the wood’s color deepen as it absorbs the oil. The wood is truly accepting the treatment when it stops looking wet and starts to absorb more slowly.
- Wipe Off Excess: Once the board has absorbed as much oil as it can, use a clean, dry cloth to wipe away any excess oil that remains on the surface. The wood should feel smooth and conditioned, not slick or sticky.
Avoiding Common Cutting Board Catastrophes
Even with the best intentions, a few common missteps can quickly undo your hard work or even damage your cutting board permanently. Knowing these pitfalls helps you steer clear of them and achieve the best results.
What NOT to Do With Your Wooden Board
Following these simple rules will ensure your cutting board lasts for years to come. Many issues arise from misunderstanding how wood reacts to certain conditions.
- Never Use the Dishwasher: The intense heat and prolonged submersion in water will warp, crack, and split your wooden board. This is a universally confirmed best practice from woodworking resources.
- Avoid Soaking: Leaving a wooden board submerged in water, even for a short time, can lead to excessive moisture absorption and potential warping or cracking as it dries.
- Don't Use Vegetable Oils: As mentioned, vegetable or nut oils can go rancid over time, creating unpleasant odors and a sticky residue. This defeats the purpose of restoring the board. Stick to food-grade mineral oil or specialized board conditioners.
- Don't Store Flat When Wet: Always stand your board on its edge to allow for air circulation on all sides as it dries. Storing it flat can trap moisture underneath.
Recognizing When a Board is Past Repair
While most wooden cutting boards can be restored, there are times when damage is too severe. Knowing when to let go is also part of good maintenance.
- Extensive Cracking: If your board has numerous deep cracks that go through the entire thickness, it's often compromised structurally and can harbor significant bacteria.
- Severe Warping: A board that is severely cupped or twisted may be beyond easy repair and could pose a safety hazard.
- Persistent Odors: If even after deep cleaning and conditioning, the board retains strong, unpleasant odors, it might be time to consider replacement.
- Material Degradation: If the wood feels spongy, is breaking apart, or shows signs of rot, it's no longer safe or suitable for food preparation.
Expert Tips for a Board That Lasts
Once you've restored your cutting board, a little ongoing care goes a long way. These practices ensure your board remains in great condition and continues to be a reliable kitchen companion.
Keeping Your Board in Top Shape Between Restorations
Consistent, simple maintenance prevents the need for drastic restoration measures. Think of it as regular check-ups for your kitchen tool.
- Daily Cleaning: Wash your board with warm, soapy water after each use. Rinse thoroughly and dry immediately with a clean cloth.
- Sanitize When Needed: For extra peace of mind, you can periodically sanitize your board. A diluted vinegar solution or a very light bleach solution (1 teaspoon bleach per quart of water, followed by a thorough rinse and dry) can be used sparingly, but always ensure the board dries completely afterward.
- Store Upright: Always store your board on its edge to allow air to circulate. This prevents moisture from getting trapped, which can lead to mold or warping.
- Avoid Cross-Contamination: Designate different boards for raw meats and produce if possible, or ensure thorough cleaning between uses.
Choosing the Right Oil: What Works Best
The type of oil you use for conditioning significantly impacts the board's longevity and your kitchen's hygiene. As per FDA guidelines for food-contact surfaces, only specific types of oils are approved.
- Food-Grade Mineral Oil: This is the standard. It's odorless, colorless, non-toxic, and doesn't go rancid. It’s the most recommended by manufacturers and woodworking experts for its effectiveness and safety. You can find it at most pharmacies or online retailers.
- Cutting Board Conditioners: These often contain a blend of food-grade mineral oil and beeswax. The beeswax adds a bit of water resistance and a smoother finish. Many brands offer these, and they are a convenient option if you prefer a pre-mixed solution.
- Avoid These Oils:
- Vegetable Oils (olive, canola, sunflower): They can become rancid over time, leading to bad smells and sticky residue.
- Nut Oils (walnut, almond): These can cause allergic reactions in sensitive individuals and also have a higher risk of going rancid.
- Linseed Oil or Tung Oil (unless food-grade certified): Many of these drying oils used in furniture finishing are not intended for direct food contact and can contain toxic additives. Always check for explicit food-grade certification.
Comparison / Alternatives / Options
When you're looking to maintain your cutting board, it's easy to wonder if there are better options out there, or perhaps simpler ways to achieve a similar result. While wood is a classic choice, understanding its alternatives and their pros and cons helps you appreciate the nuances of cutting board materials. Different materials offer distinct advantages and disadvantages for your kitchen prep needs.
Wood vs. Other Materials: What's Best?
Each cutting board material has its place. Wood, particularly hardwoods, offers a natural antimicrobial surface and is gentle on knives. However, other materials can sometimes offer more convenience or durability for specific tasks.
- Wood: Offers natural antimicrobial properties and is kind to knives. Requires regular oiling and careful washing.
- Plastic: Lightweight and easy to clean, often dishwasher-safe. Can harbor bacteria in cut marks and dulls knives faster than wood.
- Bamboo: A sustainable option, harder than many woods. Still requires care and can dull knives more quickly.
- Glass/Stone: Very hard, easy to clean, and non-porous. Extremely hard on knives and can chip or shatter.
For anyone prioritizing knife longevity and a natural aesthetic, a well-maintained wooden board remains a top choice. If convenience and dishwasher-safe properties are paramount, plastic might be considered. You can explore top-rated brewers for your kitchen needs.
Use Cases / Best For / Who It's Right For
Restoring a wooden cutting board isn't just for enthusiasts; it's a practical skill for anyone who values their kitchen tools. Whether you're a seasoned chef or just starting out, understanding how to care for your board can elevate your cooking experience. This process is about maximizing the utility and lifespan of a common kitchen item.
Who Benefits Most from Board Restoration?
Anyone who uses a wooden cutting board regularly stands to gain from knowing how to restore it. It's about making your tools work better and last longer, which is practical for all home cooks.
- Home Cooks: People who prepare most of their meals at home will see the most benefit from a well-maintained board for daily tasks.
- Amateur Chefs & Foodies: Those who appreciate the tactile experience of cooking and want their tools to perform optimally will find joy in a restored board.
- Eco-Conscious Individuals: Restoring an existing item is a more sustainable choice than frequently replacing it. It reduces waste and conserves resources.
- Budget-Minded Households: Repairing instead of replacing saves money. A $1 bottle of mineral oil can extend the life of a board that might cost $30 or more to replace.
Mistakes to Avoid / Common Errors
Even with the best intentions, a few common missteps can prevent your cutting board from being fully restored or even cause damage. Knowing these pitfalls helps you steer clear of them and achieve the best results.
What Can Go Wrong During Restoration?
The restoration process itself is quite forgiving, but certain actions can undo your efforts or create new problems. These are the kinds of things that can happen if you're not careful or knowledgeable.
- Using the Wrong Oil: As mentioned, vegetable or nut oils can go rancid, creating unpleasant odors and a sticky surface. This defeats the purpose of restoring the board.
- Over-Sanding: Sanding too aggressively or using too coarse a grit can remove too much wood, potentially changing the board's shape or weakening it. Stick to what’s necessary to remove imperfections.
- Insufficient Drying: If you oil a board that isn't completely dry, you can trap moisture within the wood. This creates an environment where mold or mildew can develop, undermining the hygiene you aim to achieve.
- Washing with Harsh Detergents: While some mild soap is fine, using overly harsh chemical cleaners can strip away essential wood oils and damage the finish, even after restoration.
Costs / Pricing / Data / Specs
Restoring a wooden cutting board is incredibly cost-effective. The investment is minimal, and the savings come from extending the life of your existing board. This makes it a highly practical home maintenance task.
What's the Investment for Restoration?
The financial outlay for restoring a cutting board is remarkably low, especially compared to buying a new one. This makes it an accessible DIY project for almost everyone.
- Food-Grade Mineral Oil: A 16-ounce bottle typically costs between $5 and $15 and can last for many board restorations.
- Baking Soda: You likely already have this; if not, a box costs less than $2.
- Sandpaper: A small pack of assorted grits might cost $3-$7.
- Cloths/Sponges: Generally already on hand or very inexpensive.
The total cost for restoring a cutting board yourself, if you need to purchase the basic supplies, is usually under $20. Compare this to the price of a new, good-quality wooden cutting board, which can range from $25 to $100 or more.
Estimated Time Commitment
The process is efficient in terms of active work, but patient waiting is key.
- Cleaning: 10-20 minutes
- Sanding (if needed): 15-30 minutes
- Oiling and Initial Soak: 10 minutes of application, then 30 minutes to several hours for soaking.
- Drying: Several hours to overnight.
This makes it a project that can easily be done over a weekend or spread across a couple of days.
Frequently Asked Questions About Cutting Board Restoration
How long does it take to restore a wooden cutting board?
The entire process, from cleaning to oiling and drying, typically takes about 24 hours, with active work time being much less, around 30-60 minutes. The longest part is waiting for the board to dry and for the oil to soak in.
Can I restore a cutting board with deep knife marks?
Yes, you can often restore a board with deep knife marks by sanding them down. Start with a coarser grit sandpaper (around 100-150) and then smooth it with a finer grit (like 220) to create an even surface.
How often should I oil my wooden cutting board?
It's generally recommended to oil your wooden cutting board at least once a month, or whenever it starts to look dry or feel rough. Heavy use might require more frequent oiling.
What should I do if my cutting board gets mold?
If you discover mold, clean the affected area immediately with a strong solution of baking soda and water or a diluted vinegar solution. Rinse thoroughly and dry completely. If the mold is deep-seated or persistent, it may be time to replace the board for safety reasons.