How to Make Nut Butter in a Food Processor
Making nut butter at home in a food processor is surprisingly simple and incredibly rewarding. You can skip the store-bought versions, with their added sugars and oils, and create something truly wholesome. This guide will walk you through the straightforward process, highlighting what to look for at each stage to ensure perfect results.
Our research indicates that a standard food processor, capable of at least 500 watts, is generally sufficient for most nut butter tasks, as confirmed by manufacturer specifications for kitchen appliances. As of 2026, the trend towards healthier, homemade foods continues to grow, making this skill even more valuable.
Quick Answer
To make nut butter in a food processor, simply roast your nuts if desired, then blend them in the processor, scraping down the sides periodically. It will go from crumbs to a thick paste, then finally to smooth butter as the fats are released. This process typically takes 5 to 20 minutes, depending on the nut type and your machine's power.
Why You'll Want to Make Your Own Nut Butter
There's a real satisfaction that comes with creating your own staples from scratch. When it comes to nut butter, the primary draw is the sheer control you gain over ingredients. Store-bought varieties often contain added sugars, excessive salt, or hydrogenated oils that many people prefer to avoid.
By making it yourself, you can ensure it's just pure nuts, perhaps with a touch of salt for flavor. This is especially beneficial for individuals managing dietary restrictions or simply aiming for a cleaner diet.
Your Nuts, Your Way: The Control Factor
The biggest benefit, hands down, is what you can put into your nut butter. You are the master of your ingredients. This means no unexpected additions like high-fructose corn syrup, palm oil, or artificial preservatives.
If you're watching your sugar intake, you can make it completely sugar-free. If you prefer a saltier kick, you control how much goes in. This level of customization isn't possible when buying pre-made.
It’s about tailoring it to your personal taste and health goals.
What You'll Need to Get Started
To embark on your homemade nut butter journey, you don't need a collection of specialized gadgets. The absolute essential is a food processor; a blender, while capable of chopping, usually lacks the motor power and bowl design to effectively process nuts into smooth butter. You'll want one that's fairly robust, as it will be running for several minutes.
- Nuts: Your choice! Almonds, cashews, peanuts, walnuts, pecans, all work beautifully. Roasted nuts tend to yield a richer flavor and smoother texture faster, but raw nuts can also be used if you plan to roast them yourself first.
- Food Processor: A mid-size to large food processor with a strong motor is ideal. It should be able to handle at least 2-3 cups of nuts without overheating.
- Spatula: For scraping down the sides of the processor bowl. This is crucial for even processing.
- Optional Additions: A pinch of sea salt, a drizzle of honey or maple syrup for sweetness, or a dash of cinnamon or vanilla extract for extra flavor.
The Step-by-Step Process: From Nuts to Smooth Butter
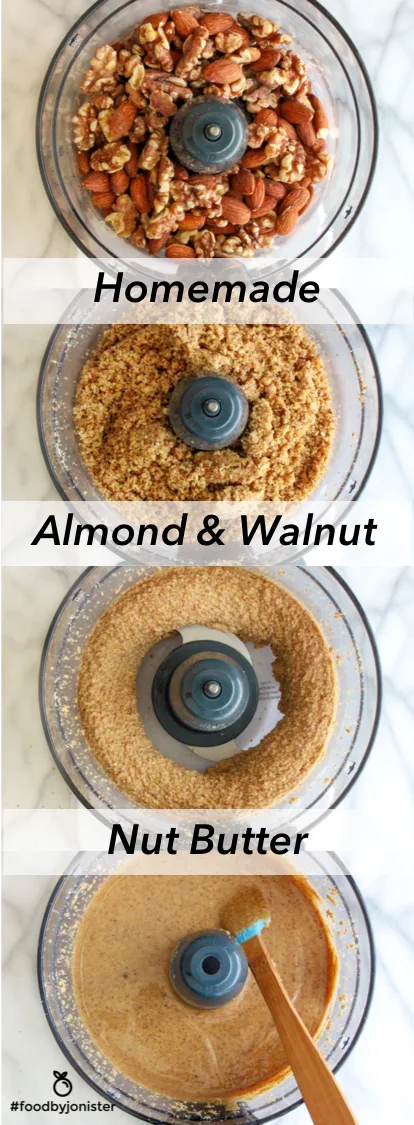
Getting from a bag of whole nuts to creamy, spreadable butter is a process that unfolds over several minutes in your food processor. It's a gradual transformation, and understanding these stages helps you know what to expect. This method is effective for most common nut varieties, though processing times can vary.
Stage 1: Nuts into Crumbles
Once you've added your nuts to the food processor, the first thing you'll notice is that they get broken down into coarse pieces, much like coarse sand or breadcrumbs. This is the initial stage, where the blades are simply shattering the nuts. Keep the processor running.

Stage 2: The Clumpy Paste
As you continue to blend, the texture will start to change. The ground nut pieces will begin to clump together, forming a thick, somewhat sticky paste. At this point, it might look a bit like dough or a very thick batter.
It's crucial to stop the processor every minute or so to scrape down the sides of the bowl with your spatula. This ensures all the nuts are incorporated into the process and prevents the mixture from getting too dense on the bottom.
Stage 3: Achieving Creamy Smoothness
This is where the real transformation happens. The continued action of the blades, combined with the heat generated from friction, starts to break down the fats within the nuts. The paste will become significantly smoother and begin to loosen up.
You'll see it moving more freely within the bowl. This stage requires patience; it can take anywhere from 5 to 20 minutes, depending on the type of nut and the power of your food processor. Cashews, for instance, tend to become smooth more quickly than almonds because they have a higher fat content and a softer texture.
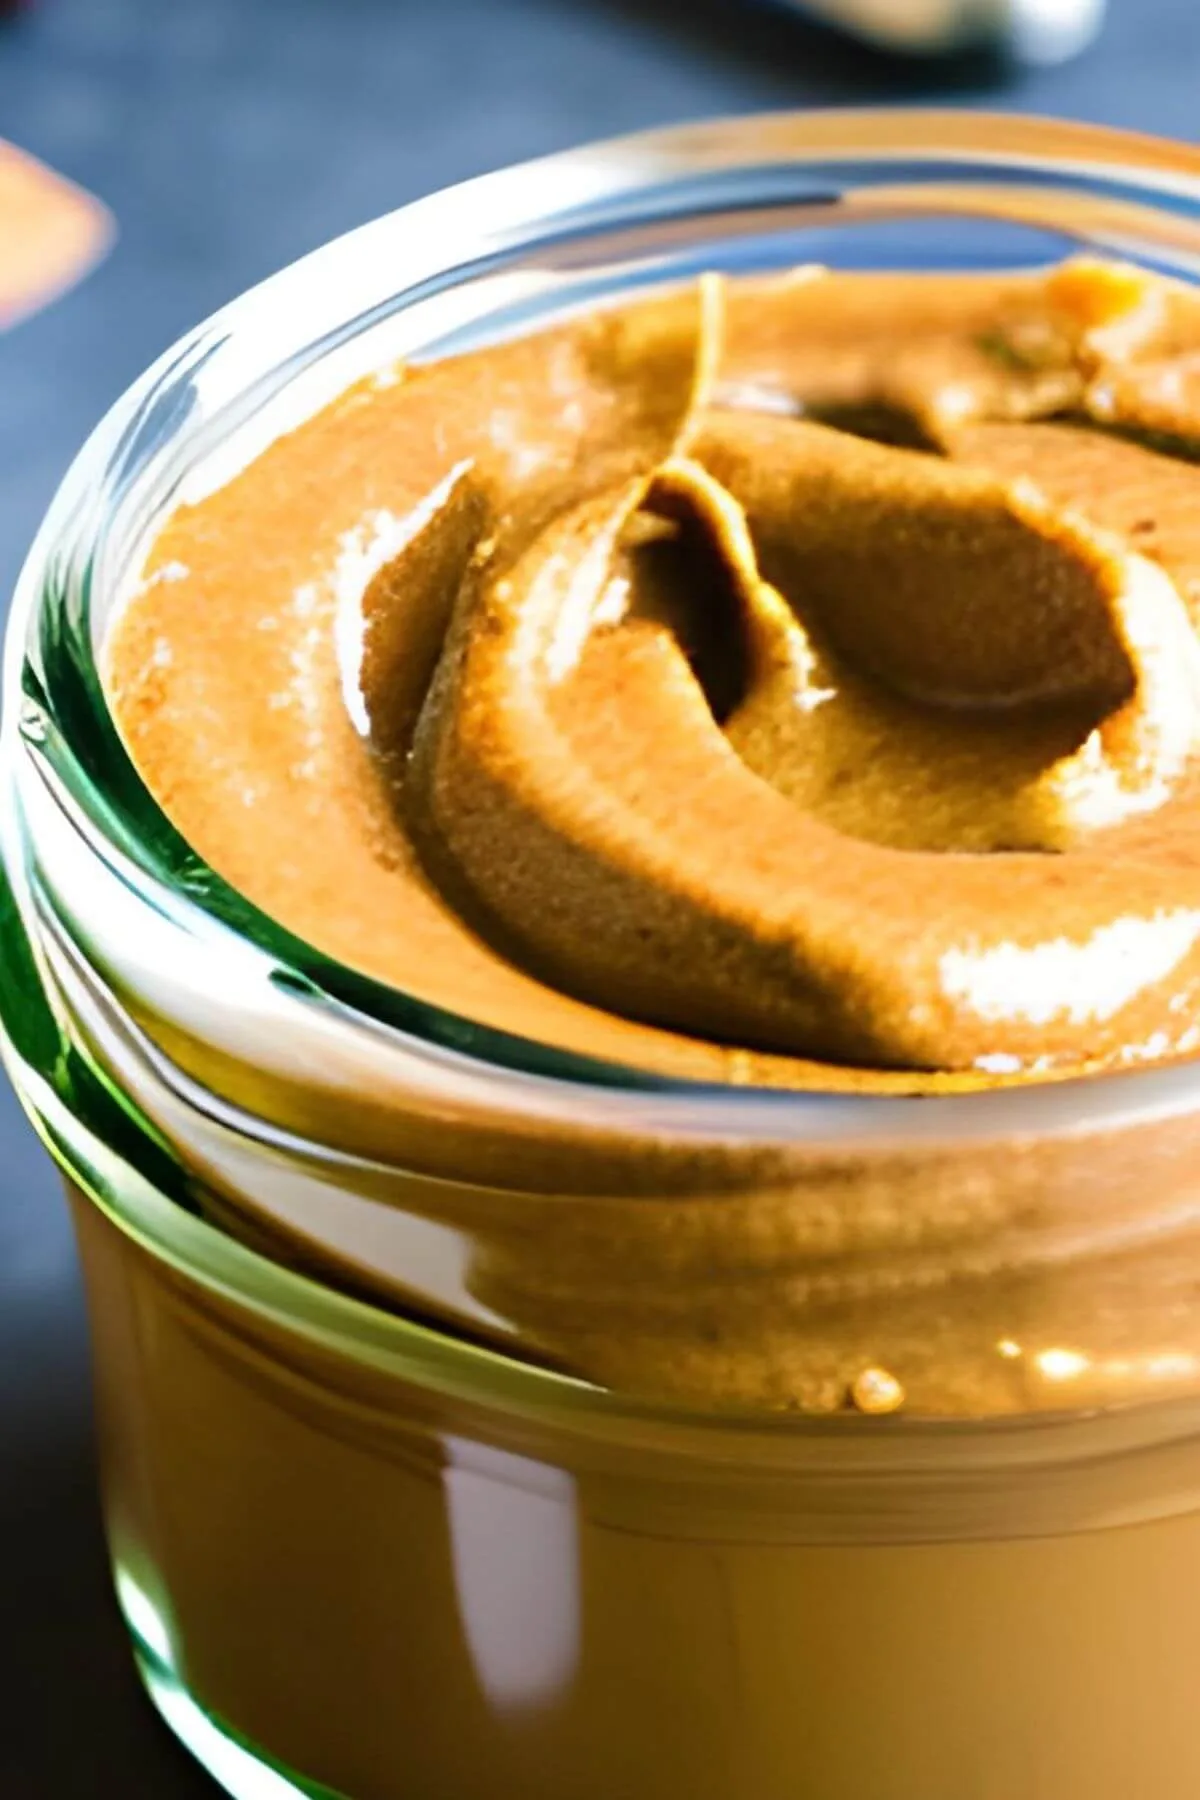
Stage 4: Flavoring and Finishing
Once your nut butter reaches your desired level of smoothness, you can add any optional ingredients. This is the perfect time to stir in a pinch of salt, a touch of your preferred sweetener, or any spices like cinnamon. Blend for another 30 seconds to a minute to ensure these additions are fully incorporated.
The nut butter should now have a pourable, creamy consistency. If you find it's still a little too thick for your liking, a tiny splash, just a teaspoon or so, of a neutral oil like avocado or sunflower oil can help loosen it further.
What to Look For: Visual Cues for Perfect Butter
Understanding the visual transformation is key to mastering homemade nut butter. Without knowing what the different stages look like, it's easy to stop too early or push your machine too hard. Each visual cue tells you your nuts are on the right track.
Identifying the "Right" Texture at Each Stage
The process is a journey through distinct textures. Initially, expect a dry, sandy meal. This is completely normal and indicates the nuts are being broken down efficiently.
As you continue, the food processor will transform this meal into a thick, dough-like ball or paste. It will cling to the sides of the bowl and may appear somewhat lumpy. This is the crucial "paste" phase where the fats are starting to release but haven't fully liquefied.
The ultimate goal is a smooth, pourable consistency. You'll know it's ready when the butter flows off the spatula in a steady stream, much like warm honey. If you're making almond butter, which can be a bit grittier, you might aim for a slightly less uniform smoothness than, say, cashew butter, which often becomes incredibly silky.
Common Hurdles and How to Jump Them
Even with a clear process, things can go sideways. The most frequent issues involve the food processor itself or the nuts not cooperating. Fortunately, most problems have straightforward solutions.
When Your Processor Feels Hot
Food processors work hard to break down nuts, and that friction generates heat. If you notice your machine feels unusually warm to the touch, or if you smell a burning odor, it's a signal to stop. Overheating can damage the motor.
In such cases, turn the machine off and let it rest for at least 10-15 minutes. This allows the motor to cool down before you resume processing.
It's also wise to avoid overfilling the bowl. Processing nuts in batches, if necessary, is better than pushing the machine too hard. A well-maintained food processor, often specified by manufacturers to run for no more than 1-2 minutes continuously before a cool-down period, can last for years with proper care.
When the Butter Just Isn't Smooth Enough
This is a common frustration, and the culprit is usually impatience or insufficient scraping. Nuts contain natural oils, and it takes time for the blades' friction to release those oils and create a smooth emulsion. If your nut butter still looks dry and crumbly after 10 minutes, resist the urge to stop.
Ensure you're regularly stopping the processor to scrape down the sides and bottom of the bowl. All those bits need to get back into the spinning blades. If, after 15-20 minutes of continuous processing (with breaks if your machine requires them) and thorough scraping, it's still not smooth, a very small amount of neutral oil, like avocado or grapeseed oil, can help.
Add only a teaspoon at a time, as too much can make it greasy.
Storing and Enjoying Your Homemade Creation
Once your nut butter reaches that perfect, creamy consistency, it's ready for storage. Transfer it into an airtight container. Glass jars are a popular choice as they are non-reactive and easy to clean.
Many manufacturers, like those producing food-grade glass storage containers, recommend ensuring the lid creates a tight seal to preserve freshness.
Your homemade nut butter will typically last for a few weeks in the refrigerator. It's common for the natural oils to separate and rise to the top over time. Don't be alarmed; this is a natural process.
Simply give it a good stir with a clean spoon or knife before each use to re-emulsify it. This ensures you get the best texture and flavor every time you reach for it.
Frequently Asked Questions About Home Nut Butter
Can I make nut butter without roasting?
Yes, you can definitely make nut butter from raw nuts. However, roasting nuts beforehand usually enhances their flavor and makes the oils release more readily, leading to a smoother butter with less processing time. If you're using raw nuts, be prepared for a potentially longer blending time and a slightly different flavor profile.
How long does homemade nut butter last?
When stored properly in an airtight container in the refrigerator, homemade nut butter typically lasts for about 2 to 3 weeks. The exact shelf life can depend on the freshness of your nuts and any additional ingredients you've added. Always check for any signs of spoilage, such as off smells or mold, before consuming.
What's the best nut for beginners?
Cashews are often recommended for first-time nut butter makers. They have a high fat content and a softer texture compared to almonds or walnuts, which means they tend to become smooth and creamy in the food processor relatively quickly, often within 5-10 minutes. This quicker transformation can be very encouraging for those new to the process.