How To Use A Hitch Cargo Carrier: Easy Loading Tips
A hitch cargo carrier mounts to your receiver hitch and gives you secure extra space for gear.
If you have ever packed for a road trip and still found the trunk too small, you already understand the value of a hitch cargo carrier. Used the right way, a hitch cargo carrier can make travel easier, keep your cabin less crowded, and help you carry bulky items without cramming everything into the back seat. In this guide, I’ll walk you through how to use a hitch cargo carrier safely and confidently, based on practical know-how, common mistakes I’ve seen, and the details that matter most.

What a hitch cargo carrier is and why people use one
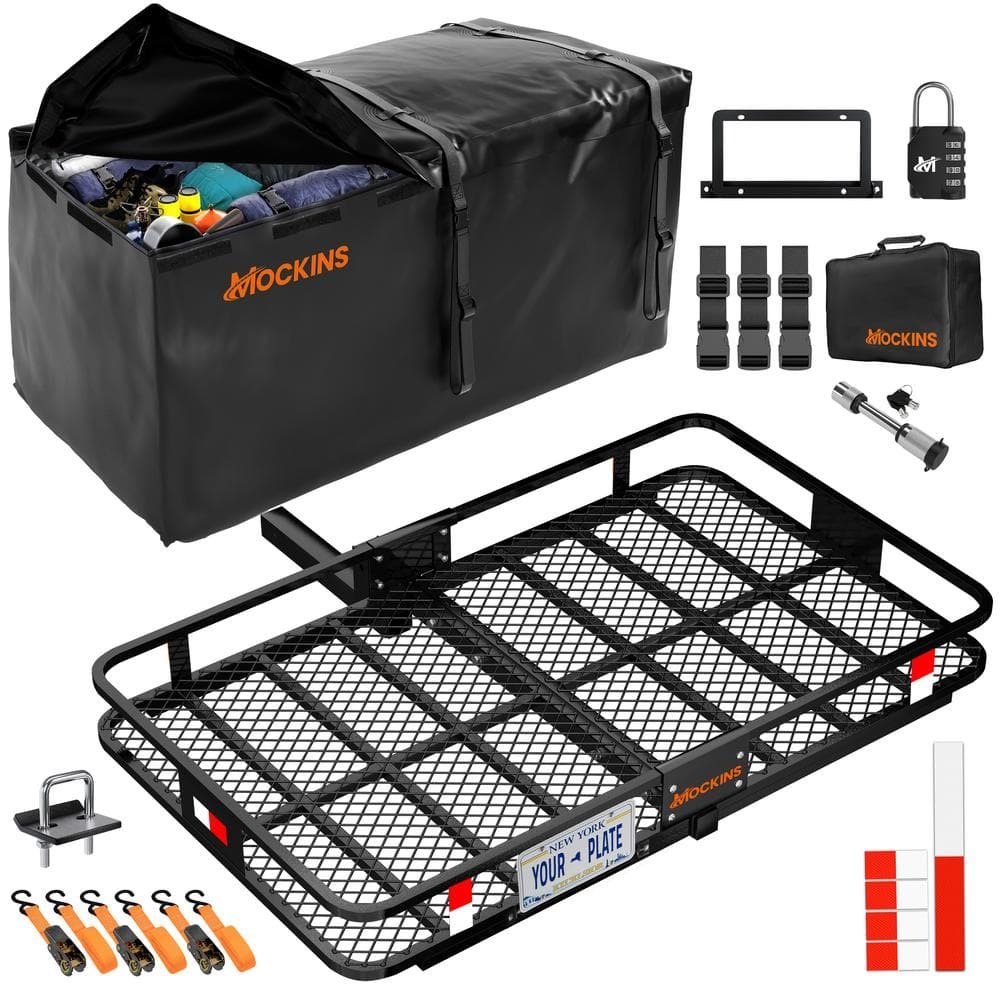
A hitch cargo carrier is an external platform or basket that slides into your vehicle’s receiver hitch. It gives you extra storage space for luggage, coolers, camping gear, tools, and other items that may not fit inside the vehicle. Many drivers use a hitch cargo carrier for vacations, moving days, outdoor trips, and everyday hauling.
The big benefit is simple: it helps you carry more without overloading the cabin. It can also keep dirty, wet, or bulky items outside the vehicle, which makes the ride more comfortable for everyone. From my own experience, it is one of those accessories that feels small until the first time you really need it.
A hitch cargo carrier is not a magic fix, though. It adds weight to the back of your vehicle, changes how you drive, and needs proper loading. That is why learning how to use a hitch cargo carrier the right way matters just as much as buying the right one.
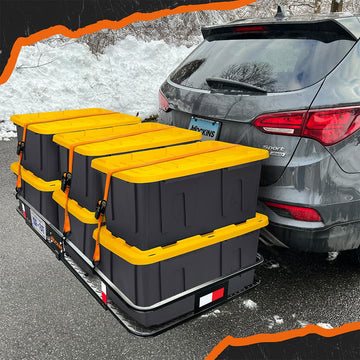
How to use a hitch cargo carrier step by step
Using a hitch cargo carrier is not complicated, but it does require care. Think of it like setting up a roof rack, only lower to the ground and easier to reach. The setup is usually quick, but safe use comes from doing each step the right way.
1. Check your vehicle’s hitch rating
Before anything else, confirm that your receiver hitch can handle the carrier and its load. You need to know both the tongue weight rating and the total towing or hitch capacity listed by your vehicle and hitch maker. Tongue weight is the downward force placed on the hitch, and it matters a lot here.
If your hitch says it can handle 500 pounds of tongue weight, that does not always mean you should load the carrier to the full 500 pounds. The carrier itself has weight, too, and the load must stay within the lowest rating in the system. In my experience, this is the step people skip most often, and it causes the most problems later.
2. Choose the right hitch cargo carrier
Pick a carrier that matches your receiver size, usually 1.25 inch or 2 inch. A 2 inch receiver is common for larger carriers and higher weight limits, while 1.25 inch setups often support less cargo weight. Always compare the carrier’s own weight with its stated cargo limit.
Look for these useful features:
• A folding shank for better ground clearance when not in use
• Raised sides or a basket design to help keep items in place
• A built-in light mount or reflector space for better visibility
• A steel frame with a rust-resistant finish
• Optional cargo bag or net compatibility
A good carrier should feel sturdy, not flimsy. If it flexes too much while empty, it usually will not feel better once loaded.
3. Install the carrier correctly
Slide the carrier’s shank into the receiver hitch and line up the pin holes. Insert the hitch pin and secure it with a clip or lock so the carrier cannot slide out. If your carrier includes a anti-rattle device, install it to reduce wobble and noise.
Make sure the carrier sits level. A slight tilt can happen, but too much angle can affect ground clearance and load balance. I always give it a good shake after installation. If it rattles excessively, I stop and tighten everything before driving.
4. Load the cargo the smart way
Place heavier items close to the vehicle and lighter items toward the outside. This helps reduce leverage and keeps the load more stable. Spread the weight evenly from side to side so the carrier does not pull harder on one part of the hitch.
Here is a simple loading pattern that works well:
• Put the heaviest item at the center and closest to the vehicle
• Stack lighter items around it
• Keep loose objects inside bins or bags
• Avoid piling weight too high
• Secure every item so it cannot shift
One lesson I learned early: cargo that seems stable while parked can move fast once the road gets rough. A few miles of vibration can turn a neat pile into a messy, unsafe load.
5. Secure everything with straps or a cargo net
Do not rely on gravity alone. Use ratchet straps, cam straps, or a cargo net to keep your load in place. Make sure the straps are tight enough to hold the cargo, but not so tight that they crush soft bags or damage gear.
Cross-strap the load when possible, especially for larger items. If you are carrying a cooler, storage tote, or camping box, securing it from multiple angles is usually safer than using one strap. Check that no strap is hanging loose where it could touch the road.
6. Check visibility and lighting
A hitch cargo carrier can block your rear lights, license plate, or backup camera. That is a safety issue, not just a convenience problem. If the cargo covers your plate or lights, use an accessory light kit or a carrier with a light bar.
Before driving, walk around the back of the vehicle and make sure everything is visible enough to meet local road rules. If you use a rear camera, remember that it may not show the full width of the carrier. I always do a slow reverse check in a parking lot before heading out.
7. Drive with the added length in mind
A hitch cargo carrier extends your vehicle’s rear end, so your turning and backing behavior changes. You will also want to leave more room when parking, stopping, or merging. Even a few extra inches can matter in tight spaces.
Drive smoother than usual. Avoid sharp turns, sudden lane changes, and hard braking when possible. A loaded carrier acts a bit like a hanging pendulum, so gentle movement keeps the whole setup more stable.
8. Recheck the load during the trip
If you are driving far, stop after the first 10 to 20 miles and check the straps, pin, and cargo. Vibration can loosen things faster than people expect. After that, recheck at fuel stops or every couple of hours on long drives.
This habit has saved me more than once. A strap that looked fine at home can loosen after the first stretch of highway. Taking five minutes to inspect everything is far better than dealing with a lost bag on the shoulder of the road.
Safety tips for using a hitch cargo carrier
Safety is the heart of how to use a hitch cargo carrier properly. The carrier may look simple, but it changes the way your vehicle handles. A few smart habits can make a big difference.
Keep these safety tips in mind:
• Stay within the hitch and carrier weight limits
• Do not block tail lights, brake lights, or the license plate
• Use reflectors or a light kit if needed
• Avoid stacking cargo so high that it blocks your view
• Secure all loose items before driving
• Check for wobble before every trip
• Reduce speed on rough roads or steep driveways
One more thing: remember ground clearance. A loaded carrier can scrape on dips, steep driveways, and curb edges. I have seen drivers forget this until the carrier bumps hard enough to shift the whole load.
What to put on a hitch cargo carrier
A hitch cargo carrier works best for gear that is bulky, sturdy, and weather-tolerant. It is especially useful when you want to keep the inside of the vehicle clean or open for passengers. The key is to choose items that can be secured well and can handle some road exposure.
Good items for a hitch cargo carrier include:
• Suitcases and duffel bags in weatherproof bags
• Camping gear and folding chairs
• Coolers and food storage bins
• Tool boxes and work equipment
• Sports gear like tents, rods, or helmets
• Firewood in approved, secure containers
Avoid placing fragile, loose, or highly valuable items outside unless they are protected and locked down. Electronics, glass, and important documents are usually better kept inside the vehicle. If the weather is bad, use a heavy-duty cargo bag to shield items from rain, dust, and road spray.
Common mistakes to avoid
A lot of problems with a hitch cargo carrier come from small mistakes. Most are easy to fix once you know what to watch for. The goal is not just to fit more stuff, but to fit it safely.
Common mistakes include:
• Overloading the carrier
• Ignoring tongue weight limits
• Forgetting to secure the load
• Blocking lights or the license plate
• Driving too fast with a heavy load
• Not checking the hitch pin or anti-rattle device
• Leaving the cargo exposed to weather without protection
The biggest mistake is treating the carrier like a dump zone. It is not. It is a load-bearing accessory, and it works best when treated with the same care you would give to any other part of your vehicle setup.
Benefits and limitations of a hitch cargo carrier
A hitch cargo carrier can be a lifesaver, but it is not perfect. Knowing both the upside and the limits helps you use it wisely. That kind of realistic thinking is part of safe travel.
Benefits include:
• More storage without filling the cabin
• Easier access than a roof box for many people
• Good for dirty or wet gear
• Usually simpler to load than rooftop systems
• Often more affordable than other cargo options
Limitations include:
• Reduced rear clearance
• Possible blocking of lights or plate
• Added stress on the hitch
• Reduced fuel economy in some cases
• More exposure to weather and road spray
The best setup depends on your trip. For camping, moving, or home projects, a hitch cargo carrier often makes a lot of sense. For fragile or sealed luggage, an enclosed cargo box may be better.
Best practices for different types of trips
The way you use a hitch cargo carrier should match the trip. A weekend camping run is not the same as a long family road trip. Small changes in packing can improve safety and comfort.
For road trips:
• Use soft bags or bins to fit space better
• Keep snacks, documents, and valuables inside the vehicle
• Check the carrier every fuel stop
• Use a cargo cover for rain protection
For camping:
• Place heavy coolers low and close to the vehicle
• Keep tent poles and chairs strapped together
• Protect sleeping bags and fabric from moisture
• Use bungee cords only as a backup, not the main hold
For moving or hauling work items:
• Group similar items in boxes
• Label boxes for easy access
• Keep tools from shifting by using tie-down points
• Cover sharp edges to avoid tearing bags or seats
Frequently Asked Questions
How much weight can a hitch cargo carrier hold?
The exact limit depends on your hitch rating, carrier rating, and vehicle rating. You should always use the lowest rated number in the setup, not the highest.
Do I need a cargo bag for a hitch cargo carrier?
A cargo bag is not required, but it helps protect items from rain, dust, and road grime. It is especially useful if you are carrying soft luggage or anything that should stay dry.
Can I use a hitch cargo carrier in the rain?
Yes, but you should protect your cargo with a waterproof or weather-resistant cover. Water can seep into bags, boxes, and seams during long drives or heavy rain.
Will a hitch cargo carrier hurt gas mileage?
It can lower fuel economy because it adds weight and increases wind drag. The effect is usually more noticeable at highway speed and with large, bulky cargo.
Can I back up with a hitch cargo carrier installed?
Yes, but be careful, especially if the carrier is loaded. The added length can make backing harder, so use slow movements and check your surroundings closely.
Conclusion
Using a hitch cargo carrier the right way comes down to a few simple habits: know your weight limits, load the cargo evenly, secure everything tightly, and drive with extra care. When you treat the carrier as part of your vehicle system, it becomes a reliable tool instead of a risky afterthought. That is the real secret to getting the most out of a hitch cargo carrier.
If you are planning a trip or need more space for gear, take a few minutes to set up your hitch cargo carrier properly and inspect it before every drive. Small steps now can save you stress, damage, and unsafe road moments later. If this guide helped, explore more vehicle cargo tips and leave a comment with your own setup experience.