How to Clean a Single Serve Coffee Maker
Is your morning brew tasting a little off, or is your single-serve coffee maker just not performing like it used to? Knowing how to clean a single serve coffee maker is key to both better-tasting coffee and a longer-lasting machine. Mineral buildup and coffee oil residue are common culprits that can affect flavour and function if left unchecked.
Over time, these internal deposits can clog vital components, leading to slower brewing cycles and even eventual breakdowns. Manufacturer specifications often recommend a descaling every 3 to 6 months, depending on your water hardness, to prevent these issues and ensure optimal performance. Let's break down how to tackle this essential maintenance.
Quick Answer
To clean a single-serve coffee maker, run a descaling cycle with a dedicated solution or vinegar. Rinse thoroughly, then clean removable parts like the drip tray and pod holder. Regular cleaning prevents mineral buildup and ensures fresh-tasting coffee.
Signs It's Time to Clean Your Single-Serve Brewer
You might not think much about it, but your single-serve coffee maker is working hard every day. Over time, that daily work leads to internal buildup that can affect both taste and performance.
Mineral Buildup and Stale Taste
This is probably the most common indicator. If your coffee suddenly starts tasting dull, a bit chalky, or just "off," mineral deposits, often called limescale, are the likely cause. These deposits come from the water you use and can coat the internal heating elements and water lines.
They don't just affect taste; they can also make your machine work harder to heat water, slowing down brew times.
Slow Brewing and Leaks
When mineral deposits build up, they can restrict water flow. You might notice your coffee brewing much slower than usual, or perhaps the water isn't dispensing with the same force. Sometimes, this blockage can even cause water to back up and leak from unexpected places, like the base of the machine.
If your brewer is sputtering, taking too long, or leaking, it’s a strong signal that an internal cleaning is long overdue.
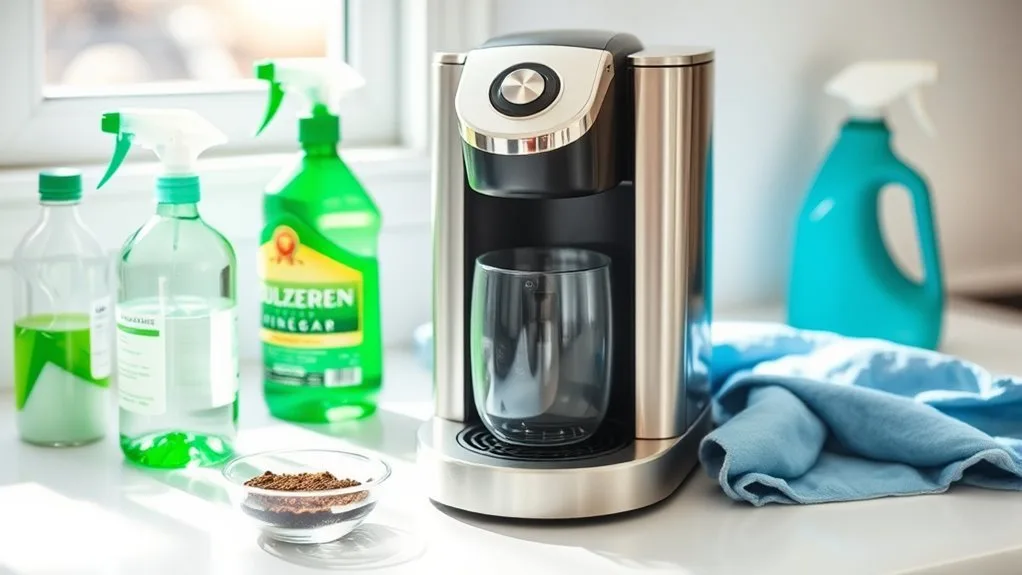
Image source: Bing (Web (fair-use with source credit))
Your Step-by-Step Cleaning Workflow
Tackling the cleaning of your single-serve coffee maker doesn't have to be a chore. By following a simple workflow, you can ensure your machine stays in great shape and keeps brewing delicious coffee. This process is designed to be straightforward, whether you use a dedicated descaling solution or a common household item.
Step 1: Gather Your Cleaning Supplies
Before you start, make sure you have everything you need. This saves you from stopping halfway through the process to hunt for an item. You’ll need your chosen cleaning agent, a clean cloth, and possibly a small brush for stubborn spots.
Descaling Solution vs. Vinegar
You have a couple of main options for cleaning agents. The most effective is a commercially produced descaling solution specifically made for coffee makers. These are formulated to break down mineral deposits without damaging machine components.
Alternatively, common white vinegar can be used. While effective, its strong smell can linger, and some manufacturers advise against it as it might degrade certain rubber or plastic parts over time. Always check your machine’s manual if you’re unsure.

Image source: Bing (Web (fair-use with source credit))
Step 2: Prep Your Machine
Preparation is key to a smooth cleaning process. This involves emptying and preparing the parts of your machine that hold water and coffee.
Emptying the Reservoir and Drip Tray
First, unplug your coffee maker. Remove the water reservoir and empty any leftover water. Give it a quick rinse if you can.
Next, remove the drip tray, which is usually located at the base of the machine. This tray often collects spills and grounds, so it’s a prime spot for grime and should be washed thoroughly.
Step 3: Run a Cleaning Cycle (Descaling)
This is the core of the cleaning process where the descaling agent works its magic inside your machine. The exact method will vary slightly depending on your machine’s specific features.
Using Commercial Descaling Solutions
If you're using a commercial descaling solution, follow the instructions on the product packaging precisely. Typically, you'll mix the solution with a specific amount of water in the reservoir. Then, you’ll place a mug or container under the brew head and run a brew cycle, or a dedicated cleaning cycle if your machine has one.
Discard the hot liquid and rinse the reservoir before repeating the process a second time, usually with plain water, to ensure all the descaling solution is flushed out.
Using a Vinegar Solution
If you opt for vinegar, mix equal parts white vinegar and water. Fill the water reservoir with this solution. Place a mug under the brew head.
Run a full brew cycle, discarding the vinegar-water mixture. You’ll likely need to run multiple plain water cycles (at least two to three) afterward to completely flush out the vinegar smell and taste.
Step 4: Rinse and Flush
This step is crucial, no matter which cleaning agent you used. After the descaling or vinegar cycle(s), fill the reservoir with fresh, clean water. Run several full brew cycles using only water.
This ensures any residual cleaning solution or vinegar is completely flushed from the internal components and the coffee you brew next tastes like coffee, not a cleaning product.
Step 5: Clean Removable Parts
While the machine is running its rinse cycles, take this opportunity to thoroughly clean any removable parts. These often harbor coffee grounds and residue that a simple rinse cycle won't reach.
Pod Holder and Drip Tray
The pod holder assembly, where you insert your coffee pod, can get quite grimy. Coffee oils and moisture can get trapped in its nooks and crannies. If you only run cleaning cycles through the brew head, you’re missing a major source of potential contamination and off-flavors.
Make sure to remove and thoroughly wash this part with soap and water during your regular cleaning routine. Similarly, wash the drip tray with soap and water. Make sure both parts are completely dry before reassembling your coffee maker.

Image source: Bing (Web (fair-use with source credit))
Common Single-Serve Coffee Maker Cleaning Mistakes
Even with the best intentions, it's easy to miss a step or use the wrong method when cleaning your single-serve coffee maker. Avoiding these common blunders will help ensure you get the best results and don't accidentally damage your appliance.
Using Hot Water Only
Many people think a quick rinse with hot water is enough. While hot water can remove some loose coffee grounds, it’s not effective at tackling the mineral scale (limescale) that builds up from tap water or the oily residue from coffee beans. Descaling solutions or vinegar are necessary to break down these tougher deposits.
Relying only on hot water means the internal components continue to accumulate grime, impacting taste and performance over time.
Forgetting the Pod Holder
The pod holder assembly can become a breeding ground for mold and bacteria if not cleaned regularly. Coffee oils and moisture can get trapped in its nooks and crannies. If you only run cleaning cycles through the brew head, you’re missing a major source of potential contamination and off-flavors.
Make sure to remove and thoroughly wash this part with soap and water during your regular cleaning routine.
Not Rinsing Thoroughly
After using a descaling solution or vinegar, it's vital to run multiple plain water cycles. If you don't rinse sufficiently, your next few cups of coffee might have a chemical or vinegary taste. This is especially true with vinegar, which has a strong odor and flavour that can linger.
Running at least two to three full water cycles is generally recommended to ensure all cleaning agents are completely flushed out.
Ignoring Mineral Buildup
Mineral buildup, or limescale, is inevitable if you have hard water. It’s not just unsightly; it actually insulates the heating element, making your machine less efficient and potentially causing it to overheat or fail prematurely. If you notice slow brewing, inconsistent water temperature, or a gritty texture in your coffee, it’s a clear sign you need to descale, not just do a quick clean.
Regular descaling, typically every 1-3 months depending on water hardness, is essential for machine longevity.
How Often Should You Really Clean It?
Figuring out a cleaning schedule for your single-serve coffee maker can feel a bit fuzzy. It’s not as simple as "clean it once a month." The frequency really depends on how much you use it and, crucially, the type of water you’re using.
General Cleaning Schedule
For most home users, a general cleaning that involves running a descaling solution or vinegar through the machine, plus washing removable parts, should happen every 1 to 3 months. If you’re a heavy user, making multiple cups a day, aim for the shorter end of that range, closer to every month. If you only use it occasionally, every three months might suffice.
It's also a good idea to give the exterior and drip tray a quick wipe-down weekly or whenever you notice visible spills.
When to Descale
Descaling is the process specifically targeting mineral buildup. You should descale your machine whenever you notice signs of limescale: slower brewing times, inconsistent water temperature, unusual noises, or if your coffee starts tasting off. If you have very hard water, you might need to descale more frequently, perhaps as often as every 30-60 days.
If you have soft water, every 6 months might be enough. Many machines have a built-in indicator light that alerts you when descaling is recommended.
Keeping Your Brewer in Top Shape: Long-Term Maintenance
Beyond the routine cleaning and descaling, a few simple habits can significantly extend the life of your single-serve coffee maker and ensure it always brews the best cup possible. Think of this as preventative care that saves you hassle and money down the road.
One key aspect is using filtered water. While it might seem like an extra step, using filtered water in your reservoir can drastically reduce the rate of mineral buildup. This means you'll need to descale less frequently, and your coffee will consistently taste better because there are fewer impurities in the water.
If you’re concerned about water hardness in your area, you can often find this information from your local water utility.
Another practice is to leave the brew head slightly open or the lid ajar after use. This allows any residual moisture inside the machine to evaporate, preventing that damp environment where mold and bacteria love to grow. It’s a small step, but it helps keep the internal components drier and cleaner between uses.
Finally, always make sure to run a plain water cycle after brewing if you're making a different type of beverage or if the machine is going to sit unused for a while. This simple flush helps clear out any remaining coffee oils or flavour particles that could turn rancid or affect the taste of your next brew. It's like giving your machine a quick internal rinse after each use, keeping it fresh and ready for your next coffee fix.
Frequently Asked Questions About Single-Serve Coffee Maker Cleaning
How do I know if my machine needs descaling?
You’ll typically notice a slowdown in brewing speed, inconsistent water temperature, or your coffee might start tasting slightly bitter or metallic. Some machines also have a dedicated indicator light that illuminates when descaling is recommended.
Can I use bleach to clean my coffee maker?
No, you should never use bleach to clean your coffee maker. Bleach is a harsh chemical that can damage the internal components of the machine and leave behind harmful residues that can leach into your coffee. Stick to designated descaling solutions or vinegar.
What if my machine doesn't have a cleaning cycle?
If your machine lacks a specific cleaning cycle button, you can still perform the descaling process manually. Just follow the steps for running a descaling solution or vinegar through the machine, using the normal brew function and discarding the dispensed liquid. You'll need to run multiple plain water cycles afterward to rinse.
Is vinegar bad for my coffee maker?
While white vinegar is an effective descaler, some manufacturers advise against its frequent use. The acidity can potentially degrade certain rubber seals or plastic parts within the coffee maker over time. If your manual specifically warns against vinegar, it's best to use a commercial descaling solution designed for coffee machines.
How to clean a specific brand (e.g., Keurig, Nespresso)?
While the general principles are the same, specific brands may have unique cleaning modes or recommended procedures. Always consult your machine's user manual for brand-specific instructions. For example, Keurig machines often have a descaling mode, and Nespresso recommends specific descaling kits for their brewers.