How to Remove Stains From Kitchen Utensils
It’s frustrating when your favorite cooking pans, spatulas, or cutting boards get those stubborn stains that just won't budge. Learning how to remove stains from kitchen utensils effectively means keeping your tools looking great and functioning properly for longer. These marks aren't just unsightly; some can actually impact how your kitchenware performs or even pose hygiene concerns.
Our research confirms that the key to success lies in understanding both the stain type and the utensil's material. For instance, a burnt-on sugar residue on stainless steel requires a different approach than tarnish on silver. According to industry standards for cookware durability, improper cleaning methods can lead to material degradation, reducing the lifespan of your kitchen essentials.
Quick Answer
Effectively remove kitchen utensil stains by identifying the material and stain type, then applying a targeted cleaning method. Stainless steel often benefits from baking soda paste, while cast iron needs specialized seasoning or rust removal. Wood requires gentle, natural agents and prompt drying.
Avoid harsh abrasives on non-stick surfaces. Always rinse thoroughly and dry immediately to prevent recurrence.
What's Making Your Utensils Look Less Than Their Best?
Kitchen utensils, the unsung heroes of our culinary adventures, often bear the brunt of our cooking habits. From searing steaks to simmering sauces, they face intense heat, acidic ingredients, and sticky residues. Over time, this constant exposure can lead to a variety of stains, discolorations, and build-up that detract from their appearance and, in some cases, their performance.
Understanding the root cause of these marks is the first step toward restoring your kitchenware to its former glory.
The specific culprits behind stained utensils vary widely. Common offenders include burnt-on food particles, often from high-heat cooking or caramelization, that fuse to the surface. Grease and oil can leave greasy films or yellowing, particularly on porous materials.
Hard water deposits can create chalky white rings or spots, especially in areas with high mineral content. Discoloration from acidic foods like tomato sauce, berries, or wine is also frequent. Rust can appear on iron or steel items, particularly if they're left wet.
Your Utensil Material & Stain Type: The First Clues
This is where we really get down to business. The exact method you use to get rid of a stain depends almost entirely on what the utensil is made of and what kind of mark you're dealing with. Trying to scrub a tough, burnt-on stain off a non-stick pan with steel wool, for example, is a recipe for disaster.
You’ll ruin the coating and make the problem worse in the long run.
Let's break down the most common materials and the typical stains they face:
Stainless Steel Stains & How to Tackle Them
Stainless steel is a workhorse in the kitchen, known for its durability and resistance to rust. However, it's not immune to stains. The most common issues you'll see are heat tint (a rainbow-like discoloration, especially on the bottom of pots), mineral deposits from hard water, and sometimes burnt-on food that's really bonded itself to the surface.
- Heat Tint: This can often be removed with a paste of baking soda and water. Apply it to the discolored area, let it sit for about 30 minutes, then scrub gently with a non-abrasive sponge or cloth. A mild acid like white vinegar or lemon juice can also help break this down.
- Mineral Deposits (Hard Water Stains): White, chalky residue usually means mineral build-up. Soaking the item in a solution of equal parts white vinegar and water for an hour or two can dissolve these deposits. Afterward, scrub gently and rinse well.
- Burnt-On Food: For tougher, cooked-on messes, try boiling water with a tablespoon or two of baking soda in the pot or pan for about 15-30 minutes. This can loosen the residue significantly. Afterward, let it cool slightly, then use a non-abrasive scrubber. For very stubborn spots, a specialized stainless steel cleaner might be necessary, but always follow manufacturer guidelines.
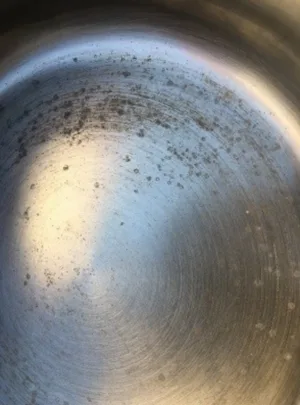
Image source: Bing (Web (fair-use with source credit))
Pro Tip: Always scrub in the direction of the metal's grain, if visible, to avoid creating micro-scratches that can dull the finish over time.
Cast Iron Concerns: From Rust to Burnt-On Messes
Cast iron cookware is beloved for its heat retention and ability to develop a natural non-stick surface through seasoning. However, it's also prone to rust if not cared for properly, and burnt-on food can be a real challenge.
- Rust: The good news is that rust on cast iron is usually fixable. For light rust, scrub with steel wool or a stiff brush. If it's heavier, you might need to use a 50/50 mix of white vinegar and water to soak the affected area for an hour, then scrub. After removing rust, it's crucial to immediately re-season the pan. Wash it with soap and water (yes, soap is okay here after de-rusting), dry it thoroughly, and apply a thin layer of cooking oil (like vegetable or flaxseed oil) to the entire surface, inside and out. Bake it upside down in a hot oven (around 450°F or 230°C) for an hour, then let it cool completely. Repeat this seasoning process 2-3 times for best results.
- Burnt-On Food: Avoid soaking cast iron for extended periods, as this encourages rust. Instead, try scraping off as much as you can with a stiff nylon brush or a specialized cast iron scraper. You can also simmer water in the pan on the stovetop for a few minutes to loosen the food. For really tough spots, some people use coarse salt as a mild abrasive with a little oil, scrubbing it in with a paper towel. Never use harsh detergents or abrasive pads meant for other materials, as they can strip away the hard-earned seasoning.
Wood and Bamboo: Special Care for Natural Materials
Wooden spoons, cutting boards, and bamboo utensils are beautiful and gentle on your cookware, but they can absorb odors and stains easily. Their porous nature means they require a different approach than metal or plastic.
- General Cleaning: For everyday use, a good scrub with warm, soapy water and a sponge is usually sufficient. Always rinse thoroughly and, most importantly, dry them immediately and completely. Letting wood or bamboo air dry can lead to warping, cracking, or mildew growth.
- Stain Removal: For tough stains like tomato sauce or berries on cutting boards, try making a paste of baking soda and water. Rub it into the stain with a soft cloth or sponge, let it sit for 10-15 minutes, then rinse and dry thoroughly. Lemon juice can also be effective on some stains; rub a cut lemon half over the stained area, let it sit, then rinse and dry.
- Deodorizing: If wooden utensils have absorbed odors, sprinkle them generously with baking soda, let it sit for 10-15 minutes, then brush it off and wash as usual.
Important: Never put wooden or bamboo utensils in the dishwasher. The high heat and prolonged moisture exposure will damage them beyond repair.
Non-Stick Coatings: Preserving the Surface While Cleaning
Non-stick surfaces are designed for easy food release and minimal oil usage, but they are also the most delicate. Aggressive cleaning can scratch or chip away at the coating, rendering it useless and potentially releasing harmful chemicals.
- Gentle Cleaning: For everyday messes, warm water, mild dish soap, and a soft sponge or cloth are your best friends. Wash gently after each use.
- Stubborn Residue: If food is stuck, avoid scraping with metal utensils or abrasive scrubbers. Instead, try soaking the pan in warm, soapy water for about 30 minutes to an hour. You can also simmer a few inches of water with a tablespoon of baking soda in the pan on low heat for 10-20 minutes. After soaking or simmering, gently try to lift the residue with a nylon scraper or a soft sponge.
- What to Avoid: Never use steel wool, abrasive scouring pads, or harsh chemical cleaners on non-stick surfaces. These will permanently damage the coating. Also, avoid extreme temperature changes; don't plunge a hot non-stick pan into cold water, as this can cause warping and damage the coating.
Silverware and Other Metals: Dealing with Tarnish and Discoloration
Silverware and other metal utensils (like copper or brass) often suffer from tarnish, which is a chemical reaction that causes a dull, dark coating to form on the surface. This is particularly common with sterling silver.
- The Baking Soda Method: A popular and effective method uses baking soda. Line a shallow dish with aluminum foil, place your tarnished silver on the foil, and sprinkle generously with baking soda. Then, pour boiling water over it until the items are submerged. You should see the tarnish disappear as the chemical reaction occurs. Let it sit for a few minutes, then carefully remove the items (they'll be hot!), rinse them in cool water, and dry thoroughly with a soft cloth. This method works because the aluminum reacts with the sulfur compounds causing the tarnish, transferring the sulfur to the aluminum rather than the silver.
- Commercial Silver Polish: There are many commercial silver polishes available that can also be very effective. Follow the product instructions carefully, as some are more abrasive than others. Always test a small, inconspicuous area first.
- Gentle Rubbing: For light tarnish, sometimes a gentle rub with a soft cloth or a bit of toothpaste (non-gel type) can help.
Note: For fine antique silver or items with intricate details or gemstones, it's often best to consult a professional jeweler or silversmith.
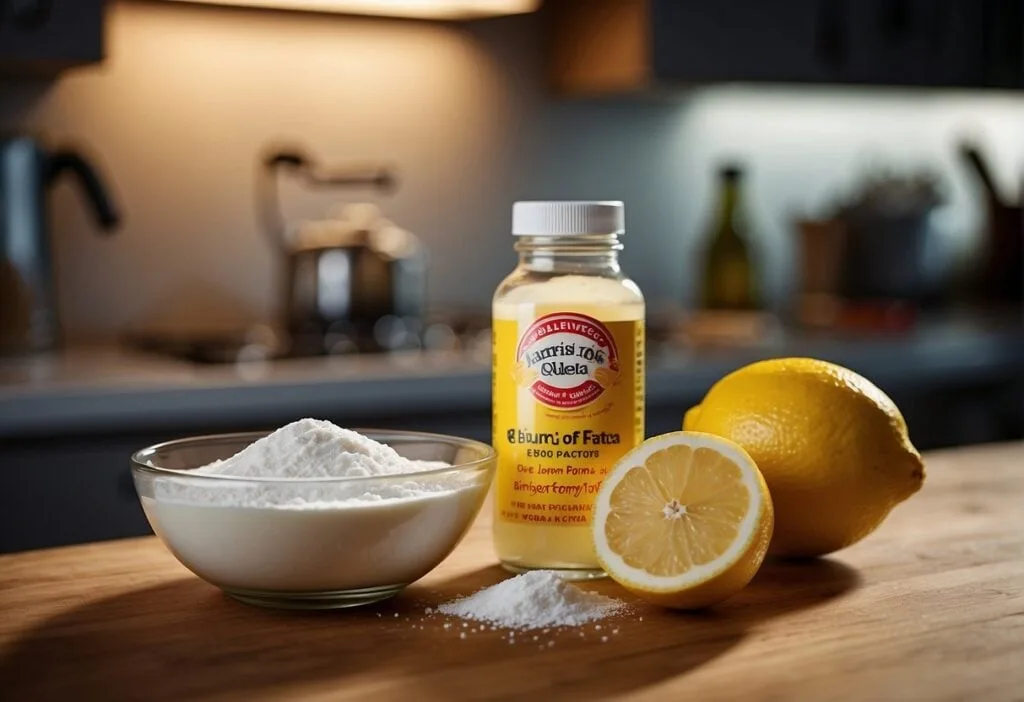
Image source: Bing (Web (fair-use with source credit))
Natural vs. Commercial Cleaners: What's Your Best Bet?
When faced with a stubborn stain on your kitchen utensils, you've got two main paths: the DIY route with natural ingredients or opting for a store-bought commercial cleaner. Both have their place, and the "best" choice really depends on the stain, the utensil material, and your personal preference for ingredients and convenience.
Our research indicates that many common stains can be effectively tackled with household staples. Baking soda, vinegar, lemon juice, and salt are fantastic all-rounders. They're generally food-safe, inexpensive, and readily available.
Baking soda, for instance, is a mild alkali that's great for cutting grease and deodorizing. Vinegar and lemon juice are mild acids that can break down mineral deposits and some food stains. Salt acts as a gentle abrasive.
However, commercial cleaners can offer more targeted power for specific, difficult stains. For example, specialized rust removers for cast iron or heavy-duty oven cleaners (used with extreme caution and only on appropriate materials) might be necessary when natural methods fall short. It's crucial to read labels carefully for both types of cleaners.
- Natural Cleaners:
- Pros: Inexpensive, readily available, generally food-safe, environmentally friendly, less harsh on materials when used correctly.
- Cons: May require more elbow grease or longer soaking times, might not be effective on extremely tough or old stains, can still damage delicate surfaces if misused (e.g., vinegar on marble).
- Commercial Cleaners:
- Pros: Often more potent for specific tough stains, can be quicker to act, convenient to purchase.
- Cons: Can be more expensive, may contain harsh chemicals that require careful handling and ventilation, risk of damaging utensil materials if not used as directed, potential for chemical residue if not rinsed properly.
When to Choose Natural: For everyday cleaning, light stains, and when you want to avoid chemicals, natural options are usually the way to go. They're perfect for maintaining the integrity of non-stick coatings and wood.
When to Consider Commercial: If you're dealing with significant rust on cast iron, very old burnt-on messes, or specific metallic tarnishes that natural methods haven't touched, a targeted commercial product might be worth exploring. Always prioritize food-safe products for anything that comes into contact with food.
Step-by-Step: Your Stain Removal Workflow
Getting rid of stains effectively is less about magic and more about a logical process. Following these steps will help you tackle most common utensil stains systematically, ensuring you get the best results without damaging your kitchenware.
Prepping Your Workspace and Utensils
Before you even grab a cleaning agent, take a moment to prepare. Clear your sink area or kitchen counter; you'll want enough space to work. Gather all the necessary supplies: your chosen cleaning agent, a soft sponge, a non-abrasive scrub brush, cloths, and gloves if you're using stronger cleaners.
If the item has a lot of loose debris or burnt bits, you might want to give it a quick initial scrape or rinse to remove the bulk of it.
Applying the Right Cleaning Method
This is where you select your weapon based on the material and stain.
- For Stainless Steel: Make a paste of baking soda and water. Apply it to the stained area and let it sit for 15-30 minutes. For tougher stains, try boiling water with a tablespoon of baking soda in the utensil for 15-30 minutes.
- For Cast Iron: If rusty, use steel wool or a vinegar soak (50/50 vinegar-water) for an hour, then scrub. If burnt-on food, gently scrape, simmer with water, or use coarse salt as an abrasive. Always follow up with re-seasoning.
- For Wood/Bamboo: Use a baking soda paste or rub with a lemon half for stains. Avoid prolonged soaking.
- For Non-Stick: Soak in warm, soapy water or simmer with water and baking soda. Use only soft sponges or cloths.
- For Silver/Metal: Use the aluminum foil and baking soda method with boiling water, or a commercial silver polish.
Rinsing, Drying, and Finishing Touches
Once you've scrubbed and rinsed away the stain and the cleaning agent, the job isn't quite done. Thorough drying is critical, especially for metal and wood items, to prevent new stains (like rust or water spots) from forming.
- Rinse: Make sure all traces of the cleaning agent are completely washed away. For stainless steel and non-stick, a quick rinse under running water is usually enough. For cast iron after de-rusting, rinse thoroughly to remove all vinegar residue.
- Dry: This is a non-negotiable step. Use a clean, dry towel to thoroughly dry every part of the utensil. For cast iron, it's often recommended to place it on a low heat on the stovetop for a few minutes after towel-drying to ensure it's bone dry.
- Finishing Touches: For cast iron, apply a light coat of cooking oil and buff it in after drying. For silver, a quick polish with a soft cloth can restore shine.
Common Mistakes That Can Ruin Your Kitchenware
Even with the best intentions, it's easy to make a mistake that can damage your valuable kitchen utensils. Knowing these common pitfalls can save you from unnecessary wear and tear, or worse, irreparable damage.
- Using the Wrong Abrasive: This is a big one, especially for non-stick coatings and polished stainless steel. Steel wool, abrasive scouring pads, or even stiff metal brushes can easily scratch delicate surfaces. Always opt for soft sponges, nylon brushes, or microfiber cloths unless the material (like cast iron) can handle more aggressive cleaning.
- Soaking Certain Materials for Too Long: While soaking can be effective for some tough grime, it's detrimental to cast iron (promotes rust) and can warp or damage wooden utensils over time. Always check the material's recommended care.
- Dishwasher Misuse: Many kitchen utensils, especially those made of wood, bamboo, cast iron, or those with delicate non-stick coatings, are not dishwasher safe. The high heat and harsh detergents can strip finishes, warp materials, and lead to premature wear. Always check manufacturer instructions.
- Ignoring Manufacturer Instructions: This might seem obvious, but many of us toss care tags or forget what the manual said. Manufacturer specifications often provide the most accurate guidance for maintaining specific materials and finishes. As of 2026, most reputable cookware brands still provide detailed care guides on their websites.
- Using Harsh Chemicals Unnecessarily: While some tough stains might call for stronger cleaners, reaching for them first can damage materials or leave residues that could affect food flavor or safety. Always try milder methods first.
Expert Tips for Keeping Utensils Stain-Free for Longer
Preventing stains is always easier than removing them. By adopting a few good habits, you can significantly reduce the frequency and severity of stains on your kitchen utensils, keeping them in top shape for years to come.
- Clean Immediately After Use: The longer food residue sits on a utensil, the more likely it is to harden, burn on, or stain. Whenever possible, wash your utensils shortly after you've finished cooking or serving.
- Dry Thoroughly: As mentioned repeatedly, this is critical. Moisture is the enemy of many kitchen materials, leading to rust, water spots, and potential mildew on wood. Make it a habit to dry everything completely before putting it away.
- Season Cast Iron Regularly: For cast iron enthusiasts, consistent seasoning is key. A light re-seasoning after cleaning and thorough drying, or a more robust full seasoning every few months, will build up that protective layer and prevent rust and sticking.
- Avoid Overheating Non-Stick Cookware: High heat can degrade non-stick coatings over time, making them more susceptible to staining and less effective. Use medium heat for most cooking tasks with non-stick pans.
- Use the Right Utensil for the Job: For example, avoid using metal utensils on non-stick surfaces, and don't use sharp knives to cut directly on wooden or plastic cutting boards if you want to preserve their finish. This aligns with general kitchen tool maintenance principles.
- Consider Material-Specific Care: Understand the unique needs of different materials. For example, while stainless steel can handle a good scrub, wooden spoons need gentle washing and immediate drying. For those looking into advanced cooking appliances, understanding upkeep is also vital, much like how to maintain a rice cooker.
Frequently Asked Questions About Utensil Stains
How long should I soak a stained utensil?
Soaking times vary greatly by material and stain. For non-stick or stainless steel, 30 minutes to an hour in warm, soapy water is often enough. For tough baked-on food, simmering with water and baking soda for 15-30 minutes is more effective.
Never soak cast iron for extended periods, and limit soaking for wooden items to 10-15 minutes maximum.
Can I use bleach to remove stains?
It's generally not recommended to use bleach on kitchen utensils, especially those that come into contact with food. Bleach can be harsh, potentially damage materials, and leave behind fumes or residues that can affect the taste of food or pose health risks. Mild, food-safe cleaners are always preferred.
What's the best way to remove rainbow stains from stainless steel pots?
These are typically heat tints, caused by oxidation at high temperatures. You can usually remove them by making a paste of baking soda and water, applying it to the discolored area, letting it sit for about 30 minutes, then scrubbing gently with a non-abrasive sponge. A mild acid like white vinegar can also help break down this discoloration.
Are there specific cleaners for burnt-on food?
Yes, there are commercial cleaners formulated for burnt-on food, but use them with extreme caution and strictly according to the product's instructions, especially regarding material compatibility. For most home kitchens, a combination of boiling water with baking soda, gentle simmering, and a non-abrasive scrub will suffice for most burnt-on messes without risking damage to the utensil.