How to Reheat Food in a Microwave

Image source: Bing (Web (fair-use with source credit))
Reheating Food in the Microwave: Your Smart Guide
Figuring out how to reheat food in a microwave can feel like a puzzle, but it doesn't have to be a frustrating one. We've all experienced the disappointment of dry edges and a cold center. Getting your leftovers just right, whether it's soup or a hearty casserole, often comes down to a few smart choices.
The good news is that with a little know-how, you can achieve consistent, satisfying results every time. Understanding how microwave ovens work, specifically their power settings and how different food types react, is key. Per general appliance specifications, most microwave ovens operate within a wattage range of 600 to 1200 watts, influencing heating speed and evenness.
Quick Answer
Reheat food in a microwave by choosing the right container. Cut dense items into smaller pieces. Use medium power for even heating.
Stir or rotate halfway through. Let food rest for two minutes after heating.
When to Use Your Microwave for Leftovers
Your microwave oven isn't always the first choice for making leftovers taste like they were just cooked, but it excels in certain situations. It’s your best bet when speed and convenience are top priorities, like for a quick lunch break or a fast weeknight meal. For liquids, such as soups, stews, or sauces, a microwave generally performs very well, heating them thoroughly and quickly without much fuss.
Microwaves are also decent for reheating many types of cooked grains, like rice or quinoa, especially if you add a little moisture. However, for items where crispness is important, like fried chicken or pizza crust, a microwave might not be your ideal tool. You’ll often find that these foods can become soggy.
For those, a toaster oven or a regular oven might yield better results.
The Key Decisions: What to Reheat & How Much
Before you even push a button, think about what you're reheating and how much of it you have. These factors will directly influence your reheating strategy, affecting time, power level, and whether you need to add anything. Getting this step right prevents common reheating woes like scorching or leaving the center frozen.
Reheating Liquids: Soups, Stews, and Sauces
When it comes to soups, stews, chilis, or sauces, you're in luck. These foods are generally forgiving because their liquid nature allows heat to distribute relatively evenly. The primary goal here is to heat them thoroughly without boiling over or drying out.
- Container Choice: Always use a microwave-safe bowl or mug. Opt for ones that are a bit deeper than the volume of liquid to prevent spills.
- Covering: Loosely cover the container with a microwave-safe lid, a plate, or microwave-safe plastic wrap. This traps steam, which helps heat the food and prevents splattering. Leave a small vent for steam to escape.
- Heating Strategy: Start with 1-2 minutes on high power.
- Stirring: Remove the container (carefully, it will be hot!), stir the liquid thoroughly to mix the cooler parts from the bottom with the hotter parts from the top.
- Continued Heating: Re-cover and continue heating in 30-second to 1-minute intervals, stirring each time, until the soup is steaming hot all the way through. This process ensures no cold spots remain.

Image source: Bing (Web (fair-use with source credit))
Reheating Dense Foods: Casseroles and Meats
Dense foods like casseroles, lasagna, thick slices of meat, or baked potatoes present a bit more of a challenge. Their density means heat takes longer to penetrate to the center. If you blast them on high power, the outside will likely overcook and dry out before the inside is even warm.
- Preparation: If reheating a large portion, consider cutting it into smaller, more manageable pieces. This allows microwaves to reach the interior more easily.
- Arrangement: Arrange food in a single layer on a microwave-safe plate or in a microwave-safe dish. Avoid piling food high, as this creates uneven heating.
- Power Level: This is where you’ll want to use a lower power setting, typically medium (50-70% power). This slower, gentler heating allows the heat to spread more evenly throughout the food.
- Heating Time: Begin with 2-3 minutes on medium power.
- Checking and Resting: After the initial heating, check the temperature. You'll likely need to continue heating in 1-minute intervals. Crucially, let the food rest for a minute or two after each heating interval. This resting period allows the residual heat to continue cooking and distribute evenly, ensuring the center reaches a safe temperature.
Reheating Starches: Pasta and Rice
Pasta and rice can become dry and clumpy when reheated in a microwave, especially if they were cooked slightly past their prime. The key to bringing them back to life is moisture. Adding a little liquid during the reheating process is essential to prevent them from turning into starchy bricks.
- Container: Use a microwave-safe bowl or container.
- Moisture Addition: Add a tablespoon or two of water, broth, or even a splash of milk (depending on the dish) for every cup of pasta or rice. This moisture will turn into steam, rehydrating the grains or noodles. For rice dishes, you might want to check out tips on keeping it from sticking.
- Covering: Cover the container loosely. This allows the steam to circulate while still preventing excessive moisture loss.
- Power and Time: Heat on medium-high power (around 70-80%) for 1 to 2 minutes.
- Stirring: Stirring halfway through helps ensure the added moisture is distributed, rehydrating the entire portion. If the food still seems dry, add another half-tablespoon of liquid and heat for another 30 seconds. Be careful not to overcook, as pasta can become mushy and rice can turn gummy.
Reheating Vegetables and Other Items
Many vegetables reheat reasonably well in the microwave, but their delicate structure means they can easily become overcooked and mushy. This applies to many other items too, like cooked fruits or lighter proteins that don't require intense heat. The goal is to warm them through without destroying their texture.
- Container: A microwave-safe plate or shallow dish works best.
- Moisture: If the vegetables look dry, add about a tablespoon of water to the dish. This creates steam to gently heat them.
- Covering: Cover loosely with a microwave-safe lid or vented plastic wrap.
- Heating: Use high power for a shorter duration, typically 1 to 1.5 minutes for a single serving.
- Checking: Check for warmth and texture. If needed, continue heating in 30-second bursts. Overheating can turn most vegetables into a sad, limp pile, so watch them closely. For items like cooked beans or peas, follow a similar approach to vegetables.
Mastering Microwave Power Levels for Better Results
Your microwave's power level isn't just a fancy setting; it's your most important tool for reheating food effectively. Running your microwave on full blast (100% power) is great for boiling water or heating liquids quickly, but it's often too aggressive for most solid foods. This is because microwaves heat food from the outside in, and at high power, the outer layers can become overcooked and tough before the center even warms up.
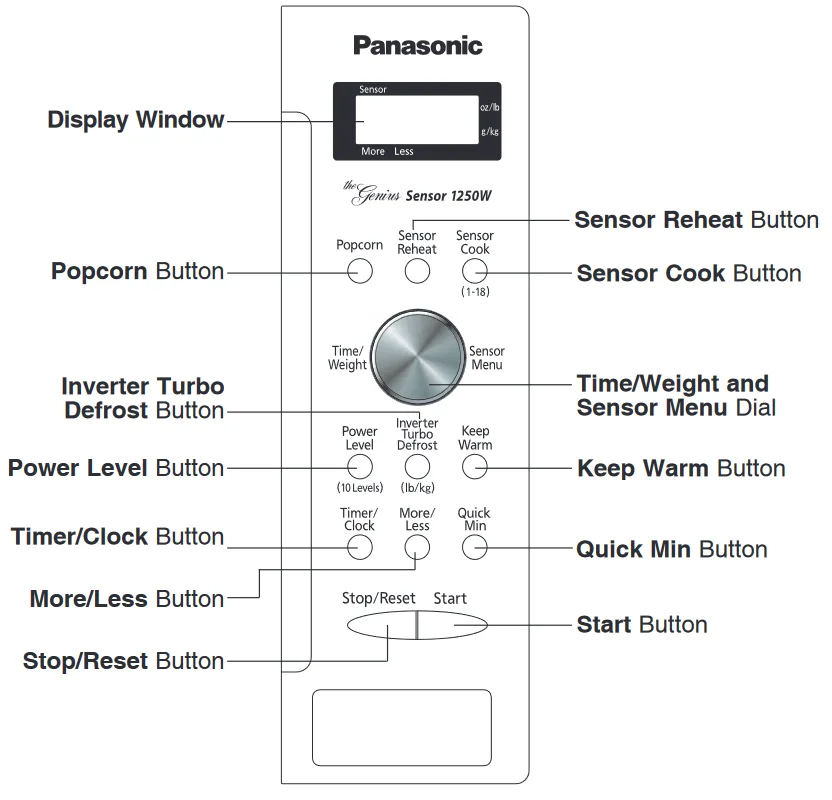
Image source: Bing (Web (fair-use with source credit))
Using lower power settings allows the microwaves to penetrate the food more deeply and heat it more evenly. This is crucial for preventing those dreaded hot spots and cold centers. As of 2026, most modern microwaves offer at least five power levels, typically ranging from 10% to 100%.
- High Power (80-100%): Best for liquids like water, soup bases, or when you need to quickly thaw something.
- Medium-High Power (60-70%): Good for reheating most cooked meals, especially if they are in smaller portions or less dense. This setting offers a good balance of speed and even heating.
- Medium Power (50%): Ideal for denser foods, reheating baked goods that might dry out, or when you want to gently warm something without cooking it further. This setting is your go-to for many casseroles or larger meat portions.
- Low Power (20-40%): Use this for delicate tasks like softening butter, melting chocolate, or gently warming something very small. It provides the slowest, most gentle heating.
Understanding and using these power levels will significantly improve the quality of your reheated meals, making them taste more like they were freshly prepared.
Common Reheating Mistakes and How to Fix Them
Even with the best intentions, it's easy to fall into common reheating traps that leave your food less than desirable. Recognizing these pitfalls is the first step to avoiding them and ensuring your leftovers are actually enjoyable to eat. The most frequent culprit is simply not paying attention to the food or the microwave settings, leading to uneven temperatures or textural disasters.
- Mistake: Overheating. This is probably the most common error. You set the timer for too long, and your food becomes dry, rubbery, or tough.
- Fix: Always start with shorter heating times than you think you'll need, especially on high power. It's much easier to add more time than to fix overcooked food. Utilize the "rest" period after heating, as the residual heat continues to cook the food.
- Mistake: Not stirring or rotating. Microwaves don't always heat perfectly evenly. If you just set it and forget it, you’ll likely end up with cold spots in the middle or around the edges.
- Fix: Stir liquids or rearrange solid foods halfway through the cooking time. If your microwave has a turntable, make sure it's working properly. Rotating the dish manually can also help if your turntable is broken or you’re reheating something particularly awkward.
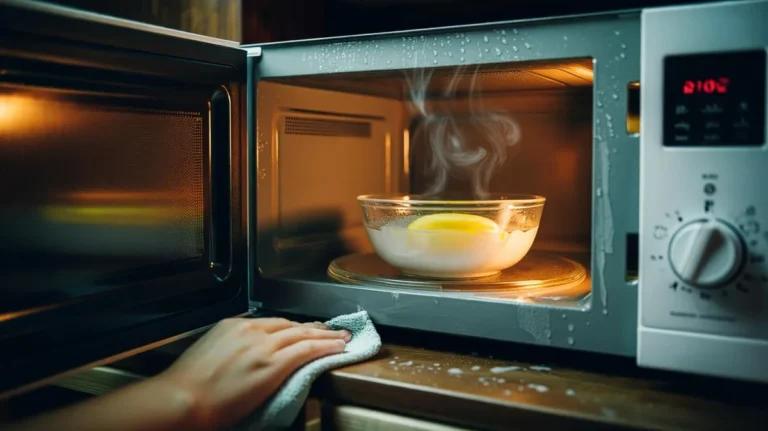
- Mistake: Reheating without covering. This leads to splatters all over the inside of your microwave, making a mess that needs cleaning. It also contributes to food drying out.
- Fix: Cover your food loosely with a microwave-safe lid, plate, or vented plastic wrap. This traps steam, which helps reheat food evenly and keeps it moist. Make sure to leave a small vent for steam to escape to prevent pressure buildup.
- Mistake: Using the wrong containers. Certain plastics can warp or leach chemicals when heated, and metal is an absolute no-go.
- Fix: Always use containers explicitly labeled as "microwave-safe." Glass and ceramic dishes are generally excellent choices. If you're unsure about a plastic container, err on the side of caution and transfer the food to a known safe dish.
Expert Tips for Perfectly Reheated Meals
Getting leftovers to taste great after a trip to the microwave is entirely possible with a few seasoned tricks. It's not just about slapping food on a plate and hitting start; a little finesse goes a long way. These tips draw from best practices and manufacturer guidance for optimal reheating.
- The Power Level is Key: As mentioned, don't just default to high. For most solid foods, medium power (50-70%) is your best friend. It allows for even heating without turning your food into shoe leather. Liquids can handle high power, but still benefit from stirring.
- Embrace the Rest: This is a critical step often overlooked. After microwaving, let your food sit for 1-2 minutes before digging in. The internal temperature continues to rise during this rest period, evening out hot and cold spots and ensuring the food is heated through to a safe temperature.
- Add a Splash of Moisture: For items like rice, pasta, or even dry-looking vegetables, add a tablespoon of water, broth, or sauce before reheating. This moisture turns to steam, rehydrating the food and preventing it from drying out. For some dishes, a tiny bit of oil or butter can also help retain moisture.
- Cut Dense Foods: If you're reheating something dense like a thick piece of lasagna or a hearty casserole, cutting it into smaller, individual portions before microwaving helps the heat penetrate much more effectively. This reduces the chances of a cold center.
- Don't Reheat Beyond Necessity: Avoid repeatedly reheating the same portion of food. Each reheating cycle can degrade the texture and nutritional value. Aim to reheat only what you plan to eat. For multi-serving meals, portion out what you need for one meal.
Alternatives to Microwave Reheating
While the microwave is king for speed, it's not always the best tool for every job. If you're aiming for a specific texture, like crispy skin or a perfectly toasted crust, other methods might be a better fit. Consider these alternatives for different outcomes.
- Oven Reheating: This is ideal for larger dishes or when you want to maintain or restore crispness. Think lasagna, casseroles, or even slices of pizza. It takes longer and uses more energy than a microwave, but the results are often superior for texture. General oven specifications suggest preheating to around 300-350°F (150-175°C) for most leftovers, covering them initially, and removing the cover for the last few minutes to crisp up.
- Stovetop Reheating: This method is excellent for soups, stews, sauces, and pasta dishes. It provides gentle, even heat and allows you to stir easily, preventing sticking and ensuring consistent warmth. It’s particularly good for reviving pasta that might have become a little dry in the fridge.
- Toaster Oven or Air Fryer: These appliances are fantastic for foods that benefit from crisping. Reheating pizza slices, fried chicken, or breaded items in a toaster oven or air fryer can often bring back their original crispness, something a microwave rarely achieves. They use less energy than a full-sized oven for smaller portions.
Who Should Use Microwave Reheating?
The microwave is perfect for anyone prioritizing speed and convenience above all else. If you're often rushing for meals, whether it's a quick lunch break at the office or a late-night snack, the microwave is your fastest route. It’s also a great option for reheating simple items like beverages, steamed vegetables, or basic grain dishes like rice or quinoa.
For individuals who have limited kitchen space or resources, like students in dorm rooms, a microwave is often a primary cooking and reheating appliance. It simplifies meal preparation without requiring extensive cooking equipment. However, if you find yourself frequently reheating foods that require a specific texture, like crispiness, it might be worth exploring alternative methods for those particular items.
Safety First: What to Keep in Mind
Safety is paramount when using any kitchen appliance, and the microwave is no exception. While generally safe when used correctly, there are a few key points to always remember to avoid burns or other hazards. Always ensure your food is heated to a safe internal temperature, typically above 165°F (74°C), to kill any bacteria.
- Container Safety: Never put metal or aluminum foil in the microwave, as it can cause sparks and damage the appliance. Avoid plastics that aren't clearly marked "microwave-safe," as they can warp, melt, or leach chemicals into your food.
- Steam Burns: Be cautious when removing covers from hot food. The steam trapped inside can cause burns. Open lids or plastic wrap away from your face, allowing the steam to dissipate safely.
- Superheating: Liquids can sometimes become "superheated" in a microwave, meaning they exceed their boiling point without visibly boiling. Disturbing them (like by adding a spoon or sugar) can cause them to erupt suddenly. To prevent this, place a wooden spoon or stirrer in the liquid before heating, or gently tap the side of the container before removing it.
Frequently Asked Questions About Microwave Reheating
How long does it take to reheat food in a microwave?
Heating times vary significantly based on the food type, quantity, and microwave wattage, but typically range from 30 seconds to several minutes. Liquids like soup might take 1-3 minutes, while denser items like casseroles could need 3-5 minutes or more, often with stirring in between.
Can I reheat food multiple times in a microwave?
It's generally not recommended to reheat the same food multiple times. Each reheating cycle can degrade the food's texture, taste, and potentially its nutritional value. It also increases the risk of bacterial growth if the food doesn't reach a safe temperature each time.
Why does my microwave leave cold spots?
Cold spots occur because microwave energy doesn't always penetrate food uniformly. Dense foods, uneven stacking, or a malfunctioning turntable can cause this. Stirring halfway through heating and using lower power settings helps distribute heat more evenly, reducing cold spots.