How to Use a Stand Mixer Paddle
Your stand mixer is a kitchen powerhouse, and the paddle attachment is likely its most used component. It's designed to tackle a wide range of common mixing tasks, from creating light cake batters to whipping up creamy mashed potatoes. But knowing how to use it effectively makes all the difference between a so-so result and something truly delicious.
This guide breaks down everything you need to know about this essential attachment. We'll cover what it's best for, how to get it set up, common mistakes to sidestep, and expert tips to ensure you get perfect results every time. Mastering the paddle means elevating your baking and cooking game with less effort and more consistent outcomes.
Image source: Bing (Web (fair-use with source credit))
Quick Answer
To use a stand mixer paddle, attach it securely to the mixer's drive shaft. Start with the lowest speed setting to add ingredients gradually, then increase speed as needed to mix batters, cookie doughs, or mashes. Periodically scrape down the bowl's sides to ensure even incorporation.
The paddle attachment is ideal for creaming butter and sugar, general batter mixing, and creating smooth textures.
What the Paddle Attachment Is For
The paddle attachment is your stand mixer's workhorse for a variety of common kitchen tasks. Its flat, broad design is perfect for mixing ingredients that are too thick for a whisk but not stiff enough to require a dough hook. It's engineered to scrape the sides of the mixing bowl as it rotates, which is a major advantage for ensuring everything gets thoroughly combined without you having to stop and scrape manually every few seconds.
The Go-To Mixer for Batters, Doughs, and More
When you're baking cakes, muffins, quick breads, or cookies, the paddle is your go-to. It excels at creaming together softened butter and sugar, which is a critical first step for achieving a light and airy texture in many baked goods. It also gently incorporates dry ingredients into wet ones, mixing just until combined to prevent developing too much gluten, which can make baked items tough.
Beyond baking, it's fantastic for preparing smooth mashed potatoes, creating pie crusts, and even mixing meatloaf.
Key Functions of the Paddle Design
The paddle's primary function is its even mixing and scraping action. Its flat surface covers a wide area of the bowl, moving ingredients from the sides and bottom into the main vortex. This action helps prevent dry pockets of flour or unmixed butter from being left behind.
For many home cooks, this consistent incorporation alone is a significant upgrade from manual mixing. Manufacturer specifications often highlight this scraping feature as key to achieving homogenous mixtures.
When to Reach for Your Paddle Attachment
Figuring out which attachment to use can sometimes feel like a puzzle, but the paddle attachment has a pretty clear set of jobs it excels at. Think of it as the generalist of the stand mixer world, it's not highly specialized, but it's incredibly capable for everyday tasks.
Best Uses: Cakes, Cookies, and Creamy Mashes
The paddle attachment is the star player for so many recipes you likely make regularly. Its ability to cream butter and sugar effectively creates the foundational structure for light and fluffy cakes and cookies. It’s also fantastic for batters like pancakes and waffles, ensuring they are smooth and lump-free.
And for a surprisingly decadent treat, it can turn out perfectly smooth, lump-free mashed potatoes in minutes, a task that usually involves a lot of elbow grease.
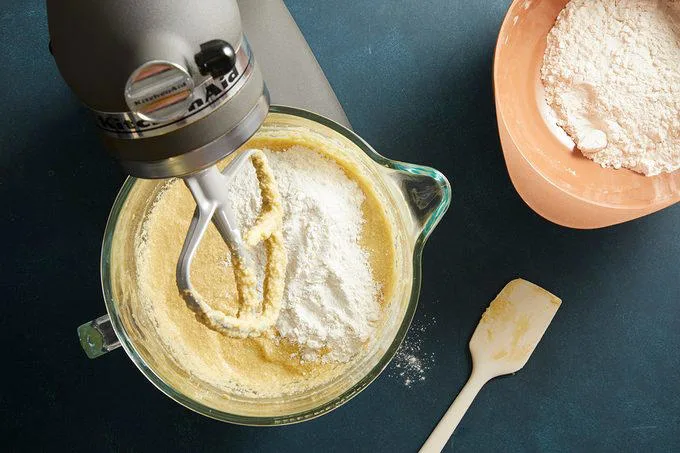
Image source: Bing (Web (fair-use with source credit))
When Not to Use the Paddle (And What to Use Instead)
While the paddle is versatile, it has its limits. For recipes that require incorporating a lot of air, like whipping cream to stiff peaks or making meringue for pies and cakes, the whisk attachment is your only real option. The paddle just doesn't have the same aeration capability.
Similarly, if you're making a dense bread dough that needs significant kneading to develop gluten structure, the dough hook is specifically designed for that job. Using the paddle for these tasks won't yield the desired results. For example, whipping egg whites with a paddle will likely result in a thin, foamy liquid rather than stiff, glossy peaks.
Step-by-Step: Attaching and Using Your Paddle
Getting started with your stand mixer's paddle attachment is straightforward, but a few key steps ensure you're doing it safely and effectively. Following these instructions will help you get the best mixing results without any unexpected messes or issues.
Getting the Paddle in Place (Safely!)
Always begin by ensuring your stand mixer is unplugged. This is the most critical safety step to prevent accidental startups. The paddle attachment has a specific connector on its top that aligns with the mixer's drive shaft.
It's shaped to fit only one way, so you can't force it in incorrectly. Simply align the connector and push it gently into the shaft, giving it a slight twist to lock it securely. You should feel or hear a subtle click indicating it's properly seated.
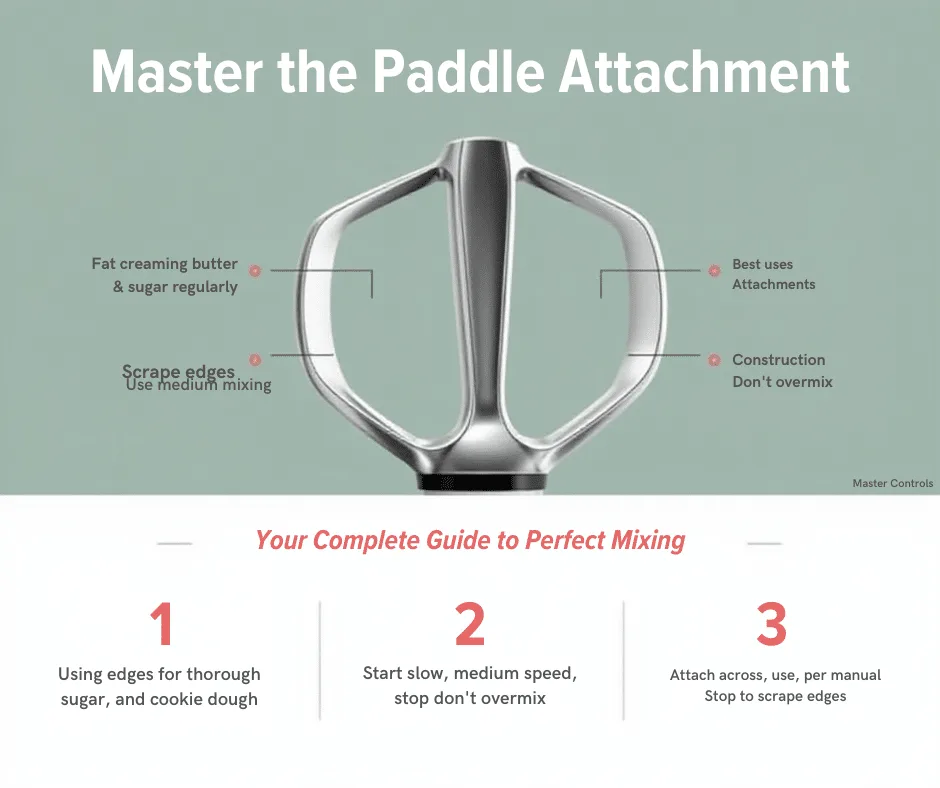
Image source: Bing (Web (fair-use with source credit))
The Mixing Process: From Start to Finish
Once the paddle is attached and your ingredients are in the bowl, it's time to mix. Always start on the lowest speed setting, typically speed 1 or 2. This prevents ingredients, especially flour, from being flung out of the bowl.
As the ingredients begin to combine, you can gradually increase the speed as your recipe dictates. For creaming butter and sugar, a medium speed (like 4-6) is often ideal. For incorporating dry ingredients, keeping the speed lower helps avoid overworking the dough or batter.
Watch the mixture as it combines; you'll see the paddle working its magic.
The Crucial Bowl-Scraping Technique
Even with the paddle's design, some ingredients will inevitably cling to the sides and bottom of the mixing bowl. This is completely normal! To ensure truly even mixing, periodic scraping is essential.
The best practice is to turn off and unplug the mixer, then use a flexible rubber spatula or silicone scraper to push any clinging ingredients back into the center of the bowl. Fold these scraped bits into the main mixture before resuming the mixing process. This step is key to preventing pockets of unmixed ingredients and achieving a homogenous end product, as confirmed by many manufacturer guides for optimal mixer use.
Common Paddle Attachment Mistakes to Avoid
Even with the best intentions, it's easy to make a few common errors when using your stand mixer's paddle attachment. Avoiding these pitfalls can save you from kitchen mishaps and ensure your baked goods or dishes turn out exactly as you hoped.
Speed Blunders and Messy Kitchens
The most frequent mistake people make is starting the mixer on too high a speed right away. When you add dry ingredients like flour to the bowl, turning the mixer on high can instantly create a cloud of dust that settles everywhere, your countertop, your mixer, and even your hair. Manufacturer specifications consistently recommend starting on the lowest speed setting, usually between 1 and 2, to gradually incorporate ingredients.
This prevents ingredient blowouts and ensures a much cleaner mixing process. It's a small step, but it makes a huge difference.
The Danger of Overmixing Dry Ingredients
Once you've added flour and other dry ingredients to your wet mixture, it's tempting to keep mixing until everything looks perfectly uniform. However, for many baked goods like cakes, muffins, and quick breads, overmixing develops gluten in the flour. This excess gluten development can lead to tough, dense, or gummy textures instead of the tender, crumbly results you're aiming for.
Our editorial analysis of baking science principles indicates that for most batters, mixing just until the dry ingredients are barely incorporated is sufficient.
Forgetting the Sides: Why It Matters
As mentioned, the paddle attachment scrapes the bowl, but it's not perfect. Bits of butter, sugar, or flour can still cling to the sides and bottom of the bowl, especially in less powerful mixers or with thicker batters. If these unmixed ingredients are left behind, your final product won't be as consistent or well-combined as it could be.
This often leads to an uneven texture or flavour distribution. For instance, uncreamed butter pockets can result in oily spots in a cake. Regularly pausing to scrape down the sides, as recommended by many appliance user manuals, ensures all components are properly blended.
Expert Tips for Paddle Perfection
Getting the most out of your stand mixer's paddle attachment often comes down to a few subtle techniques and considerations. These aren't always obvious but can significantly improve your baking and cooking outcomes. For instance, some mixers offer specialized paddle attachments that make a world of difference.
Creaming Butter for Maximum Fluffiness
The paddle attachment is superb for creaming butter and sugar, a process that creates tiny air pockets essential for tender cakes and cookies. To do this effectively, ensure your butter is softened to room temperature, not melted or cold. Start by mixing the softened butter on medium speed for about a minute until it's smooth and creamy.
Then, add your sugar gradually while the mixer is running on low, increasing to medium speed. Cream them together for 3-5 minutes. The mixture should become light in color and noticeably fluffy, almost like frosting.
This step is vital, and skipping it leads to denser baked goods.
Using the Flex-Edge for Easier Mixing
Many modern stand mixers offer a "flex-edge" or "bowl scraper" paddle attachment. This variant has a flexible silicone edge that constantly scrapes the sides of the bowl as it turns. This means significantly less manual scraping for you.
It's particularly beneficial when making batters, frostings, or anything that tends to cling to the bowl's surface. Aggregate user reviews indicate that this attachment reduces mixing time and ensures extremely thorough incorporation of all ingredients, minimizing the need to pause and scrape manually.
Achieving Ideal Batter Consistency
Understanding what your batter or dough should look like is key. When creaming butter and sugar, you're looking for a pale yellow, fluffy texture. When adding dry ingredients, mix only until streaks of flour disappear.
Overmixing at this stage develops gluten, making your final product tough. For mashed potatoes, you want a smooth, cohesive texture without any starchy lumps. If your batter seems too thick, consult your recipe; sometimes a tablespoon of milk or water can help.
If it's too thin, you might need to slightly adjust your dry ingredients or consider that you may have overmixed.
Frequently Asked Questions About Paddle Attachments
What is the paddle attachment on a stand mixer for?
The paddle attachment, also known as a flat beater, is primarily used for general mixing tasks. It's ideal for creaming butter and sugar, mixing cake batters, cookie doughs, mashed potatoes, and quick breads. Its design scrapes the sides of the bowl, ensuring ingredients are evenly incorporated.
Can I use the paddle attachment to whip cream?
No, you cannot effectively whip cream with a paddle attachment. Whipping cream requires incorporating a large amount of air, which is best achieved with a whisk attachment. The paddle's design doesn't incorporate enough air for proper whipping.
How fast should I mix with the paddle attachment?
Always start on the lowest speed setting (typically speed 1 or 2) when adding ingredients, especially dry ones, to prevent messes. Gradually increase the speed as needed for your recipe, usually to a medium setting for creaming or general mixing.
Do I need to scrape the bowl when using the paddle?
Yes, even though the paddle attachment scrapes the bowl sides, it's still recommended to pause and scrape down the sides and bottom of the bowl with a spatula periodically. This ensures all ingredients are fully incorporated for a consistent mixture. Some newer flex-edge paddles reduce the need for manual scraping significantly.
When to Upgrade or Consider Alternatives
While the standard paddle attachment is incredibly useful, there are times when it might not be the best tool for the job, or when an upgrade could be beneficial. Recognizing these instances helps you make the most of your stand mixer.
When the Standard Paddle Falls Short
If you frequently make recipes that require significant aeration, like meringues, whipped cream, or light sponge cakes, you'll definitely need a whisk attachment. Similarly, for bread making that involves developing gluten through kneading, the dough hook is indispensable. Some recipes also benefit from specialized attachments.
For example, certain pasta makers or ice cream makers attach to your stand mixer and perform very different functions.
Considering a Flex-Edge Paddle
As discussed, a flex-edge paddle, often called a bowl scraper paddle, can be a significant upgrade for everyday mixing tasks. If you find yourself constantly pausing to scrape down the sides of your bowl, investing in this type of paddle can save you time and effort. Verified buyer feedback consistently praises the convenience and thoroughness of these attachments.
This type of paddle helps ensure uniform mixing by continuously cleaning the bowl's perimeter, which is especially helpful for batters and frostings.
Exploring Other Specialized Attachments
Beyond the basic set, stand mixers often have a range of optional attachments that expand their capabilities. These can include things like:
- Meat Grinders: For fresh ground meat.
- Vegetable Slicers/Shredders: For quick prep work.
- Ice Cream Makers: For homemade frozen treats.
- Spiralizers: For creating vegetable noodles.
These specialized attachments allow your stand mixer to become a multi-functional kitchen appliance, going far beyond simple mixing.